Fill and Line progressively out of sync from one side to the other, plus related problem

I am etching rulers into annodized aluminum. The rulers come out inconsistently, off by up to a few hundredths of an inch from one run to another. It seems to be a calibration issue because they are gradually out of sync across the ruler.

The belts are looking well tensioned to me and nothing has any wobble or give when I manually try to move the gantry and head while the machine is on.

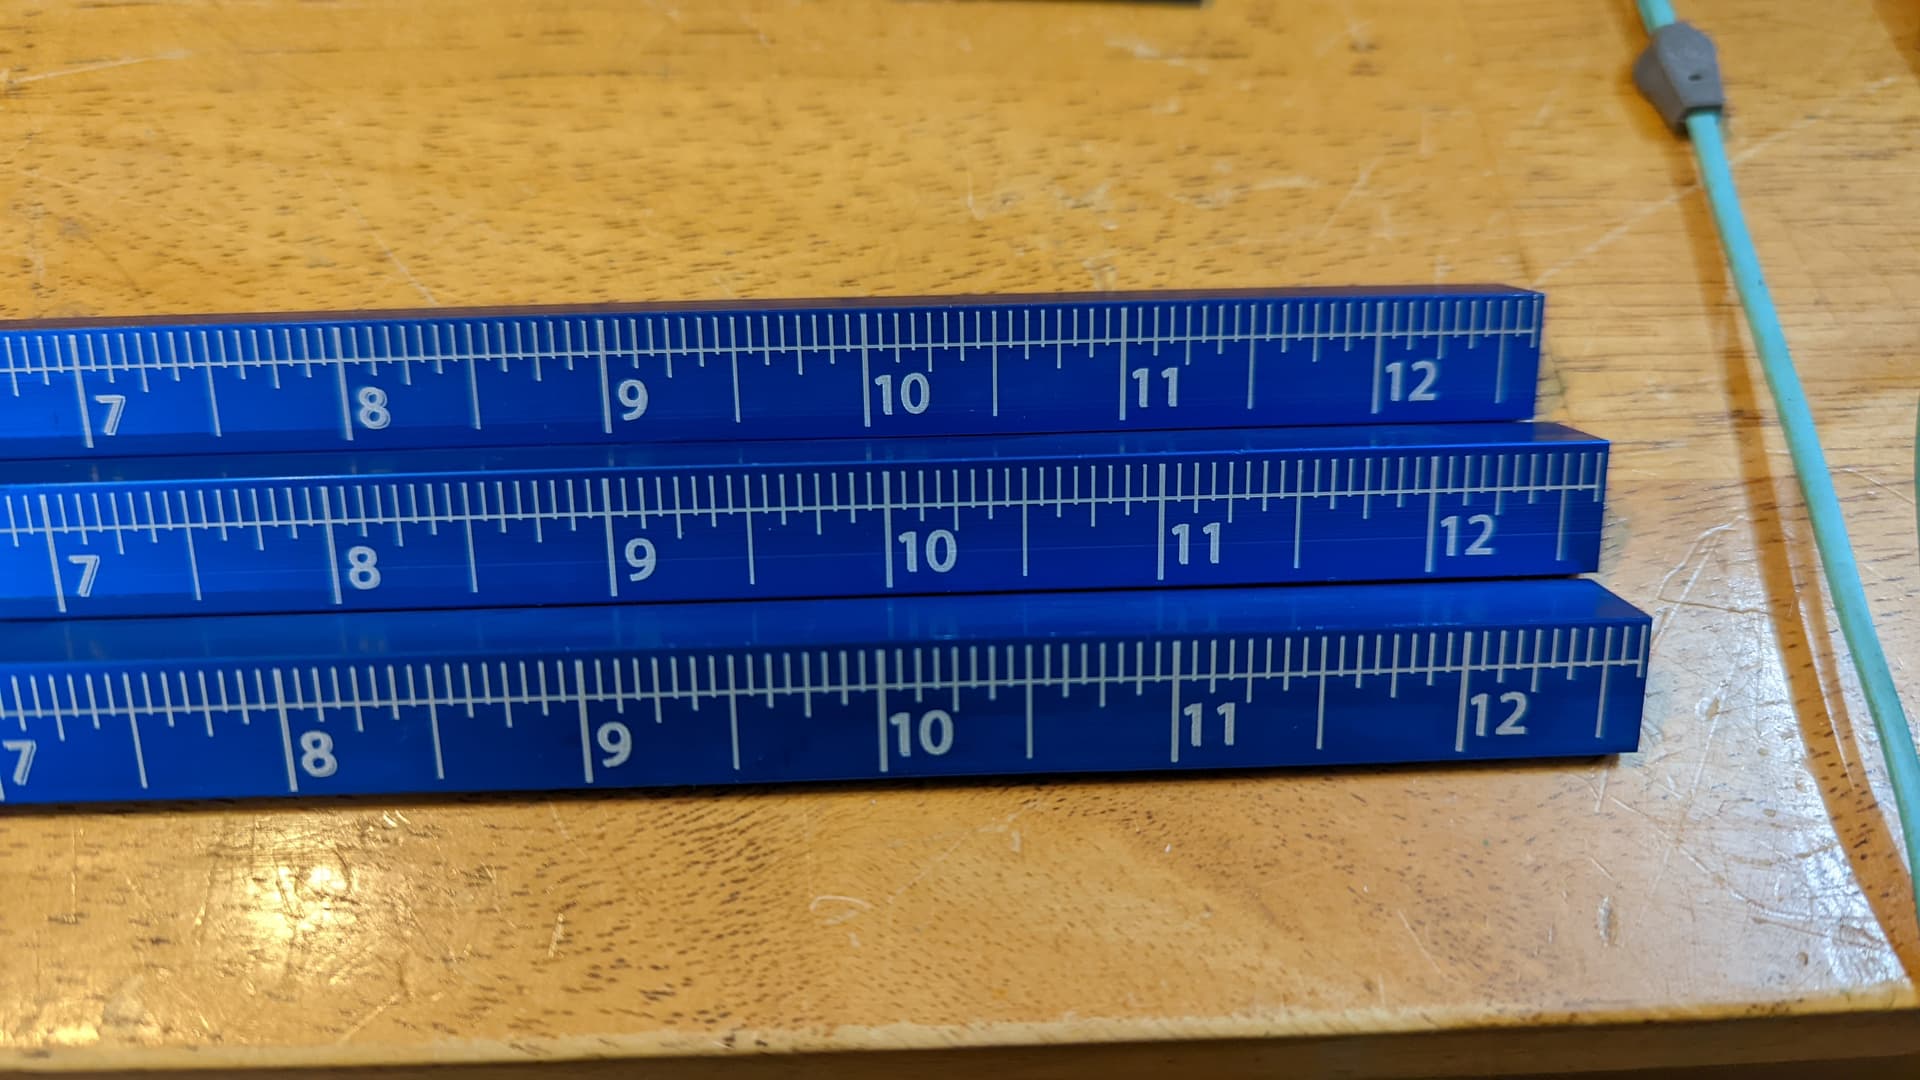
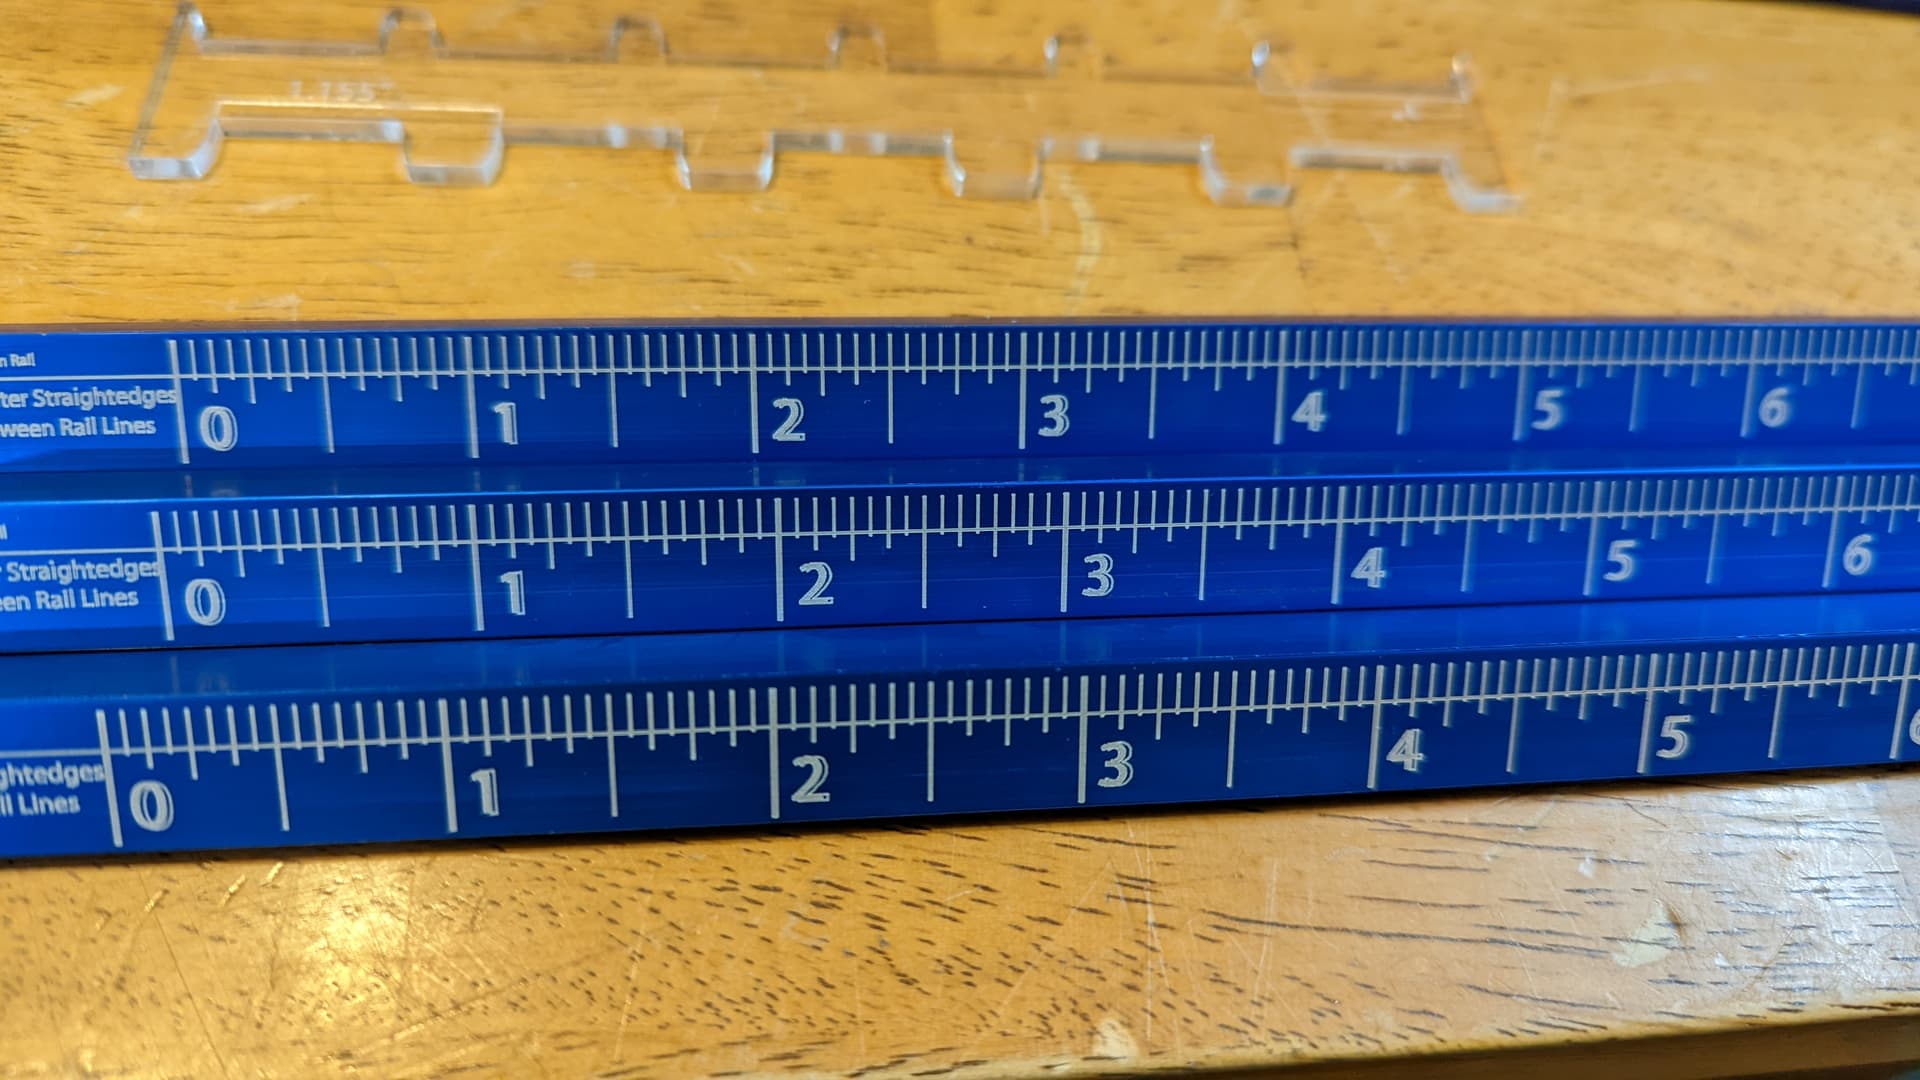
More details: Lightburn is creating a path that first makes the smaller ruler marks for 8th and 16ths from right to left: each mark is a small narrow rectangle that I have set to Line with no fill. Then the larger lines for 1/4th, 1/2 and whole inches are etched from left to right. The smaller marks are dead on accurate. The larger marks begin accurately from the left, but are slightly too far apart so that by the time they get to the right side they are a couple hundredths too far to the right. So: calibration is correct when moving right to left, but appears to be off when moving left to right.

Secondly, the numbers on the ruler are etched with a fill and line setting, but the lines do not match the fill, also gradually from one side to the other (they start ok on the right, then get more and more out of sync toward the left) End result is about 1-2 hundredths off.

If this is a calibration or backlash issue, why does it only happen in one direction (Moving left to right vs. right to left?)

Speed and power were set to 50/15

I tested increasing the speed and power to 200/35. The first problem with the lines seemed to have been greatly improved by this change…

The second problem with the ruler number fills not matching their outlines did not improve.
My next step was to change ‘PWM Rising Edge Valid’ settings as per:
https://lightburnsoftware.github.io/NewDocs/ConfiguringRuida.html?fbclid=IwAR1xT_GTmrXugaAF_GtqookfsNGzpMns0FKL-EnCc3T48yTfSn_xptjaxBM

This did not change the results.

Next I did a scanning offset adjustment: Scanning Offset Adjustment - LightBurn Software Documentation

The fill appears to be more crisp, but the offset from the outline is now more clear and obvious. Still gradually increasing from right to left.

What could cause the machine to be progressively out of sync from one side to the other?

This is a really interesting problem - I’m going to try to find a Ruida guru.

Update:
Even with “Fill shapes individually” problem is exactly the same.
Also, I tested running three rulers together, and each looks exactly the same. No problems with the lines now… regardless of whether they are etched from right to left or from left to right.
The numbers were filled and outlined, with “fill shapes individually” checked. The machine did the individual fills in a fairly random order, then did all the outlines afterward. The outlines are dead on at the right side of machine, and gradually more and more offset toward the left side, consistently in terms of multiples within a run, and between multiple runs.

Worth looking into missed motor steps due to acceleration settings being too high, and/or resonance caused by lots of short cuts & short hops. This is not uncommon on lower-cost machines with steppers. :slight_smile:

Yup. Why do you ask?

How would one diagnose and resolve resonance issues?

Update: After running several batches, the start point seemed to be drifting. I pressed the reset button on the Ruida controller, and sure enough the start point had drifted a bit. But probably not enough to match the sum of accumulated drift over multiple runs… more like the equivalent of offset on one single run. so not sure it’s related to the non-synced fill and lines.

I see. Even if the parts were moving, would you expect them to move in such a consistent way despite the machine path being so random?

For this project, my workaround is to use only lines for ruler lines and some smaller text, and only fills for the numbers. It’s working just fine - all the ruler lines accurate now. The number fills might not be accurately positioned but it doesn’t matter if they are off by a couple hundredths of an inch as long as I don’t outline them.
The problem is that this workaround won’t work for all projects.
What specifically might be exceeding the machine limitations, so I can test changes?
Should I overwrite the acceleration settings?

Machine is a new EMTech 50W btw.

You could make a backup of the current settings, ‘Edit’->‘Machine Settings’, and save that somewhere safe, then adjust your acceleration settings a bit to see if you can get better results.

Simple answer, slow down to lessen or alter the potential resonance frequency point and see if you get a different result. :slight_smile:

1 Like

Hi Rick,

I am working with an OMTech 50W, now upgraded to 60W. My tube had gone bad before I could fully test your suggestions. Now that the new tube is installed, I have been testing reducing acceleration and speed. It doesn’t seem to be solving the problem. I started conservatively, gradually reducing settings until I have now drastically reduced every acceleration setting that I could find, and reduced the speed from 200 down to 20 (currently testing 15) mm/second. This seems incredibly slow to be still having the problem. I am engraving small text, with line not fill. Over the course of less than 200 words, I am progressively losing steps until the x axis is 3 to 6mm off.

I have seen suggestions of increasing the voltage to the steppers to reduce slipping. Otherwise I am not sure what to do at this point.

Do you have any thoughts about what a reasonable speed and acceleration I should expect on this machine for very small text?

Does anyone know of a good resource for learning about increasing the voltage to the steppers?

Thanks!

This is worth review: Configuring a Ruida - LightBurn Software Documentation

This topic was automatically closed 30 days after the last reply. New replies are no longer allowed.