Trying to figure out what is going on in my fill mode…
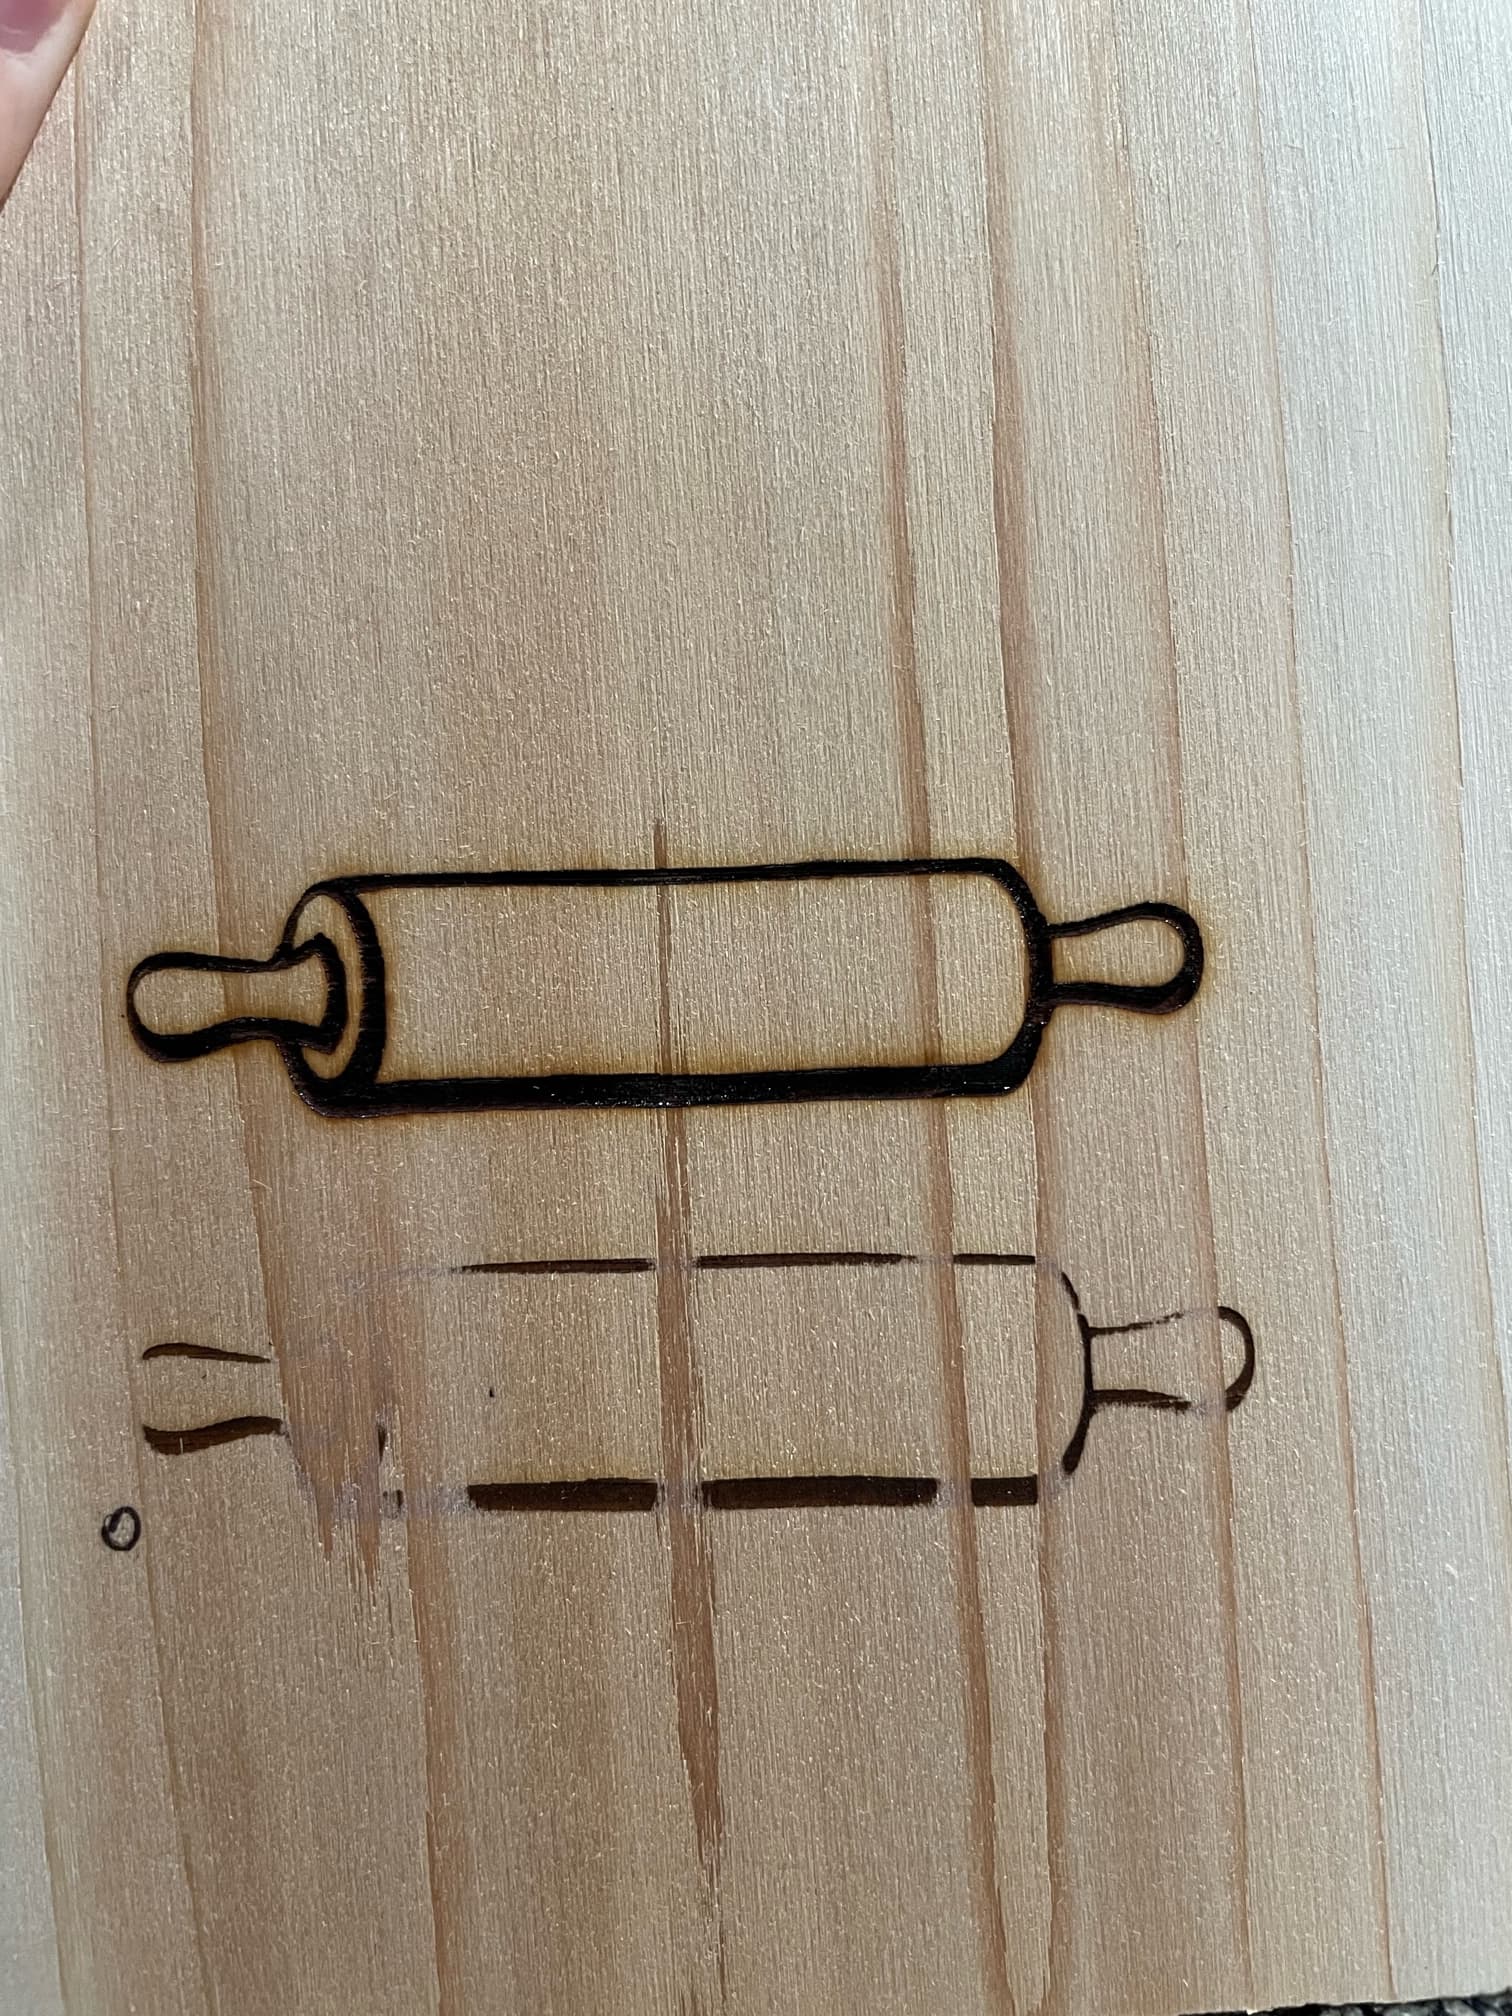
Engraving a simple graphic of a rolling pin on a piece of wood (pine), and it keeps giving me gaps on what should be a straight line. My laser is a Universal engraver 3W, runs on GRBL.
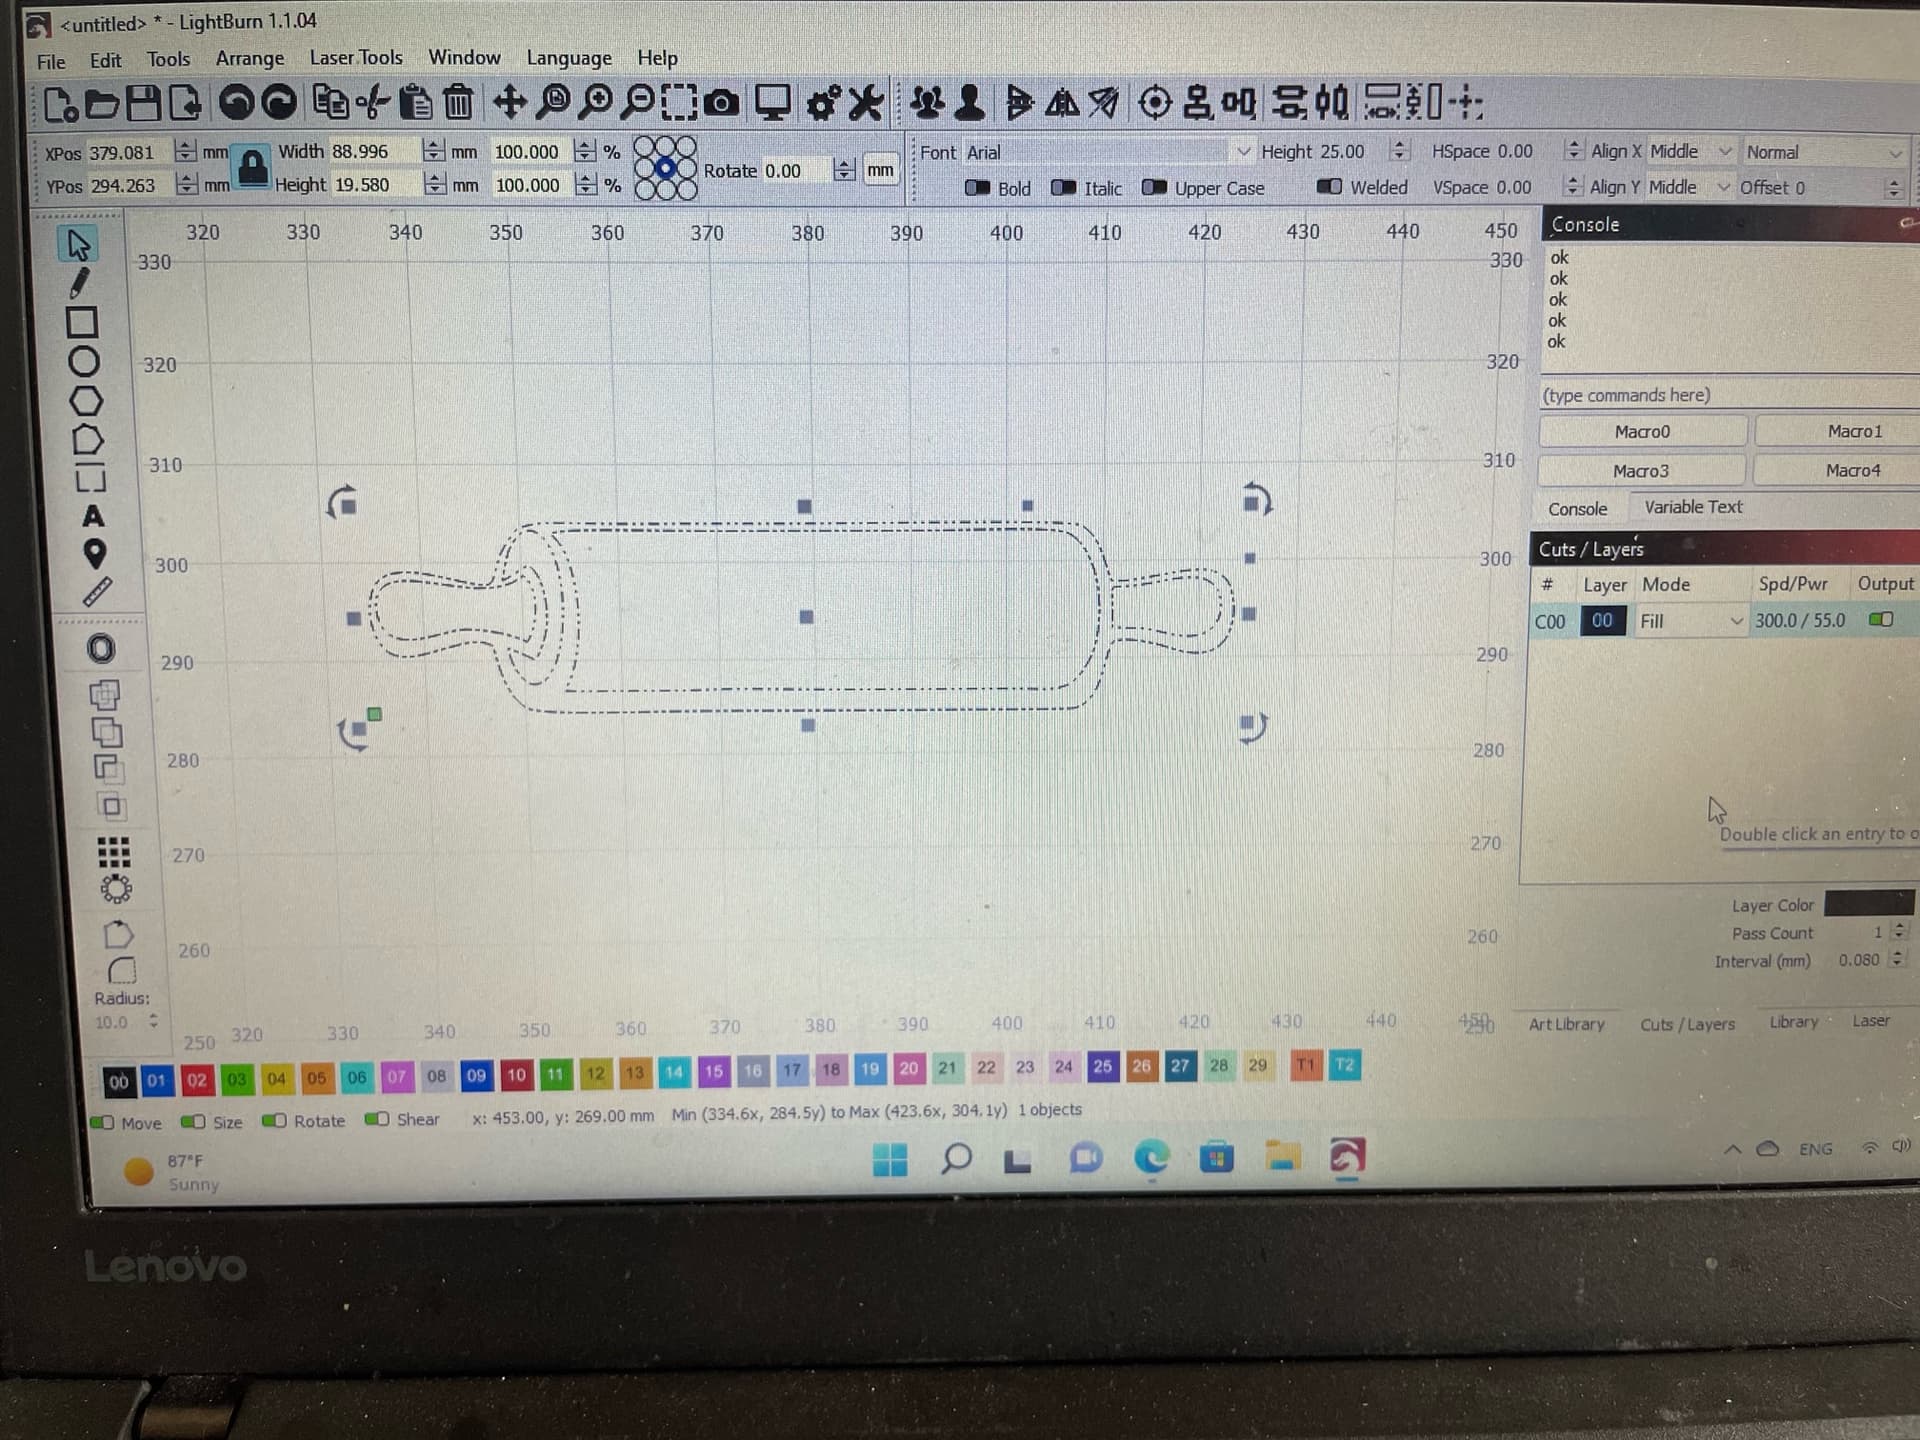
Screenshot:
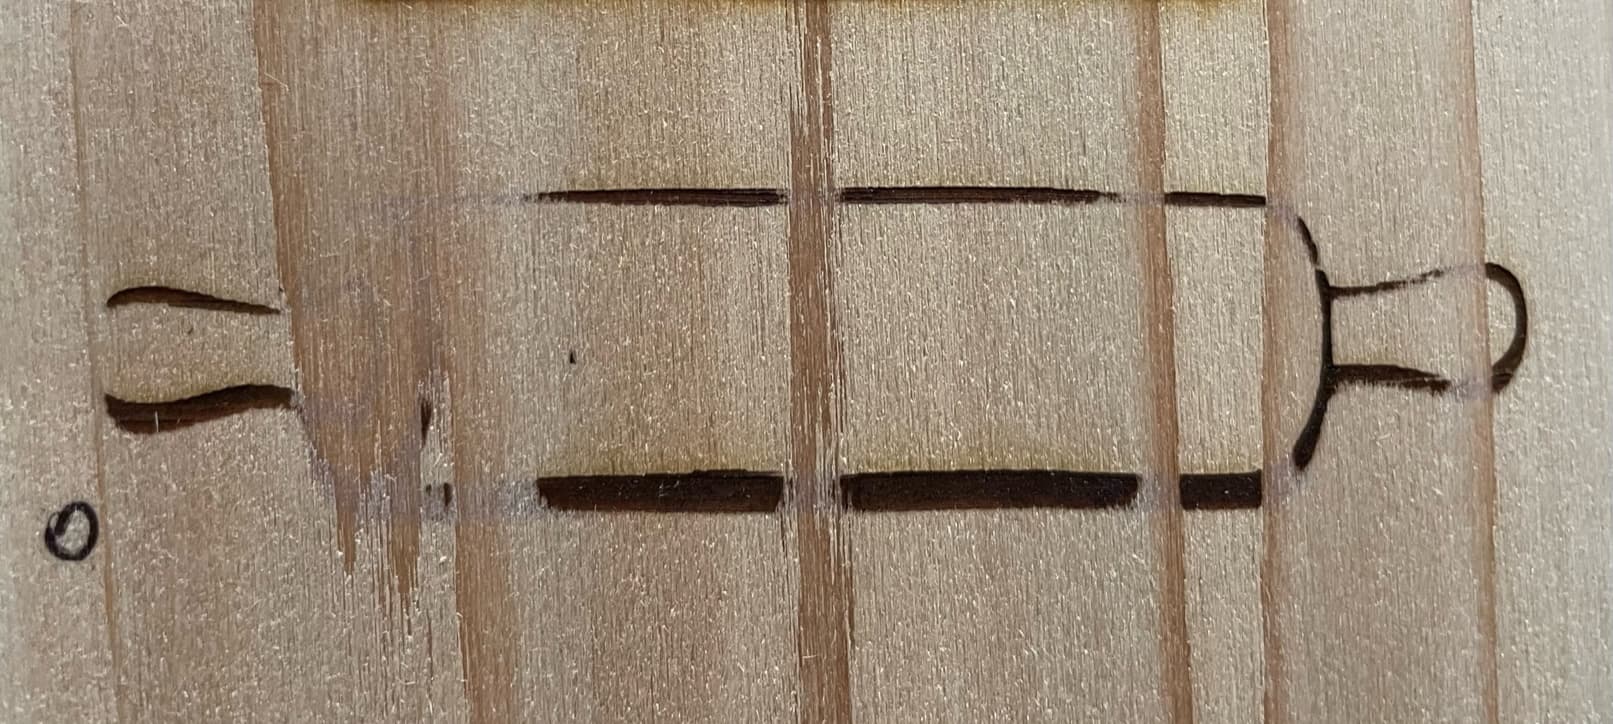
It may appear as if the wood grains affect the engraving - the gaps line up with the grain lines, but I don’t think this is so (though it may be part of it).
The grains did not affect the engraving on the materials test.
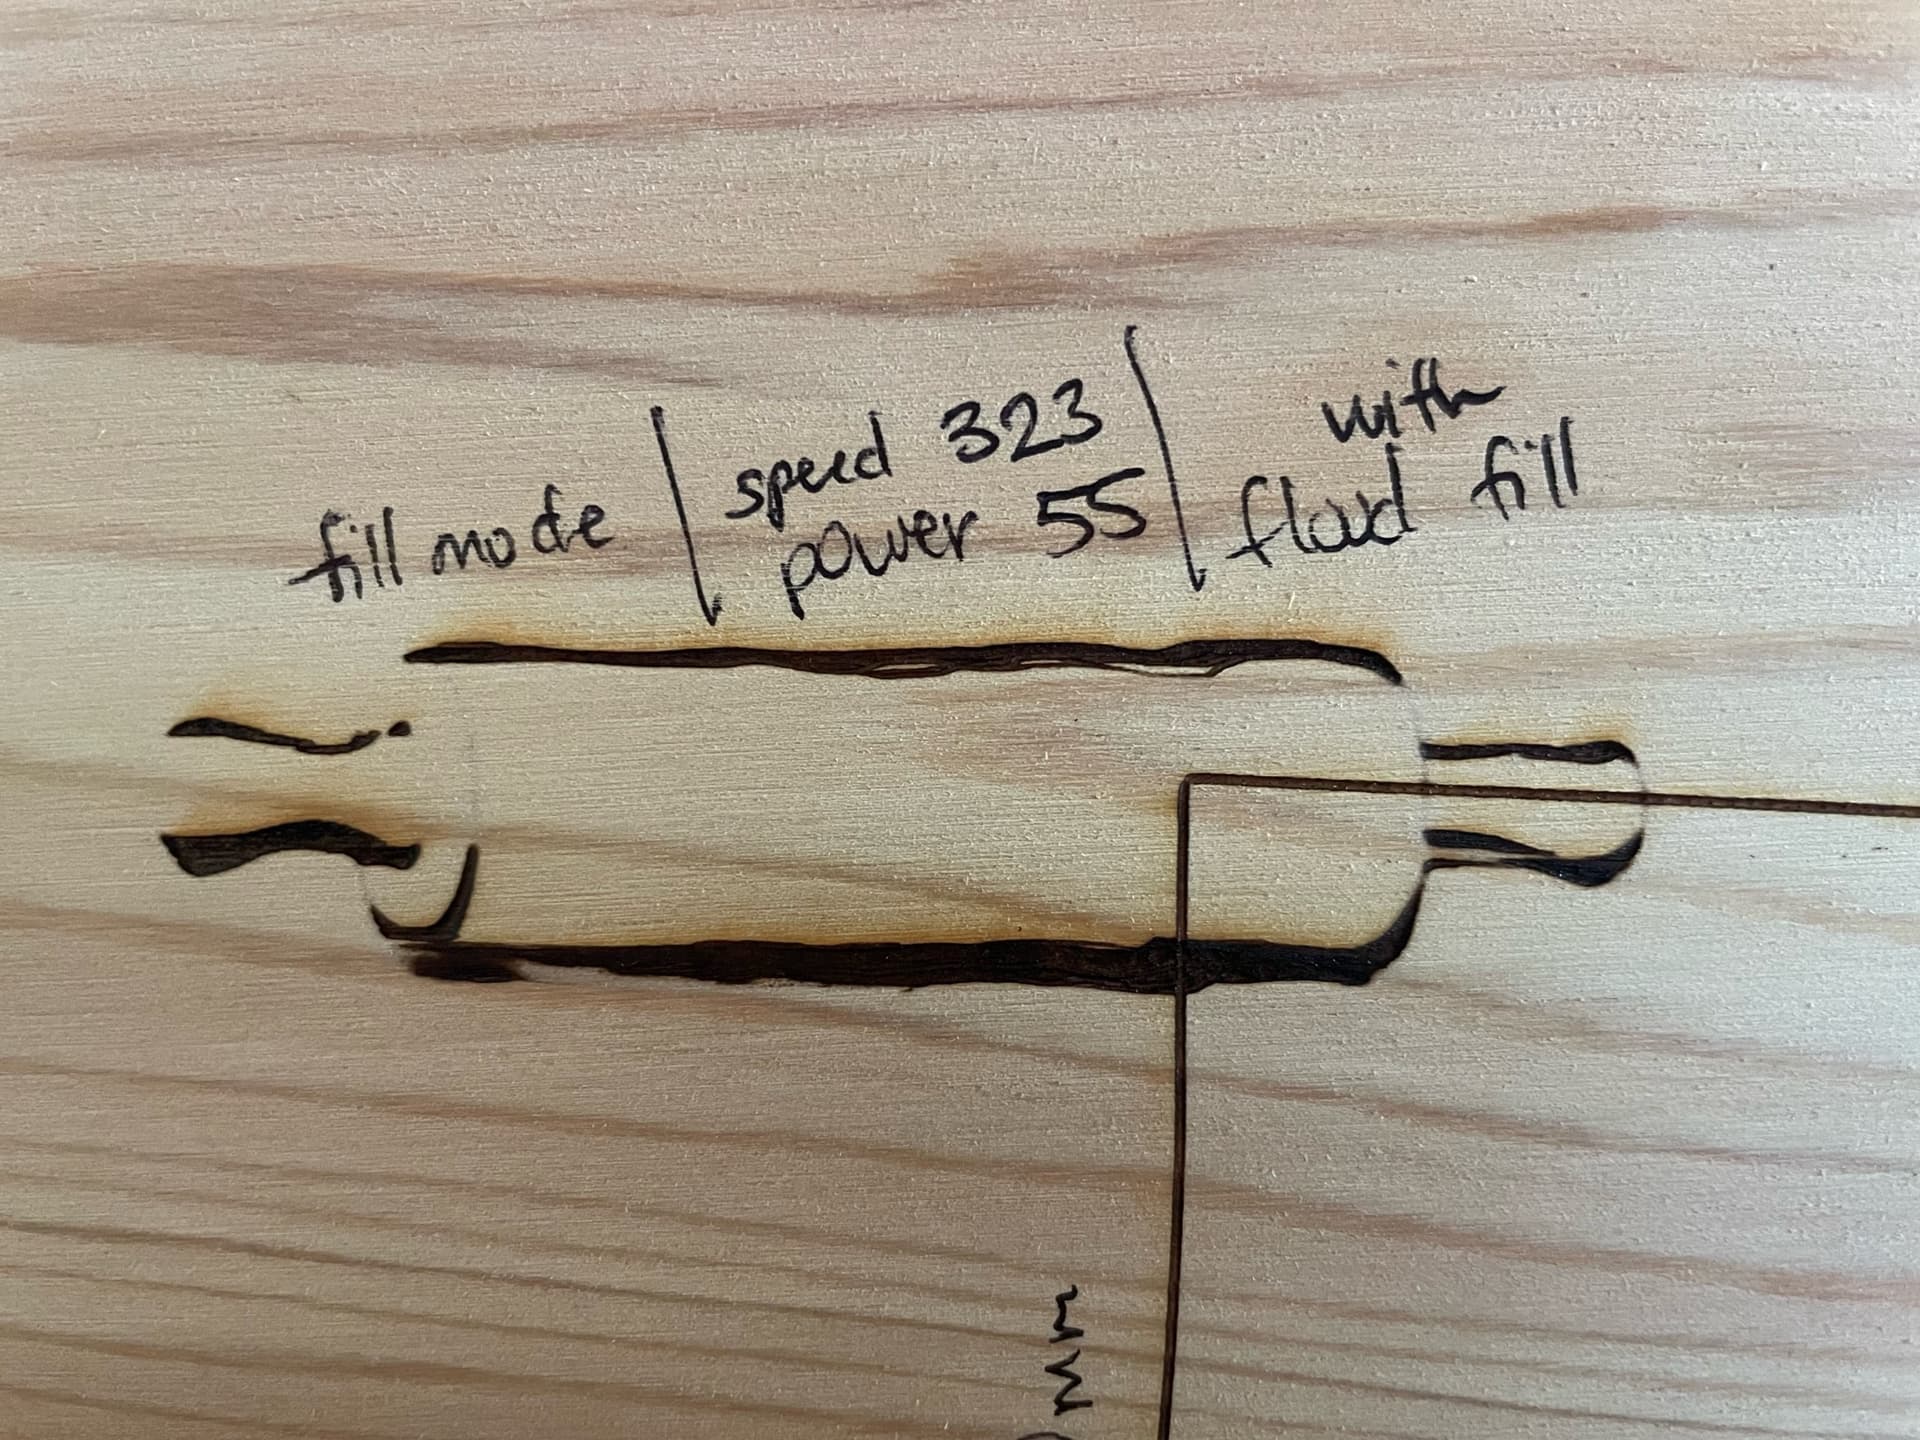
I’ve also run this engraving with the direction of the grain going side to side intead of vertical, and with Flood Fill on to see if it would make a difference - it engraved quicker, but results are not much better.
There may be a few things going on but looks to me like the primary issue is focus. Is your laser fixed focus or variable focus? For fixed focus you need to make sure that the distance from laser lens to material is set to the correct focal distance. For variable focus there’s likely an ideal distance to material plus you need to adjust the dial to get the focus dot tack sharp (or as small as it can get).
The lens on the laser is threaded and can be screwed in or out, and I do have it set to the smallest dot possible.
So I don’t think thats it. I did check the focus, along the way figured out how to solve the mechanical issue I was having happy about that!
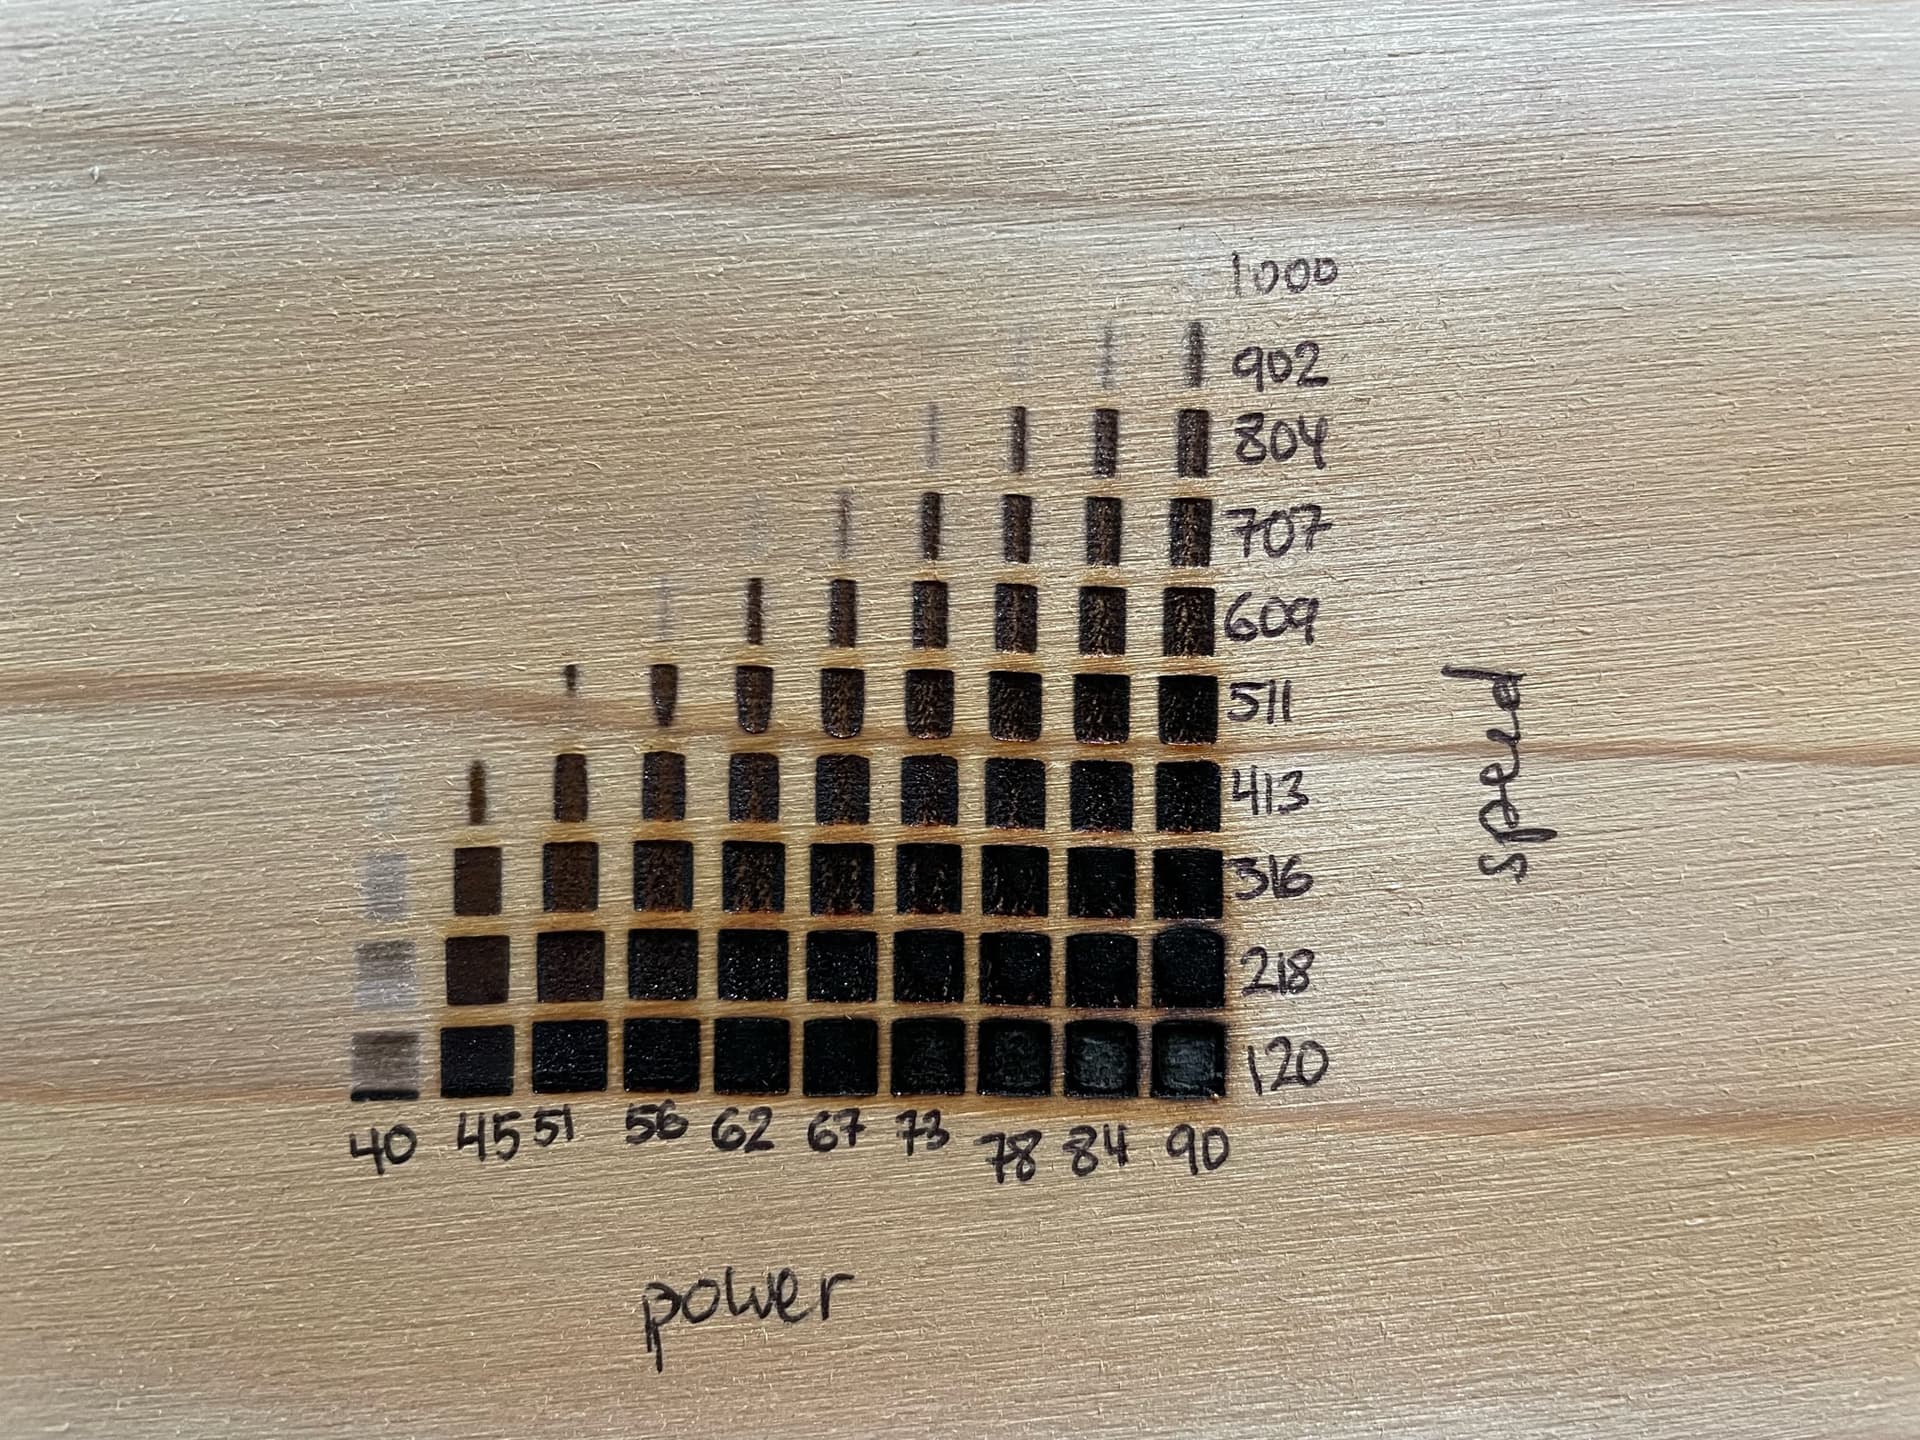
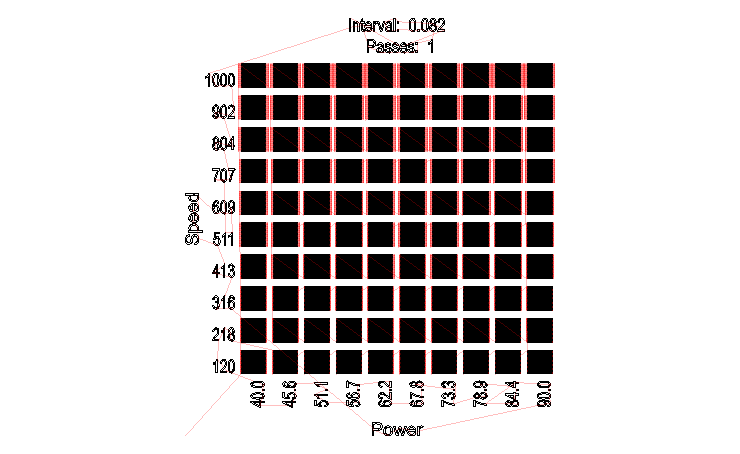
Then I ran another fill test on the material, and here is what it looks like:
It certainly (again) looks like the grains are affecting it, but here is another run, on the same piece, but now set to Image mode, 300 speed and 90% power.
There is also likely an ideal distance of material to lens. Have you accommodated for that in any way?
Also, what is the shape of the focused dot?
Can you take a screenshot of the design for this? Or upload the .lbrn file. I’m curious what this is meant to look like. I see some waviness which might indicate an additional mechanical issue.
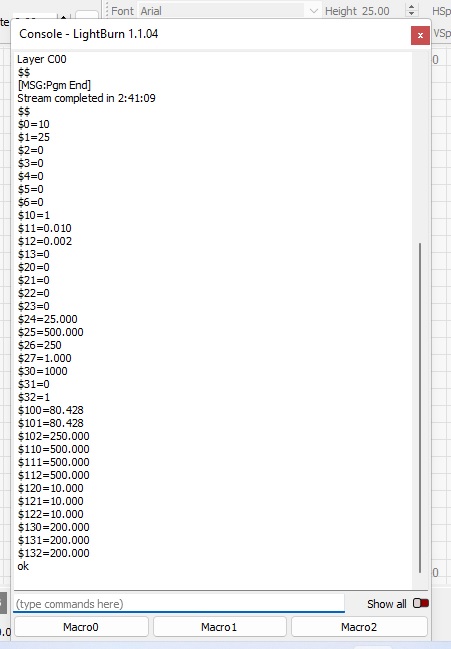
What are the units for the speed?
This wouldn’t be surprising. Slight variations can cause differences like this. What kind of wood is this and has it been prepared in any way? You may have some residue on the surface that further makes engraving difficult.
In general you have a fairly lower power laser so it’s likely it will have more difficulty with certain material types.
You may want to experiment on different material like cardboard that has more uniform structure and that’s easy to burn.
I’m also questioning the level of power modulation you’re getting. The material test behavior is quite odd in that nearly every portion that engraved looks charred… with the only difference being the extent of the charring.
You would first set to ideal distance and then focus. This isn’t as critical as just getting a tight dot.
I don’t see anything obvious in your settings other than that you have Z-axis enabled. Is that deliberate?
I suggest you run tests on a different material that’s more uniform. That will help you sort out any potential issues with your laser before having to deal with the variability of the wood you’re using. I’ve never engraved pine but I imagine the sappiness of it could cause issues.