I tried searching, but maybe I don’t know the correct term to search for. I was wondering if it is possible to fill shapes, without scanning across the entire width or a shape or image. As an example, burning a circle, with a wide perimeter, it will fill, but it only needs to burn a thin amount around the perimeter of the circle, but scans across the whole width each pass. I feel it would speed things up considerably if it could just scan the part it needs to fill, all the way around. Kinda like how a 3D printer would print an empty cylinder.
I’m using a custom built 2020 extrusion frame with a NEJE 30(7.5)watt laser head driven by GRBL-ESP32, and Lightburn 0.9.24.
yes, LightBurn is what is generating the GCode your GRBL firmware is using to move the machine. Try the Export GCode option in the File menu and look at the text file it saves. That’s GCode. LightBurn is also what’s called a GCode “sender” as it will stream the GCode to your laser when you hit the RUN button.
What type of artwork you are using when you observe this behavior? An image (raster bitmap) or vector paths? If an image, transparent background? What are the entire settings for that layer?
If you are willing, post the file and we can take a look.
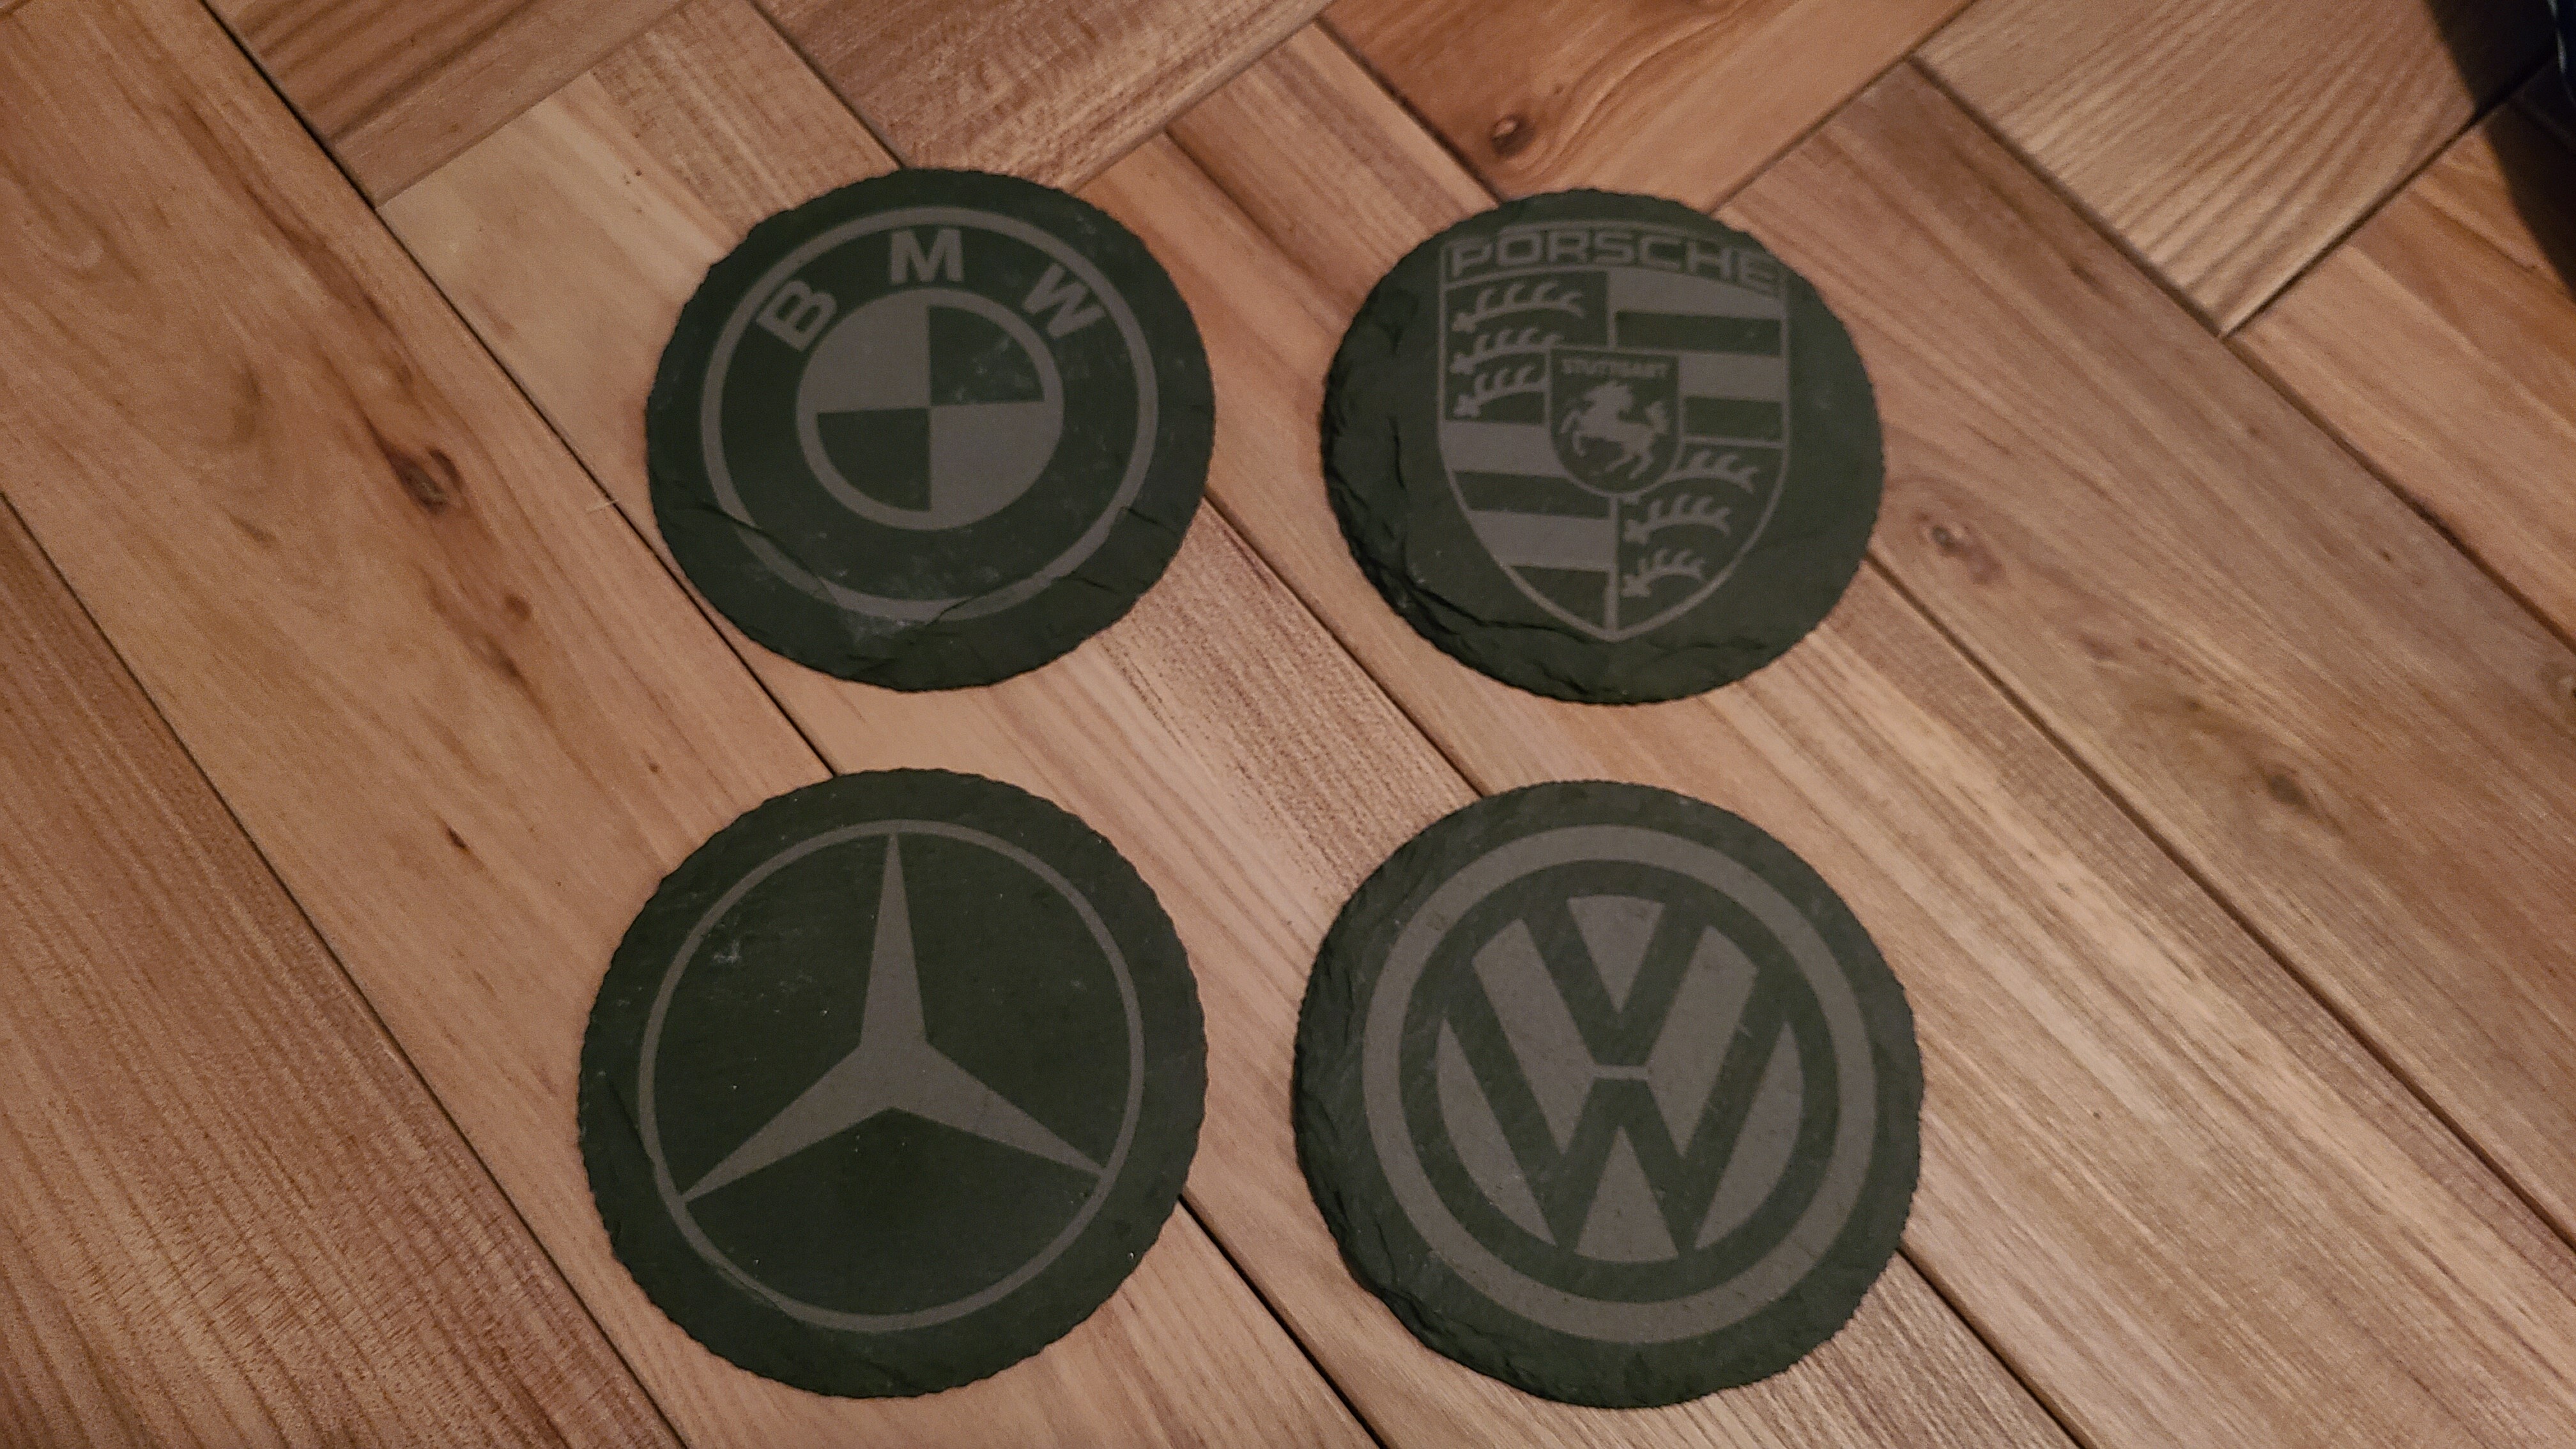
But take the Mercedes logo, lots of area not burned, but the head still had to scan edge to edge, for the whole image. The over-all area on each was 90mm diameter.
If you use the Simulation to show what’s going to happen you can then try different settings to see the results as opposed to reading up on all the different ways to do things.
You can also turn things into vectors vs images(more reading for you there) and you can edit the image in LightBurn or other image editing software and so something like make the ring a different layer and use the Offset Fill for it and then set the inner 3 pronged image to standard fill.
Laser engraving is a gateway drug to image editing and some stuff can be done in LightBurn itself and other stuff is better left to tools with lots of image editing plugins, tools and features while letting LightBurn handle the CAM side of the process.
Hello. I came here to ask this same basic question, found this thread. I have used Offset Fill, and in some cases that’s a good option. But in most cases it just does not look as good as a normal fill.
I found one other way to cut down on the time. In my case, I’m working with a border that runs around the square pattern, and fortunately this border is a series of separate patterns. So I am able to make each one a separate layer, and optimize by layers. This cuts the burn time down from 2 hours 24 minutes to just 24 minutes. But it won’t work if the border cannot be separated out.
I have also tried making the objects into separate groups and optimizing by group, but it seems that the software completely ignores my optimization when I do that.
Update: I just dicovered the “Fill groups together” and “Fill shapes individually” options in the Cut Settings screen when I have Fill selected. This will help me with this border. Unfortunately it does not help with a one-piece uninterrupted border, but I guess I will need to do some creative editing and arrangement to break those up.
It seems like the software can do so many amazing things, and yet it can’t figure out that scanning across the entire project hundreds of times to burn a 1/8" line on either side is a poor method.
Exactly Paul! By learning a little bit about how things work and working with the design either in LightBurn or outside(before LightBurn) we can get the output working better for us and the final result.
LightBurn has added lots of capabilities and flexibility which take a little time and familiarity to use in intended and unintended ways. The Simulation feature is great for this too.
Thank you for the link. It was a lot of lead-up to get to:
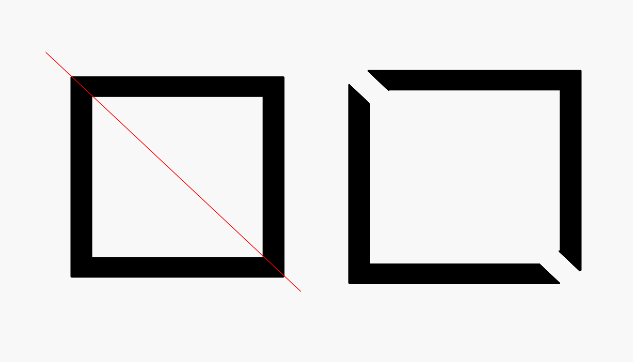
Draw a polygon where you want to cut.
Select the polygon and the shape.
Select Tools → Cut Shapes.
Except, I just tried it, and it didn’t work. The option was there, it just didn’t do anything. And then I googled “Cut Shapes” and found a quick article about it on the Lightburn site which was basically a summary, and it doesn’t tell me the necessary prerequisites, if there are any, like the Mask function.
I tried it with an image and a polygon, and the option was available but did nothing.
Then I traced and deleted that image and tried it with a shape, and the menu option is grayed out.
Kind of frustrated now, the video loses me at 10:00 when I do the same thing they did and it does not work. There must be some detail I am missing. I saw earlier when he switched his layer from Fill to Line, and I’ve tried mine both ways.
OK, I figured it out. It needs to be a shape, not an image, and it was this detail that I was missing: “The last selected shape is the cutting path, and it is discarded when used.”
From this thread: How To use 'Cut Shapes'
The video did not clearly call out that they needed to be selected in that sequence for it to work. Anyway, thanks for the tip!
 )
)
")