I just got a new Monport Mega Desktop CO2 with 70W and started my first experiments with cutting and engraving. Cutting looks good (will probably improve the air assist), but engraving isn’t working yet.
I did some quick experiements and found that the start and end of each engraving is missing (even with 10mm of Overscanning), very thing lines (<0.3mm) are not engraved at all and if I engrave a thin line with Bi-directional fill, it’s engraved twice with a distance of around 0.5mm.
Cutting looks good (~0.07mm length difference for a 20mm square), so I assume that the gantry does not have that much of a backlash (at least at slower speeds…).
Any ideas which parameters I could vary or experiments to run to pin down the issue?
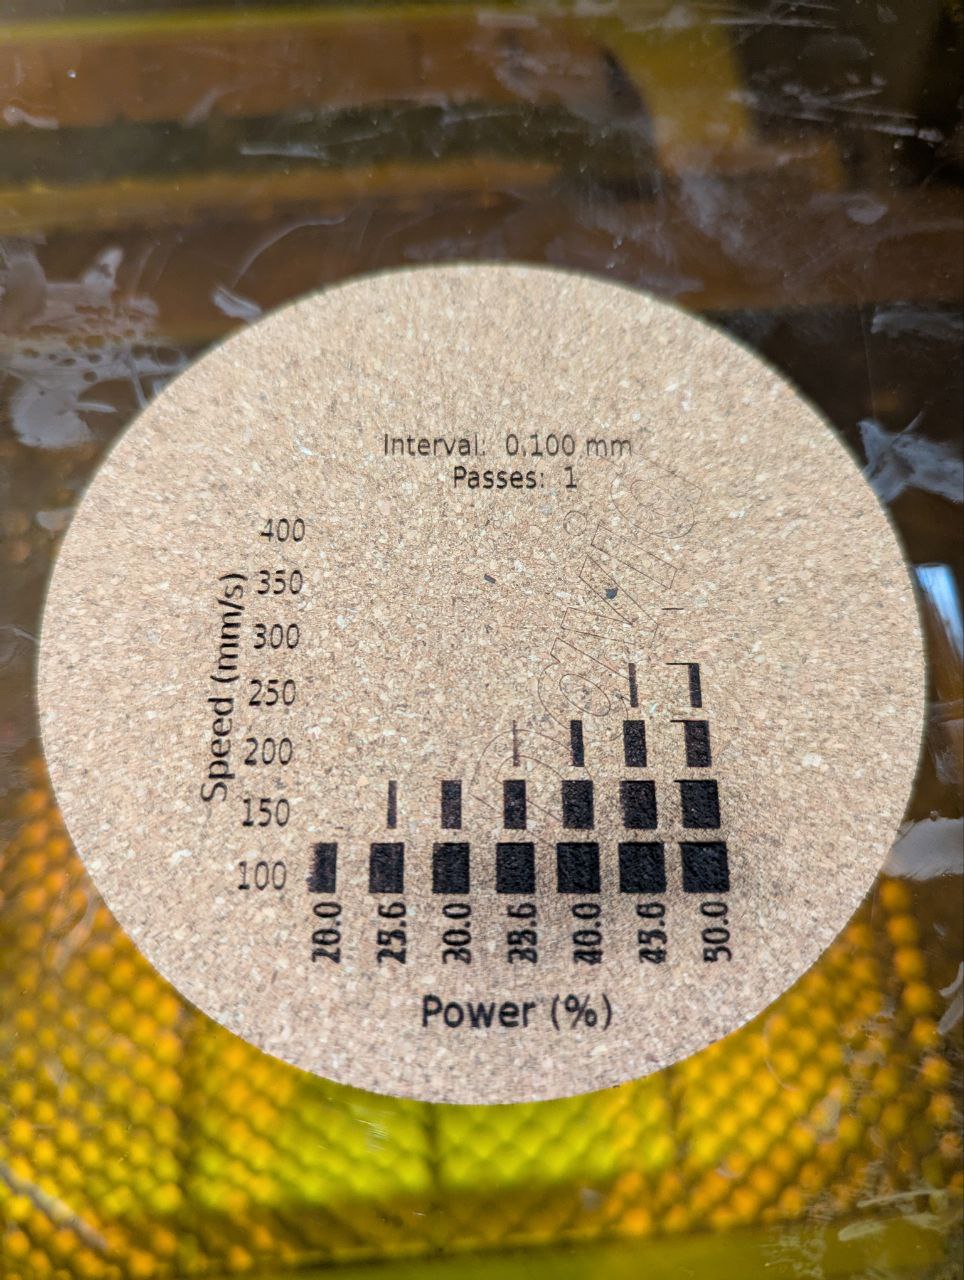
In round numbers, the response time of the laser power supply is 1 ms. A 0.3 mm distance at 250 mm/s requires a 1.3 ms pulse, so whatever’s under the laser gets only a fraction of the intended energy.
Although it’s all shiny-new, you may safely assume the mirrors are poorly aligned and the mechanical bits will have at least one loose (or missing!) screw. Devote a few hours to getting acquainted with the innards while verifying everything looks and feels good in there.
That’s good advice, even for a brand new laser! @FooTheBar you’re in luck, the Monport Mega has a visible assist laser to make this process way easier (use the Google Drive link to the video on this page):
Monport may have a .lbso “Scanning Offset Adjustment” file for you to import in the Device Settings. See, if you find such a file on an USB stick.
I already adjusted the mirrors (with the red additional guiding laser, I guess I should also test it with the CO2) and had to remove and remount the housing around the moving z-mirror to be able to focus flat objects. It looks like no one tested the full z-travel after assembling the laser
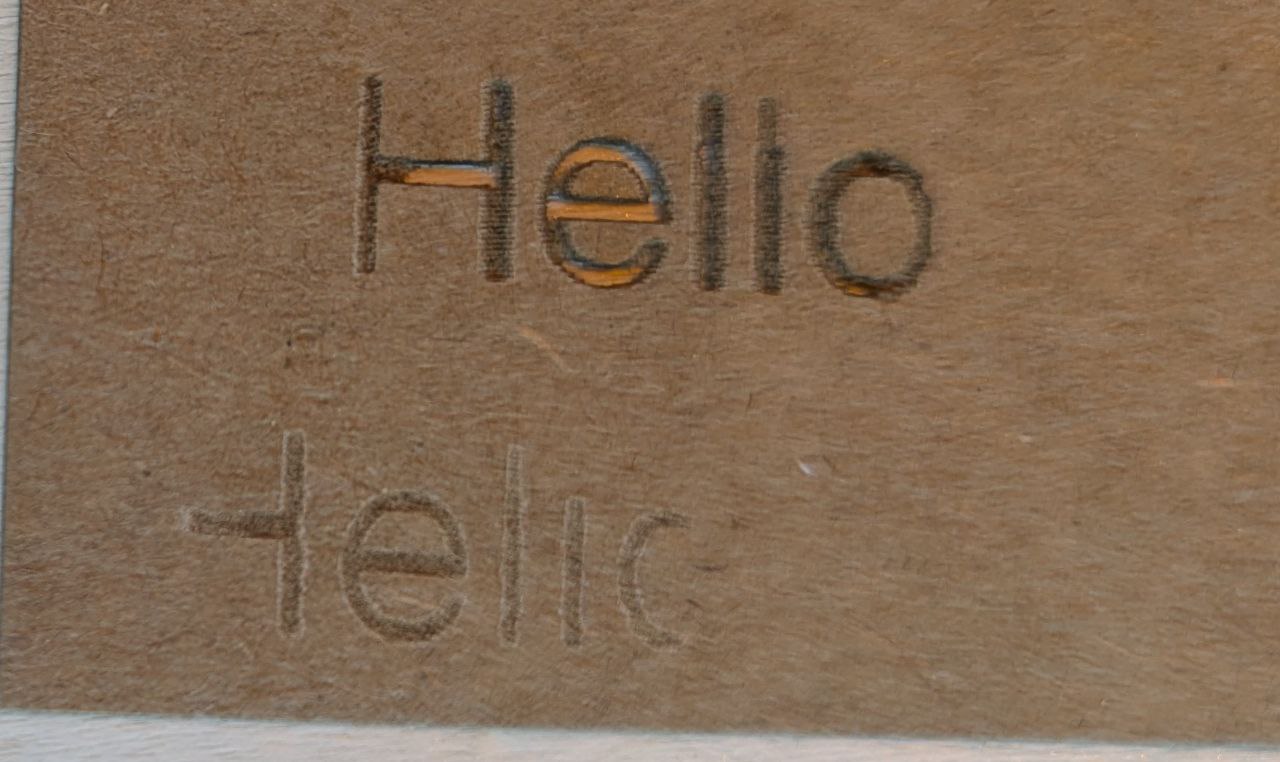
I ran the scanning offset calibration and it looks much better now! I’m having issues with the missing start and end line.