I have a 60W Omtech CO2 laser and my frame button has stopped working after I updated to 1.7.08. I have since downloaded the previous software (1.7.07) however the issue is still there.
My Start From is “Current Position” and when I hit frame it will stop halfway, sometimes only measure two points of the square. Sometimes it does not move at all.
I am using a Mac and connecting to the machine via USB.
Most likely, the design extends beyond the boundary of the axes, so the controller prevents the laser head from smashing into the edge. You can verify that by checking the Preview window: if the design extends beyond the green border, it won’t work.
The machine has homing switches and, presumably, homes correctly when it starts up. That means you can should use Start from: Absolute Coordinates to make the LightBurn workspace map exactly to the machine platform.
In that mode, you put the design where you want it in the LightBurn workspace and that’s where it will burn on the machine platform. No fussing with origins, no moving things around, It Just Works™.
There’s one gotcha with engravings: the controller calculates the overscan based on the machine’s speed & acceleration limits. If the design is too close to the axis end of travel, the overscan can extend beyond the machine boundary and the controller will not run it. You can help LightBurn detect that situation in the Preview simulation:
I have checked the boundary via the preview window and my design does not extend beyond the green border. Even when I am cutting a smaller shape in the centre of the machine the frame button does not work. I switched over to Start From: Absolute Coordinates and I am still running into the same issue. I just tried to do a Material Test Generator and the frame button would not work even though the design was in the centre of the workbed.
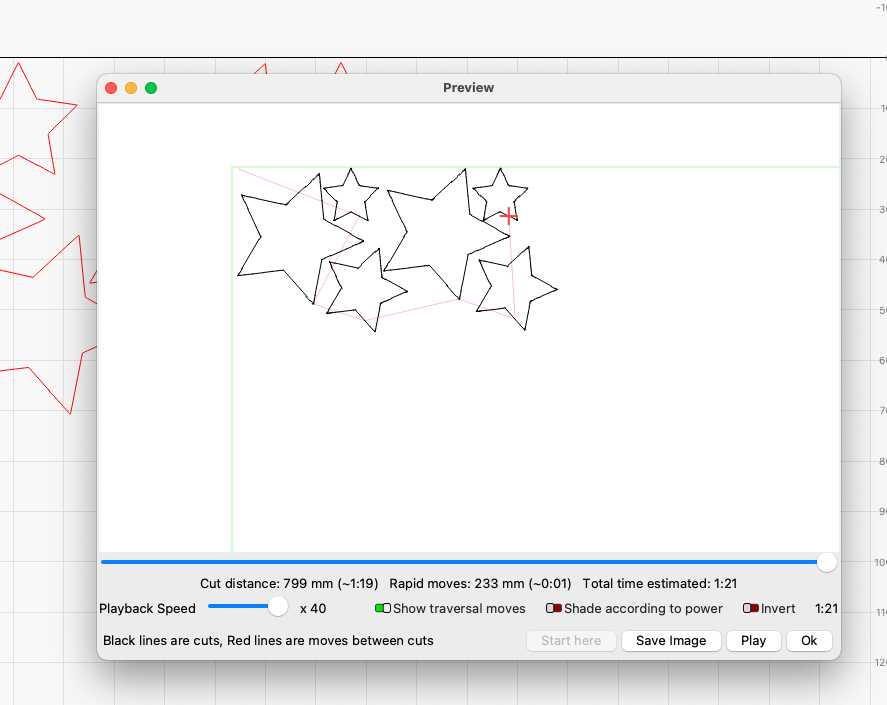
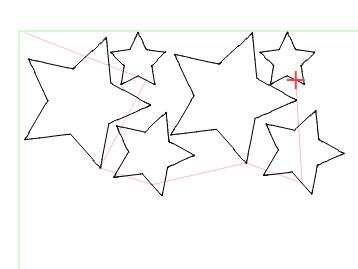
The tips of the upper stars appear to be exactly on the green line marking the rear edge of the platform. I cannot tell whether they extend slightly beyond that line, but there’s no daylight in between.
The thin red line from the upper left corner shows the laser head’s current position is in the left-rear corner, which is likely where the machine homes.
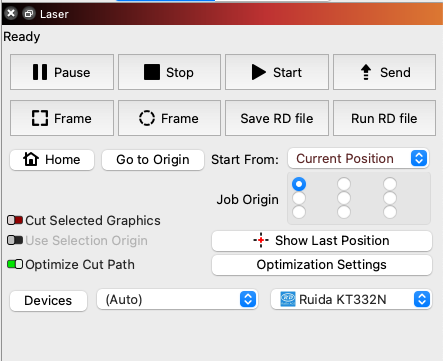
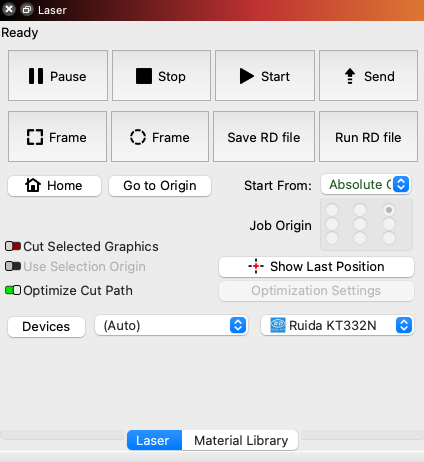
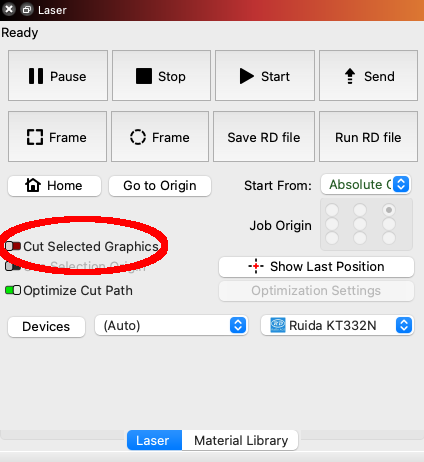
The Laser window shows Start From: Current Position with the job origin at the upper left corner of the design.
If LightBurn calculates the frame as sitting exactly on the bounding box of the design, the laser head coordinates will start at the home position. That means the rear of the frame lies exactly on the platform’s rear limit and that’s enough to trigger the “No can do!” error.
As I suggested above: switch to Start From: Absolute Coordinates, put the design in the middle of the LightBurn workspace, lay down some cardboard, and see what happens.
If the design doesn’t appear in the middle of the cardboard, upload screenshots of the Prevew and Laser windows, along with the entire LightBurn window showing the workspace borders.
The doc on Start From and Job Origin choices explain what’s going on:
I have rest my laser and the origin is at the rear right. I have also switched to Start From: Absolute Coords and placed my design in the middle of the workspace. I am still having the issue of when I hit frame it only moves slightly or stops halfway through framing. I have included the below screenshots to assist:
Screenshots:
Preview
Laser
Cuts/ Layer
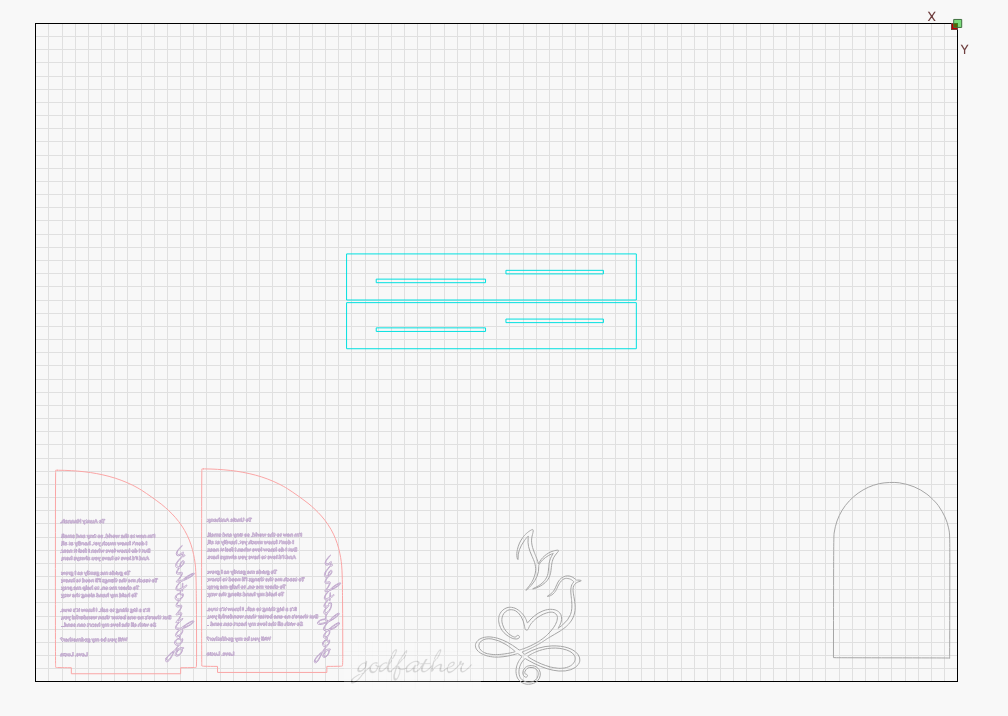
Entire workspace with what I am cutting placed in the middle.
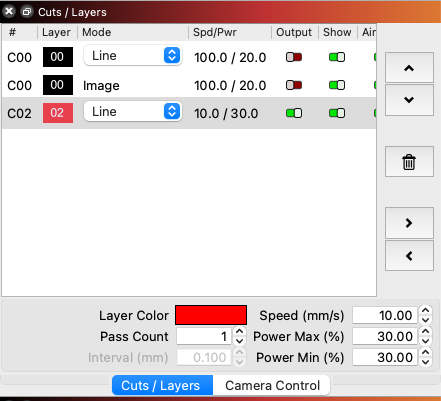
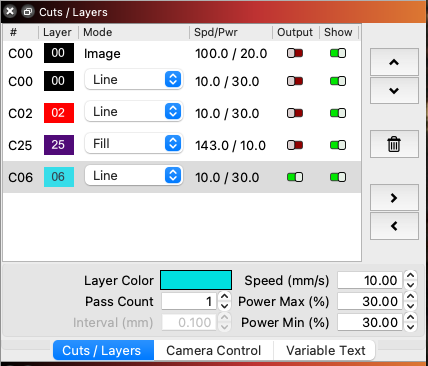
The Cuts / Layers window shows the layers for those off-workspace patterns are turned Off and they do not show up in the Preview. However, did you send the job to the laser immediately after you closed the Preview window?
That setup makes it very easy to inadvertently send unwanted things to the laser, so try this test:
Turn Cut Selected GraphicsOn
Select only those squares
Verify the Preview appears correct
Close the Preview
Hit Start to run that selection
How does that behave?
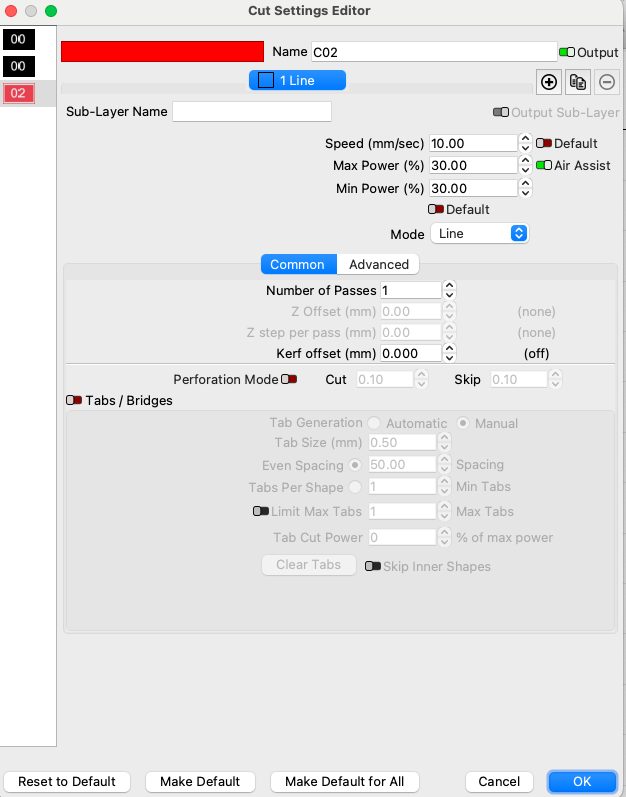
The speeds & powers appearing in the Cuts / Layers window seem excessive for a CO₂ laser marking cardboard; my 60 W machine makes a serious mark with 20% power at 300 mm/s. Upload a picture of the result of that test so we can look over your shoulder.