They use sand to make glass, so I suspect it would work. However, every sandstone rock I handled could be easily broken.
I am not an artist, so I would have to hand that part off to someone else. But that is a good idea.
I am sure it could do better, and with a wider beam, the marking would be more pronounced. I am away from home, but when I get back I will see what my 40w diode can do. The 10w warms up some of the rocks, by the way. that takes a lot of energy.
Maybe, but I do not see the advantage over plain dry sand.
Looking at the quality thats already achievable, the type of rock & consistancy is probably more important.
The lizard looks great and pretty straight forward…without adding more time and process to the job.
Once this enclosure is built and Im burnin I’ll take a drive to the coast and see what I can find among the pebbles.
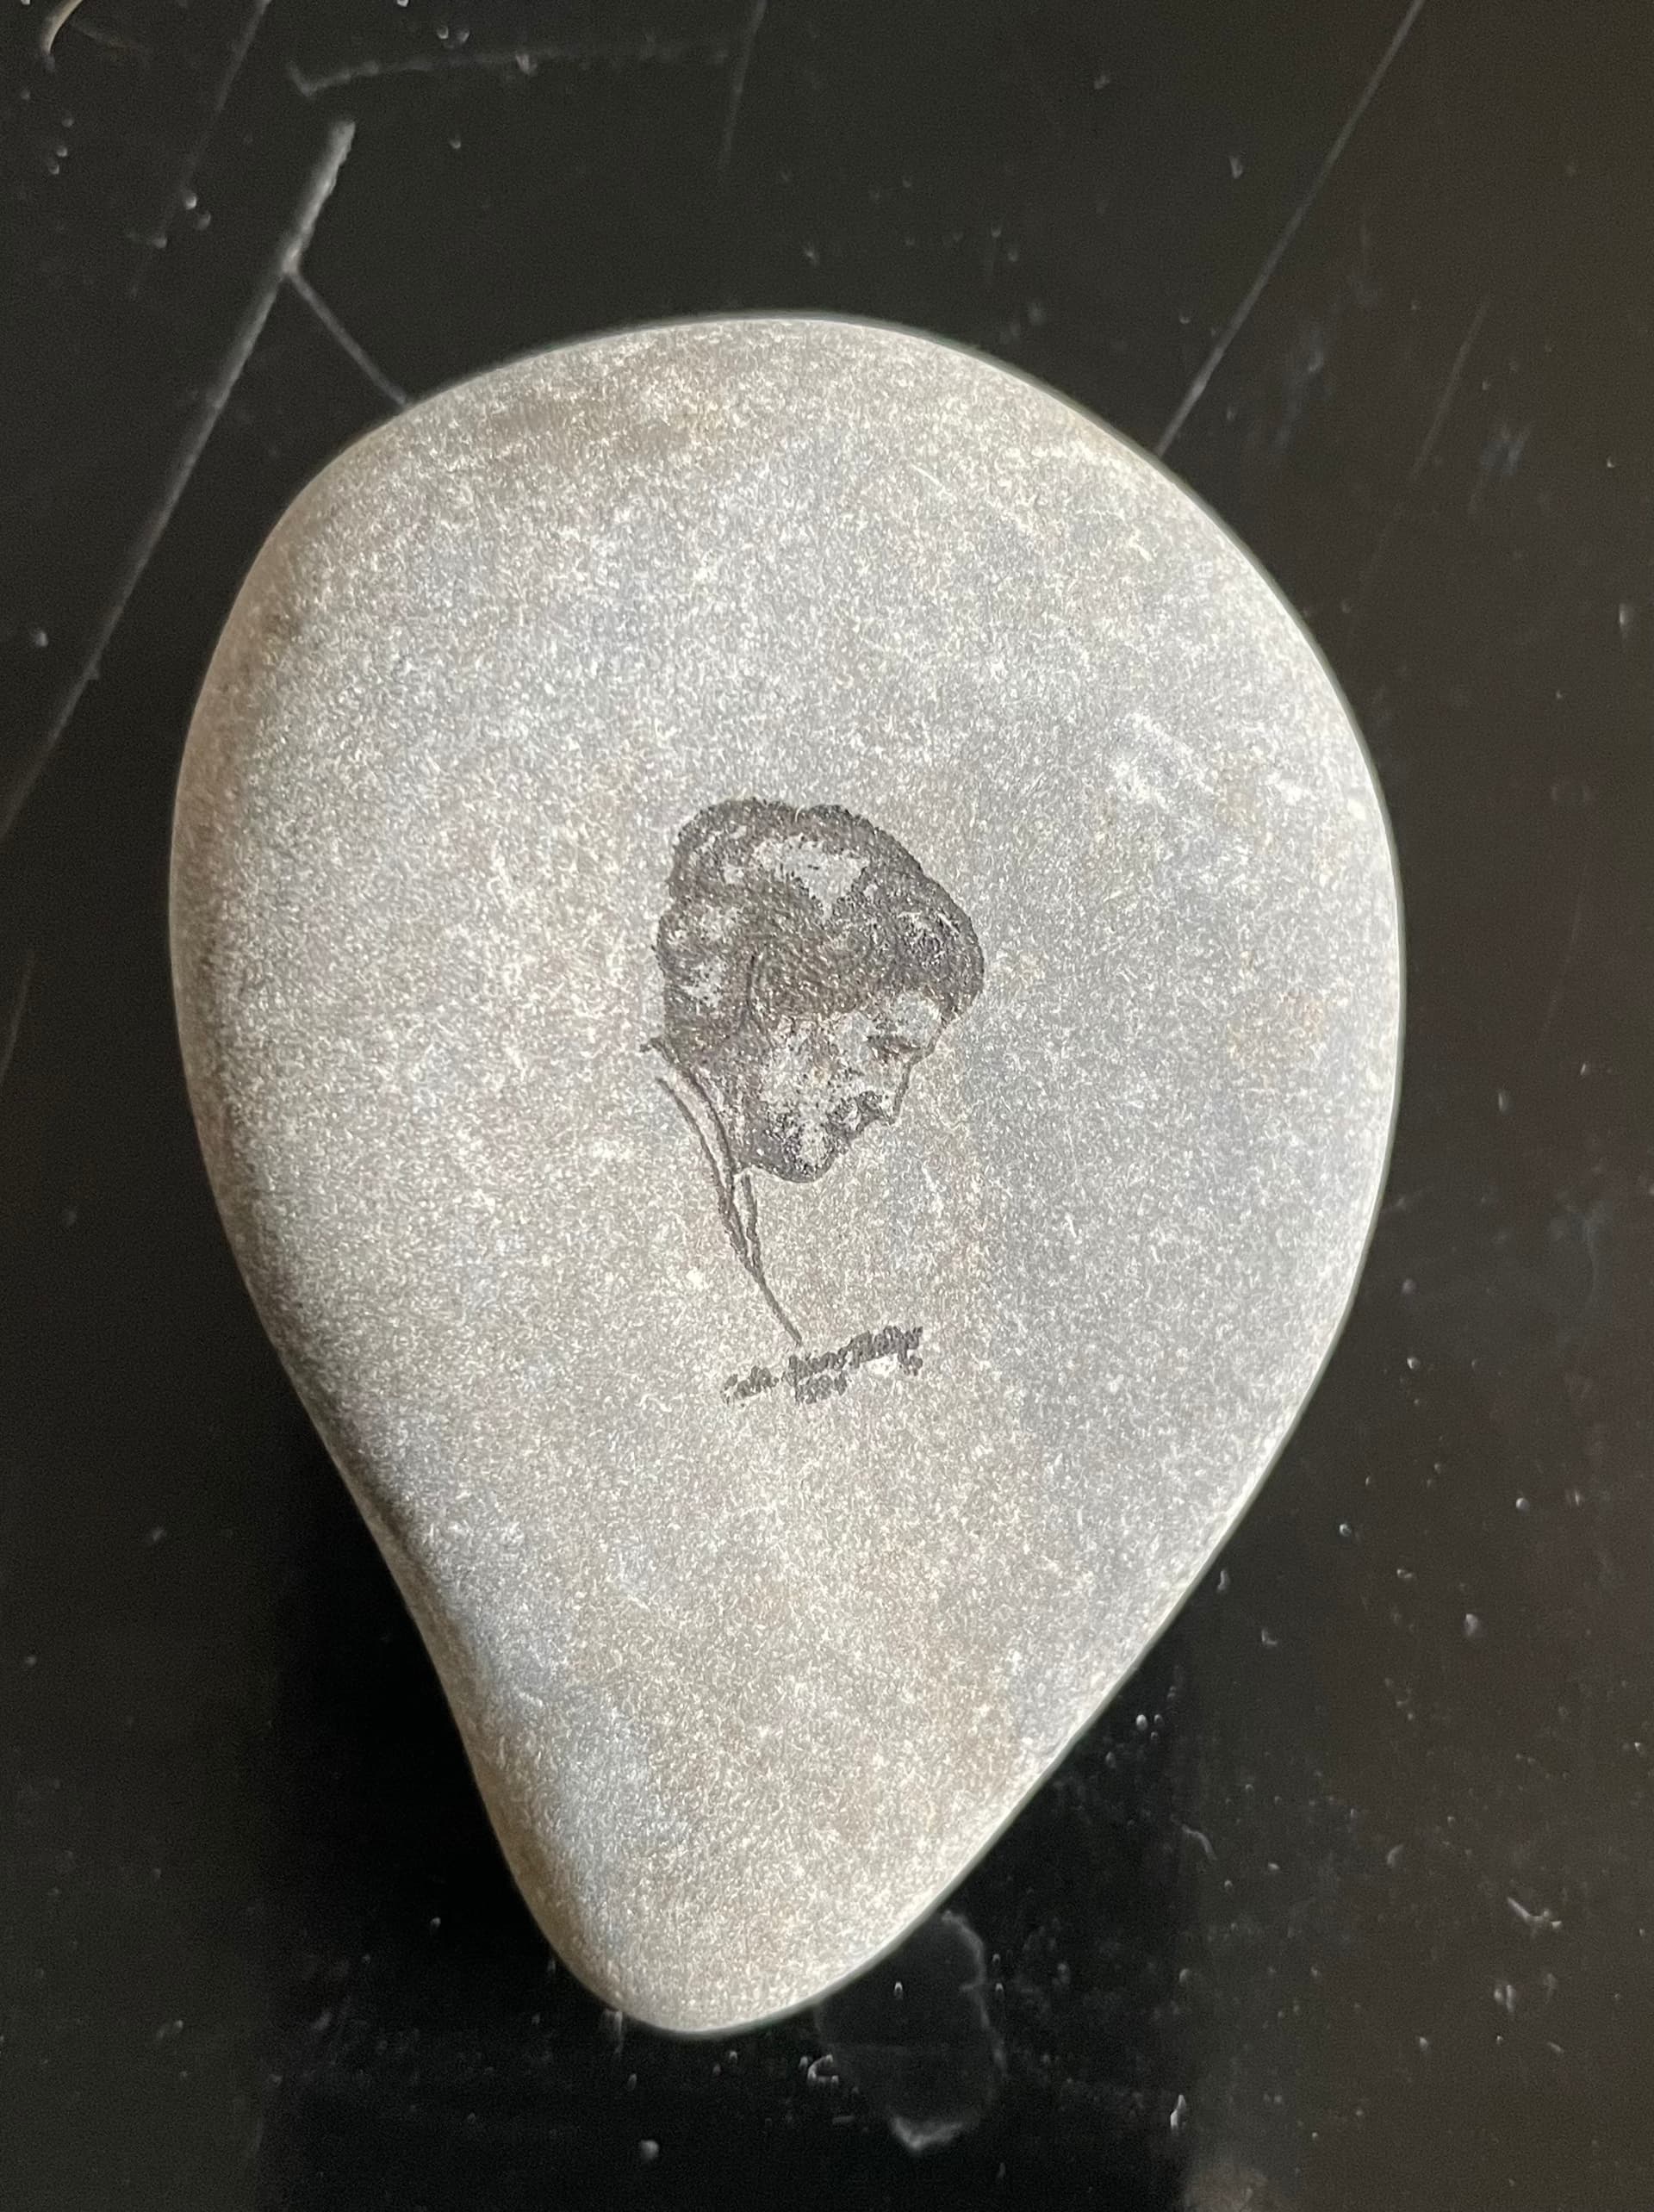
This is rock that showed practically nothing after engraving. Used some black powder coating to go over it again at a lower power setting and it came out very nice. Powder coating from Harbor Freight.
Yes it is. Just spread it on smoothly with the edge of a business card. With my 40W laser I go back over it at 10% power and 200mm. Brush off the excess. Works also great on wood engravings.
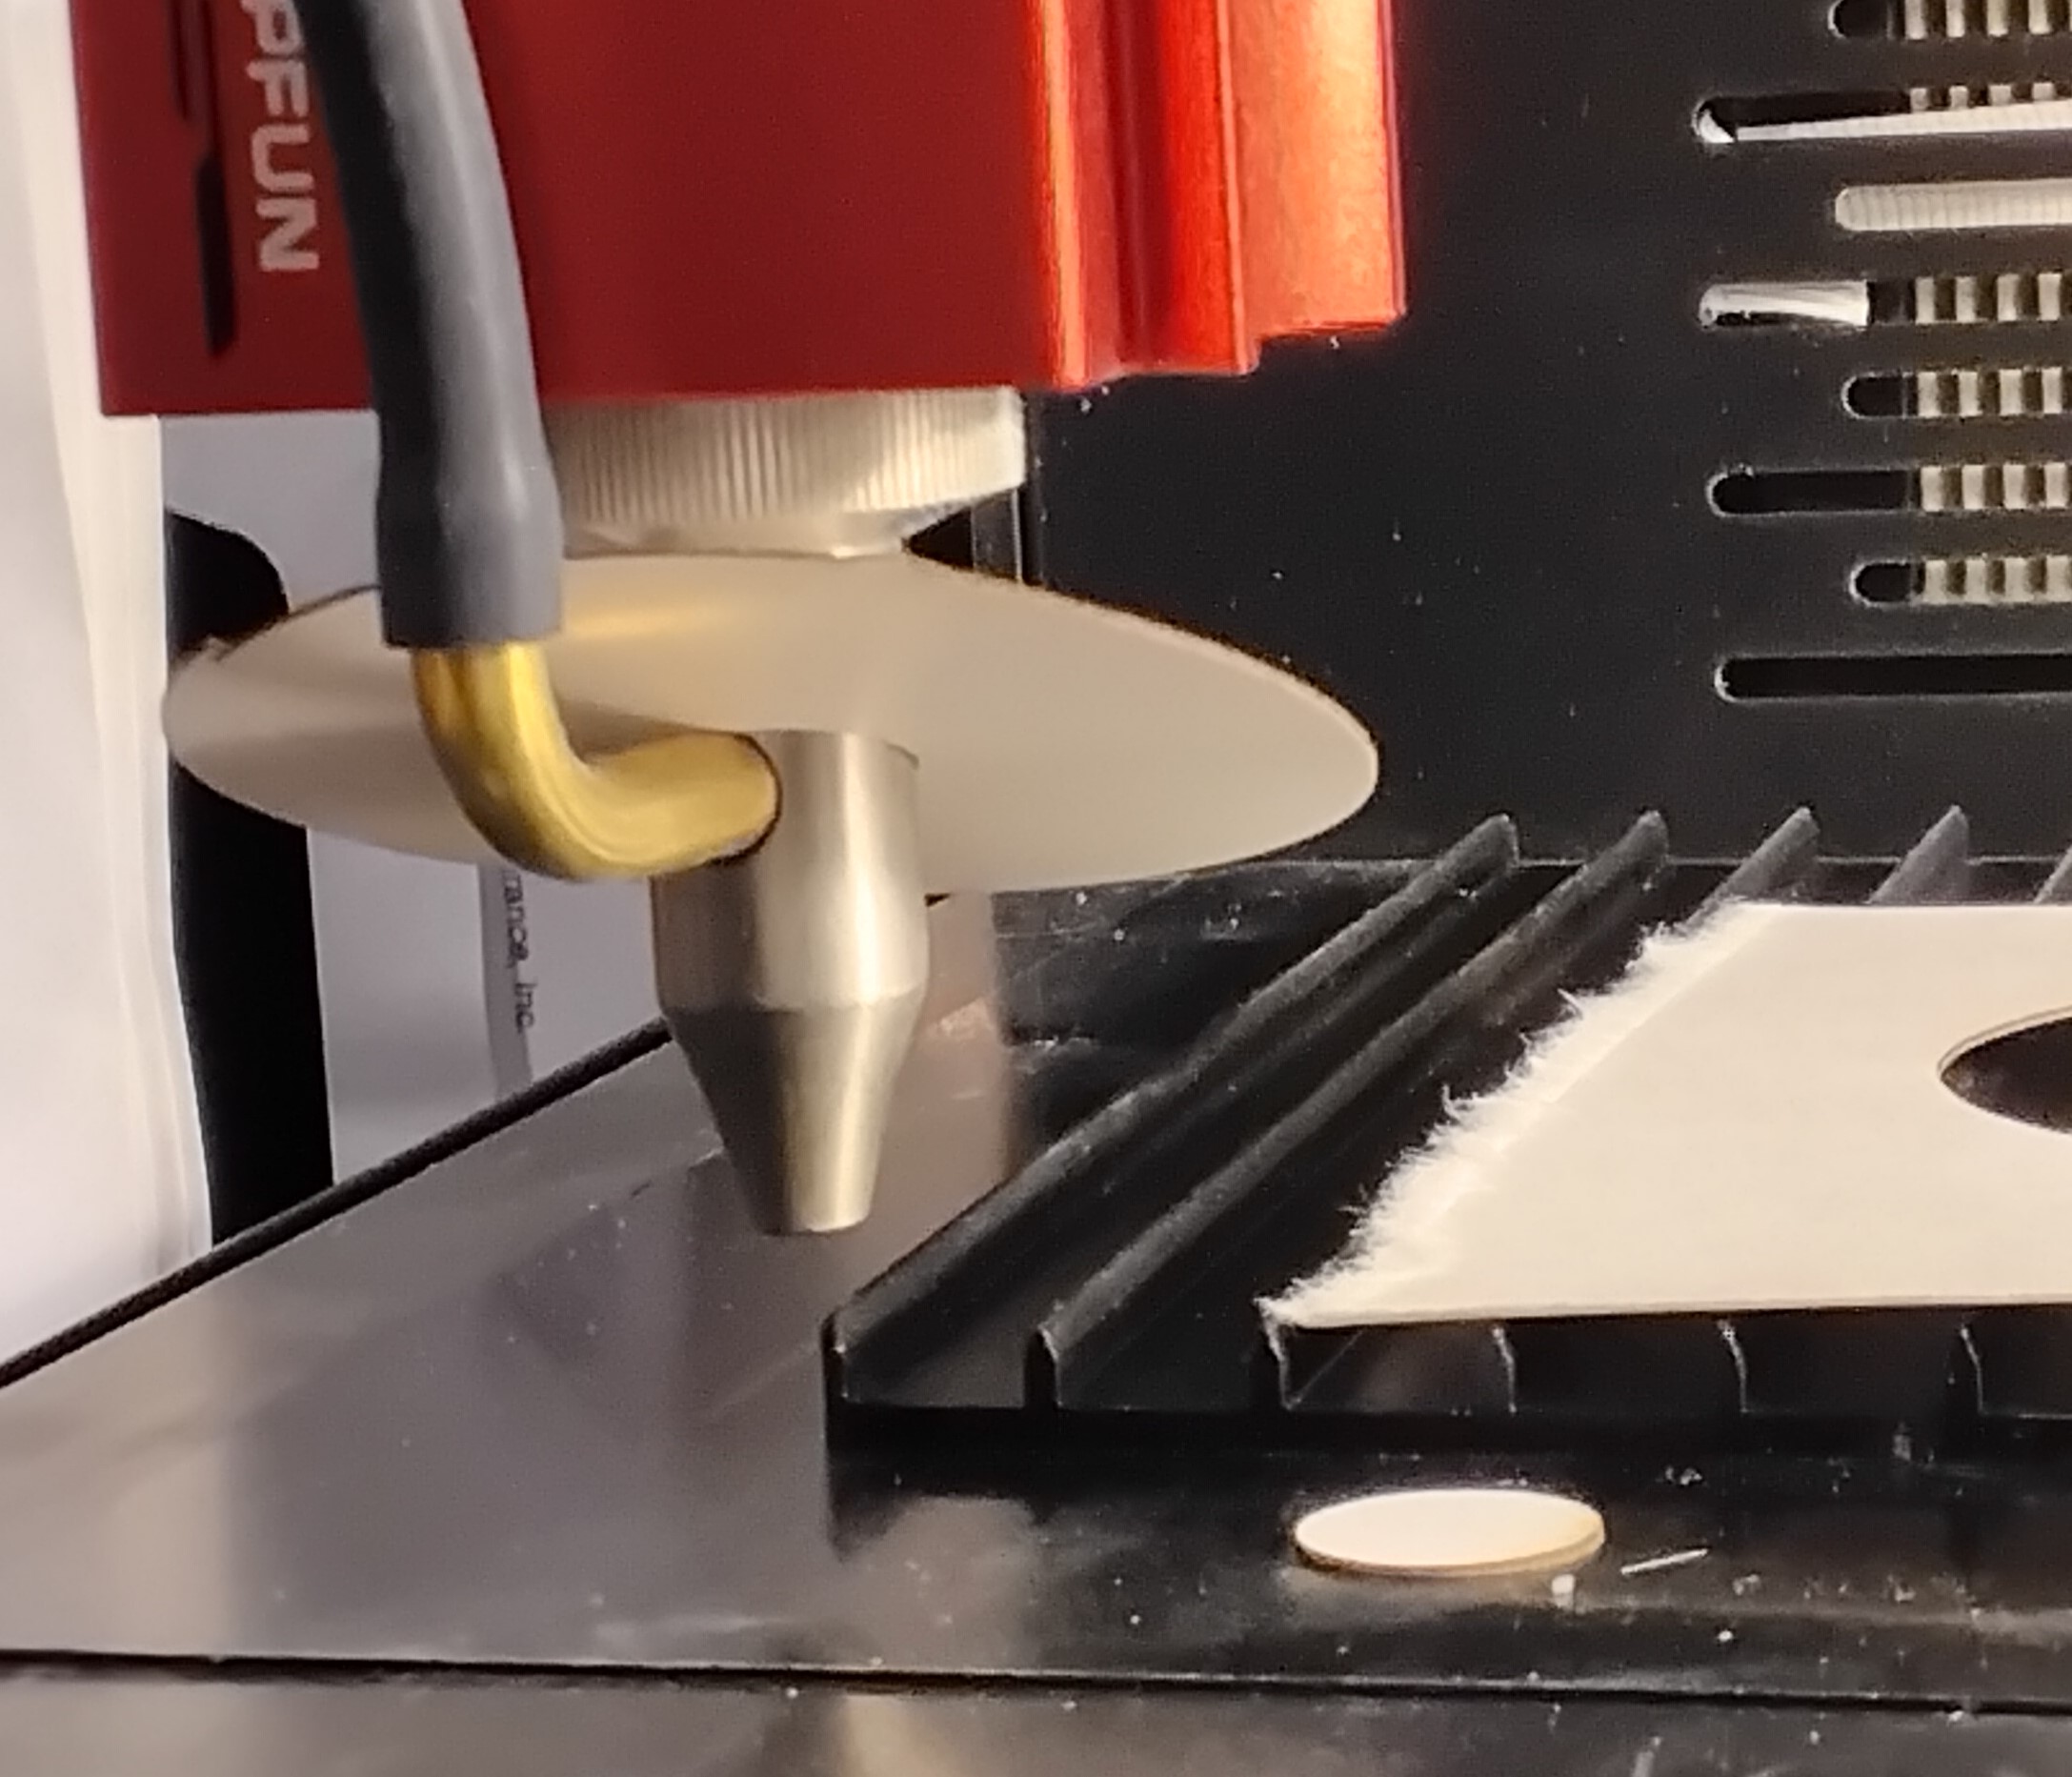
Also I use electricians putty to stabilize the rocks or any other small item. Doesn’t dry out and doesn’t leave any residue. You can find it a Lowes or Home Depot.
Hi John
Really nice work by the way. Do you think that different colored powders would keep their color after lasering.
MikeyH’s rock with the larger white particles (the one on the right) didnt show the design as good as the grey stone but if the depression is there then the extra process of adding powder makes it worth the extra time. Also because its nice looking rock.
Not sure this would work for me. the SF-A9 has continuous air assist and the laser cooling fan has quite a downdraft. I would be reluctant to do rocks without air assist.
I know what you are talking about, but it is also known as machinist’s putty.
Thanks! I only choose upscale rocks for my best customers.
I have only tried the black but I am going to get some other colors. Harbor Freight only has Black & White. The laser just melts the paint into the engraving.
I turn air assist off when going over the powder at a low power setting but keep it on when etching the stone. If you can’t turn air assist off then it probably wouldn’t work.
Can’t with my 40w, but I can with my 2 10w machines. Unfortunately, the laser cooling fan cannot be turned off. I ran into this when tying TiO2 + alcohol on white tiles. Blew the powder right off the tiles. Maybe I can mix the power with a binder like a bit of white glue.
Just had an idea… Maybe put a wind deflector around the nozzle. Even a cardboard circle should work.
5 minutes later: I whipped up a little something with Lightburn that might work. A little adjustment for the air hose and it should be ready to go.
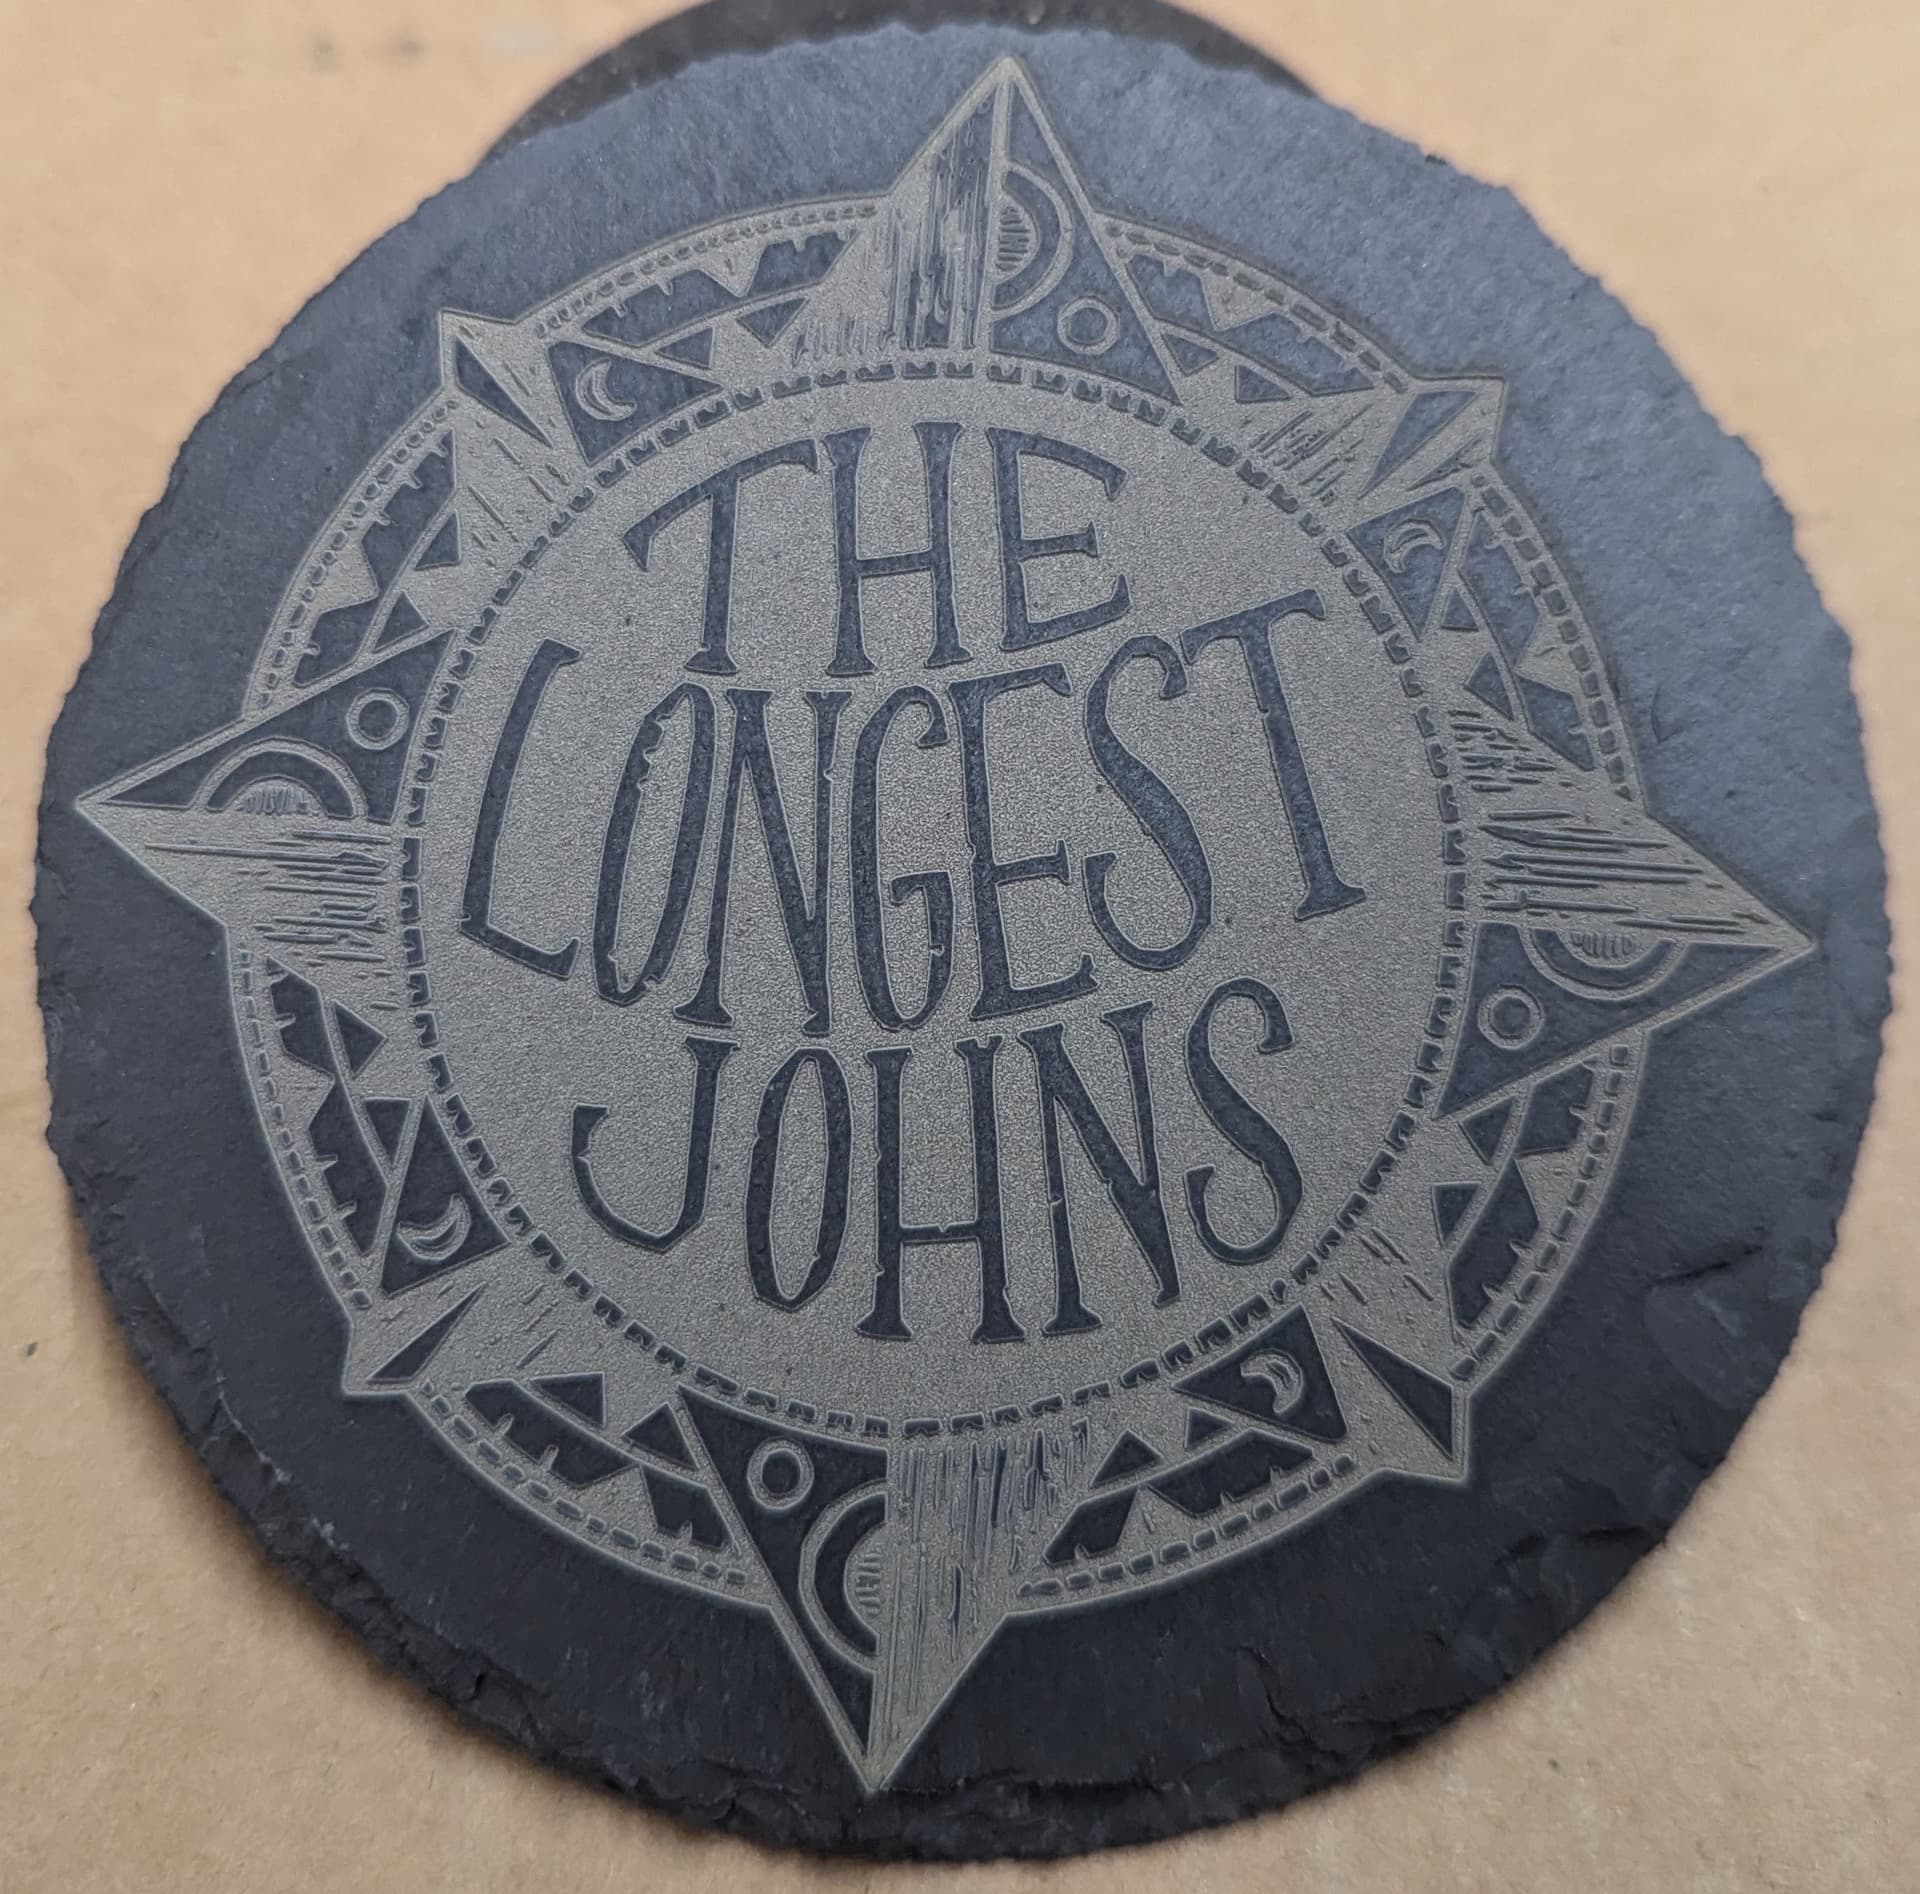
Okay, so they’re pre-cut rocks instead of random landscaping rocks, but I took what I’ve learned from the black rocks and tried it out on slate coasters. This was my 60W fiber laser again, and I did the two-part treatment again. The first part is engraving down into the surface (removing material to give it relief), and the second part goes back over the engraved area with settings to give kind of a micro-beaded/vitrified surface.
A standard etching turns the slate light, but that seems to be from the microtexture scattering light. When it gets wet, the water makes the surface much less scattering. The intention with the second part micro-melting the surface of the coasters is that the being tiny glassy bits should make it less affected by water, I think.
I’ll have to get around to looking at it under a cheap microscope, not to mention doing a proper A-B test. For now, at least, it looks nice, and I finished the set of coasters before the concert in Dallas on Saturday night.
Really nice texture & finish on the lower grey surface.
So do you remove the material down to depth where the spot becomes defocused and go again without adjustment to z to just apply heat, or is it a speed and power adjust for part 2.