Is it normal for a new machine’s laser red dot to not be centred on the bed? The manufacturer stated, “The centre point of the galvanometer is accurate, but it does not mean that it corresponds to the centre point of the bottom plate. Please follow the machine parameters, adjust the position of your jig, do not easily move the machine.” Since it can’t be manually adjusted to the center, how do others handle this issue to ensure accuracy without complex adjustments? My concern is that this explanation might be an excuse Thanks a lot.
Welcome to the site…
I have an M60 JPT M7 MOPA. I use the center of the work area for alignment. I use P on the keyboard to center it and go from there.
Since you can generally move the galvo head around relative to the platform.
But, I’m not following the actual problem you’re trying to solve.
There are offsets in the device settings and on the rotory gui, but I don’t use them.
![]()
Using the OP’s subject, I have a Max 50W Fiber with a 110 lens.
I’m using a jig to hold the work and when I hit Frame, the light is off the piece and when I move the jig to get the frame on the piece, none of the jig holes line up with the bed holes to secure it.
Is there a work around? Can the head adjust?
Thanks from a very newbie.
Have to figure out how to position your holes in the jig. As I stated I use the center option to put the graphic in the center…
I can’t change your holes, so I’m not sure what to suggest.
Hang in there and see if @Albroswift has any suggestions.
![]()
The laser path can be slid forward and back quite a bit by loosening the screws to the lift bracket from underneath looking up. Need to try to keep it straight / square with the table.
Other option is to add register marks to your artwork to align /offset the center.
1 Like
Thanks, guys. I forgot when I put the head on it had screw slots. Duh.
How do I add register marks and where do they show up? in the frame?
Another placement question: the design has a notch that matches the notch on the piece. The frame doesn’t show the notch so how do I align it?
Thanks, again.
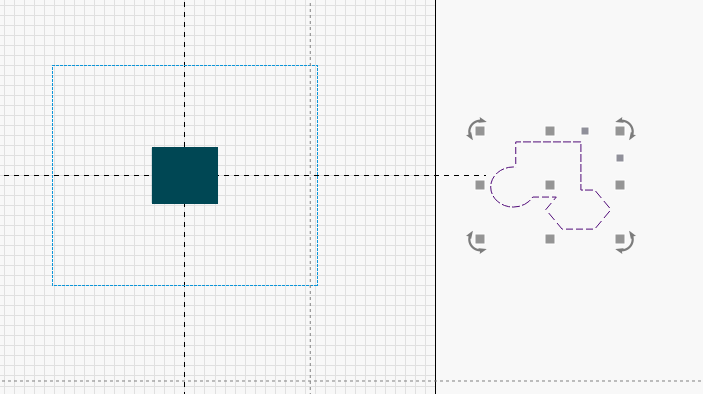
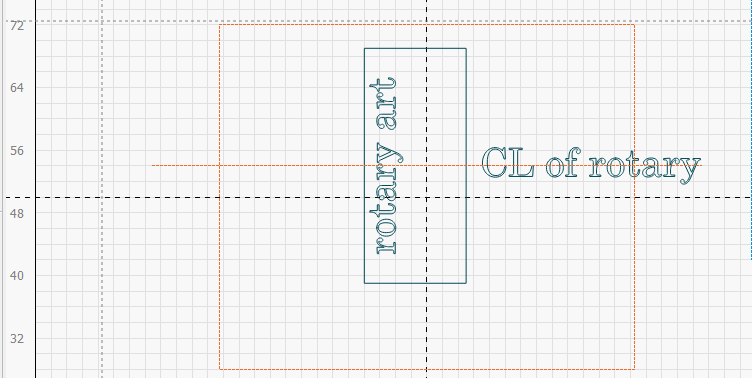
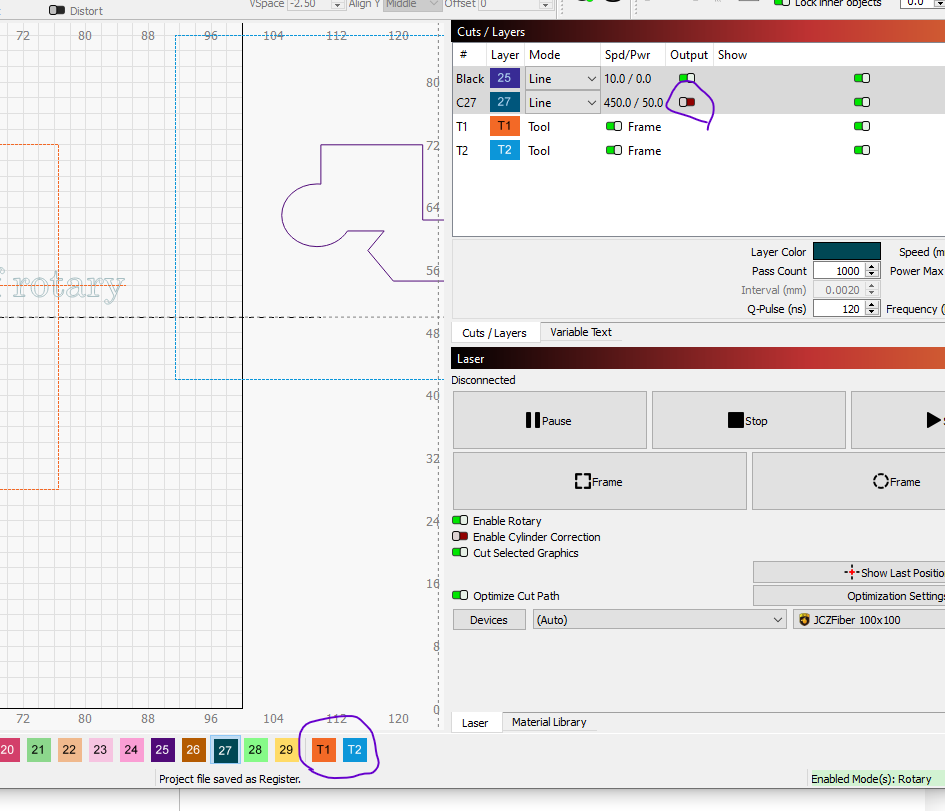
Hope I’m not getting too far into the weeds here, this example I used the 2 tool layers as registers and grouped with the 2 shapes. The 2 tool layers were centered before grouping. This way Shift-P centers the tool layer and art is located in reference to the tool layer regardless where the art is located in relation to the center of the work area.
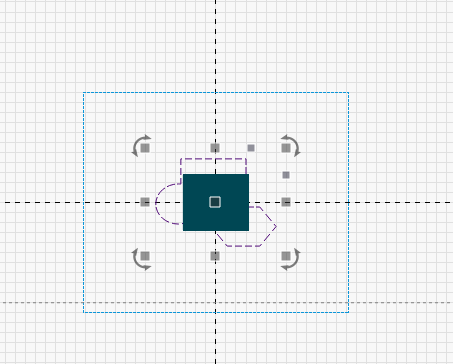
Without register box:
Shift+P
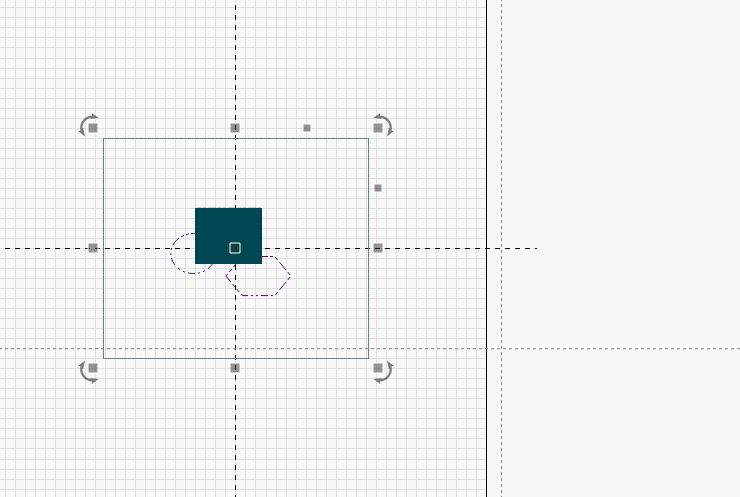
With the register box
Shift+P
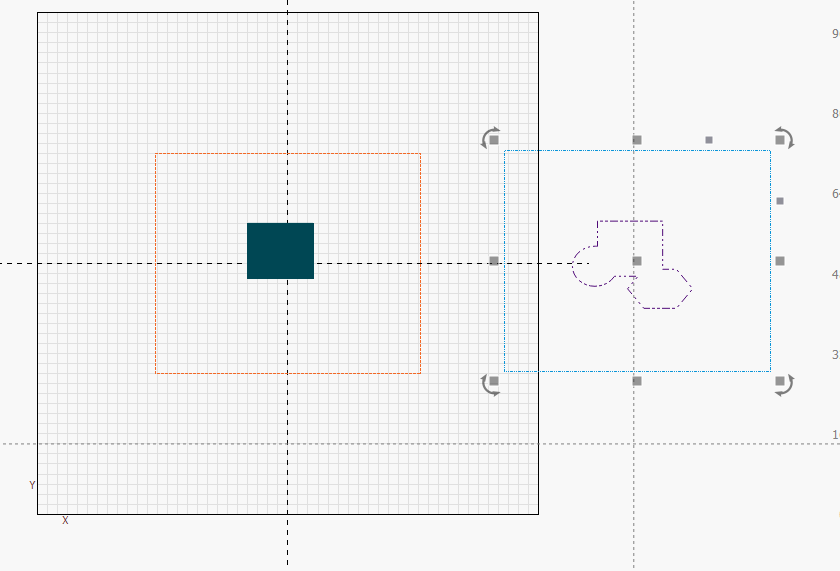
For the rotary, you could add a set of crosshairs that perfectly aligned with the rotary location.
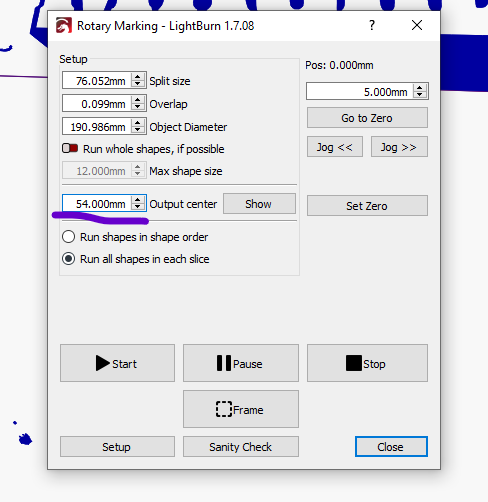
You also need to check/ adjust your output center, looks like 54mm in my example. If you get your rotary perfect it would be 50mm for a 100x100 lens.
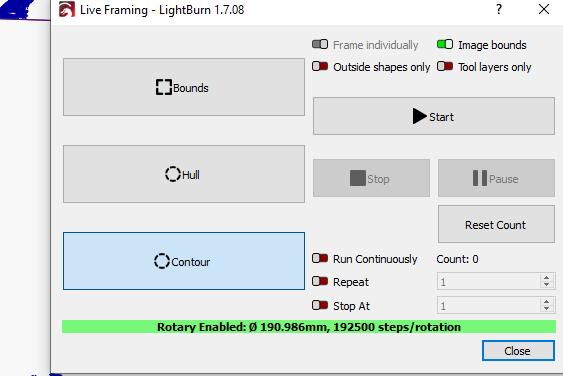
Last, changer your framing to “Contour”
Good luck!
Looks like I’m lost in the weeds.
I appreciate the help and time put into teaching me, but for the life of me I can’t get a tool layer. I’m starting to see how it works and i’ve looked at 'Tool" articles but how do I get a layer that says Tool?
No Problem.
Select the object and click on T1 or T2.
T1 or T2. Or really any layer can act kind of like a tool layer with visibility on and output off.
Alright, I think I finally have it. Thank you. I do not have a rotary tool.
One part of the design is to long for the piece with a 110 lens. If I switch lenses, how many settings do I have to change besides the size in basic settings?
1 Like
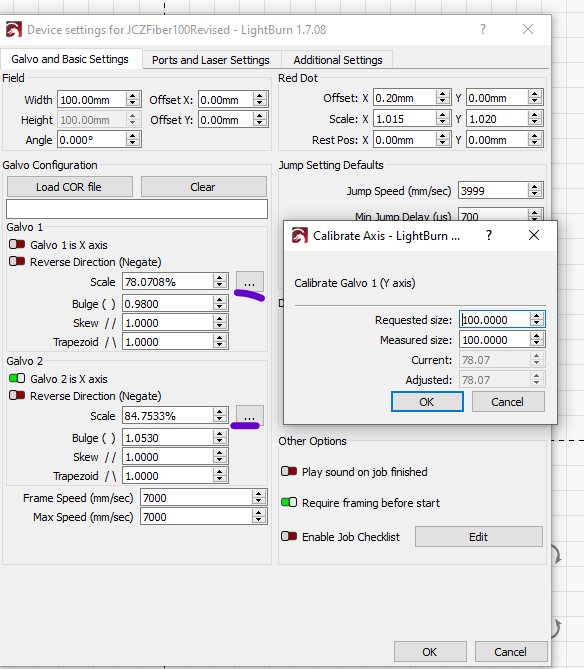
So if the lens didn’t come with the laser you need to go through a complete setup. Each laser and lens combo has its own unique settings. It’s not that difficult but may seem a bit overwhelming at first.
Review this information. I like to cover the whole bed with black painters tape, low power leaves a nice crisp white line to do your measuring with. Black construction paper works also, lots of things will work, needs to be flat, bigger then your table, and mark easily.
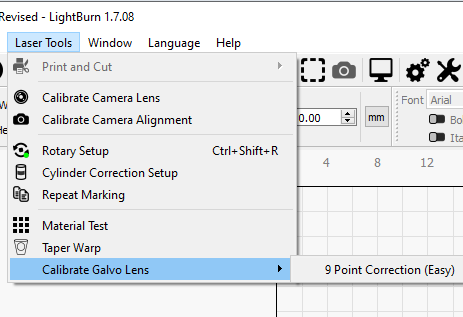
After going through this with the new lens, next step is scale. Each axis has its own button
I calibrated the 110 with black construction paper and ended up with burn marks on the bed. I couldn’t see the lines on low power, so I kept bumping it up. Maybe I’ll try the tape next time.
I’ll click the links.
Thanks again. You’ve been a tremendous help.
1 Like
The black tape is the way to go.
2 Likes