With regards to the gcode errors I have sorted it.
I had to leave my coputer and closed the configuration panel. I tried to continue from the calibration. It didn’t work so I restarted the whole process that worked.
I think the issue might be that I set home against the stop at the bottom left of my engraver. I’m going to try resetting home in the centre and see what happens.
I can’t take a phot right now as I have closed the alignment set up. If I get the same problem after resetting home and realigning the camera. I will uplaod one.
I see that many peolpe are having a problem with camera calibration. I’m confused and trying towork through it. One of the reasons is that the help video is very different from the set up walk through images.
I followed the camera calibration and that was OK.
I am trying to align the camera but that is causing problems. A major issue for me is the difference between your video and the imges in the set up.
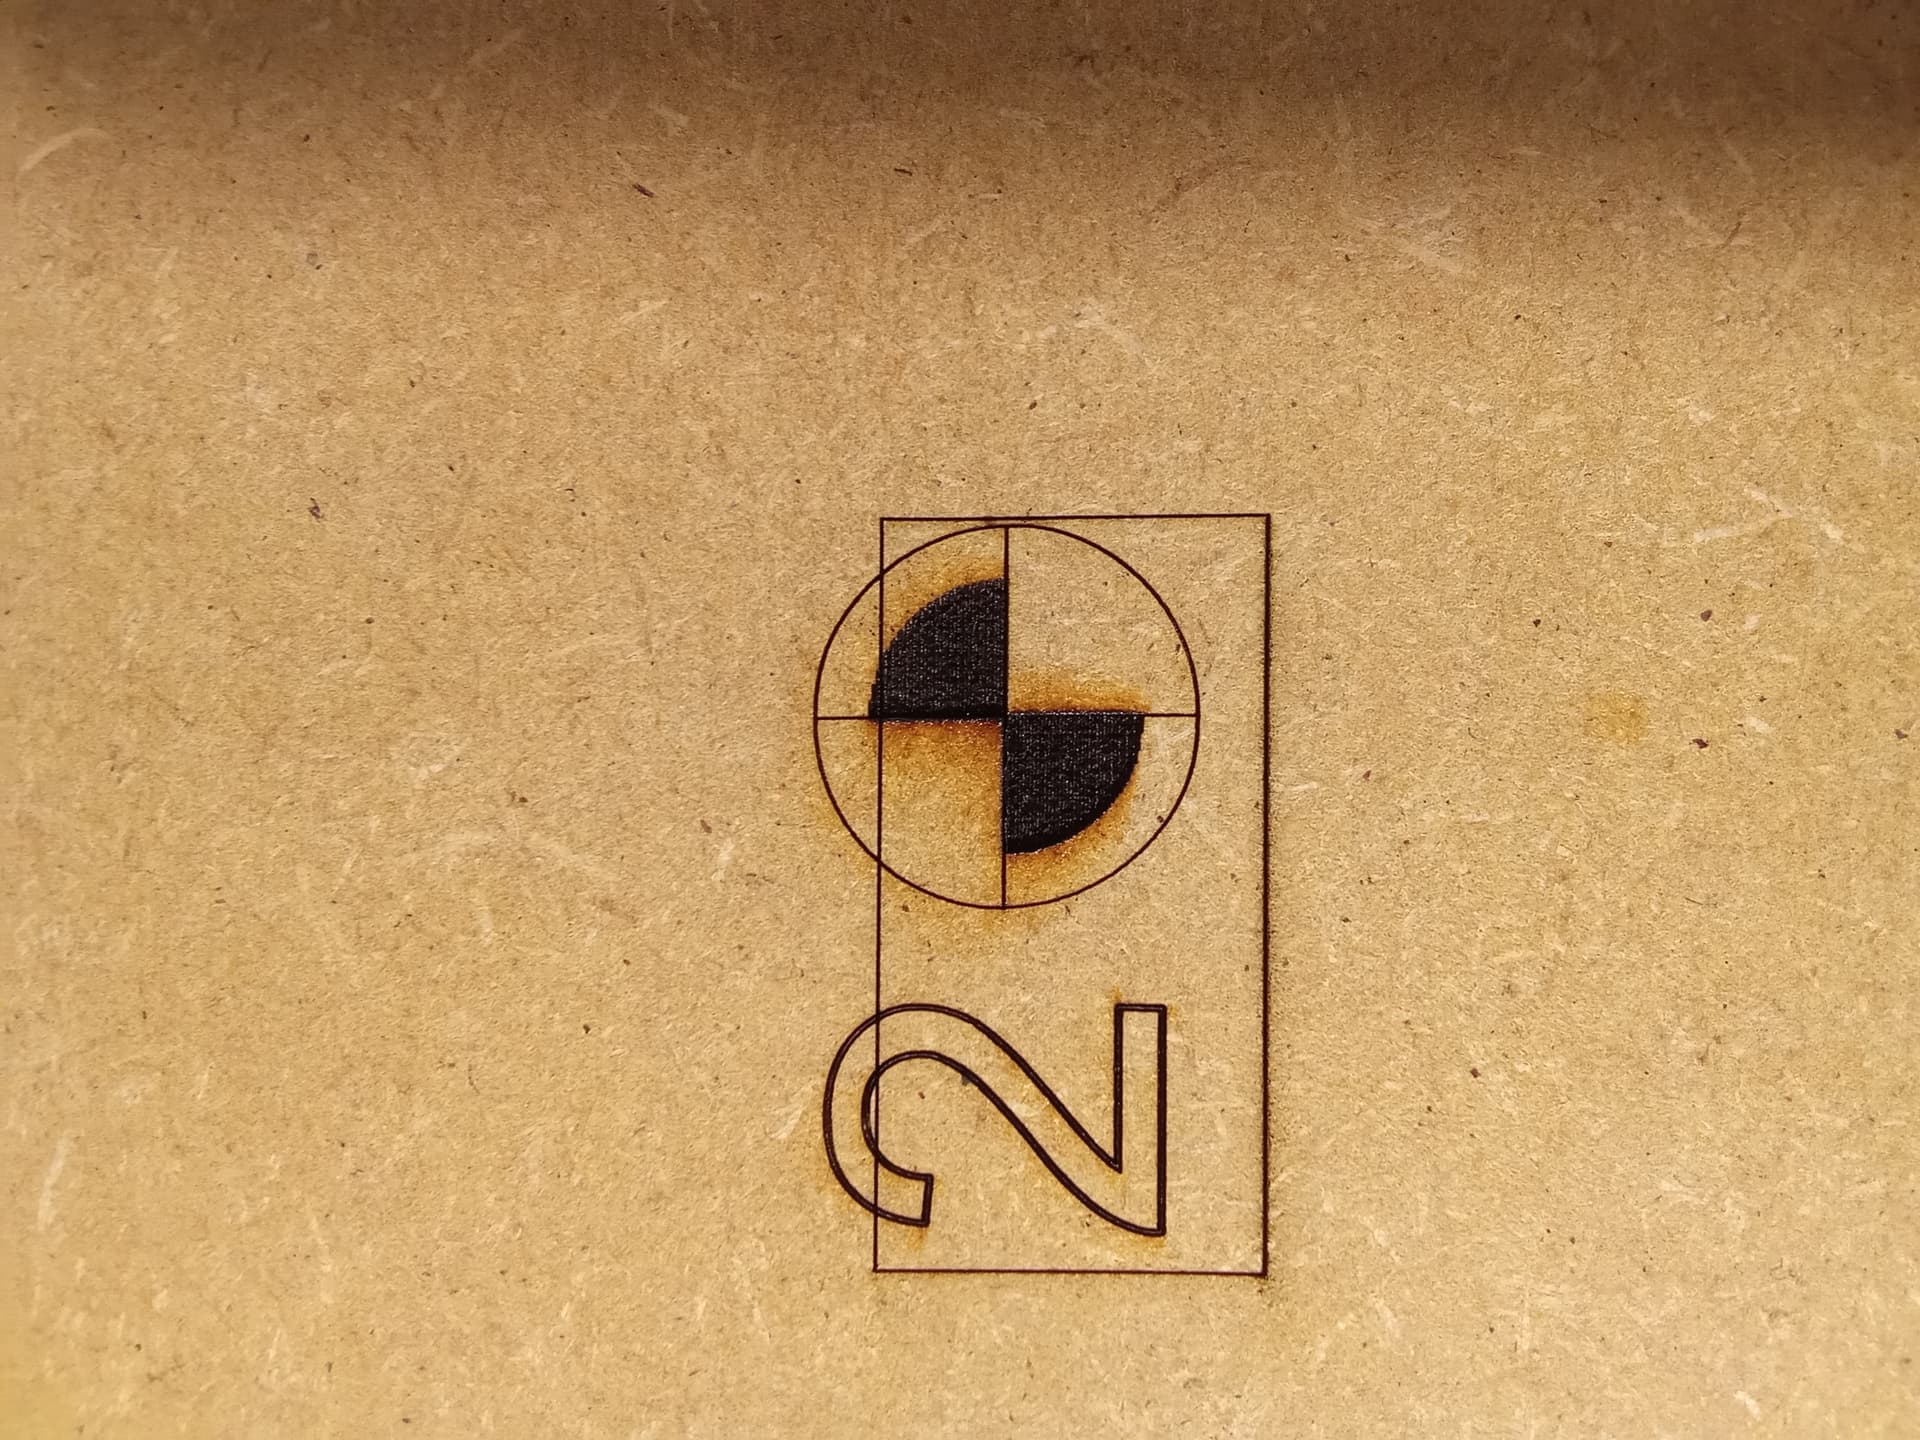
In the video the guy shows that in order to set up the configuration by holding the dotted paper below the camera. I tried this but the best score that I got was 0.888 which is too high.
Your walk through from the app shows the dotted paper resting on the the surface. That works a treat!
Part of the calibration video is using a cross (engraved on a coaster) in the centre of the board to calibrate the camera. It also states not to move it. However in the alignment video the cross is nowhere to be seen so I removed it. Is this correct?
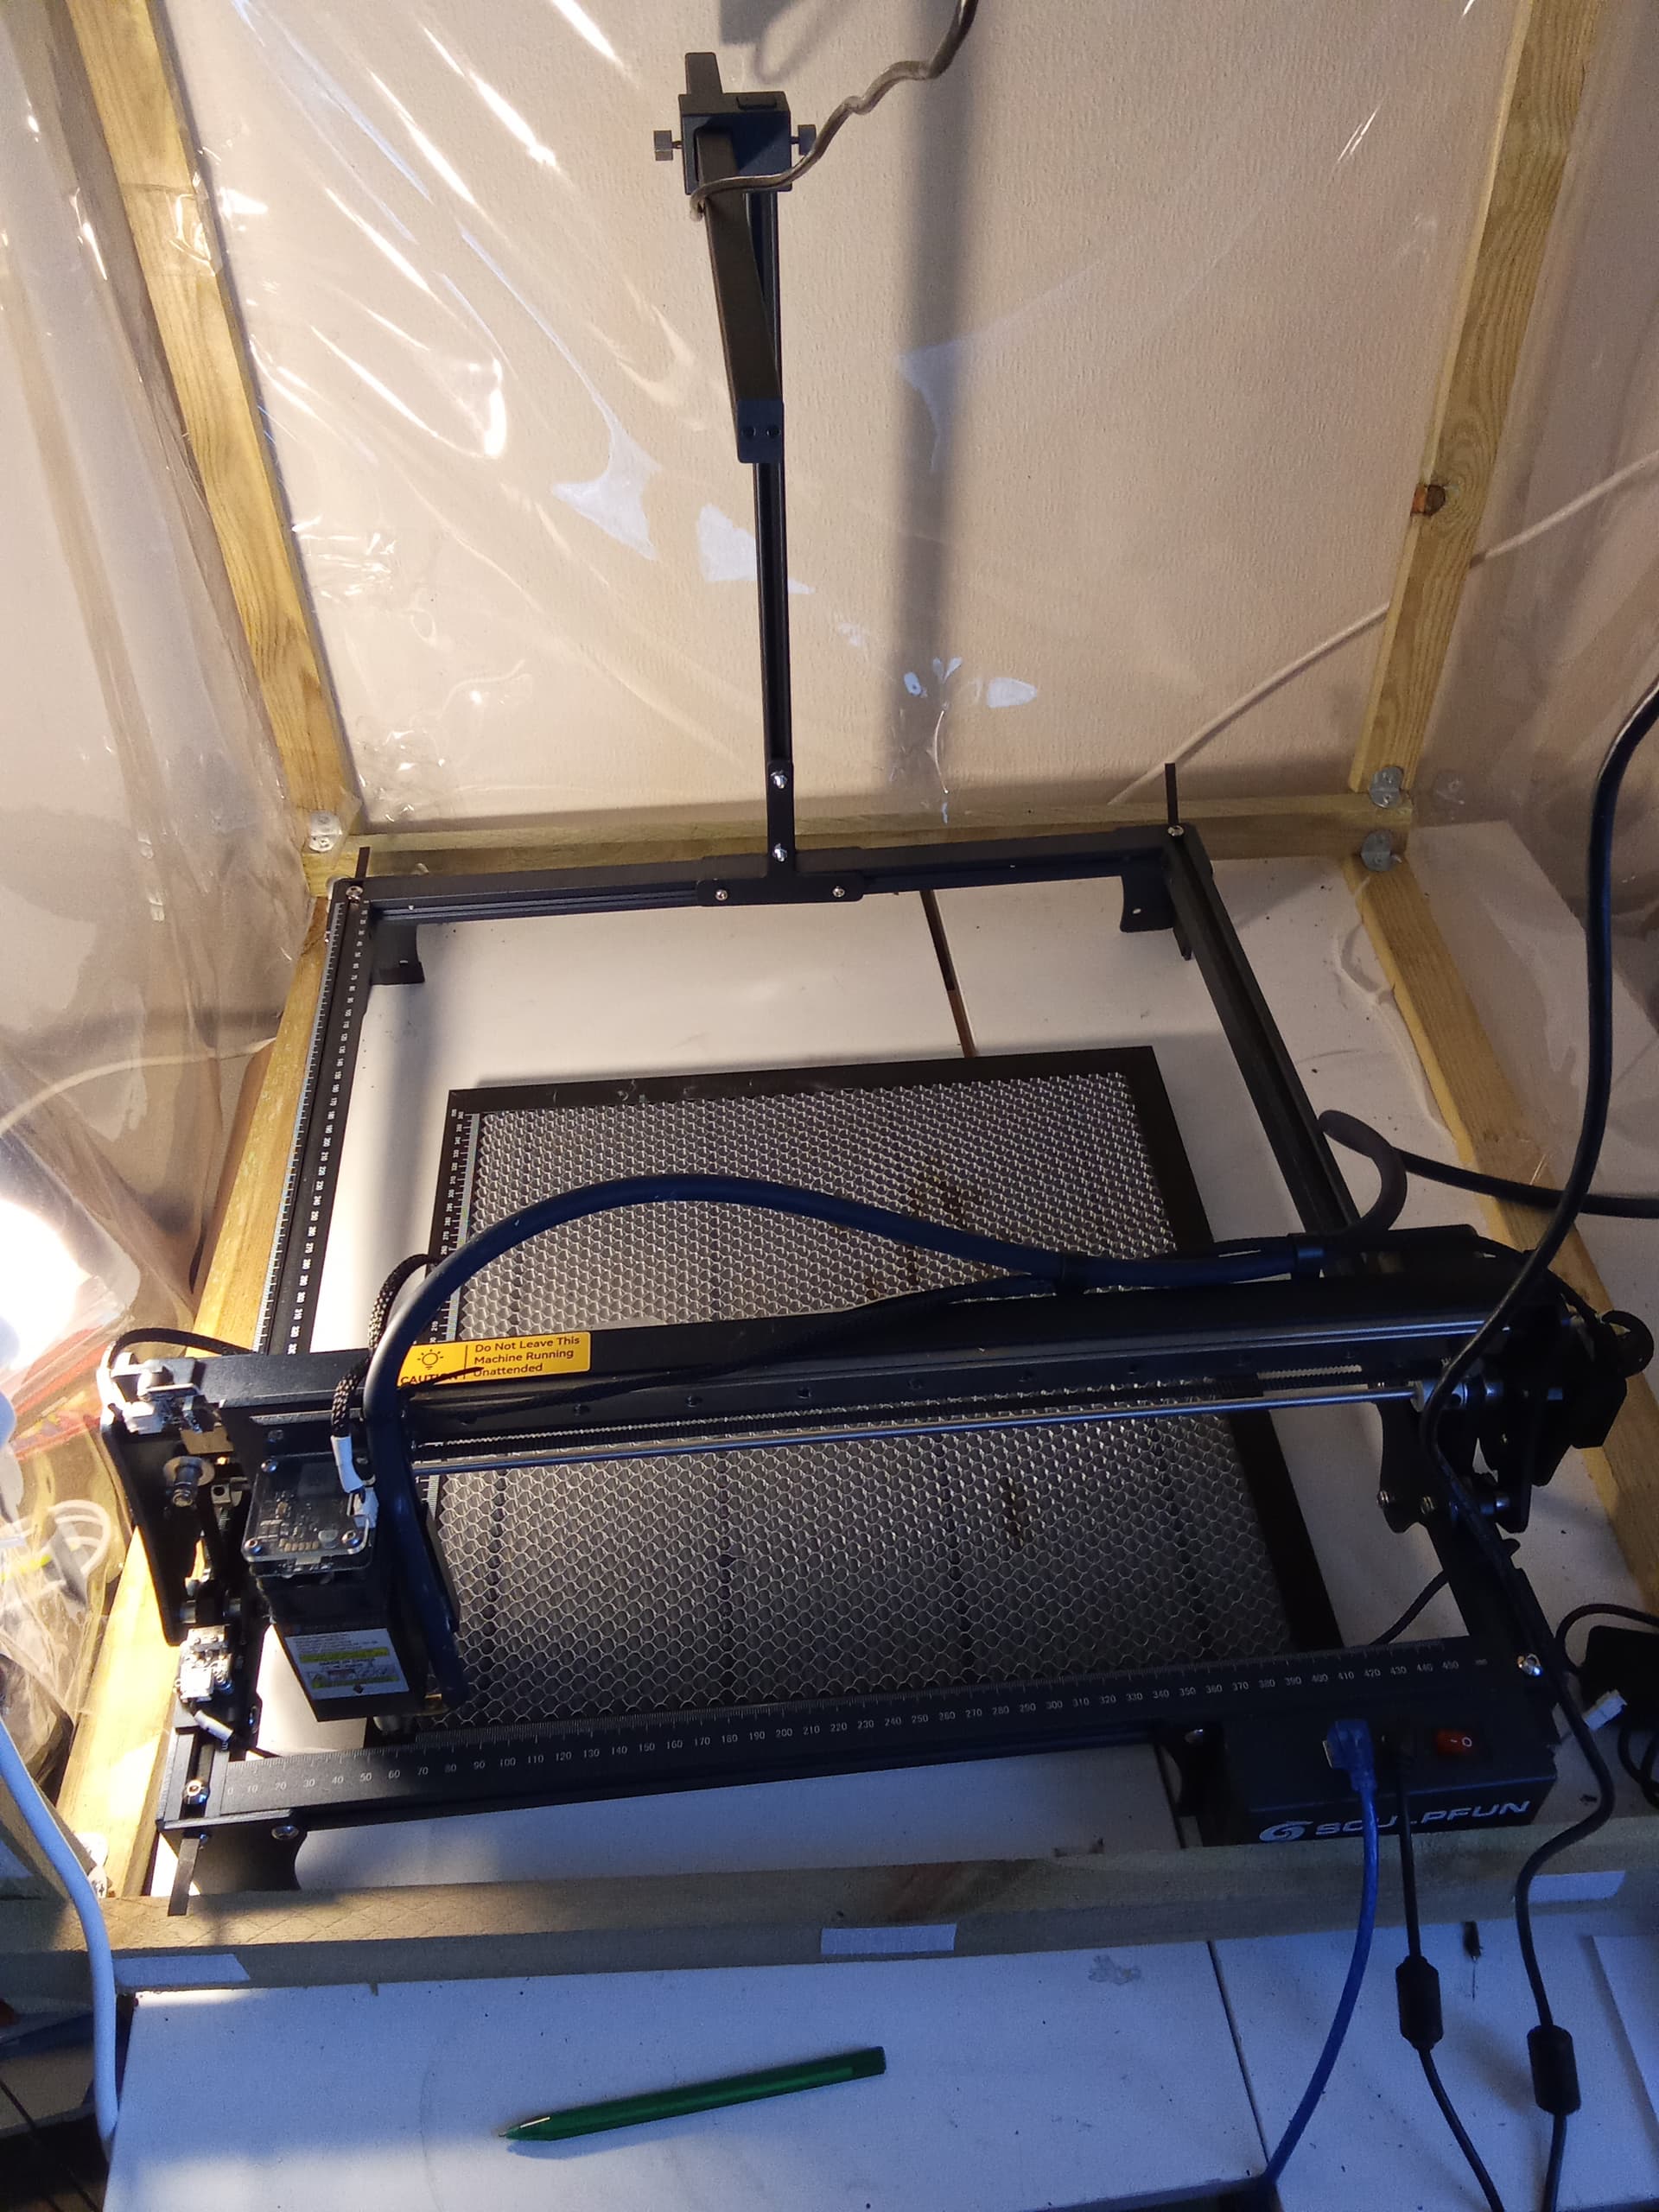
The origin of my laser is bottom left. I have attached a photo to show this.
With regards to setting the laser to the centre for the alignment cut. I think I am confused by the terms home and origin.
My understanding now is that origin is where I park the laser (bottom left) and for home, I need to set that for every cut. Click the home button in the side bar and then click the centre of the screen board.
I’ll reconfigure the camera and try this out later today.
You have it backwards. Home is where your laser goes home, front left corner(also called machine origin, which really confuses things). Job origin is where you start the job from in Lightburn and Start from is how it’s interpreted to your laser position. I have a video that explains these 3 things. It’s imperative to understand them to be successful at lasering.
It would certainly be less confusing if they used different terminology. Yes, the machine origin is the same as home. It is defined by the laser manufacturer. For the sake of this conversation, let’s call machine origin home.
The origin point on your laser and Job origin are user defineable, both in Lightburn and on the laser bed. They are also dependant on the different start from modes. Home does not change.
In absolute coordinates, home, origin and job origin are the same location.
In User origin, you define a location on your laser bed as the origin and you choose the job origin of your graphic in the laser tab, which defines how the graphic interacts with the origin point.
In current position, the origin becomes wherever the laser head is sitting at the time. Job origin is still set in Lightburn.
I watched this video and gave up becuase the screen output turned to Chinese and I don’t understand it. It’s not translated.
Also it states use system camera which I assumed was the installed windows camera app. The video shows vcam, which I thnk is another app. Am I meant to download this? It’s not mentioned.
If I am meant to download the vcam app what are the options to select? They’re not explained.
No, this app is only used to place the camera correctly centered. You can use any app where you see the full video image. That’s the only reason to use a third party app. If you manually placed it centered, you don’t need this step.
Take a bigger piece of cardboard, that will save you frome wasting much wood
With regards to the vcam app. I think I’ve posted this in the wrong forum. It’s sculpfun 's video for installing the webcam 500 with lightburn. The short version, the vcam set up screenshots in their video is in Chinese and without explanation.
I have decided to buy a piece of A3 sized wood today (30 x 40cm about 12 x 15cm). It’s about the largest size that I can buy off the shelf that fits.
With regards to centering; my idea is to draw diagonals on a coaster to it’s centre, centre the laser and place the coaster underneath it.
My honeycomb is small 40 x 40cm. I think that I will have to do the same with that as I will do with the coaster and fix the honeycomb in position on the laser bench.
I have managed to set up my camera but the laser is about 5mm out.
I find it hard to align to the centre of the marks as they are very pixalated when I magnify them. Is there a way to get around this?
Also, if I enlarge the alignment marks on the screen they go off the top of the screen. There are no scroll bars to scroll the screen.
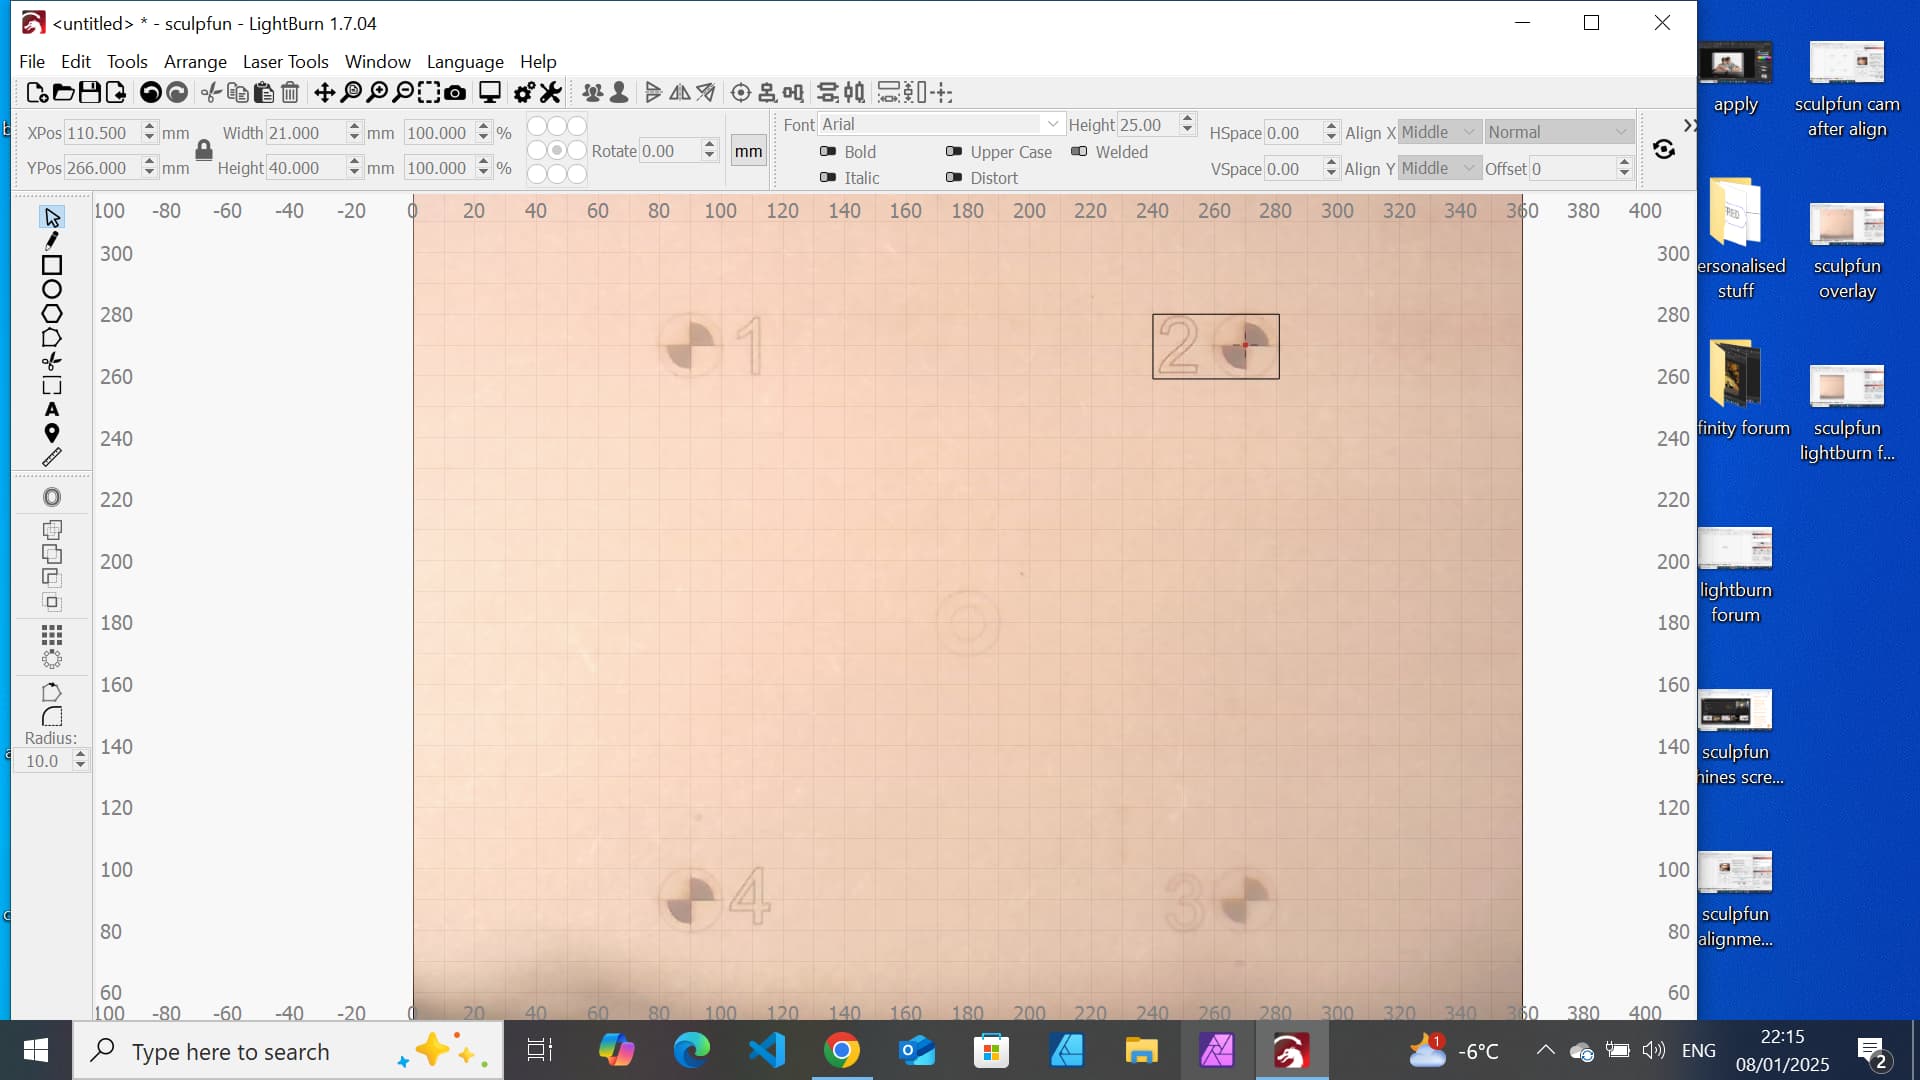
I’ve ttached 2 screen prints:
1 to show the area that I wanted to cut around the 2
2 showing the result of the cut. The top is about 5mm lower the sides are correct.
Is there a simple way to adjust this?
I am also concerned that the area is much smaller tham my honeycomb. Is there a way to change this? I did alter the size in lightburn (360mm).
Maybe this will help:
When setting up the configuration the readings that I got were between 0.09 and 0.12
I couldn’t align the dots along the edges of my lazer cutter’s frame as lightburn kept stating that the dots weren’t seen. I had to ove them in a bit. I pasted the printed sheet to a bit of plywood.
I am going to buy some lighter wood and redo the set up tomorrow. Hopefully, i’ll get around some of the above issues!
You mean the calibration is about 5mm off? That’s normal. Usually, it takes a few tries until it works well. Be aware that you can only use materials at exact the same height as you calibrated. If you use another material with another thickness, you need to run calibration again at that height.
That’s also normal but no problem.
You can use the mouse buttons to drag the screen around. Or use the mouse wheel to zoom in and out which will shift the position as well.
Yes, there is a scale box in the calibration window to change the size. But LightBurn usually selects the correct size for the workspace size you set. It doesn not need to be in the corners completely.
Also very common and shouldn’t pose a major issue. That’s fine.