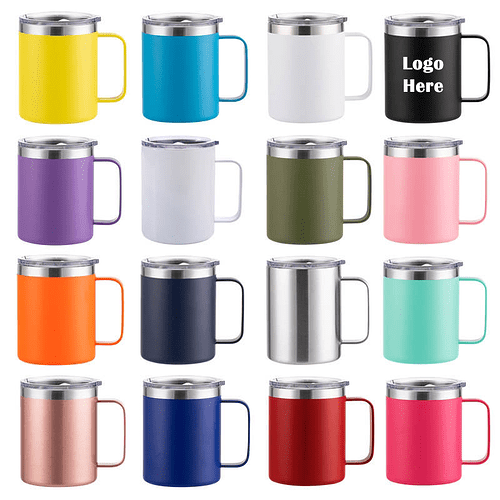
To date, all I’ve ever done with regard to drinkware is tumblers. I want to start to offer coffee mugs like these. Can anyone shed light on how to center your image on the opposite side of the handle, or like the black coffee mug? Not sure about handles to be honest.
Thanks… I’m talking about more what’s involved in LB to place an image exactly opposite of the handle, or 45 degrees from the handle. I have a chuck style rotary.
ohh, sorry I didn’t catch that.
You have to wait until someone comes along who has experience in this field, I don’t have that.
No worries… B
I’ve done some of the larger 30 oz and 40 oz coffee mugs. On the 30 oz there is no handle so no issue there and on the 40 oz the handle is held on by two screws and is removable. By removing the handle i could get the logo pretty close to the handle at 90 degrees. I little bit off but not noticable. You would really have to try one on the rotary and see if the handle hits the laser head. If your doing the engraving at 180 degrees then the issue is will the handle hit the plate on the rotary as it turns. Again best to try one and see if its doable. Another option would get a mug with a slide on handle.
Thanks Loren.
I’m not too concerned about handle clearance. What I’m lost on, but haven’t tried yet, is to put a logo 180 opposite of the handle. I’ve never done mugs / tumblers with handles. I want to be able to know exactly where my artwork will be on the coffee cup.
How to split the logo on the opposite side of the handle, if that makes sense.
I’m going to take one of my junk 20oz tumblers today, put a piece of masking tape on it, and pretend that is the handle. Then figure out where the artwork should be placed in LB to burn it, 180 from the handle.
Start job in center, make sure handle is at the bottom. Seems too simple but it works for me.
Another thing to consider is the size of the job. The handle will come all the way around and interfere with the laser head.
Frame the job at least 3 times before running it.
I hope that helps, good luck.
Wg
Make yourself a jig similar to the one in this guys video and use painters tape on the cup before you mark. Faster to “clean”
Video is for a large tumbler with a handle however the same principle applies to your mugs.
Cheers
![]()
Sas
You should be able to Frame just like normal to see where it will buen
By having a template it will allow the engraver the ability to mark in the exact same place on multiple mugs.
This is useful when you get a large order (i.e. sports team, promotional, etc)
Framing is great on single items however repetitive engraving without a jig will be affected by human error of not remembering exactly where the last cup started the engraving and getting mismatched end products.
Cheers
![]()
Sas
The art is rotated 90 degs as the mug sits that way in the rotary.
Depending on which way your rotary is facing or how you mount the mug will determine top/bottom.
I set the rotary to it’s center of travel and the head so it’s on the bottom of the design on the mug, then press origin. I can move the head out of the way with the console if I need to.
Start from set to user origin.
Job origin is center left.
I place the mug on the rotary with the logo up, this is the left, center or bottom of the artwork.
Make sense?
![]()
Thanks for all the input everyone. I forgot to mention, that I use my Fiber to engrave tumblers. I find it a lot quicker since I don’t have to raise the top up on the CO2. With my fiber, and change out a tumbler in less than 5 seconds.
Can’t practice today, but will be over the weekend. My mugs won’t be here for another 30 days so I have some time… ![]()
Have a good one. Going to be a busy day for me with the wifey.
Ensure you set return to zero in the rotary gui. You can then easily run another pass.
Good luck… post a couple mugs ![]()
![]()
Set your rotory per instructions. Set Lightburn to start at current postilion. Chuck up your mug and turn the mug to where you want the center of your design to start opposite side of handle. Set the gantry and module to the center of where you want your design to start. Do a frame to make sure you handle does not interfere any where.
Find chuck centerline height minus half the handle width, and make a spacer block that the handle could rest on while you close the chuck. Remove block, rotate chuck to start position (start GCode?), burn. A bit of work up front, but should be quite repeatable and quick.
Wouldn’t absolutely require the mug to be at a specific orientation. Really, any known and repeatable initial orientation should work. Just adjust the first rotation move.
Of course, I’m saying this having absolutely no experience with hobby rotaries. Plenty in the industrial space, but much of that experience doesn’t translate well.


