Hello
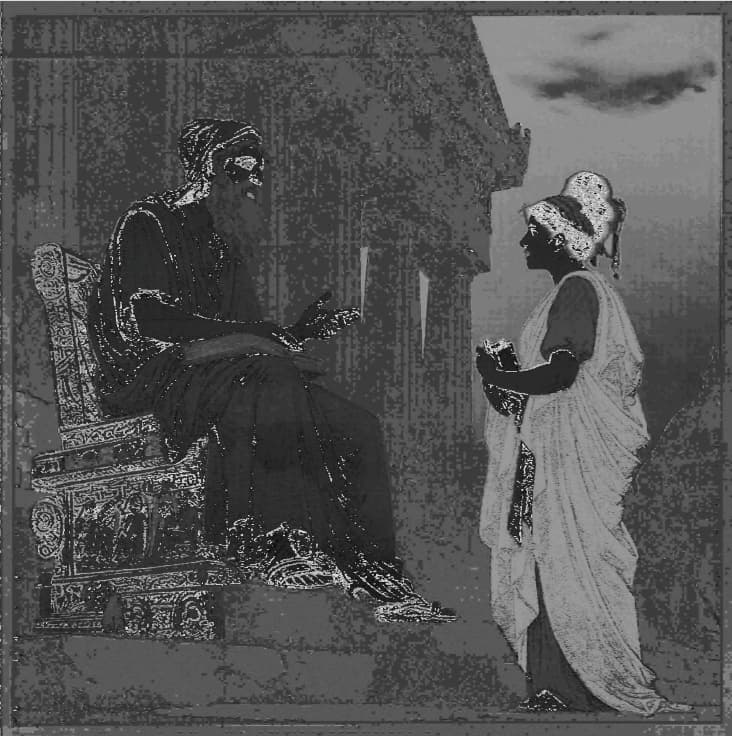
I am mostly doing color engravings on stainless steel. I first tried with solid colors in a closed form (polyline). I want to go farther and manage gradient color in the same form. For the moment, i do it in an indirect way. Is there any thought of including in the lightburn the gradual change of speed or power for one shape? I will attach the project to see what I mean: the color of the sky changes from bottom to the top. This is achieved indirectly.
How?
There is a grayscale option with images.
A suggestion on how to tell Lightburn software what you want might help…
How would Lightburn know how to gradually change it? There are an infinite number of ways that you might want to vary power, speed, interval and q-pulse width across and object.
Been doing this over a year on my fiber…
Let’s make sure we are talking the same game. Lasers can’t print color… what’s happening is a layer, I refer to it as an oxidized layer, some refer to it as annealing… whatever you wish to refer to it as, the color is produced by the thickness of the layer and the interference of two reflections off the oxidized layer with the light reflecting off the metal, underneath the oxidized layer.
Like a radio where signals are mixed and result in frequencies of addition, subtraction and harmonics of these values, it’s technically the same operation.
How warm you heat the metal creates these layer. Different thickness creates changes in the perceived colors.
On my tests, a change in speed does much less than a change in interval, which relates to how much energy I’m putting into the metal and the type of oxidation depth. I haven’t seen any done this way that there isn’t an angle it either disappears or is black.
What I’m trying to say is that I don’t think a gray scale will result in a transition of colors like you’re after. It might fade the to the wrong color in either direction.
Which is why I asked how are you doing it now.
This is an assumption… I’ve struggled with color for over a year with my fiber and it’s elusive in some situations. If I change material thickness the color that I got from another piece of the same material is different. It seems to have a lot to do with how much heat stays where you want it…
Maybe someone can suggest something.
My only thought was to do it like the offset presses do it, separate the colors into CMYK and white for stainless and lase each color. The problem is I can’t lase a pixel size area for a specific color.
Good luck, I’ll be following for some other suggestions.
![]()
For instance (using Creality Falcon2-40W):
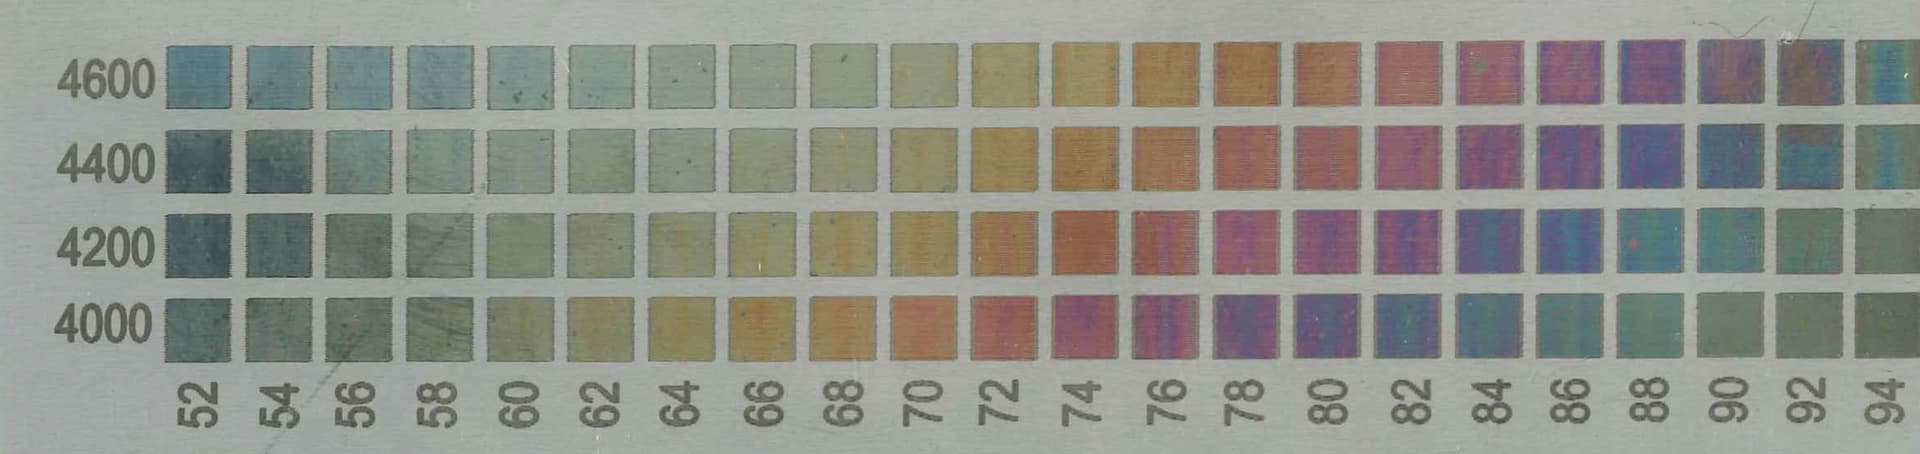
In order to do the sky on the project I sent you previously, If I had the possibility to change the power gradually, I would start burning the sky from bottom to the top, starting at the bottom with 4600/66 (speed mm/m / power %) and finish at the top with 4600/52. I would have the same result as the project.
Sorry, I can’t talk (for the moment) about my way because I am in a middle of a negotiation for collaboration with some manufacturers.
In a similar way I made the second project. I used the same method for every section (like the one marked with red), where the color changes from item to item.

1 Like
I think you’d have to draw the grayscale gradient in something like inkscape or gimp, then use the objects shape to cut it out. Along with lase it as an image.
Of course you’d have to know or figure out the gradient range for your intended purposes.
I don’t know of any way to do this with a fill operation.
Good luck
![]()
Dannnggg this is all gorgeous!!! ![]() I agree re greyscale mode, I like to think of that one as “power scaling” it changes the power based on how light or dark the part of the image is.
I agree re greyscale mode, I like to think of that one as “power scaling” it changes the power based on how light or dark the part of the image is.
The change in power should be easily achieved using grayscale. There’s no method of doing gradual speed changes as far as I know.
There are multiple ways to approach this but the easiest in this case for your example:
- create a grayscale image where the bottom of the image is 66% gray and the top is 52% gray and with the appropriate gradient that you want.
- set layer max power to 100%
- set layer min power to 0%
I think I see what you mean, you want an automatic variation of frequency and/or lpi (dpi) block by block almost pixel by pixel in a user-configured range to simulate the gradient?
Indirectly it’s a lot of work, but I don’t think Lightburn has that function built in at the moment.
I’m just starting with stainless steel using a JTech 44watt diode laser. What type of stainless steel are you using? My first attempt for color was using this from Amazon. Sample It seems to have a coating on it and my results were essentially shades of black.
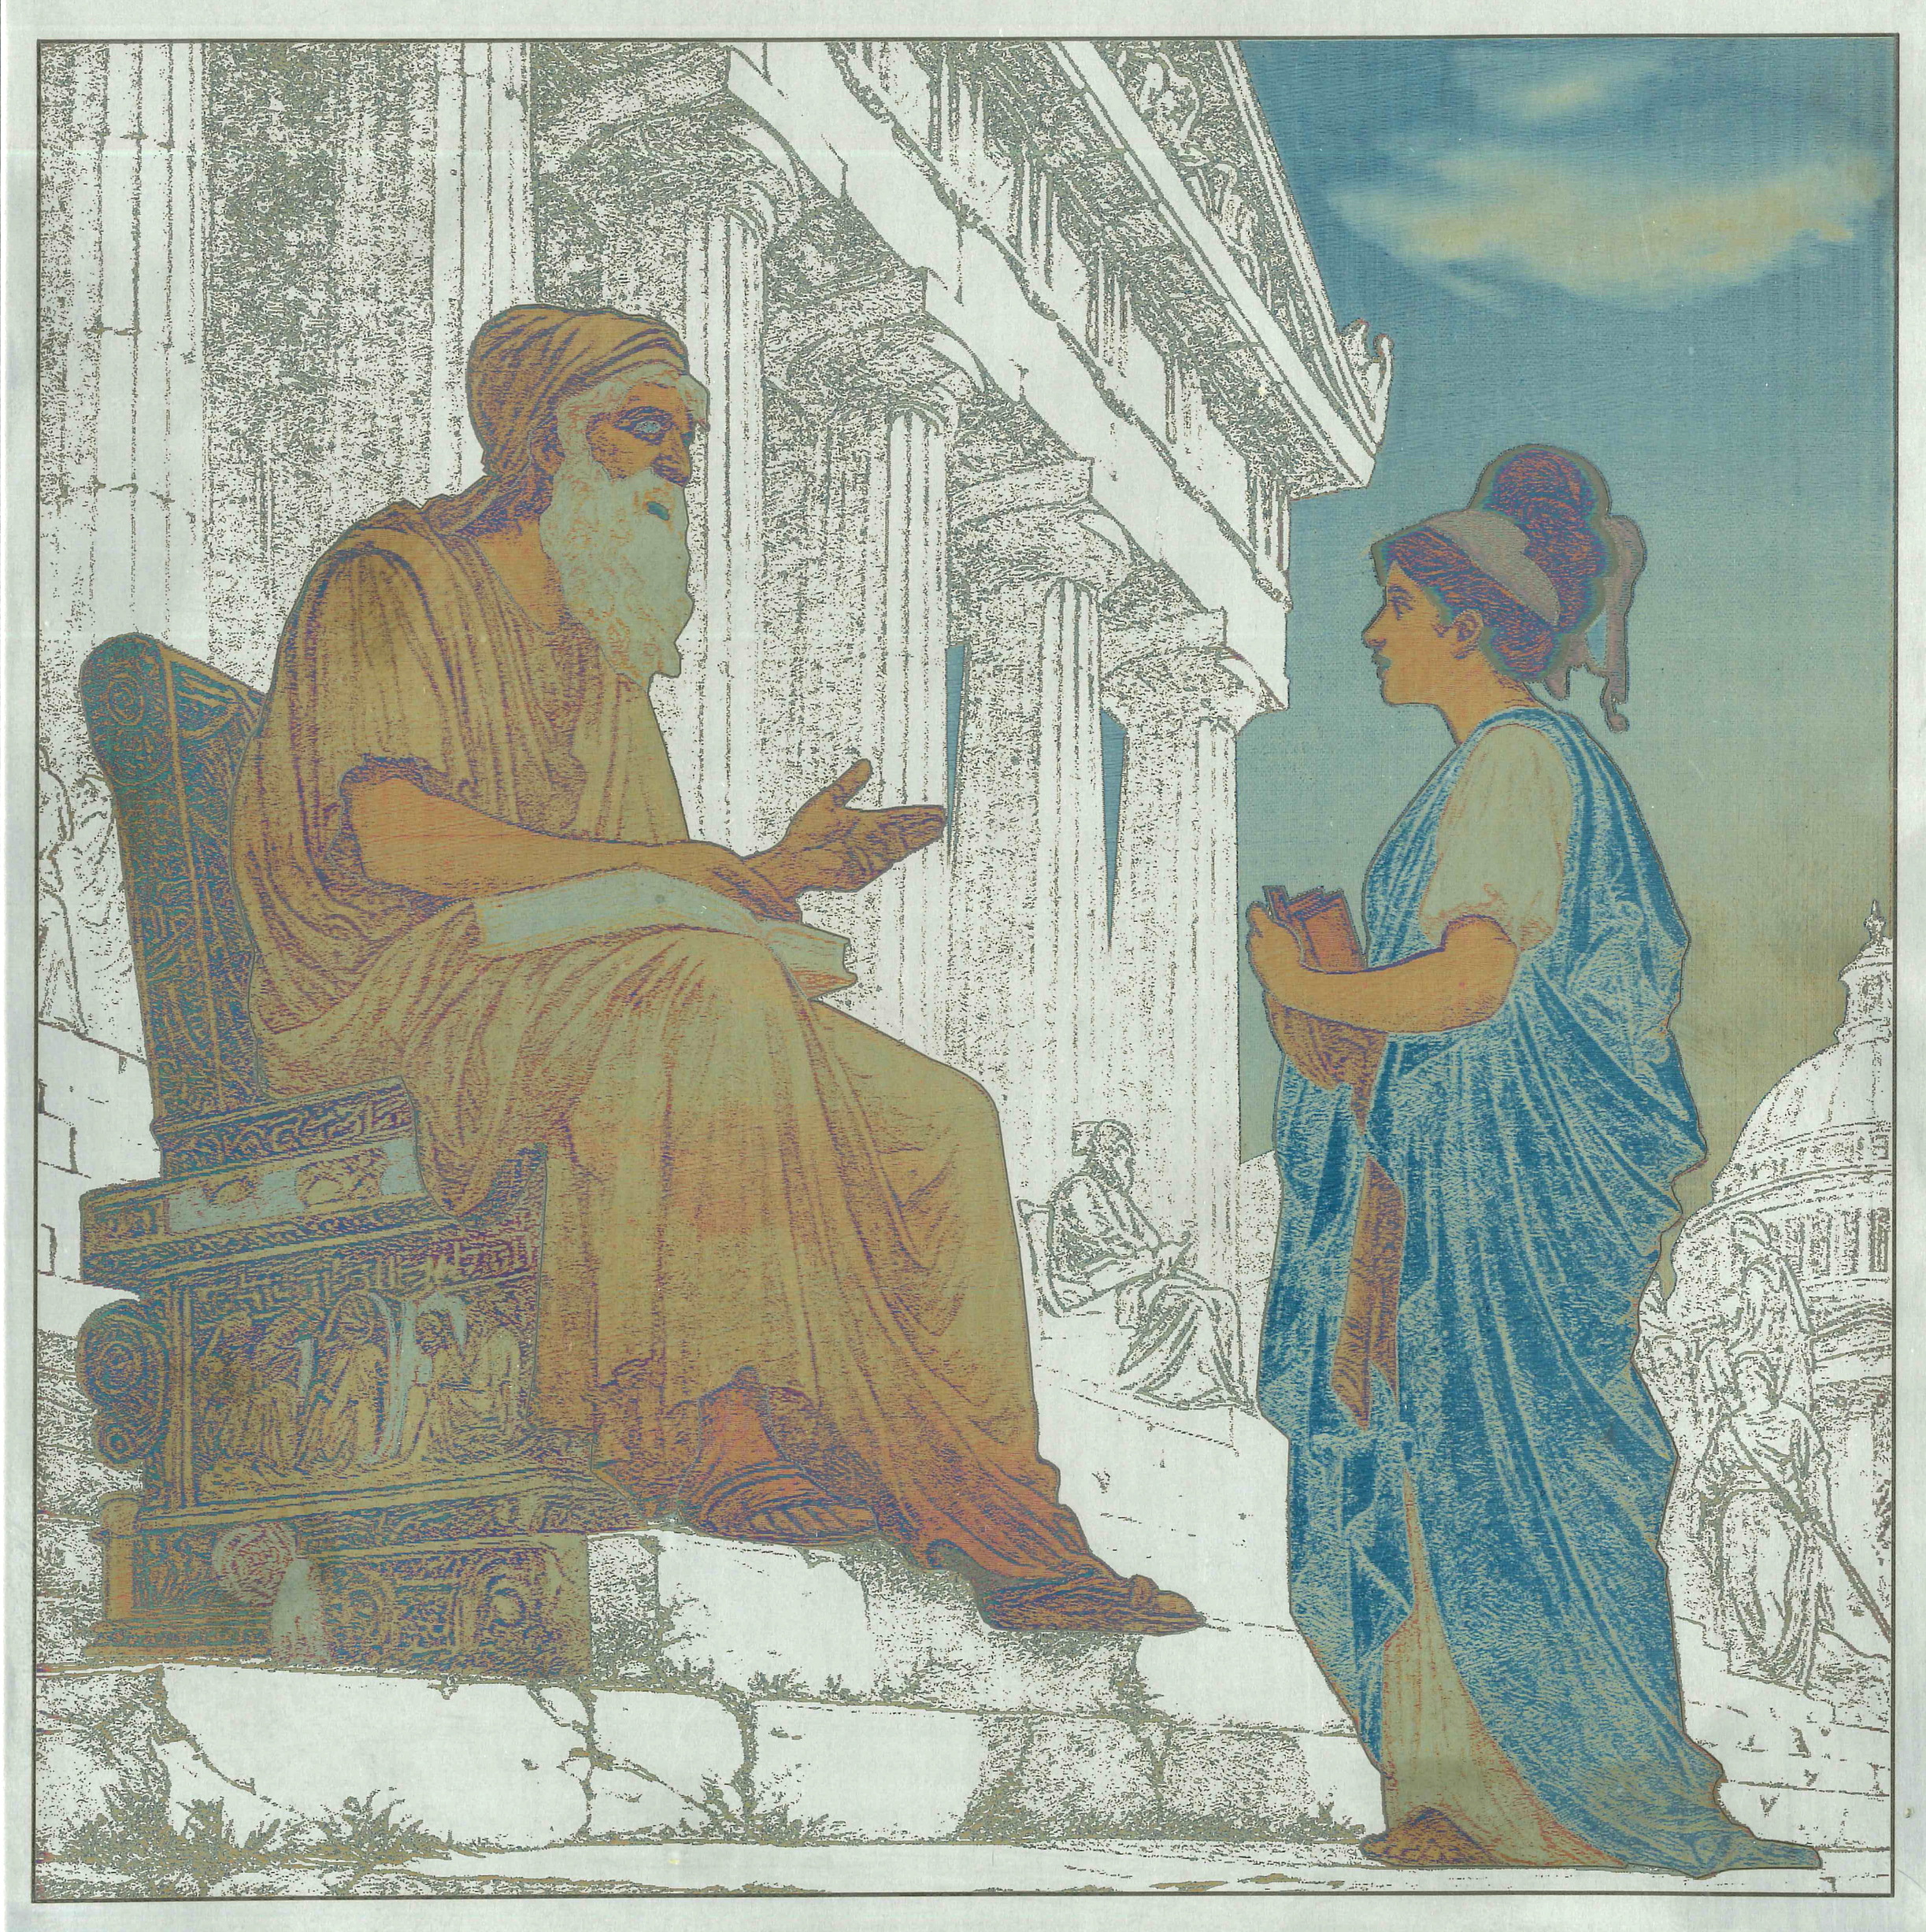
In theory it would be “simple” to convert the image coloring to a corresponding grayscale if you can settle on the palette of a specific speed. What you are looking for is the H-value in HSL. Depending on which software there are different ways. In Paintshop Pro there is a function to split image to HSL and then I can just use the H-layer. Here is an example of it on your image.