Grayscale question

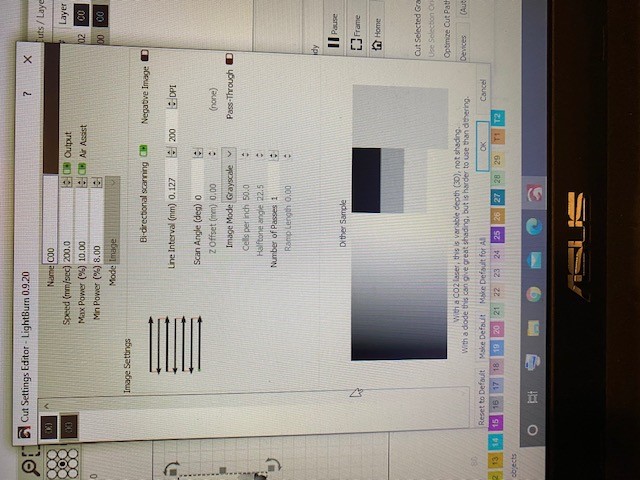
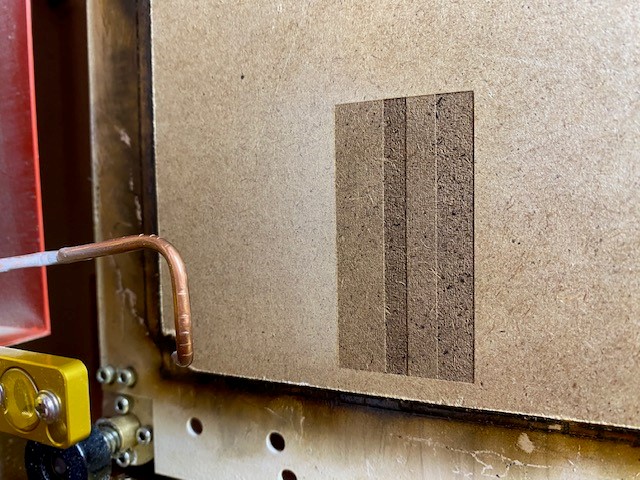
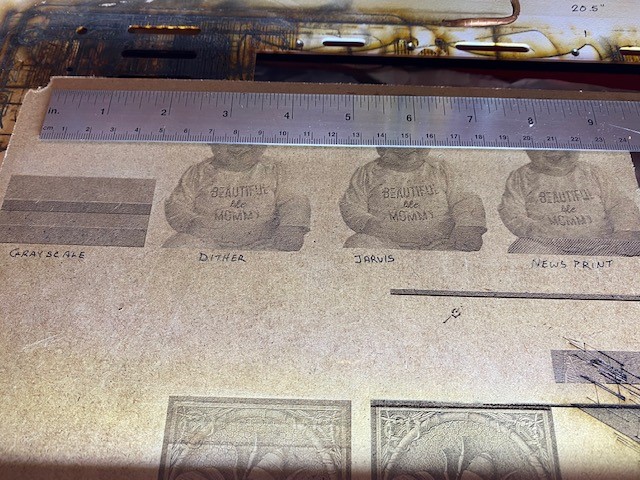
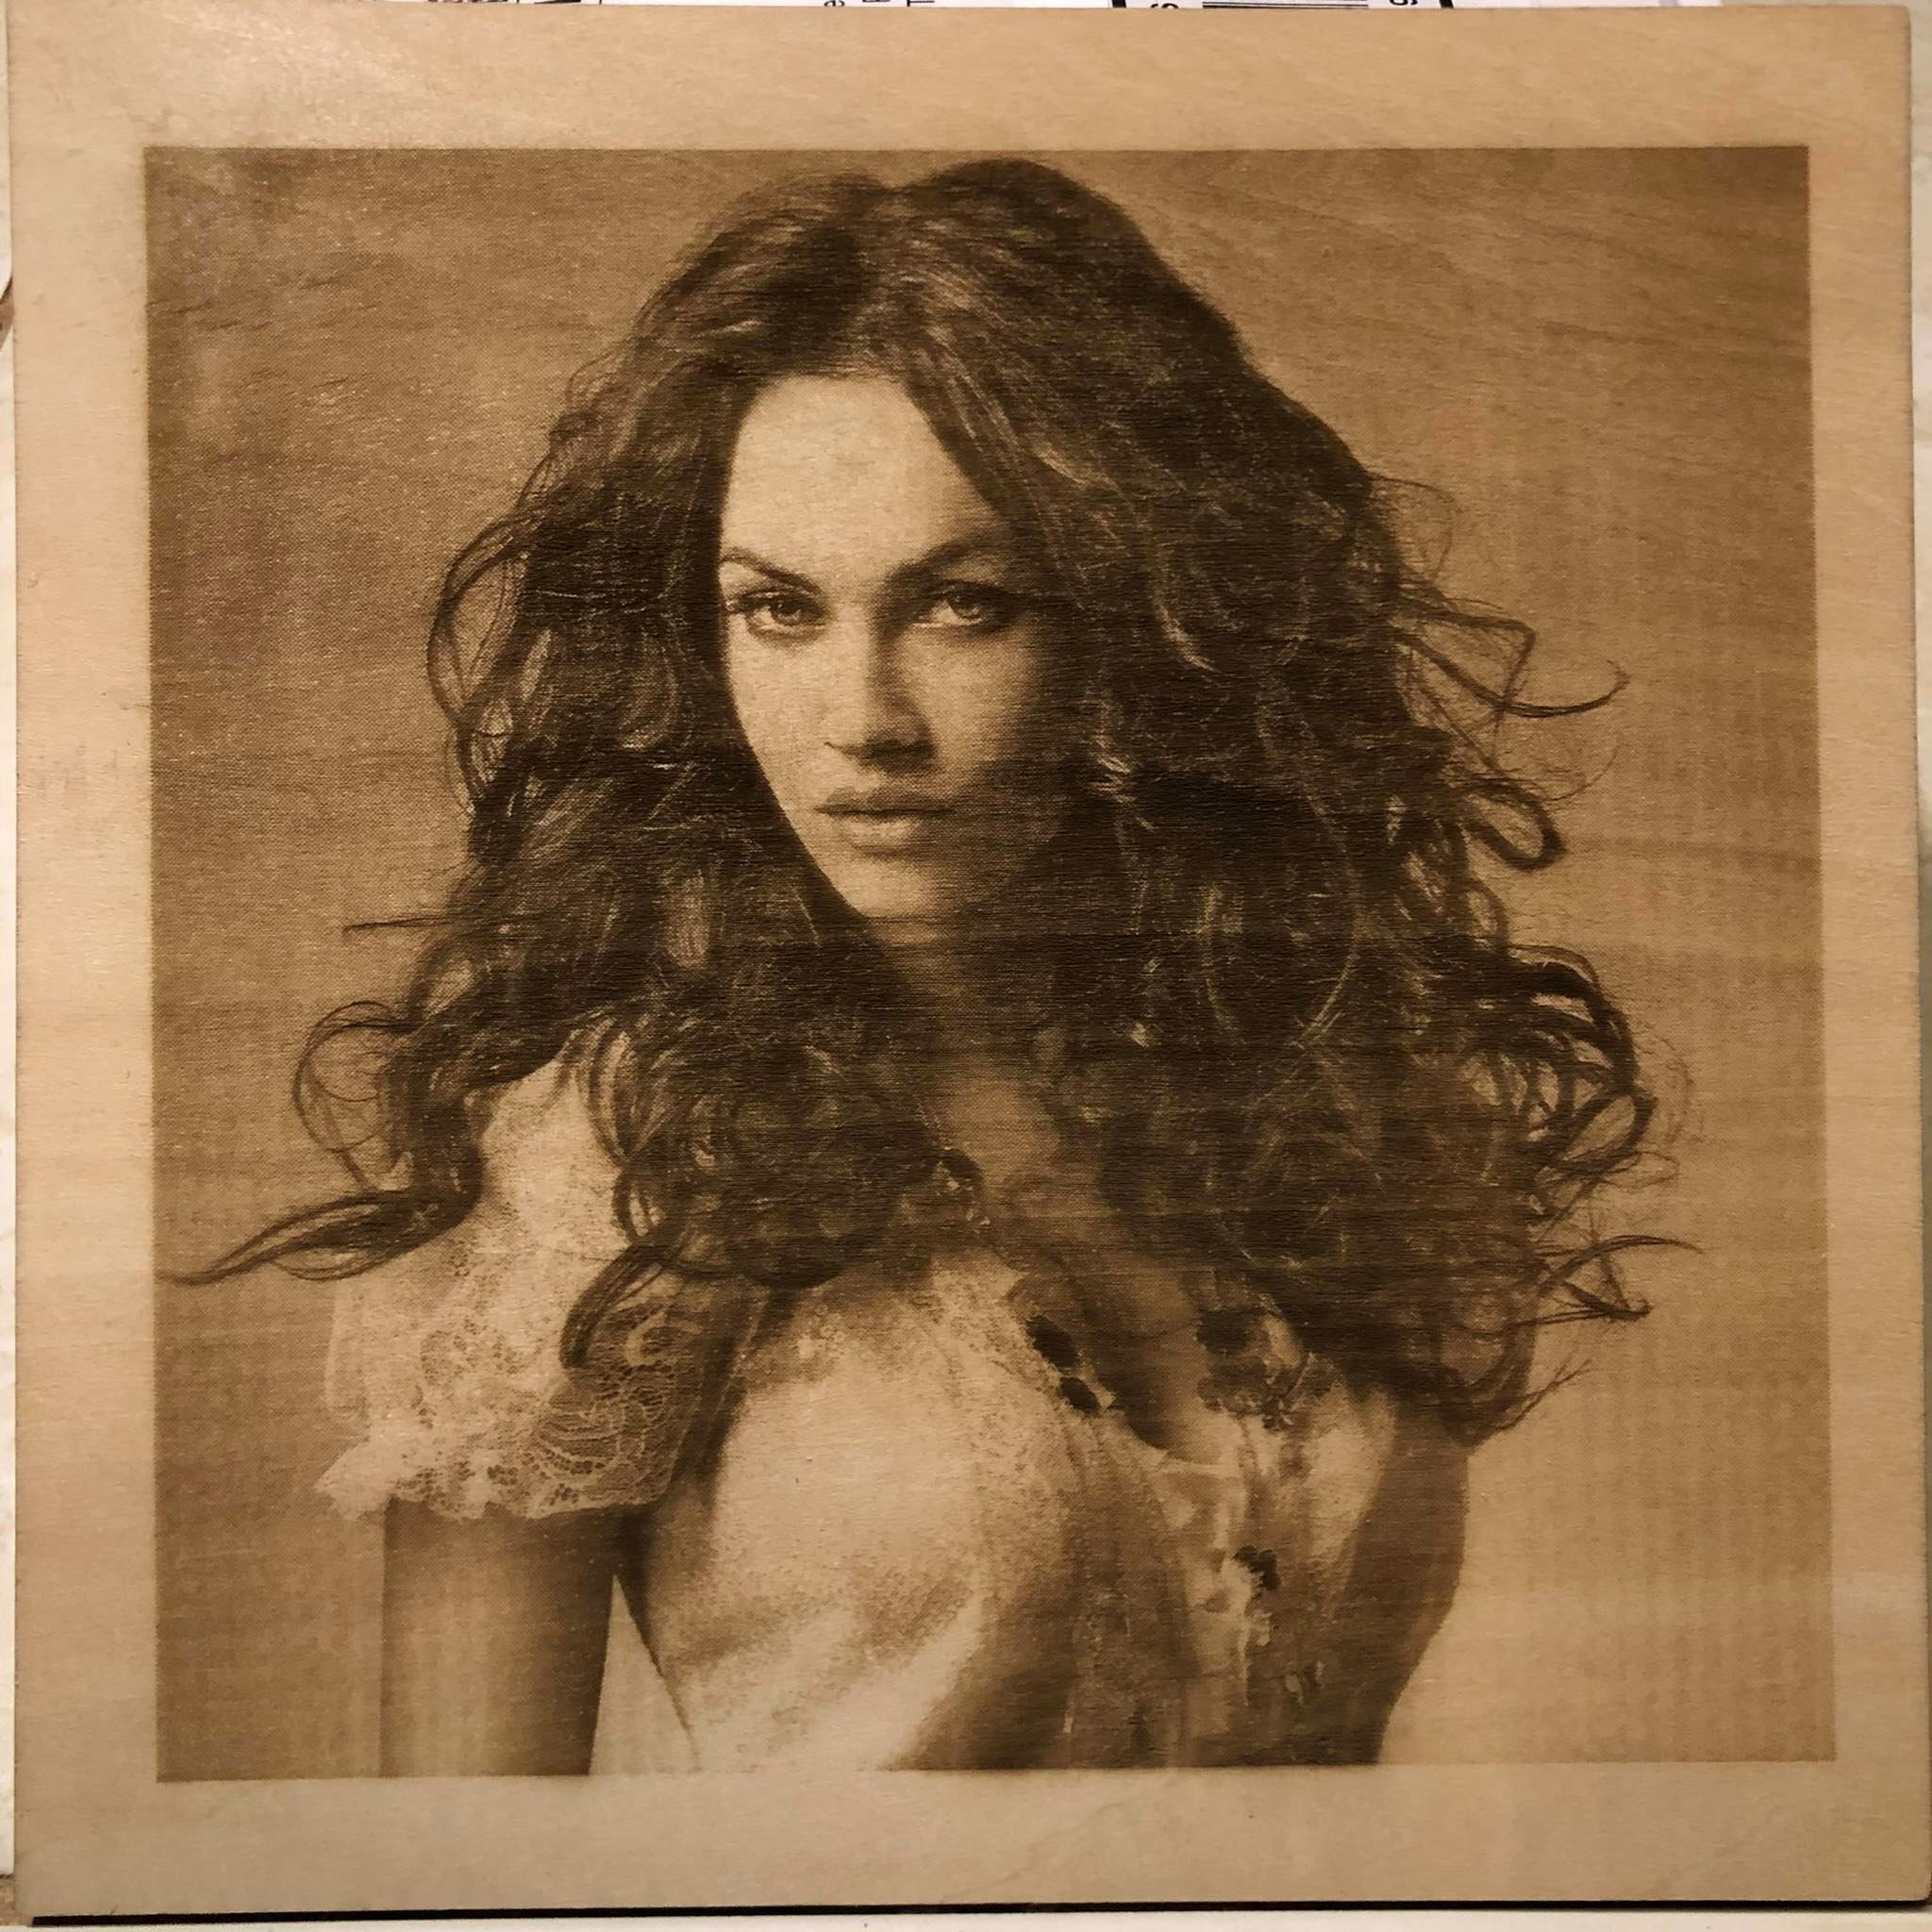
Hi everyone, like many of you I have started down the photo engraving path. Last night was test night so I downloaded a photo from my phone (not the greatest pic but just wanted to play with settings) and plopped it into LightBurn. I didn’t tweak the picture at all except removed the back ground. I set my parameters where I guessed would be a good place to start using grayscale (see photo) and set it to the laser to run. As you can see, it burned a consistent depth the shape of a rectangle (it didn’t burn at the outline of the photo). I tried a few different power settings but there was no detail. Moved the laser over and tried a few others, dither, ect. with the same original settings I had and while they are not pretty, I have something to start with while tweaking things to find a sweet spot.

Am I missing a obvious step, a setting or a slide switch that will allow grayscale to work? And why would it not burn the shape of the baby instead of a rectangle? Any and all help is appreciated, thank you.
1 2 3

Hi,

I looked at your profile and it says you are using a K40. CO2 lasers don’t do grayscale images well, it’s more 3D relief engraving. This is something I just did,

For images using a CO2 laser, one of the dither modes works best. I have had some fair results with trying grayscale on images but the range is very narrow.

I do have a Ruida controller so I was under the impression that it should be possible. Can you explain the deep square burn when I tried Grayscale?

With a CO2 laser, you don’t get shading with a change in power, you get a change in depth of cut.

So in an image where it is white, you will be at the minimum power you set. in areas that are black, you will be at the maximum power you set, then everything in between. The white areas get a minimal cut and the black areas cut deeper, how deep depends on the power you set.

With a CO2 laser, more power doesn’t darken the shade that is being engraved, it cuts deeper.

Take a close look at the engraving I linked to and then look at the link I posted and relate the image to my 3D engraving.

The controller you have does not matter, it’s about how a CO2 laser works.

You are not wrong, but there is a limit and not easy to dial in. As @joel1 mentions, the power emitted and the range, or degree of control is where the challenge to dialing the Grayscale settings in for shading effects. It can be done, no doubt. But the return on investment may be better served with one of our other Image output options.

With a CO2 based laser, Grayscale is great for this type work (produced on a 60W CO2 Thunder Laser):

And here are a few examples of what the some of the other Image settings can produce:

Click on the image to see the full size! :slight_smile:

Stucki dither, 300dpi, 9.4% power, 110mm/sec, 60w, no external image processing - just LightBurn on basswood.

Stucki dither, 110mm/sec, 9.3% power, 0.085 interval (300dpi) 60w, no external editing.

Halftone, bumped the contrast by 5%, no other adjustments.
7” square image on cheap birch ply, Halftone dither, 500 dpi (0.05mm interval), 90 halftone cells per inch, 9.5% power, 165mm/sec, 60w Thunder Nova 24. First attempt.

And finely, we posted this last February. This is the first actual test run of the new Halftone image mode in LightBurn. Still some work to do, but for a single run with a wild guess at settings on cheap wood, this is a very good result.
7” square, 350mm/sec, 15% power, 60w laser. 508DPI, 100 halftone cells per inch.

3 Likes

wow
love this
have taken note of the settings you used and will play with this…thank you

This topic was automatically closed 30 days after the last reply. New replies are no longer allowed.