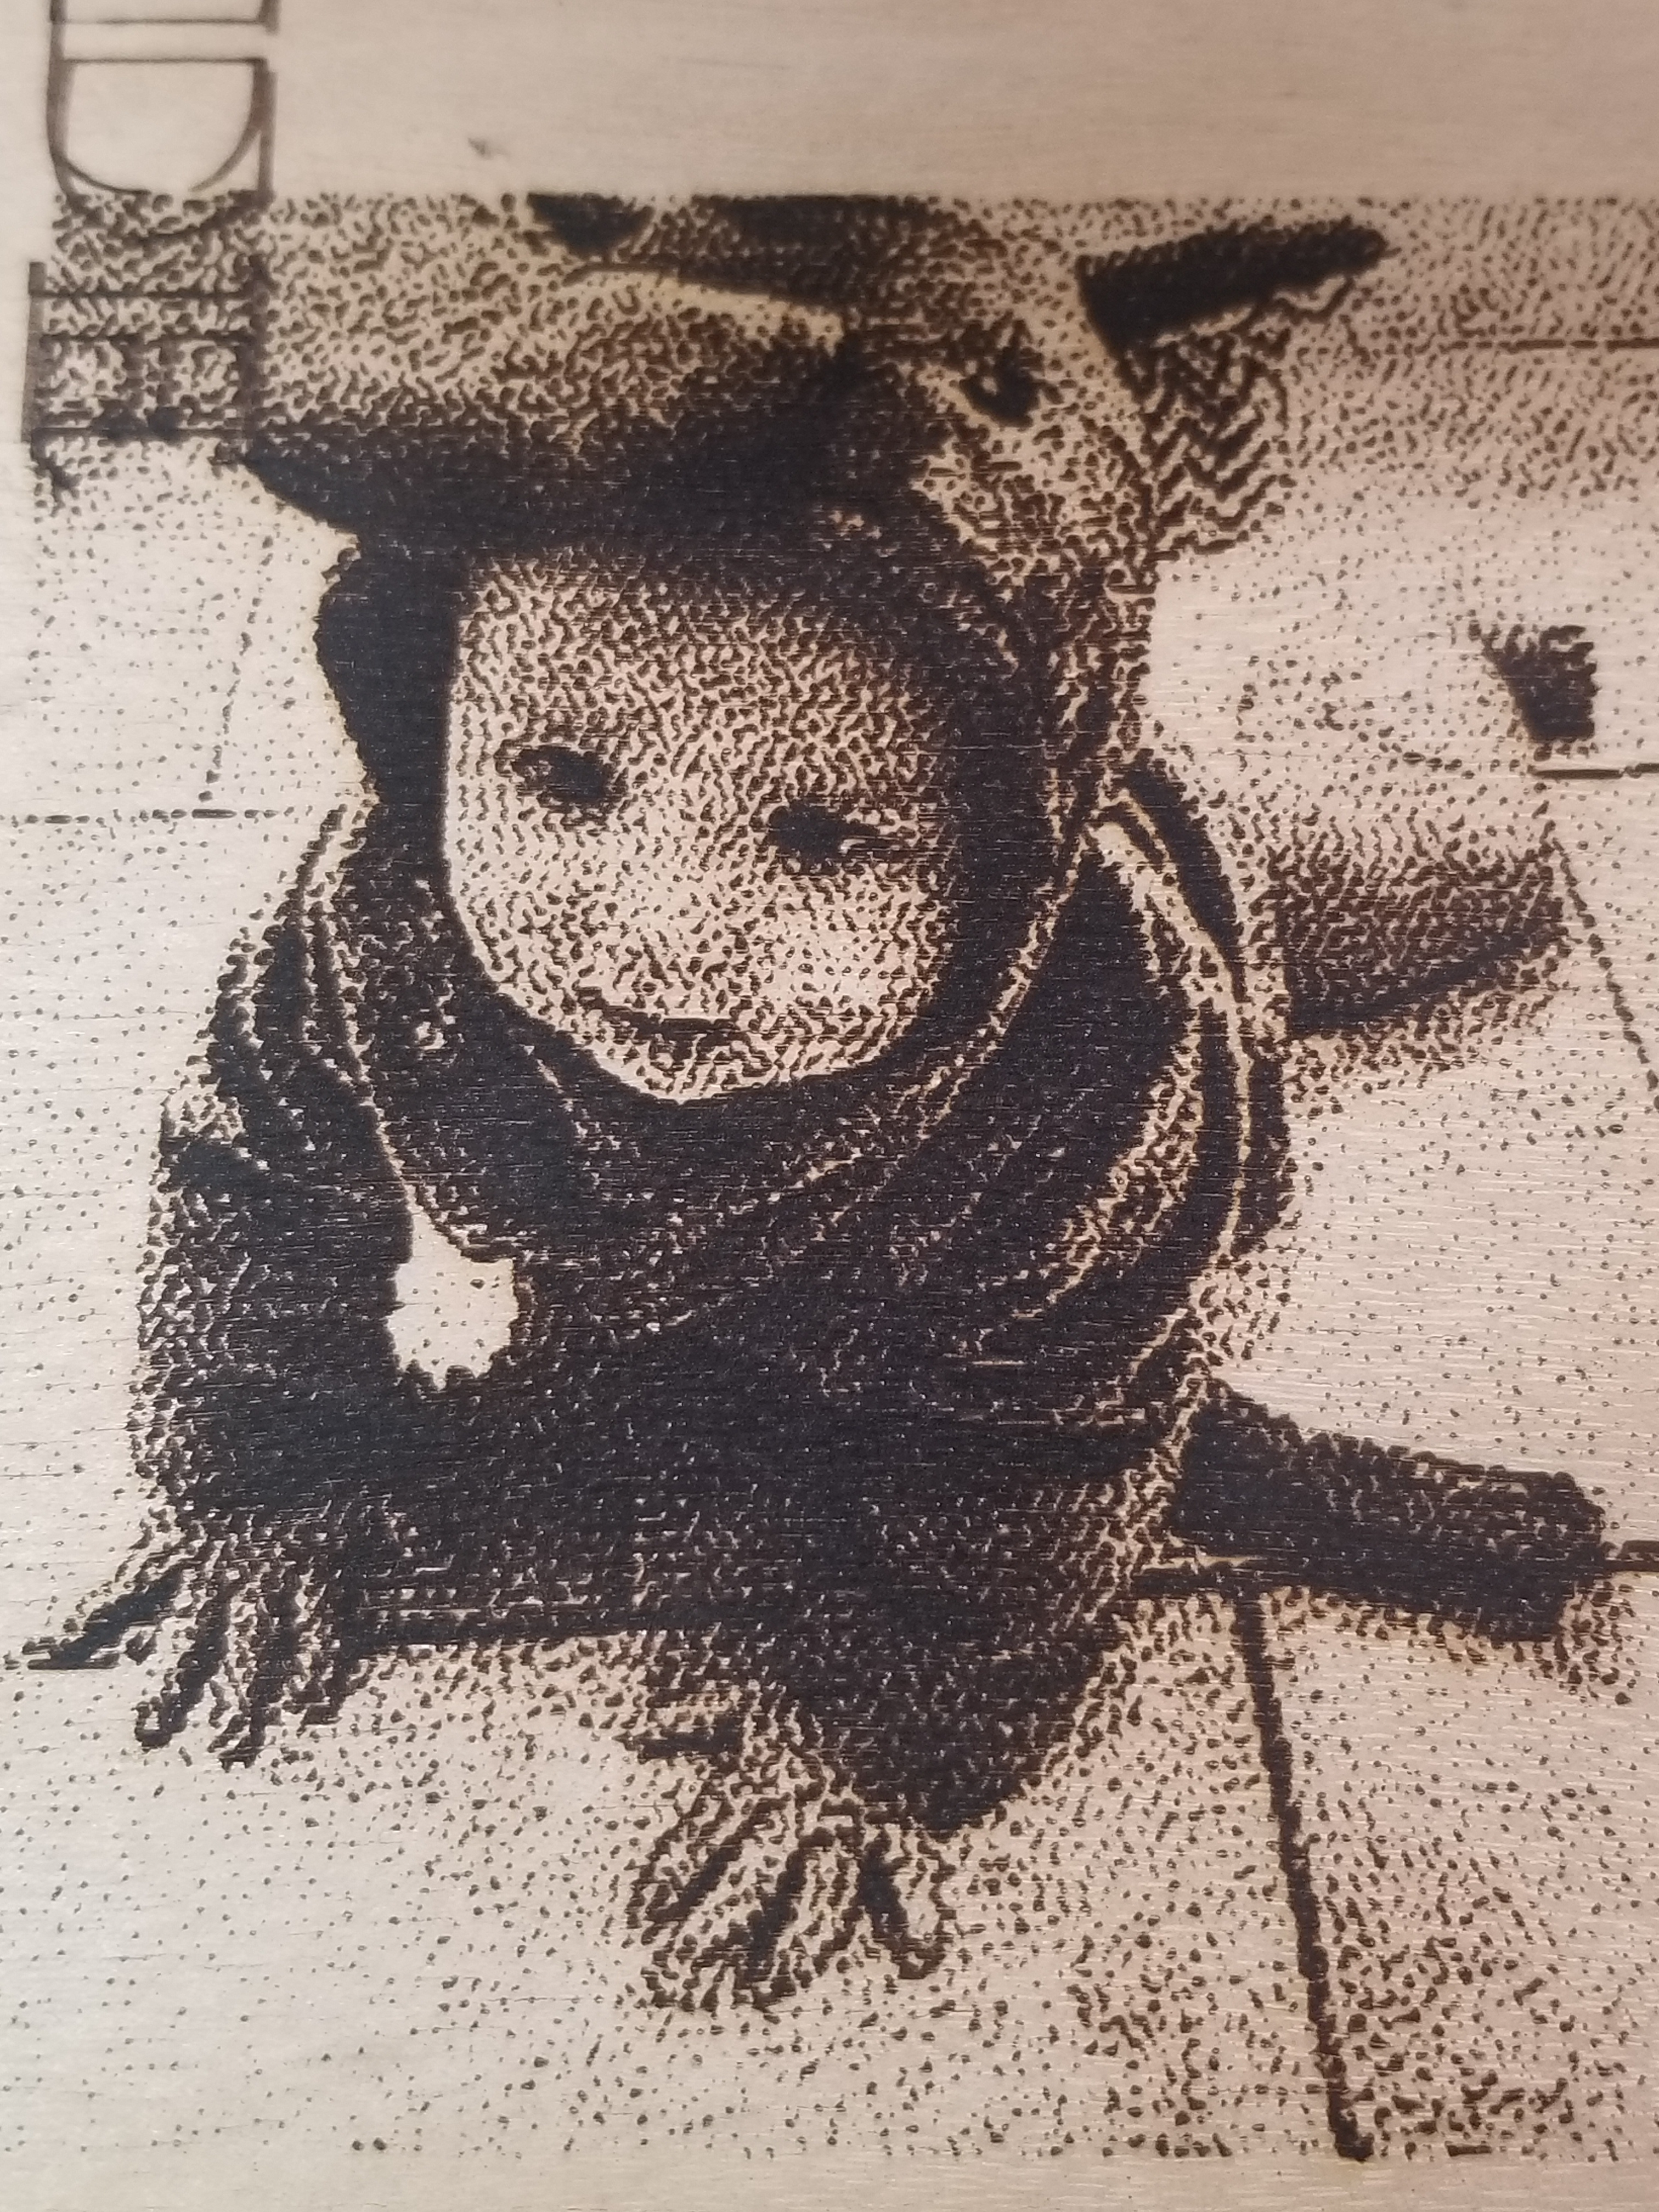
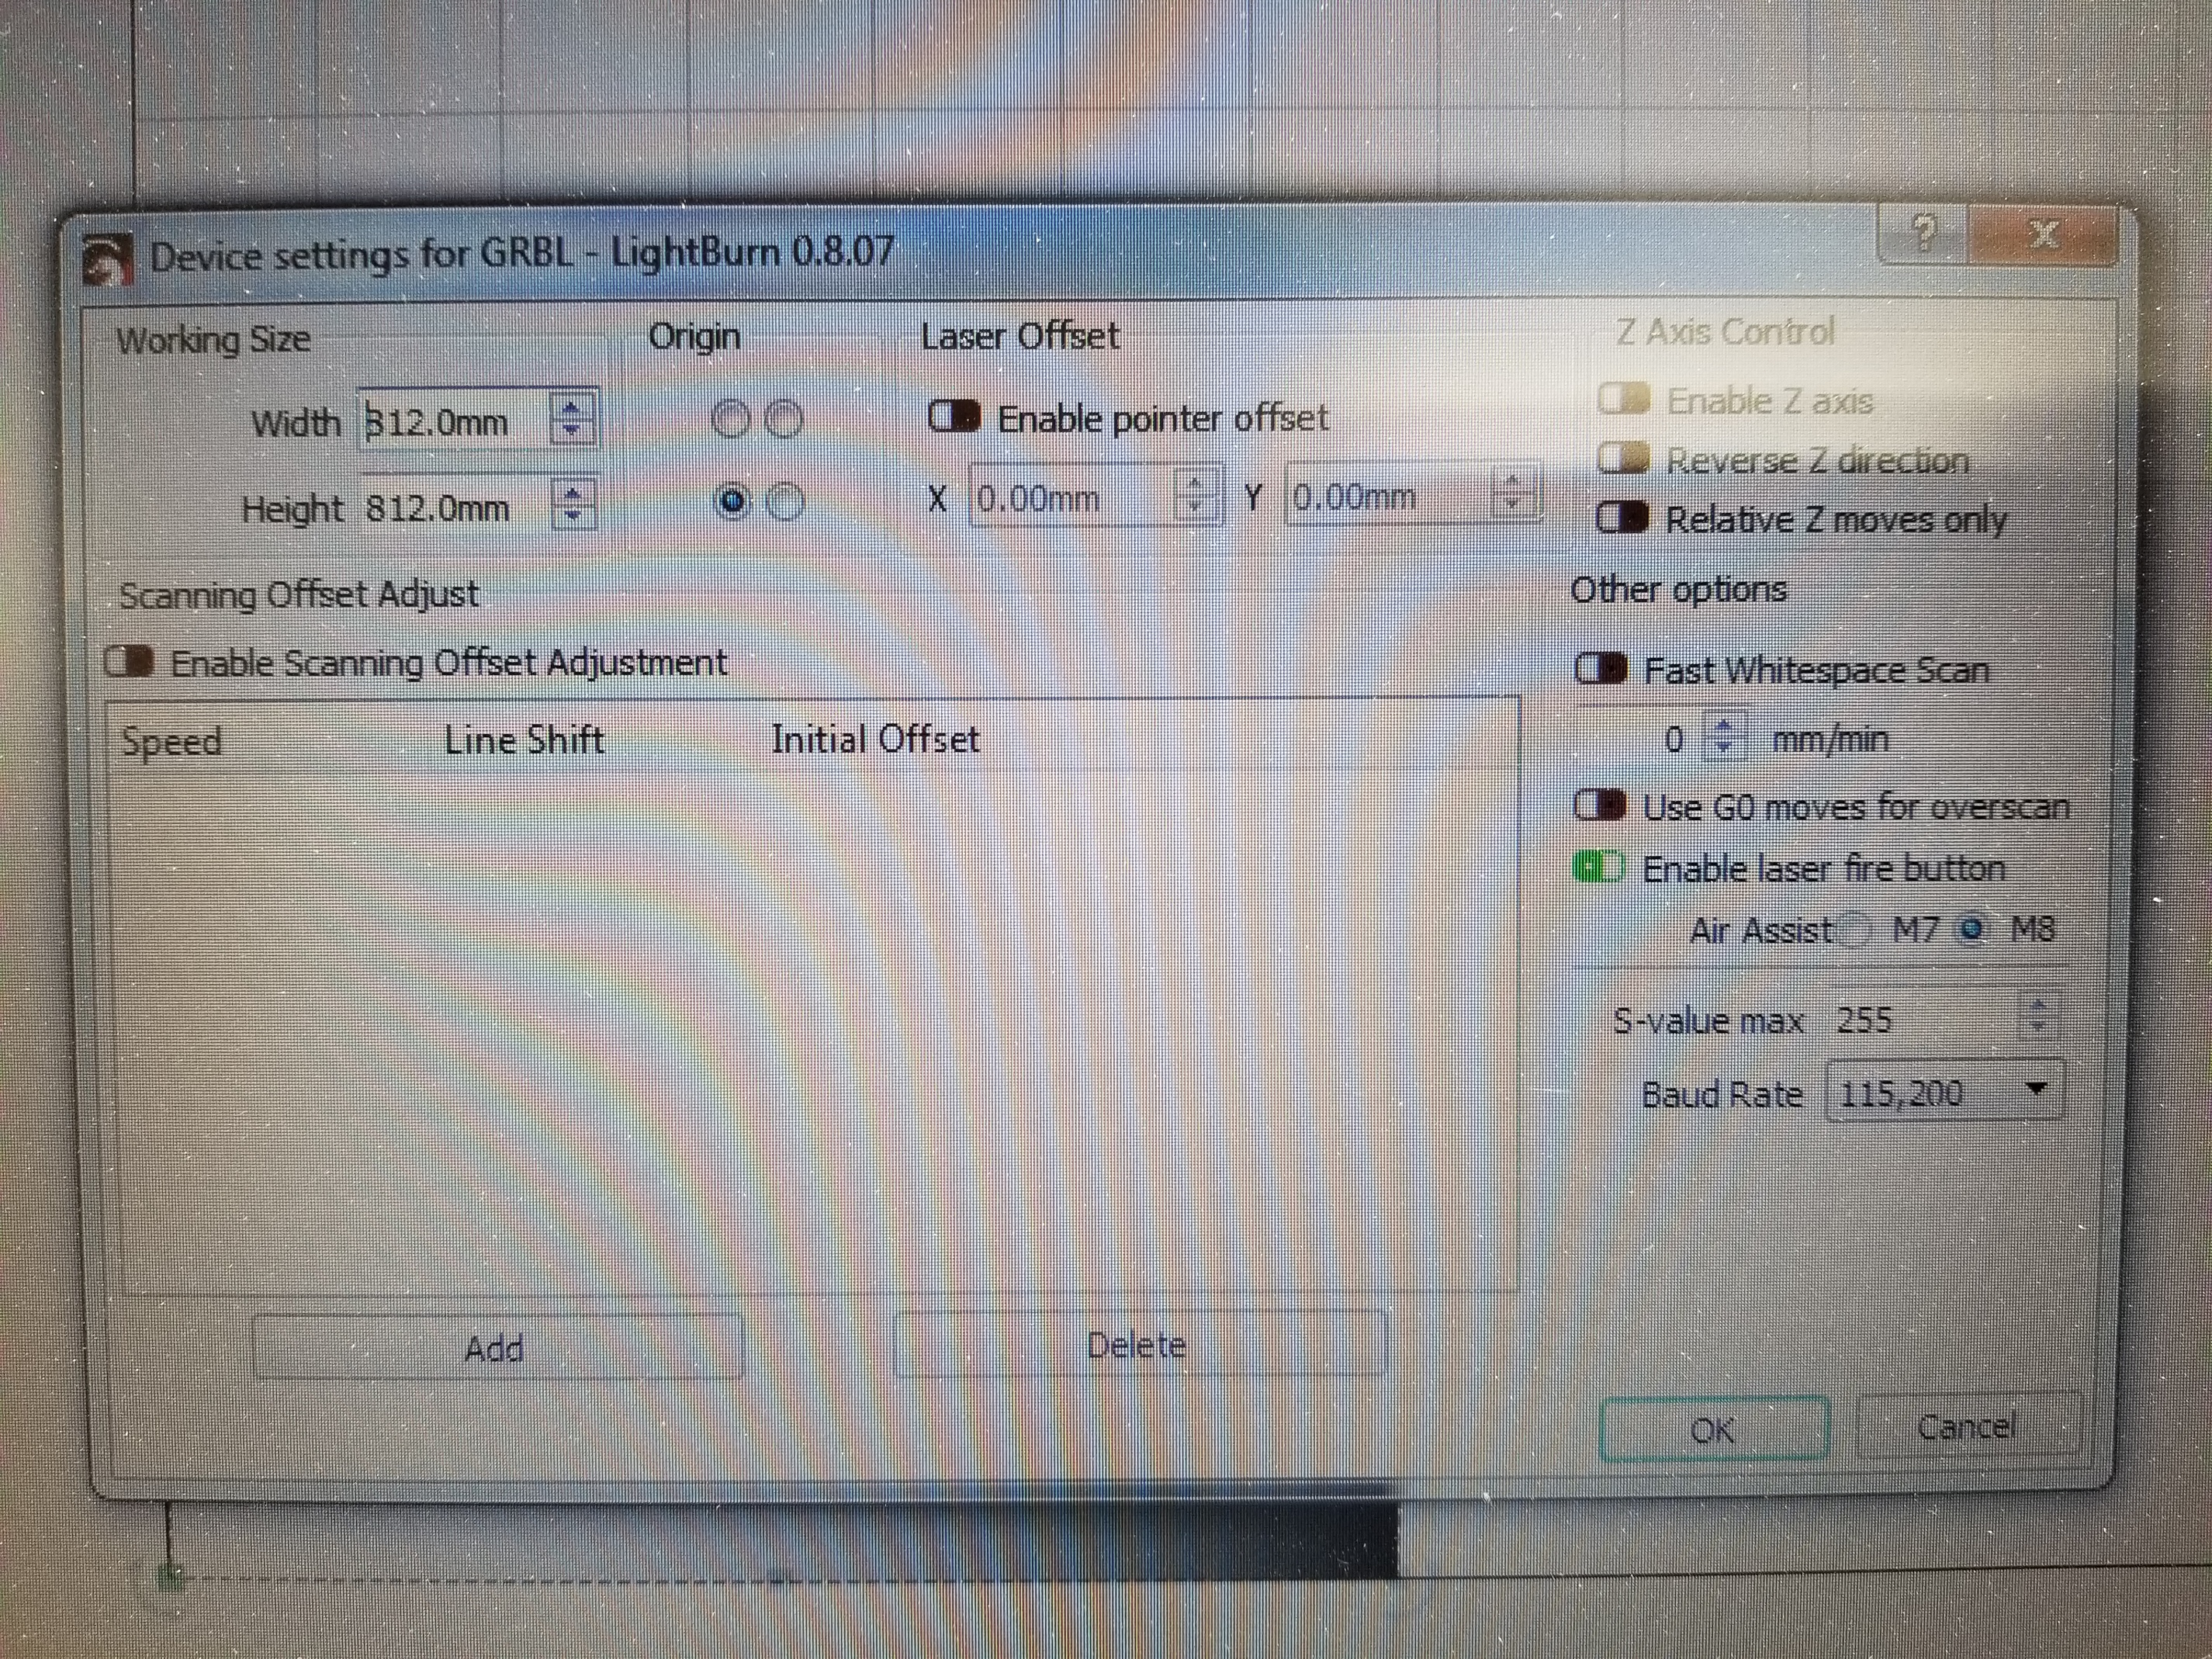
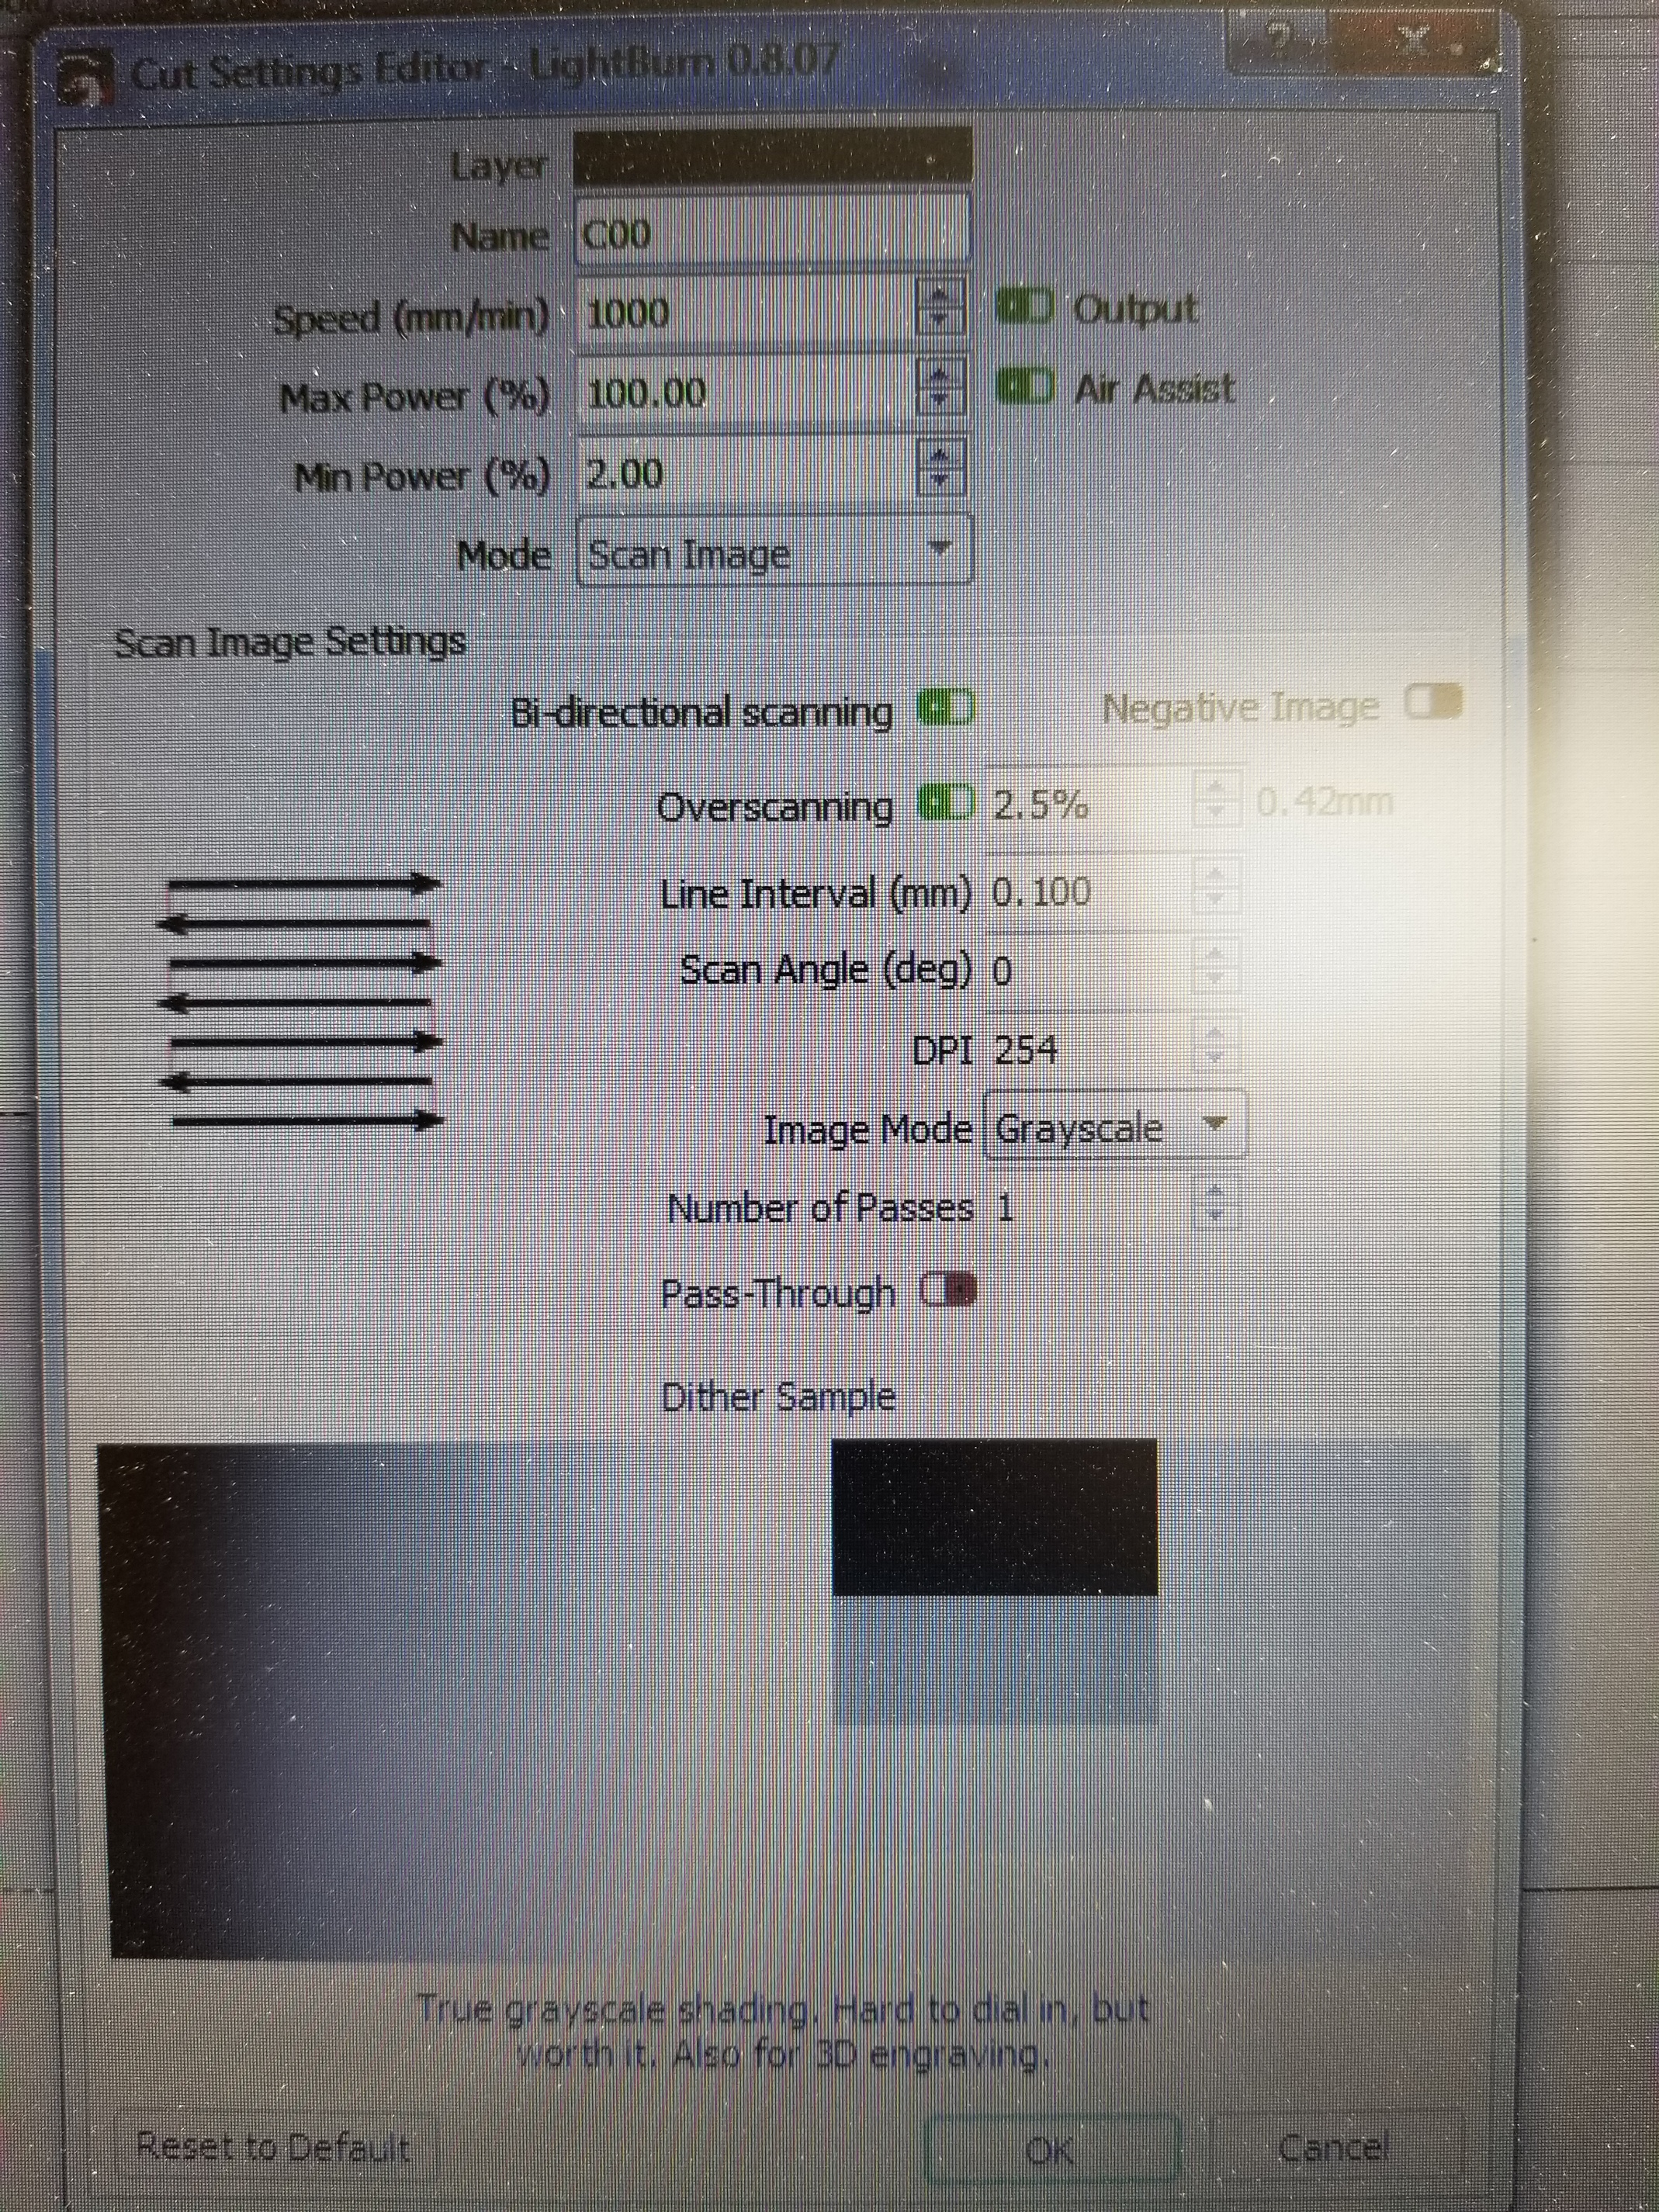
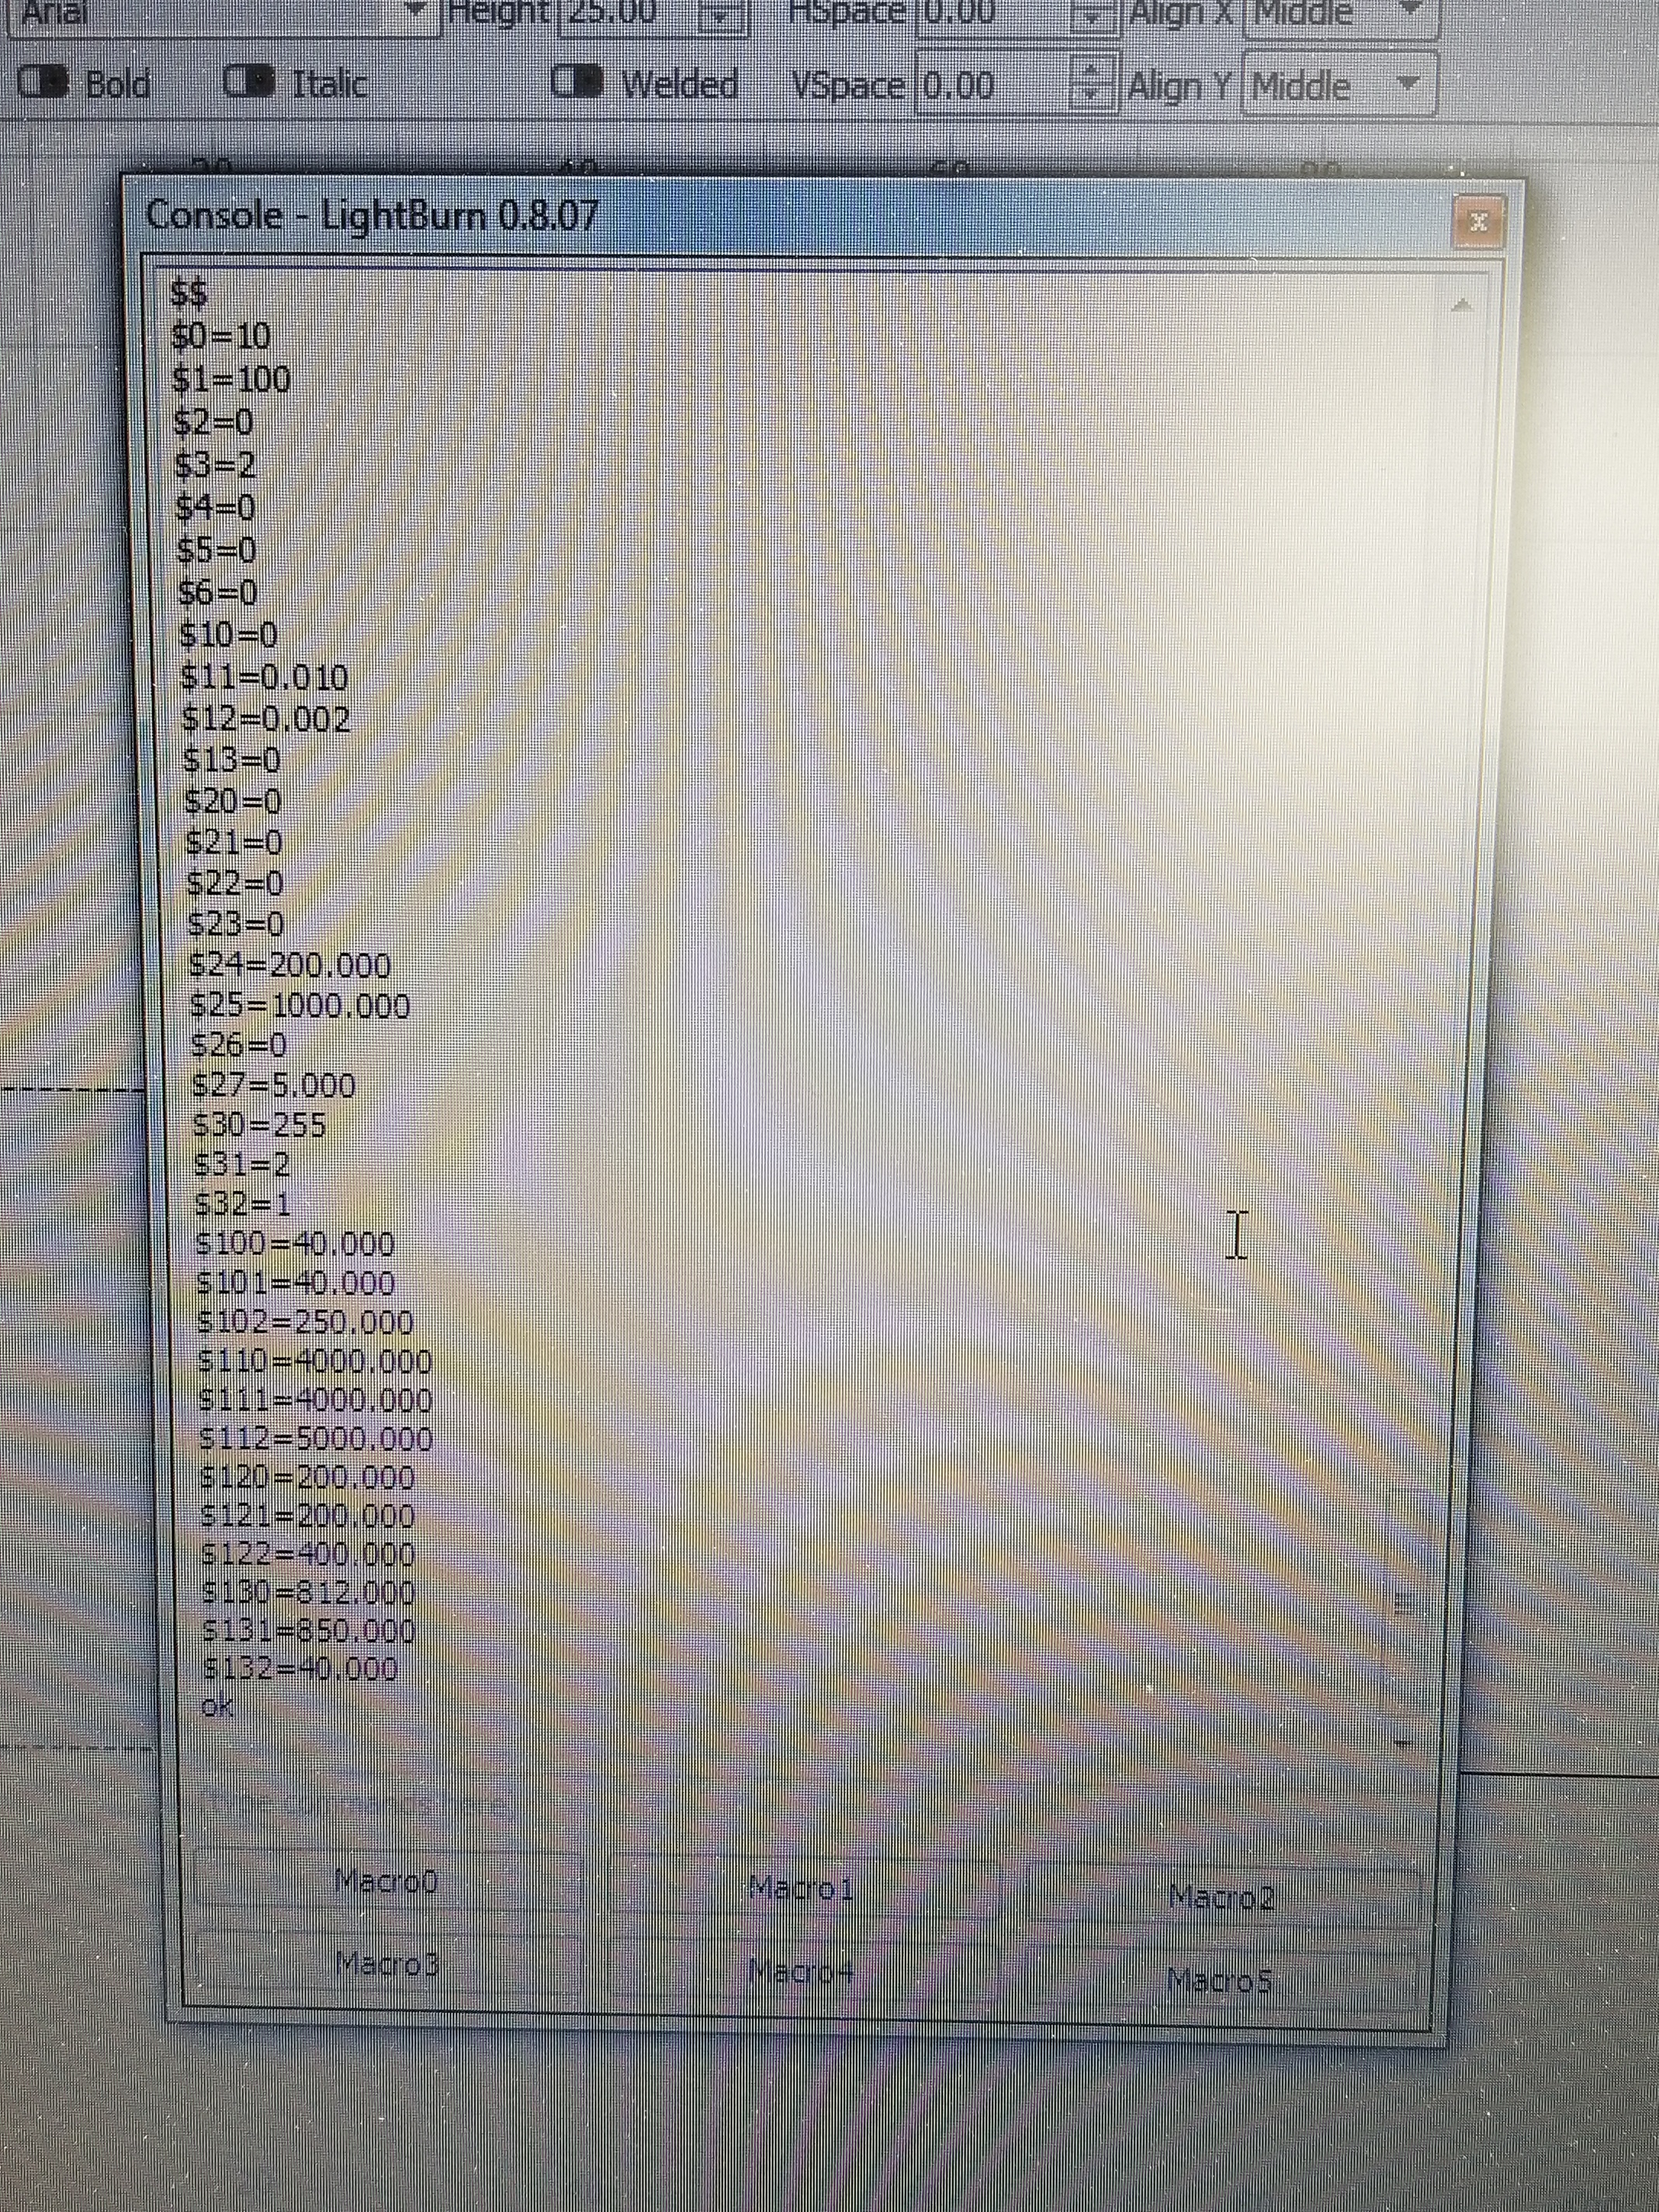
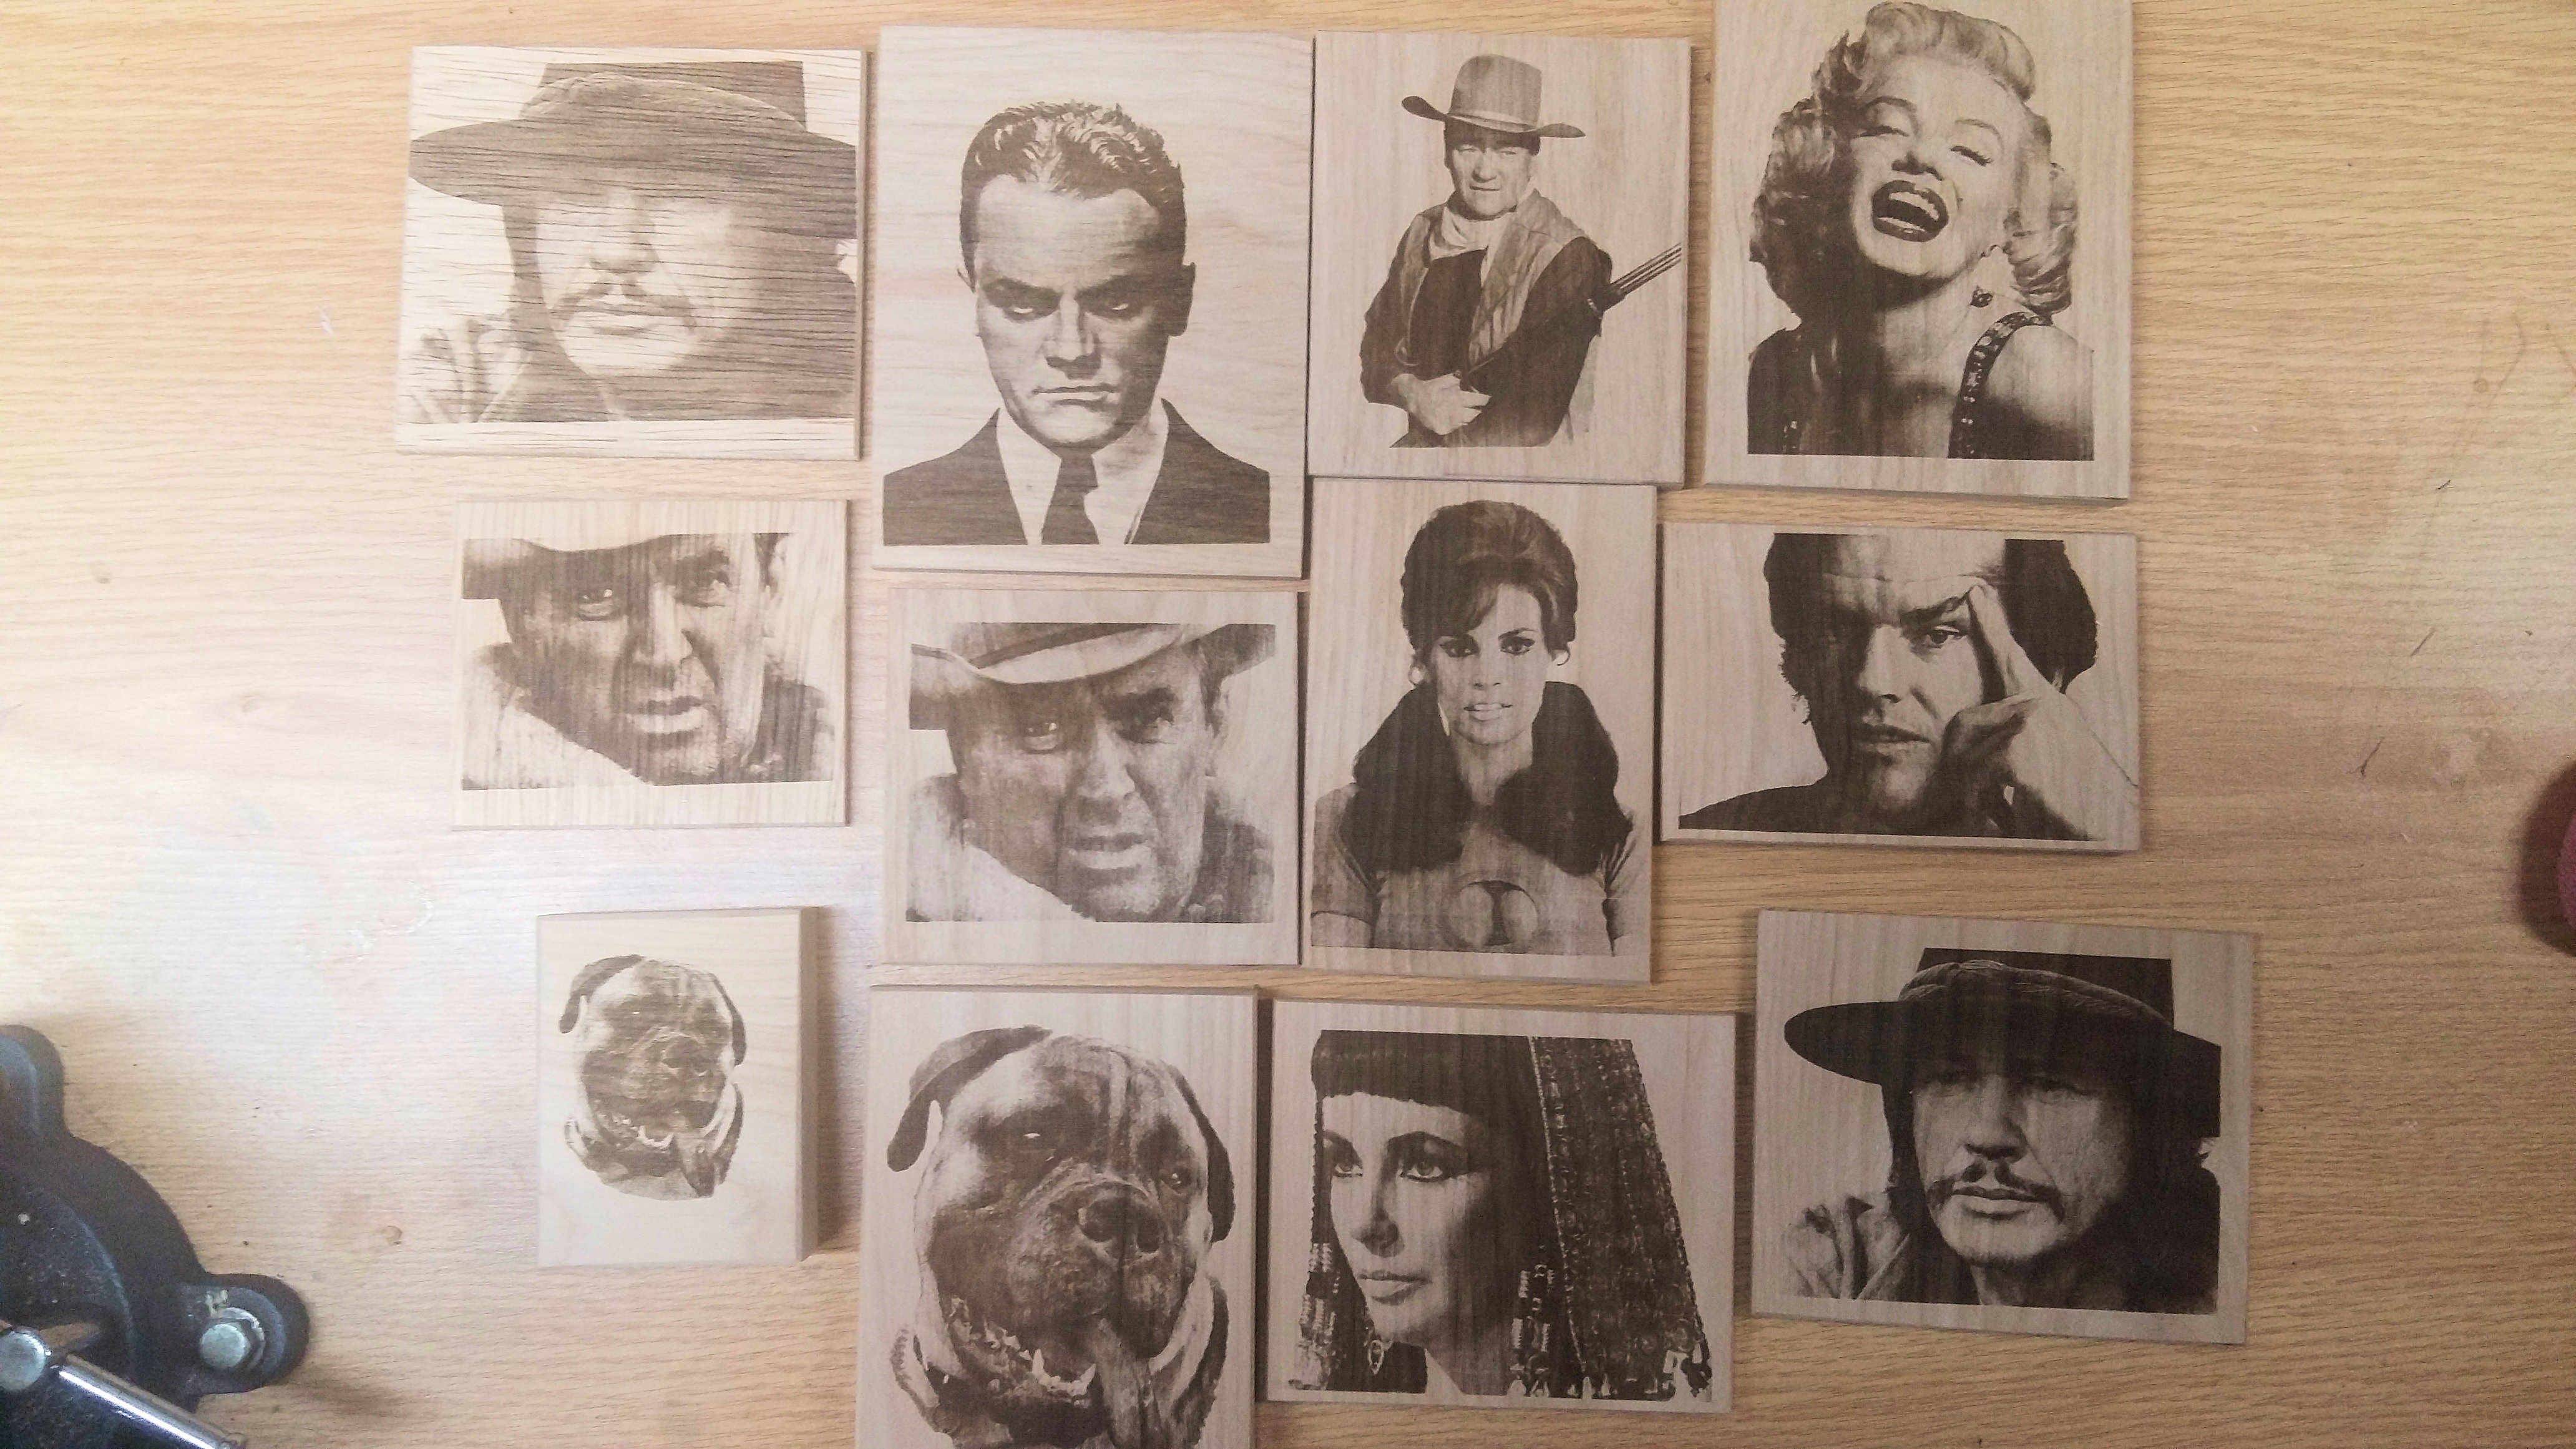
I am having trouble engraving an image. I want to do grayscale and have spent many hours changing settings and not really getting anywhere. I am posting a few pictures on my settings and a couple pictures of the laser job. The first one is the grayscale test box and the second was on Jarvis. I am using shapeoko 3 grbl 1.1f and a 3.5w laser. Any help would be greatly appreciated.
Sorry about the bad quality pictures on the settings. Took it from my phone looking at the computer screen.
Anytime you do a picture you want detail. Your line interval is .100. Drop it to .04 which will increase the number of dots. It will take longer to do but it’ll look better. Also, make sure you have a high res photo. Use a photo program to tweak the brightness and contrast and save as a bmp which will increase the size. Grayscale isn’t the easiest thing to master but once you do it, you’ll be glad you did.
Your settings all look reasonable. Your laser might not be in focus, as the dots in the 2nd pic look a little large. Also, what material are you trying to burn? Some work better than others.
Thanks for the reply, I will change line interval to .04 and try and refocus the laser. The photos have been good high res photos. The first one is the grayscale test where it goes white to black, mine looks like as the laser power increases it is not a gradual burn it looks more like on off.
What kind of preadjusting are you doing to your image? Corel draw gimp, inkscape? That almost looks like it has been processed with a dithering in another program then greyscale engraved. Your contrast looks great! Initial image asjuatment also looks great. Just a thought and my .02
I am not adjusting or editing the images prior to testing. Just taking them straight from the camera to lightburn. I refocused the laser and I tested with .04 (and various line interval) and the only change I see is the grayscale test block looks better and seems to show better burn from 0-100% but still no real change when doing an image.
You haven’t answered yet with what material you’re using, and you’re also running this quite slow - 1000mm/min is 16.6mm/sec. You should probably be in the range of 3000mm/min to 4500mm/min. It’s entirely possible that the low speed just means you’re over-burning everything.
I have a 2.5 watt Eleksmaker…My beam width is approx .12 mm that works out to 212 DPI before the dots start to overlap…my testing on my unit has shown that going over 250 DPI "starts to smudge-burn " the image…
The other thing I noticed is that you have your power set to 100%…I only use 100% if I.m trying to cut something
As Lightburn asked what is your material
I might add I,ve spend Hours!!! working on photos and greyscale is very hard to “dial in”
The other issue I found was that the size of my etched photo will depend on the # of pixels in the photo I"ve imported
For example if the imported photo is 2400 pixels wide (and at best I can get 250 DPI) then the min size of my etched photo would be 2400/250= 9.6 inches…If I tried to etch a 4 inch wide photo it would result in black and not very well defined edges…(because of the overlapping of the dots)
Below are photos etched using Lightburn “Jarvis” on Alder wood…speed 1000mm/min…power…20%…interval 250 DPI…(my $30 value is 255)
Sorry, I am using mainly birch plywood, and a little bit of pine, but mainly the plywood. Since I posted my picture of my settings I have tried using higher speeds 3000 3500 and 4000 with not much change. I will try some of your settings James and see what I can get. Also I will try to do a larger picture to see if anything changes there. Thank you all for your responses and help.
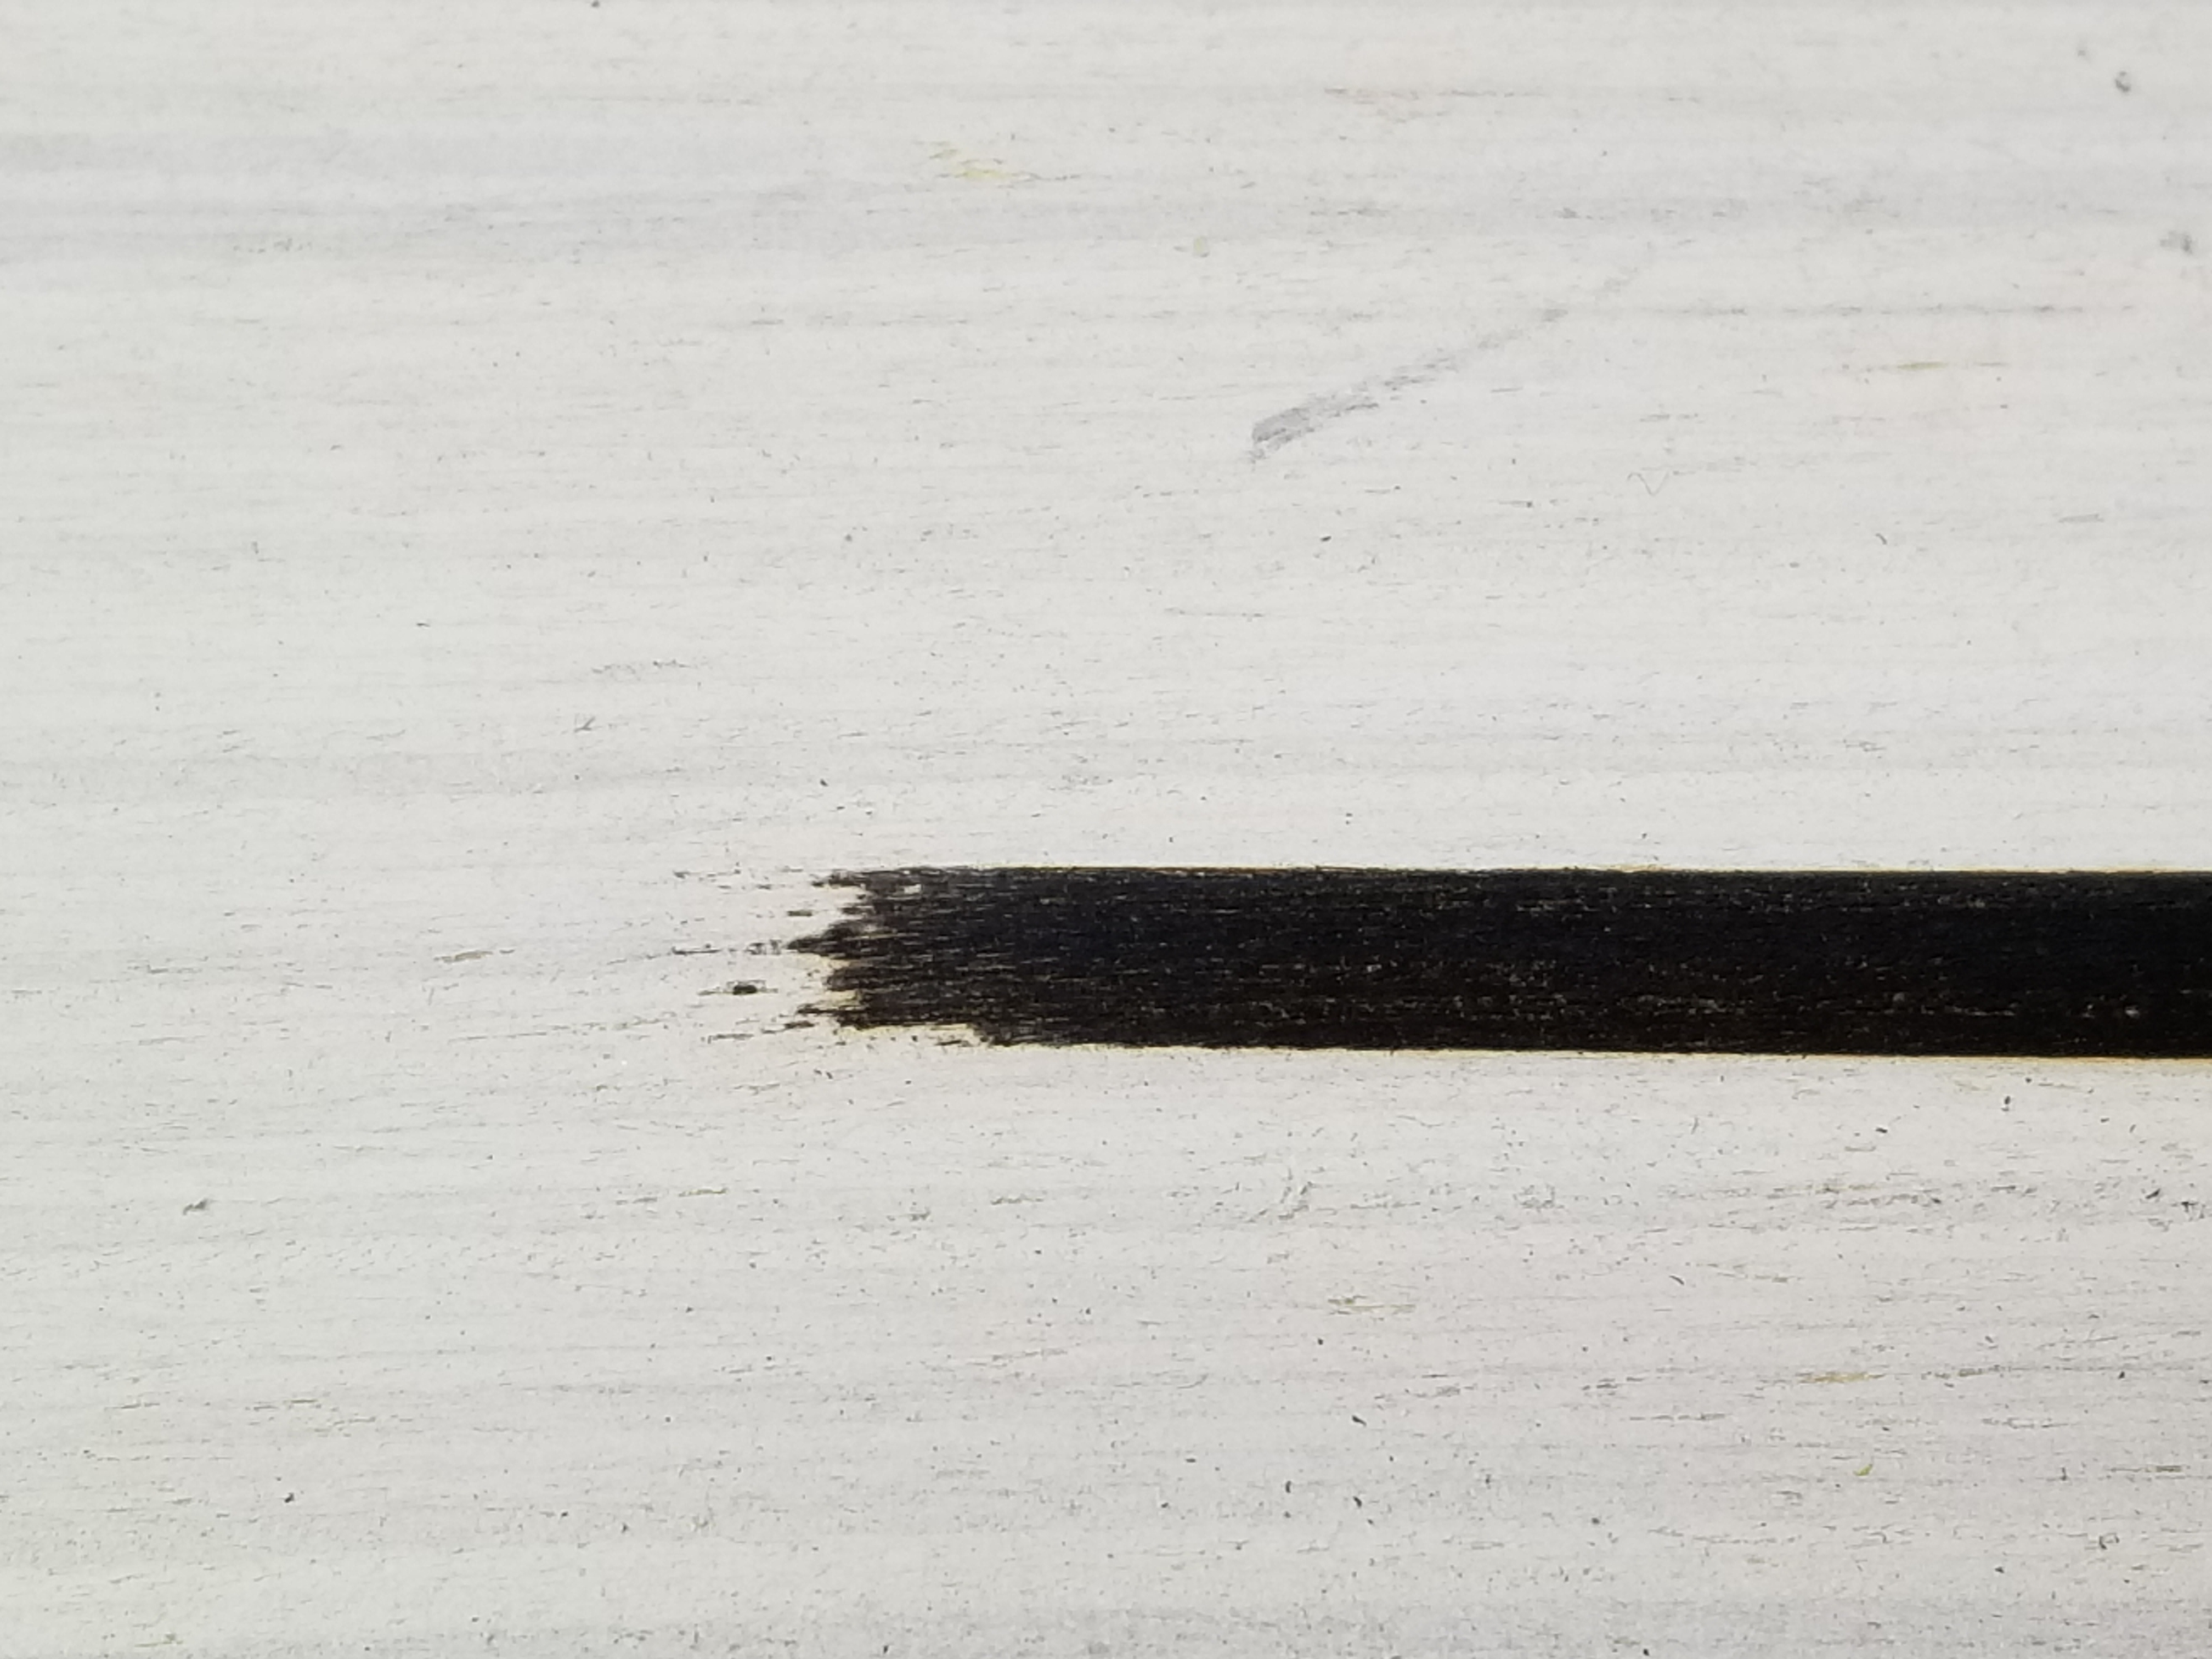
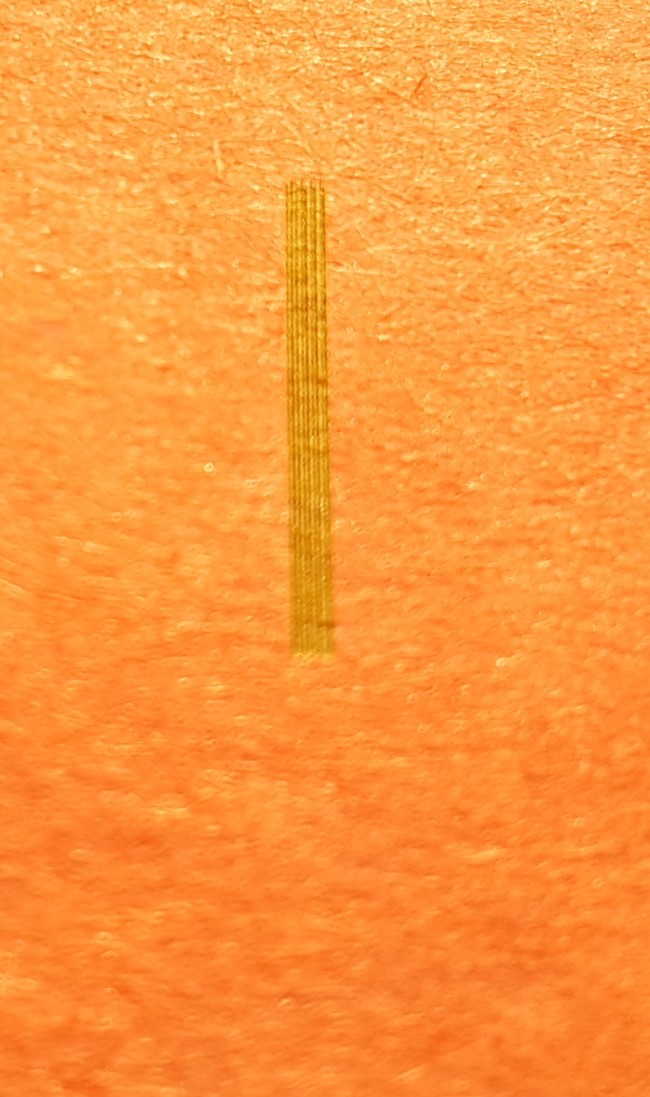
Using lightBurm I draw a straight line
resize to 1 x 10 mm
focus my beam on piece of red paper
then I scan,starting at .1 mm interval
look at the etched line under x30 magnifier
if the burned lines aren’t touching I increase the interval by .01
look at lines under magnifier…once they are all touching (and not one big blob) that is approx your beam width
I might add that what I thought was a focused beam was not as the resultant scan was not distinct
By turning the focus about 1/16 th of a turn CCW or CW the scanned lines became very distinct
So now I use this method to “fine tune” my focus before doing a job