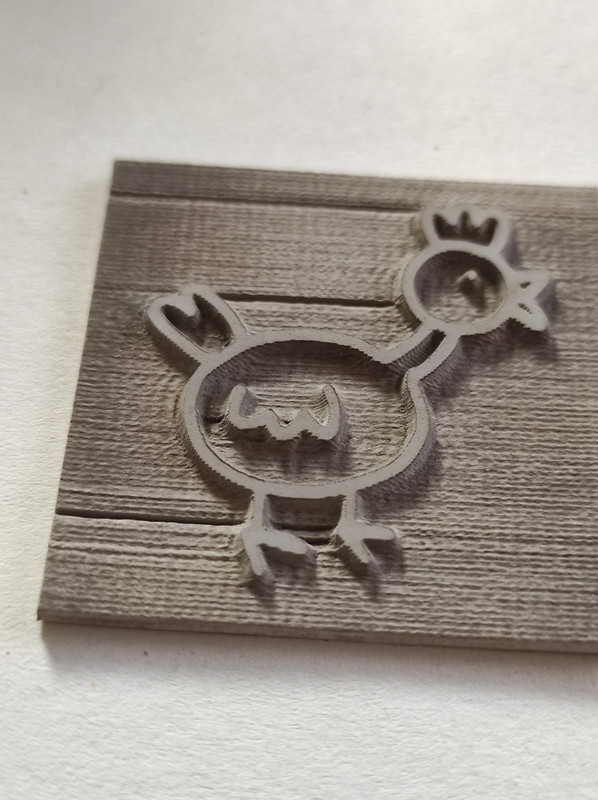
I’m new to lasercutting/engraving and Lightburn. I recently bought a Creality Falcon2 20W and I try to create some stamps. This works fairly well, but I get some additional grooves in the final result. It doesn’t seem to matter where I put the rubber in the working area (top right, bottom left, …). It occurs in all my test cuts so far. It doesn’t seem to correspondent with any traversal moves. I use Fill mode, 1 pass, 1750mm/min, 0.1mm interval.
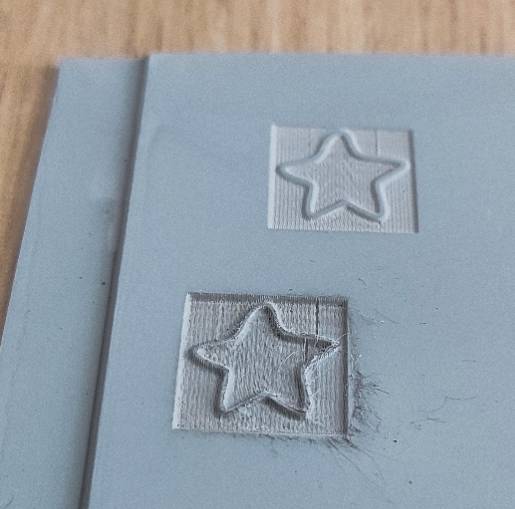
The chicken is about 35 x 35 mm, the star about 20x20mm.
The Deep grooves could be caused by the stack-up of ‘rounding error’ related to the holding power of the stepper motor and the Line interval. Some of the split-steps or ‘microsteps’ in between the full steps don’t hold very well.
If I knew how many belt tooth ‘pockets’ are on the pulley on the drive motor I could assume the motor has a 1.8 degree step and 2mm belt pitch and make a good guess as to which way to adjust the Line interval.
May I ask what you have selected for DPI or Line Interval?
The background ‘grain’ looks like the curtains artifact that belt driven devices make.
I’m afraid I don’t have any details on the belt tooth pockets on the pulley. The laser is a (stock) Creality Falcon2.
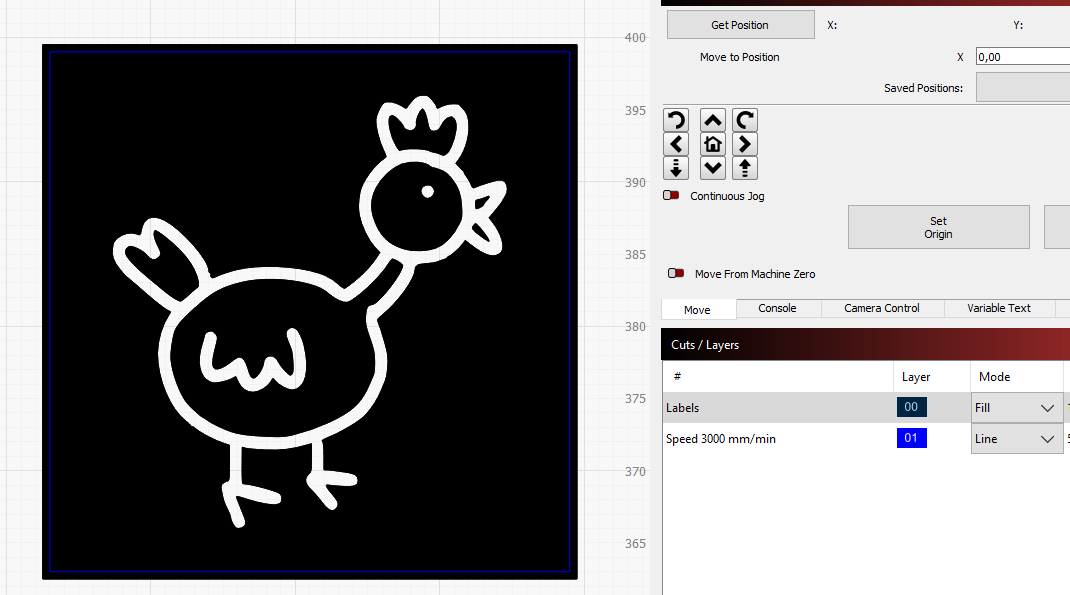
The DPI seems to be 254, with a line interval of 0.1 mm. I think these are standard settings from the Falcon2 profile, I didn’t change anything in this screen (being new to lasercutting):
I did some more tests, and it happens in other designs as well. There is no debris or crumbs in the pulley or belts. The belt tension seems to be OK. An engraved circle is truly a circle.
I’m engraving this at 1750 mm/min @ 100% power. Do you think a lower speed would help?
If you mirror these and run them, to does the location of the grove change?
It appears to be connected to prominent areas of the graphic. That’s the idea behind using a horizontal mirror… if the anomaly also mirrors the groove.
I finally had the time to look a bit further to this.
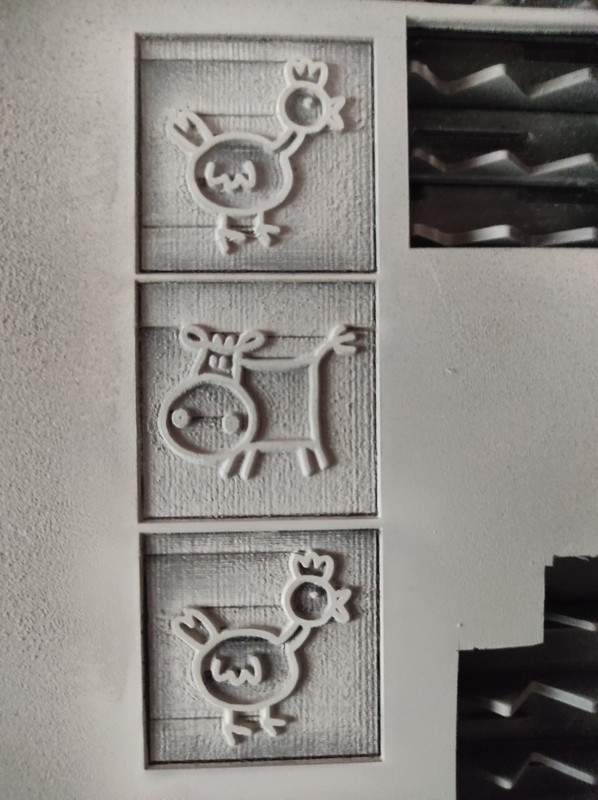
It’s 100% sure that the grooves are not image related: I engraved the same image three times:
Bi directional fill
Bi directional fill, but with the image rotated 90°.
Offset fill
1 + 2 were engraved at the same time, 3 afterwards. (don’t mind the upper part of 1+2, the rubber was thinner there and I forgot to take this into account)
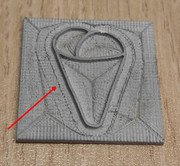
As you can see, there is some kind of overlap in the offset fill + there remains a high spot all around the ice cream as well.
Some settings:
The stamps are 30 x 30 mm
Laser used: Creality Falcon 2 22Watt
Fill settings:
Speed: 1750 mm / sec
Max Power: 100%
Constant power mode OFF
Bi directional fill
Overscanning OFF
Line Interval 0.1000
Lines per inch: 254
Scan Angle: 0
1 pass
Ramp length 0.50
Ramp outer Edge ON
Flood Fill ON
Any suggestions to solve this issue would be more than welcome!