Posting this because I only saw people asking and no real answers or howto’s for this.
Disclaimers & Warnings;
-
This works for me without any breaking issues, so it will probably work for you on your Ortur. However, I did not build this functionality, so I have no idea if it will work for all other lasers and there are known issues.
-
This functionality enables you to use your laser through a webpage. Main reason for me to do this is not needing to manually hook up and make sure i have the poweradapter on my laptop for longer prints. Also it seems i cannot do anything else on my laptop while printing.
-
This functionality is NOT intended to start/stop your cutting/engraving remotely. USE WITH CAUTION!
-
If you have never worked with Octoprint before, this guide is probably not for you. I will not go into the details of installing or using Octoprint.
-
Use a separate instance (or Raspberry Pi) for your Octoprint Laser version; do not use the same instance for your 3D printer. This will mess stuff up.
Step 1
-
Tape off the 5v pin on your USB cable connecting to the laser.Honestly, I have no idea why this isnt widely known for this laser, as it is widely known for Octoprint. This step is REALLY useful even if you choose not to use Octoprint.
-
If you do not do this, the laser (or your 3Dprinter) will draw power from your USB connection as well as from the powersupply. This is a cause for a lot of random disconnects and connectivity errors. Put tape on the 5V pin - Why and how - FAQ - OctoPrint Community Forum
Step 2
- Install Octoprint, preferably on a Raspberry Pi, making it Octopi.https://octoprint.org/
Step 3
-
Install the plugin Bettergrblsupport through the Octoprint Plugin manager GitHub - synman/Octoprint-Bettergrblsupport: Better Grbl Support Plugin for Octoprint based (loosely) on the original Grbl Support plugin developed by mic159
-
DO NOT CHANGE ANY OF THE SETUP VALUES; Check if they match the guide in above link.
-
Octoprint Settings → Features: Disable Temperature Graph
-
Octoprint Settings → Appearance: If you have multiple Octopi’s, it is handy to set a different Title and Color
-
DO NOT install the ‘UI Customiser’ plugin, this will break functionality.
-
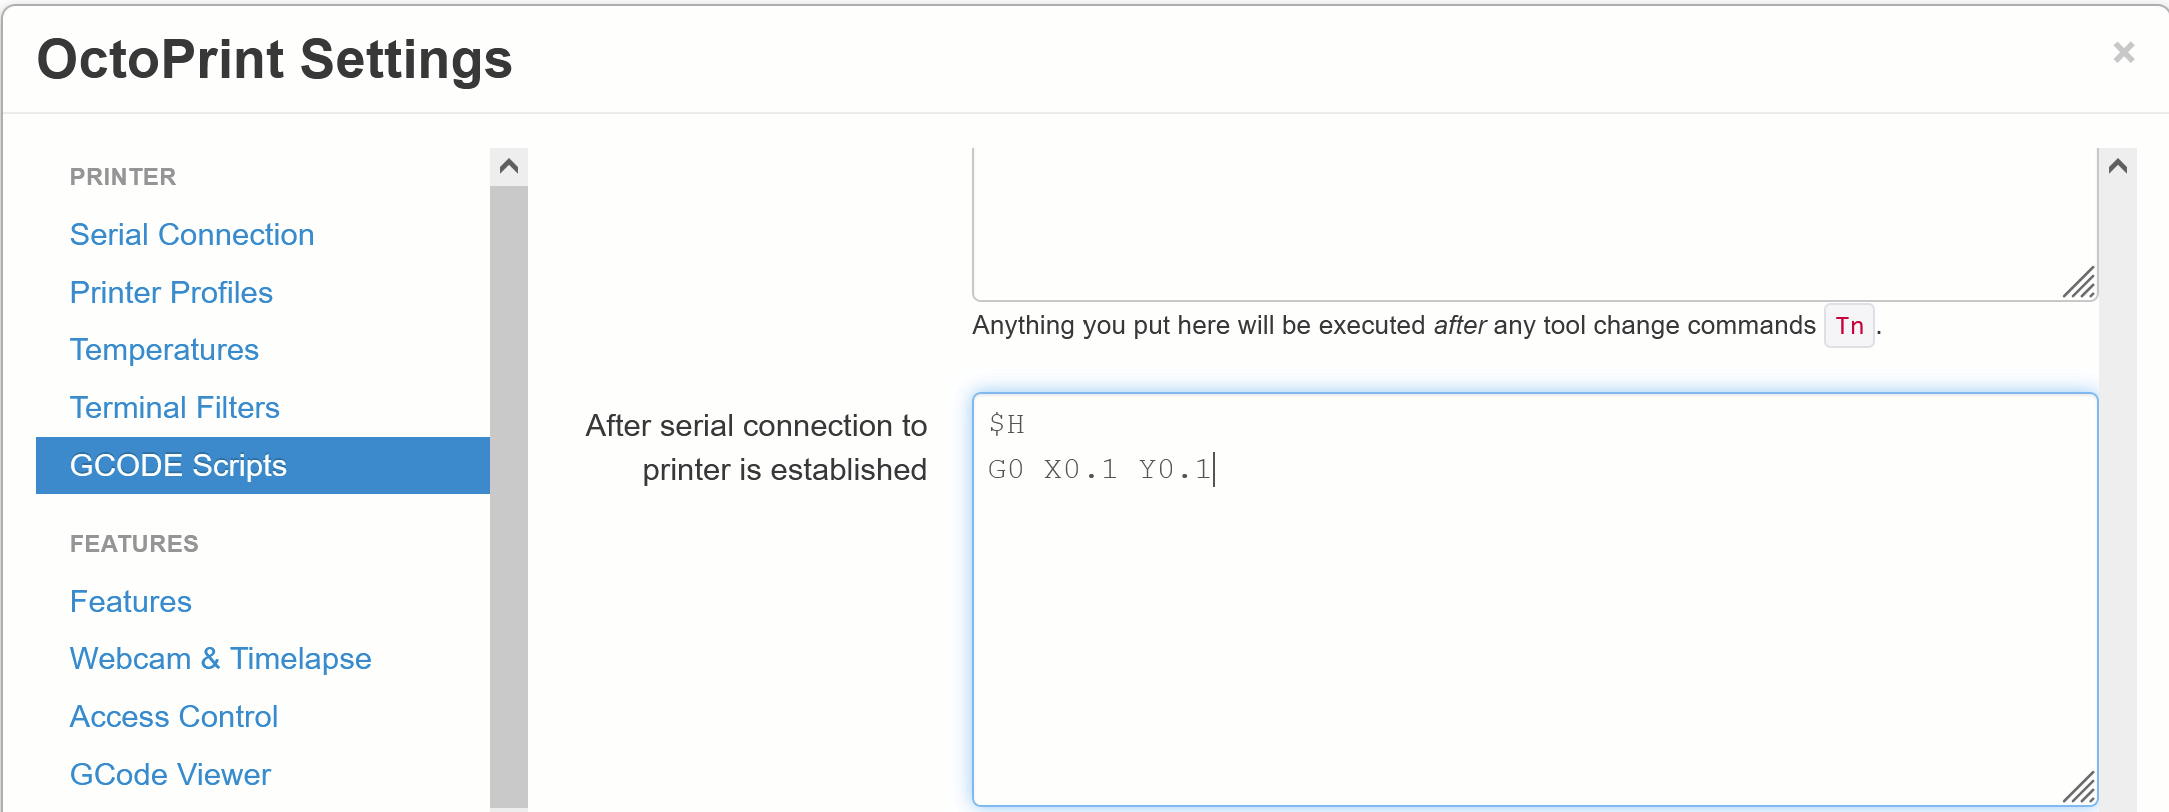
Octoprint Settings → Gcode Scripts, clear out ALL scripts. (By default ‘after print job is cancelled’ is filled. - Set the script for ‘After serial connection to printer is established’:
$H
G0 X0.1 Y0.1
Rounding errors can lead to end-of-print homing travel movements out of bounds errors. See issue at : Rounding error creates out of bounds movement and raises alarm
Step 4
- Set up a printer profile with the following values:
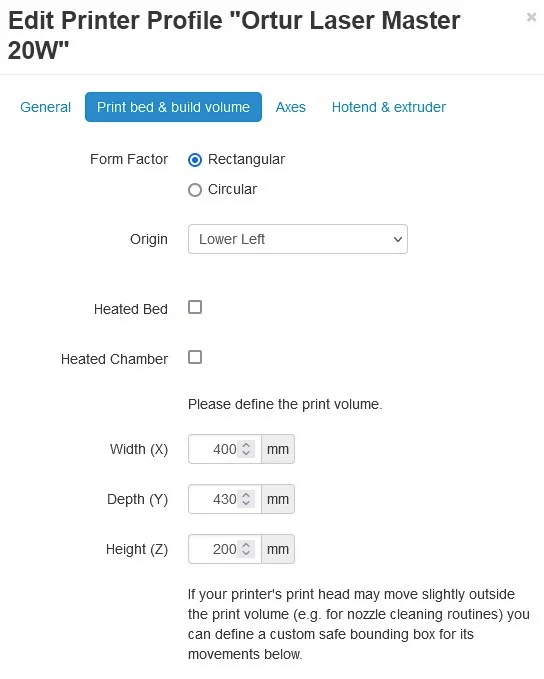
Z Value is ignored
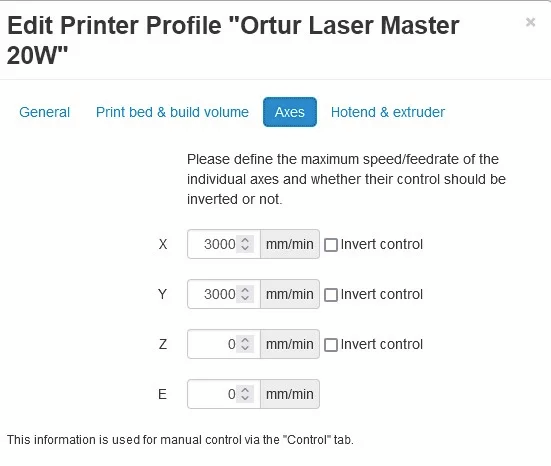
speed rates might be able to be higher
Step 5
-
Hookup the Laser USB cable to your Octopi, Power on your laser with the powerbutton on the laser. Wait until it has finished its homing sequence.
-
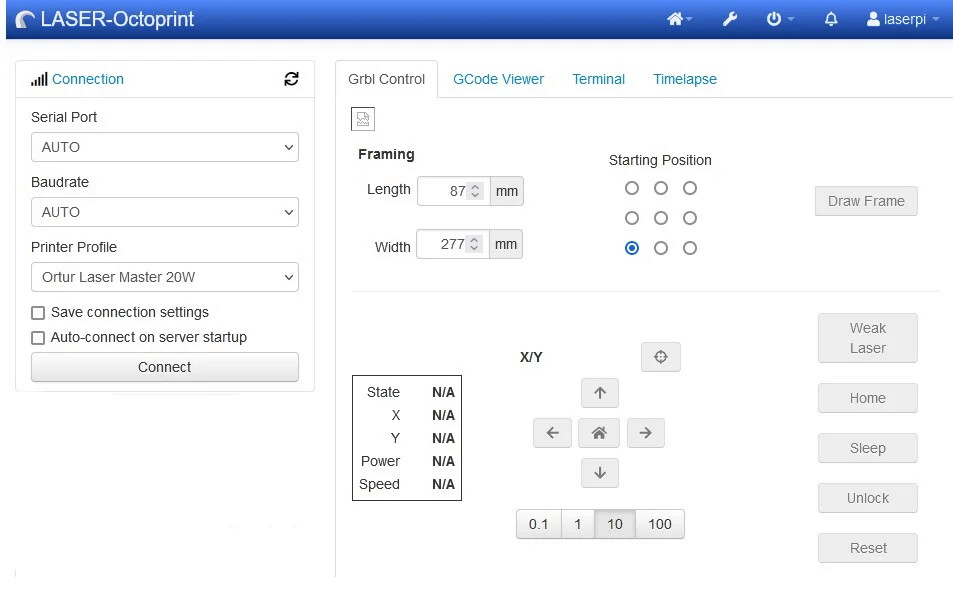
In Octoprint, connect with AUTO / AUTO.This will probably hook up to serial port /ttyACM0 and Baudrate 115200, but I have issues connecting when selecting these values.
-
If you connect/disconnect/connect in rapid succession, you will break it and have to unplug the power of the laser and power it back on before the connection works again.
Step 6
-
You should now have a working connection with your laser. If you don’t, retrace your steps.
-
Make sure you set the "Starting Position’ in above image to bottom left, otherwise the laser will disconnect on an ‘out of bounds’ error.
-
Home your laser with the ‘Home’ button (this will travel to the X and Y stops.
-
You can set 0.0 by moving the laser with the arrow buttons to a position of your choice and clicking the mark/target button above the arrow buttons.
-
You can move the carriage to ‘0.0’ with the little house inside the arrow buttons.This feature is really handy when using an engraved grid where your 0.0 isnt exactly where your endstops are.
Step 7
-
Load up your design in Lightburn.
-
Make sure all designs are strapped to bottom left; 0.0
-
Set ‘Start from’ to ‘Current Position’
-
Check the four encircled items in the picture below.

Check all 4 circles
Step 8
-
Export your gcode.
-
Note; manually type the file extention as .GCODE ; the first time it tries to name it as .gc and this isn’t a recognised format in Octoprint.
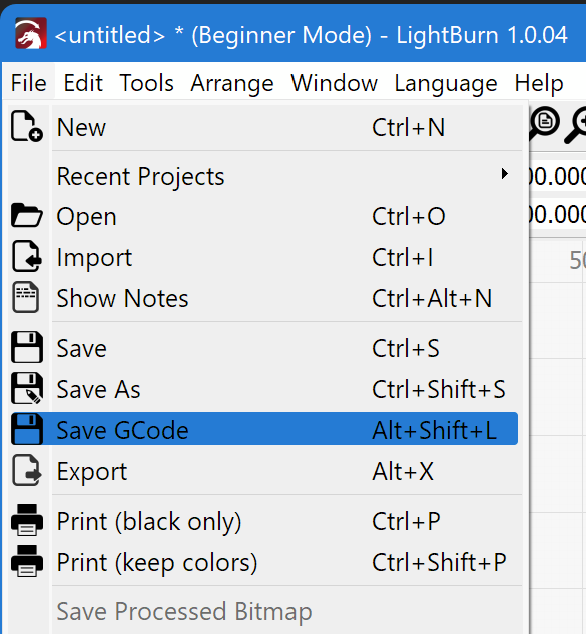
save as .gcode !!
Step 9
-
Drag&drop your gcode in Octoprint.
-
In the files section, Load your print
-
The “framing” should resize to your actual print.
-
Make sure you have set the start position to bottom left and click ‘draw frame’.
-
The frame is drawn from your start position
-
You can now place your start position with the arrow buttons and align that part to bottom left of where you want your print to start. (Note; this is where the print starts, not where the object you want to print on starts!!)

Step 10
-
Everything set?
-
Recheck
-
Go
Cancelling a print
-
Cancelling a print takes time and will often disconnect your printer on error.
-
Better route seems to be to ‘pause’ and wait until it is paused (this isnt instant) and then restart or cancel.
Endless possibilities
I have Octoprint hooked up to my Home Assistant through MQTT.This enables me to automatically start a powerswitch with my aquariumpump for air assist when i start a print and 10s after finishing turn it off again. Also, this starts my bigger exhaust for smoke extraction outdoors.With Home Assistant and MQTT you can literally connect everything to everything, too much to go into here.