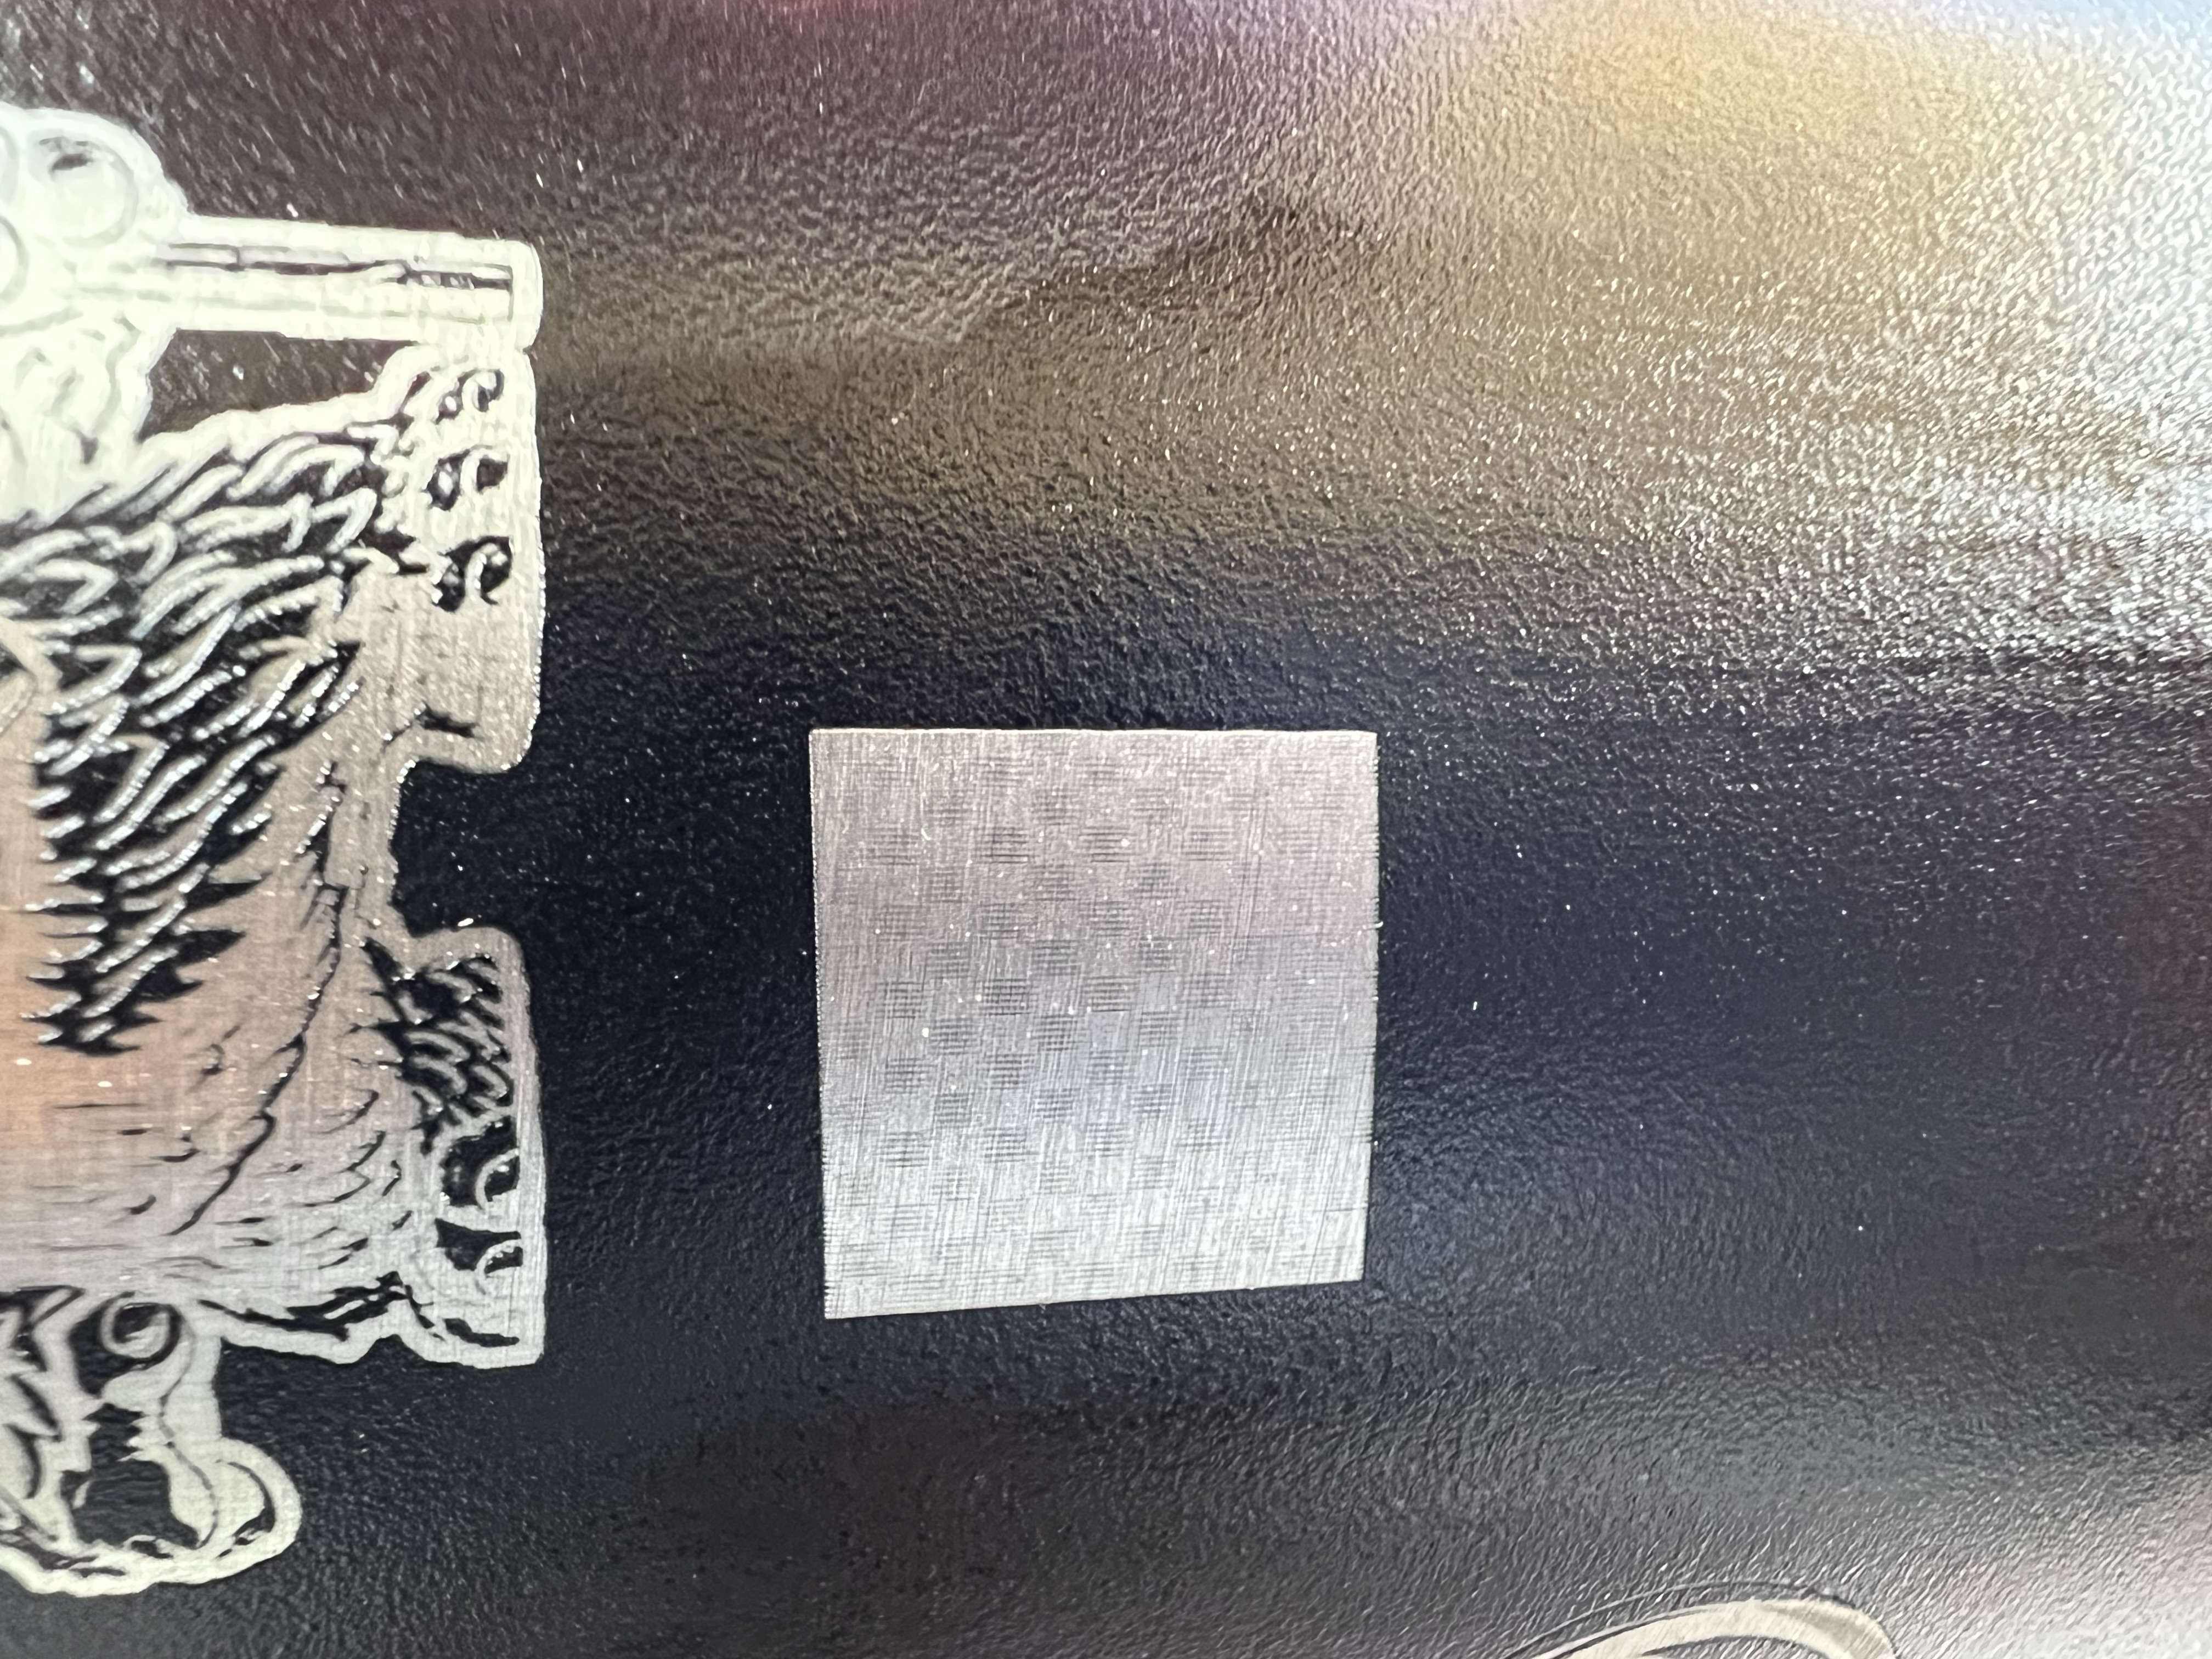
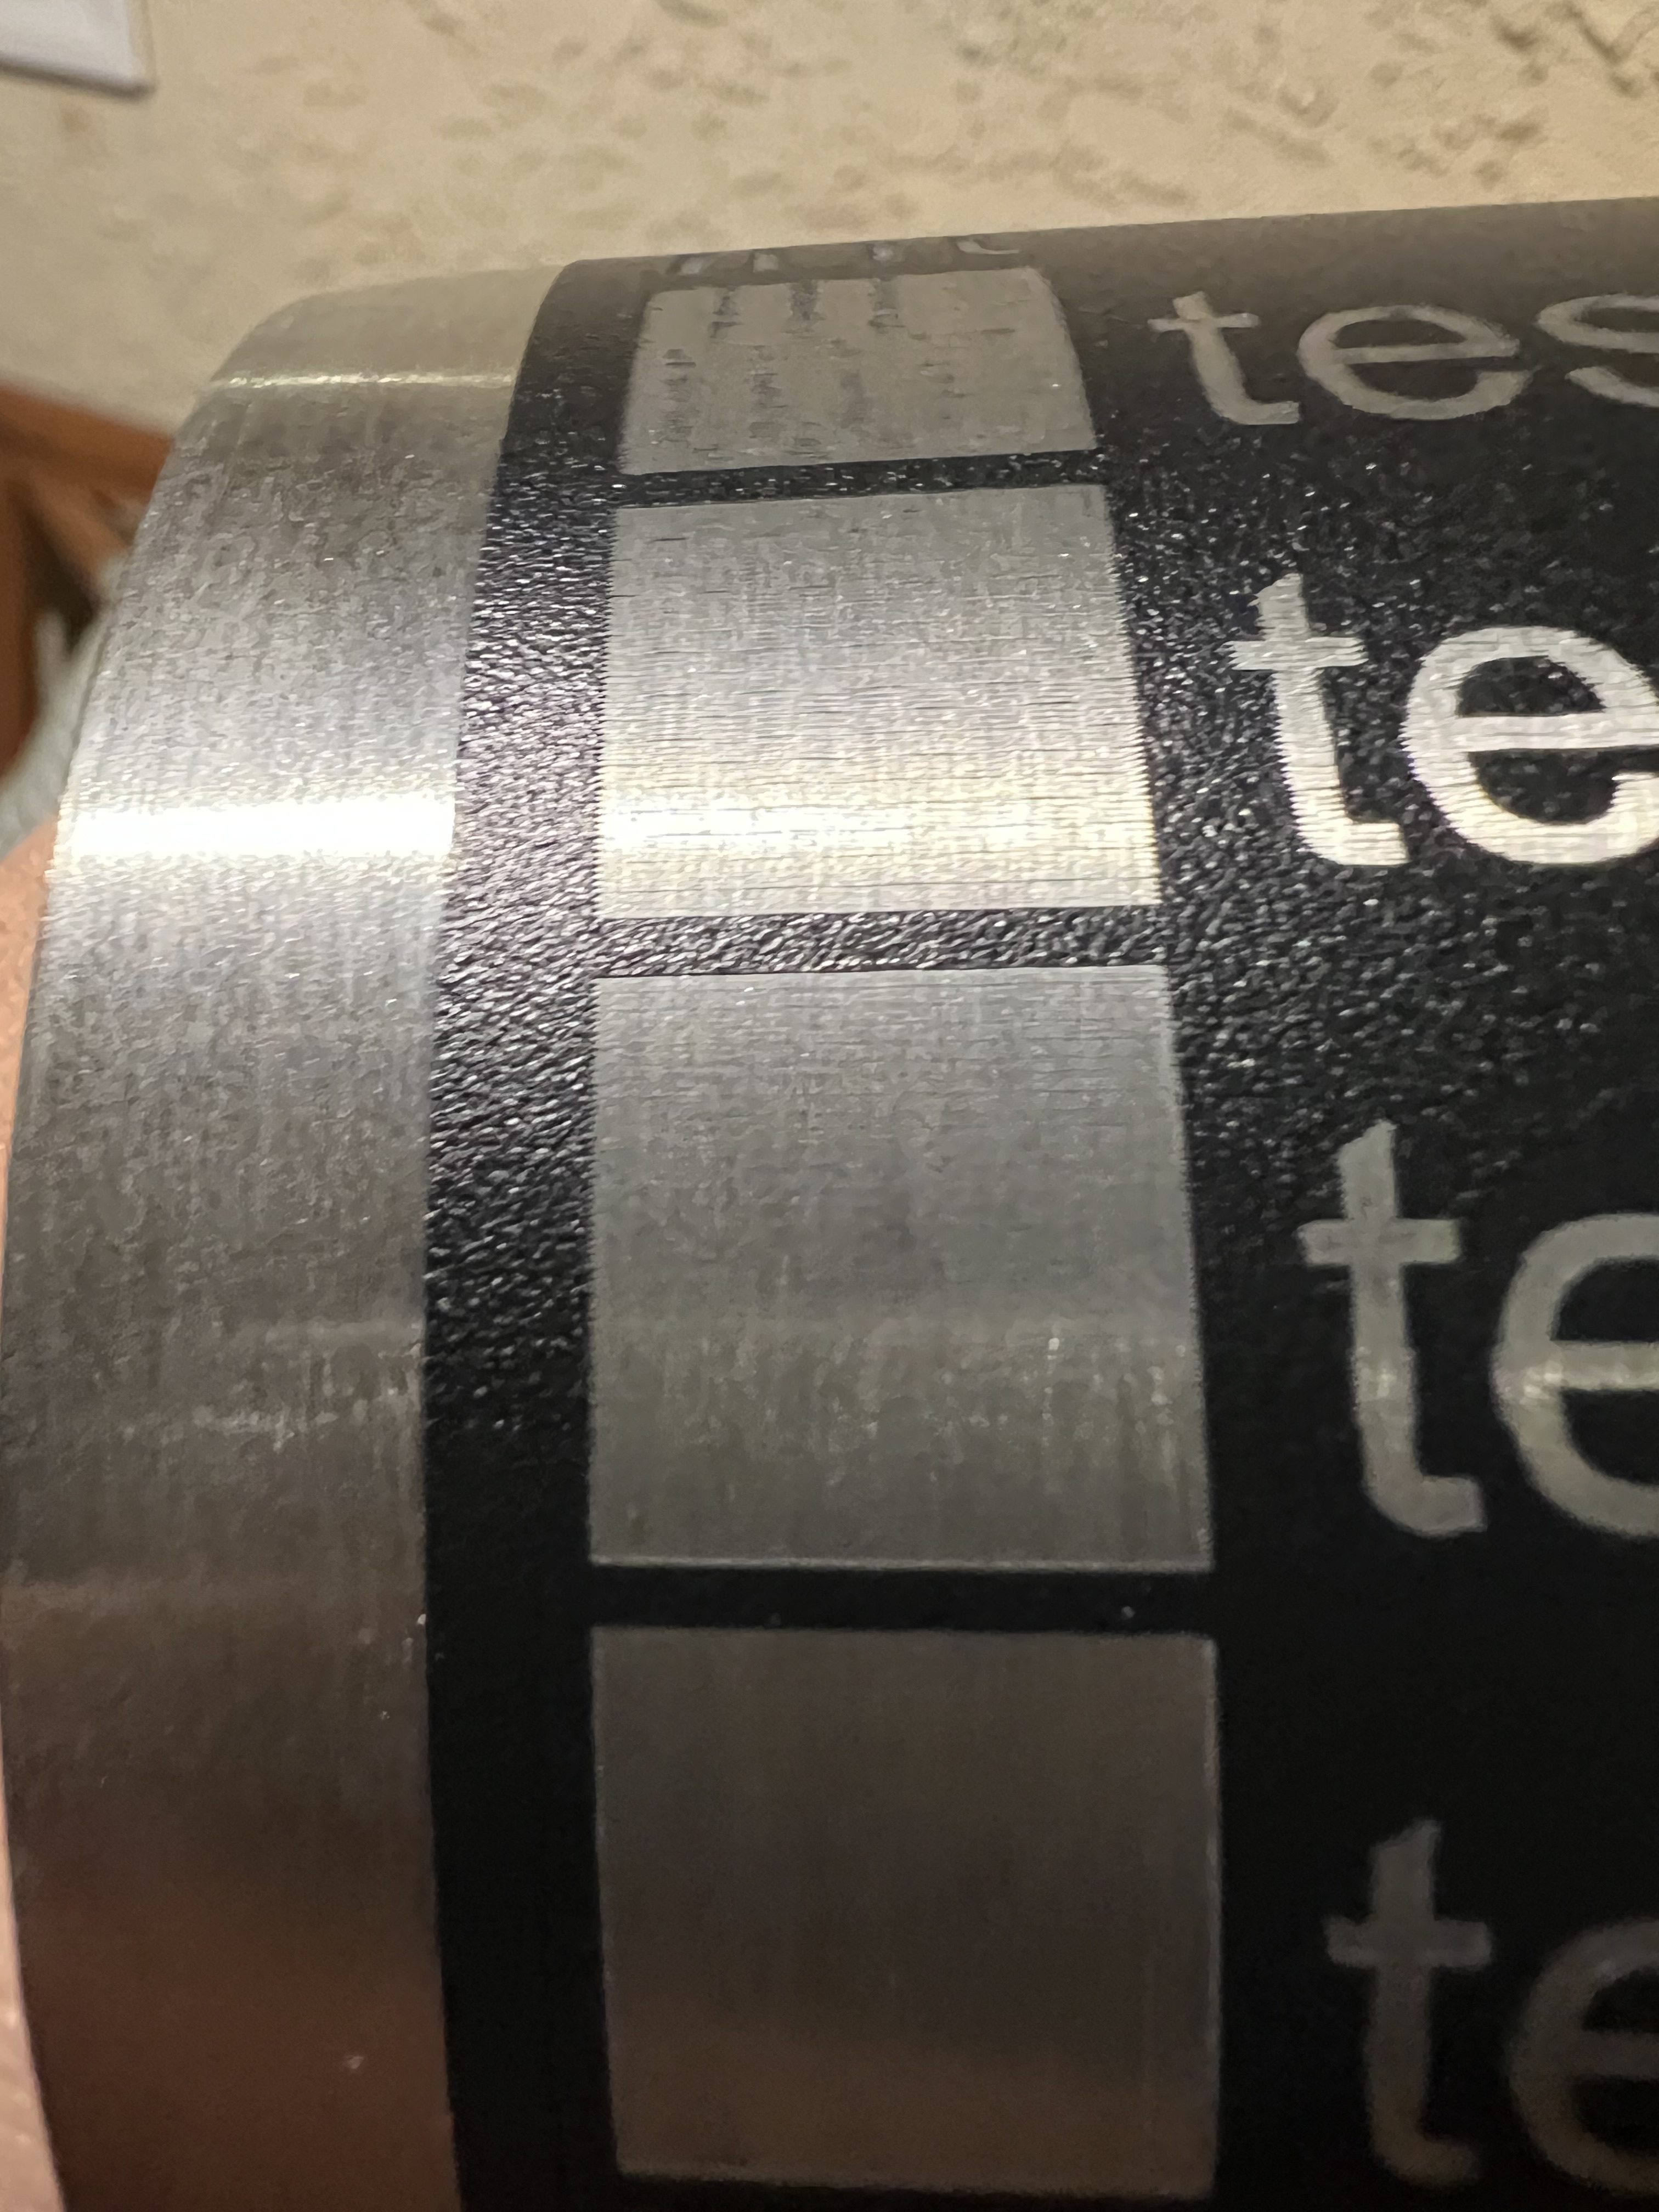
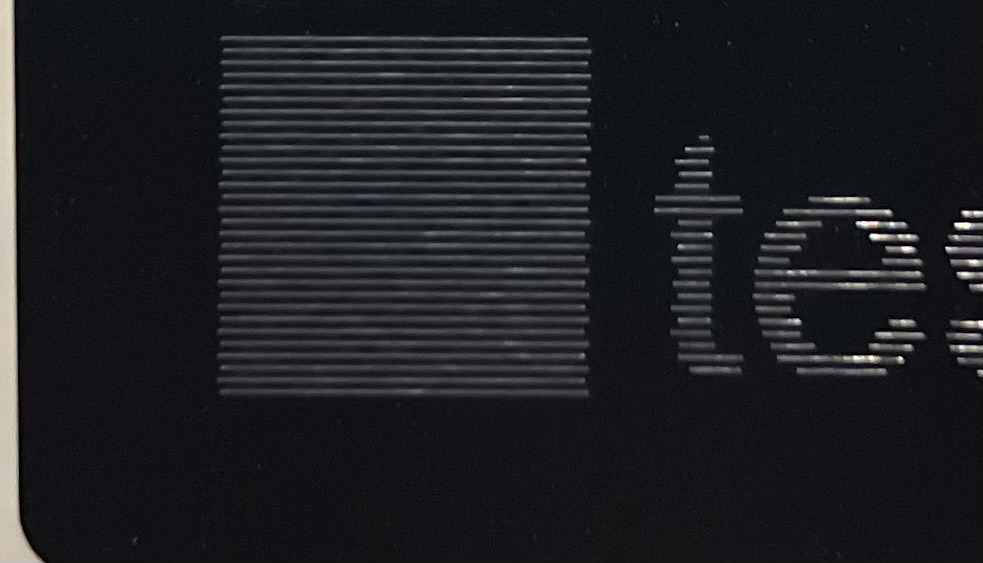
The image attached is just a square set to fill but it comes out looking like a checkered pattern. Any ideas what could cause this or had anyone encountered this before? My only thoughts are consistent drops in power at each spot where the paint was left. It’s odd because there seems to be a very specific and accurate issue that’s causing the pattern to be identical all the way up the square when filling. Crosshatch wasn’t used and I did the tumbler with a 0 degree scan angle so it may look crosshatched but is not. The black lines are paint not metal burn. I’m also running a diode laser that’s on 10w mode(10/20w laser module). I can get a clean engraving but that isn’t what this post is about. I’m just looking for what would cause this.
Uploading the *lbrn2 file here will allow other folks to check your work, because often there are hidden complexities behind “just a square set to fill”.
1 Like
I do get strange effects when etching tumblers, it follows the contour of the cut. It has to do with the heat transfer and thermal inertia, I believe.
Do those spot rinse off with a solvent, or are they caused by changes in the surface itself?
1 Like
I might be horribly wrong here but a while ago I was getting strange square/line when I previewed my work and when Lasered it was the same as the preview
I found out it was "under the Cuts and Layers there is a setting called Interval (mm) and mine was something like 0.100 and when I went looking on other files they where set to 0.080…That made the difference to squares/lines as to solid fill…
Just a though…Merlin…
2 Likes
I will upload the file tomorrow morning once I run another test to replicate it again as I didn’t have it saved. Thanks!
I use LA’s and a magic eraser and it won’t budge. ![]()
Yeah I’ve messed with the interval quite a bit and they all have some type of anomaly whether it’s a checkered pattern like this or loss of steps that cause lines in my engraving. I appreciate you taking the time to give your input! Also worth noting that this only occurs when I use my rotary and I haven’t noticed this pattern on ceramic wood, or acrylic.
Did the “checkered pattern” appear in any of the other areas on that tumbler? i.e. did it show up in the engraved area seen to the left or just in the filled square? I had a similar problem a while back. It turned out to be a conflict with the gear ratio on my rotary and the interval I was using for the graphics I was engraving. I solved it by putting a larger drive gear on my rotary, which gave me smaller increments of rotation at the tumbler.
2 Likes
Another thing to try is rotate the square 45 degrees and note if the artifacts follow the rotation or if they stay in line with the x and y axis.
1 Like
The engraved area to the left I had tested using a different rotary. The previous issue was that I couldn’t get a clean engraving using a regular 0 scan angle so I switched rotaries and that got rid of the issue, the only thing is my laser is enclosed and I rather not remove the bottom plate to use the rotary.(one that came with my laser fits in enclosure). It is a Roly Lasermatic MK2 with a dual laser head 10w and 20w engraving modes. I always get engravings with missing steps unless I use a 90 scan angle on the original rotary.
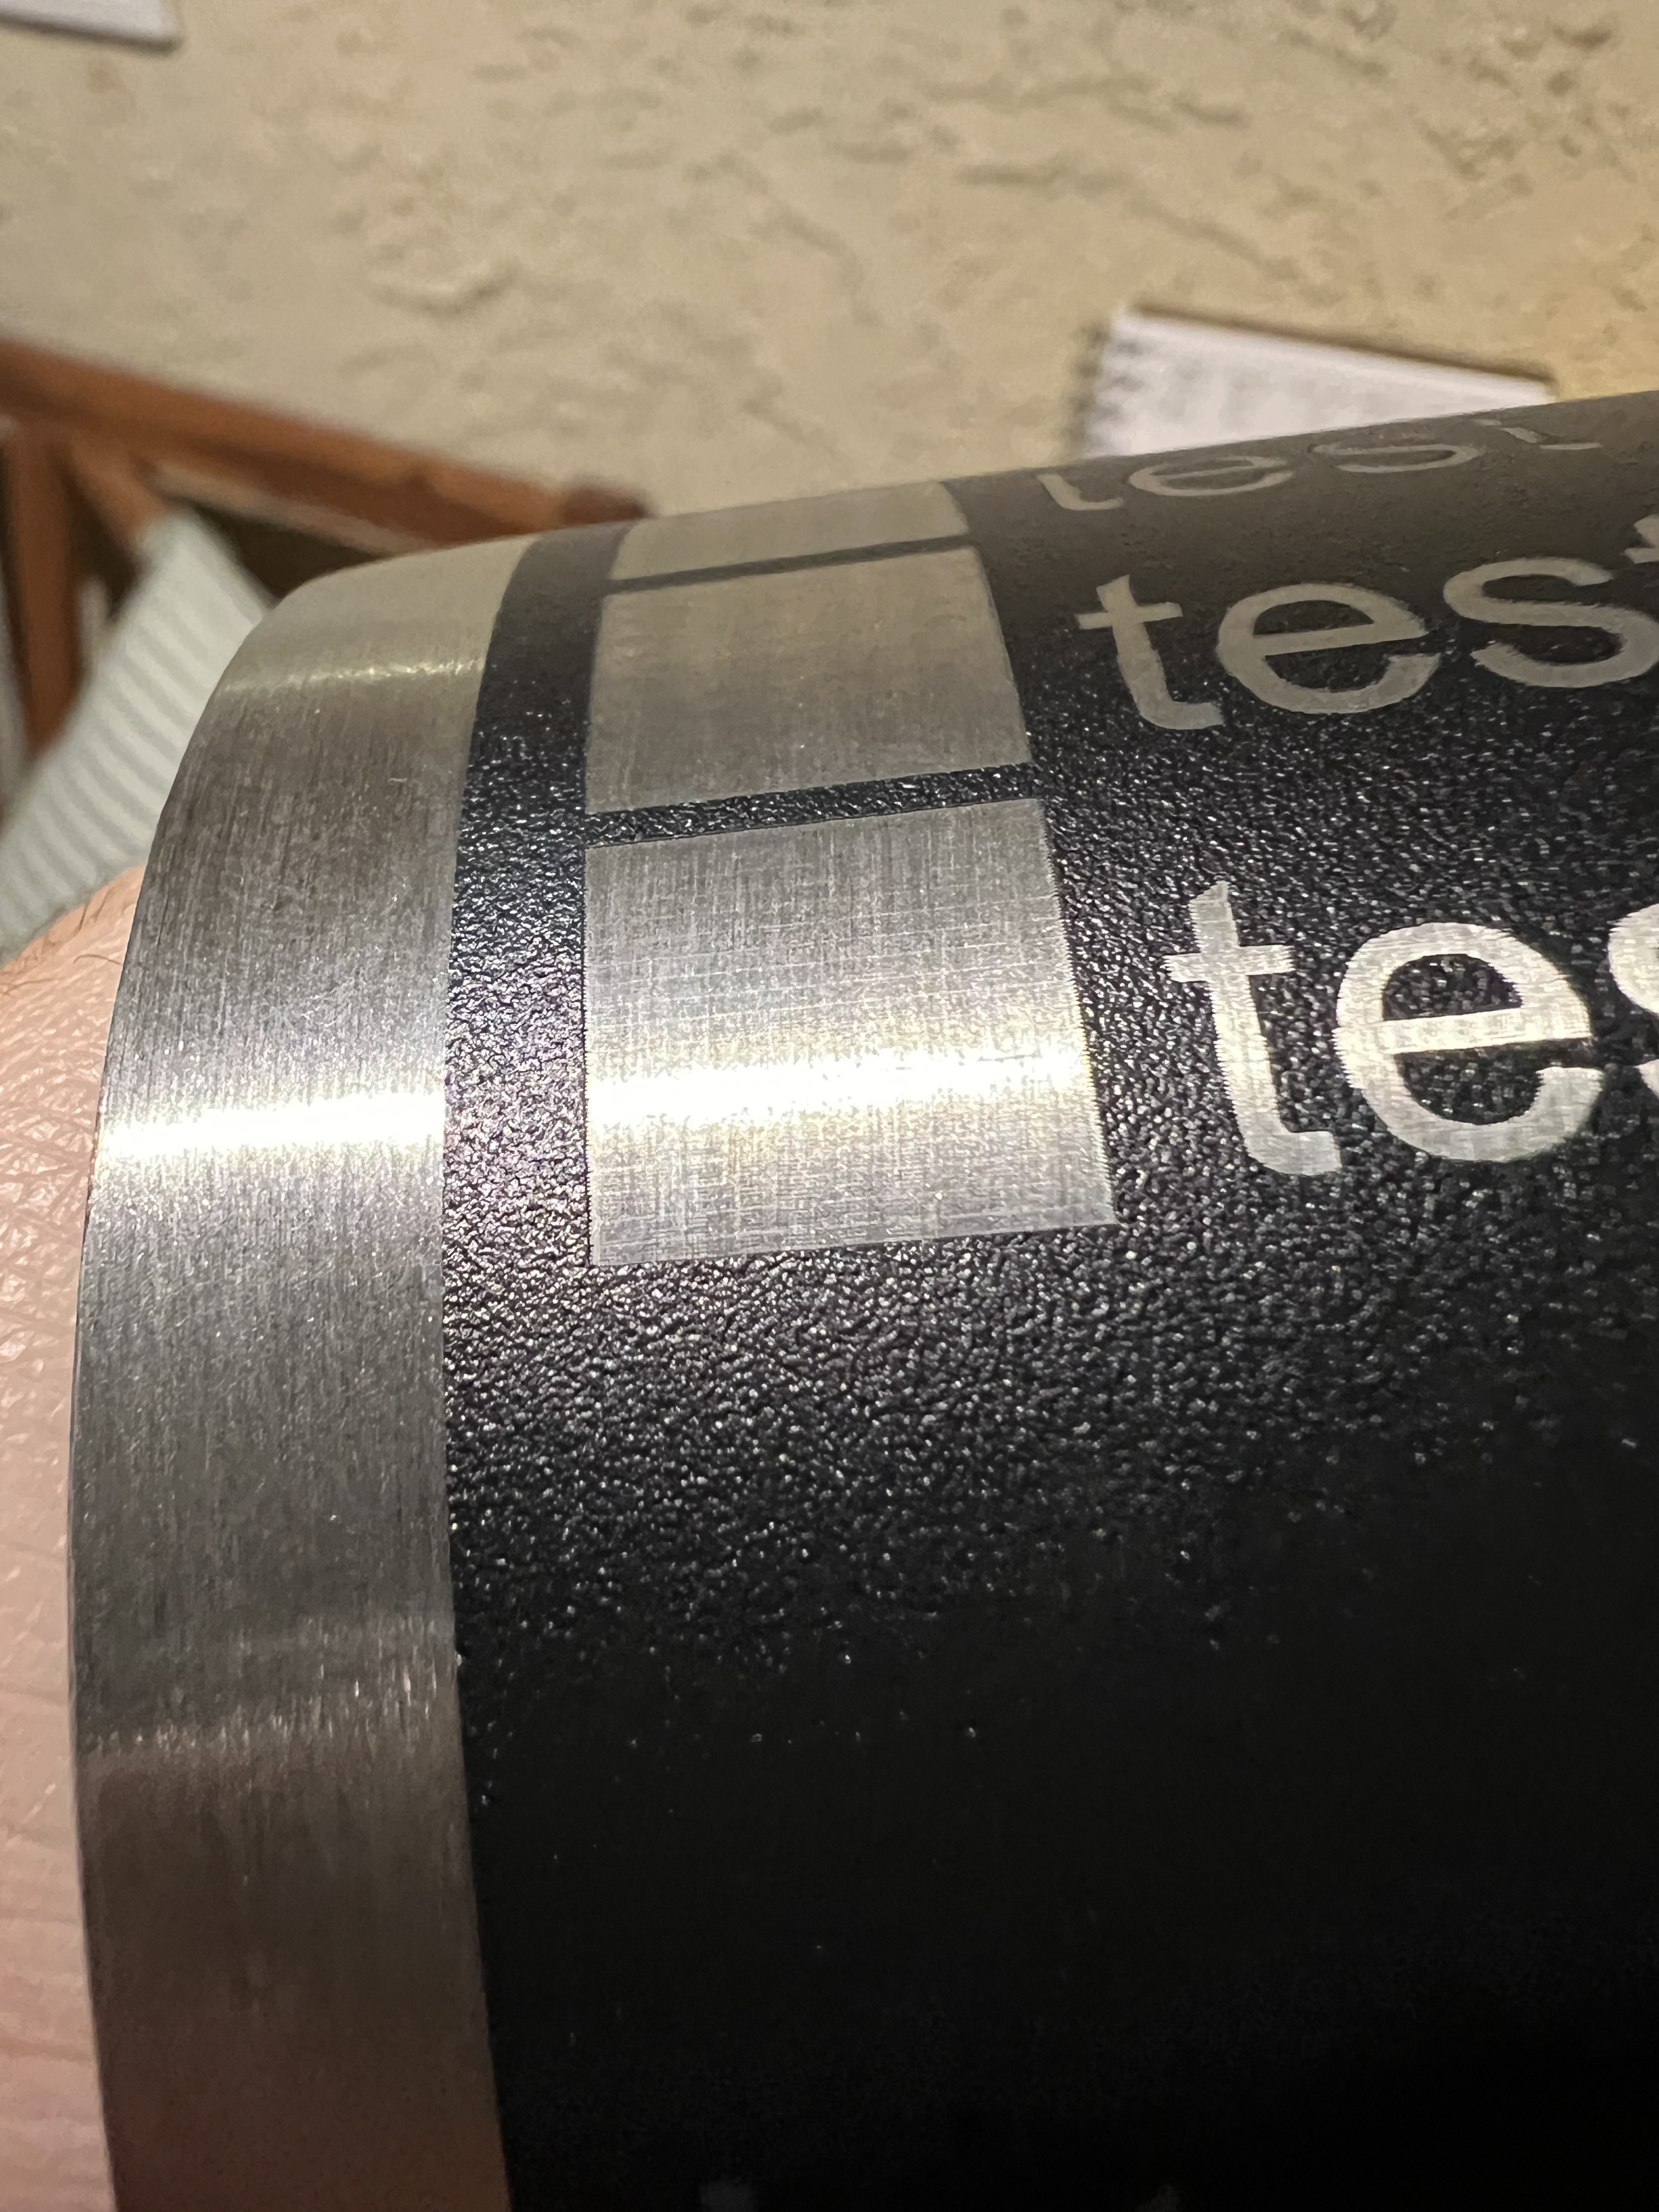
The top square with no lines is a 90 scan angle and the other is at 0.
Yes, I get the same. I engrave at 90 degrees to avoid that effect. I increase overscan to 4-5% and keep my speed slow.
I have my overscan at 5.0 the only thing is when I use the 90 scan angle, I get this issue.

Not only do I get a drop in quality on the edges, it seems whenever it passes from one shape to the next it doesn’t do well at aligning and it comes out looking darker. I tried moving my overscan up to 7% and still won’t fix it.
I’d try @nzmerlin suggestion of lowering the interval.
![]()
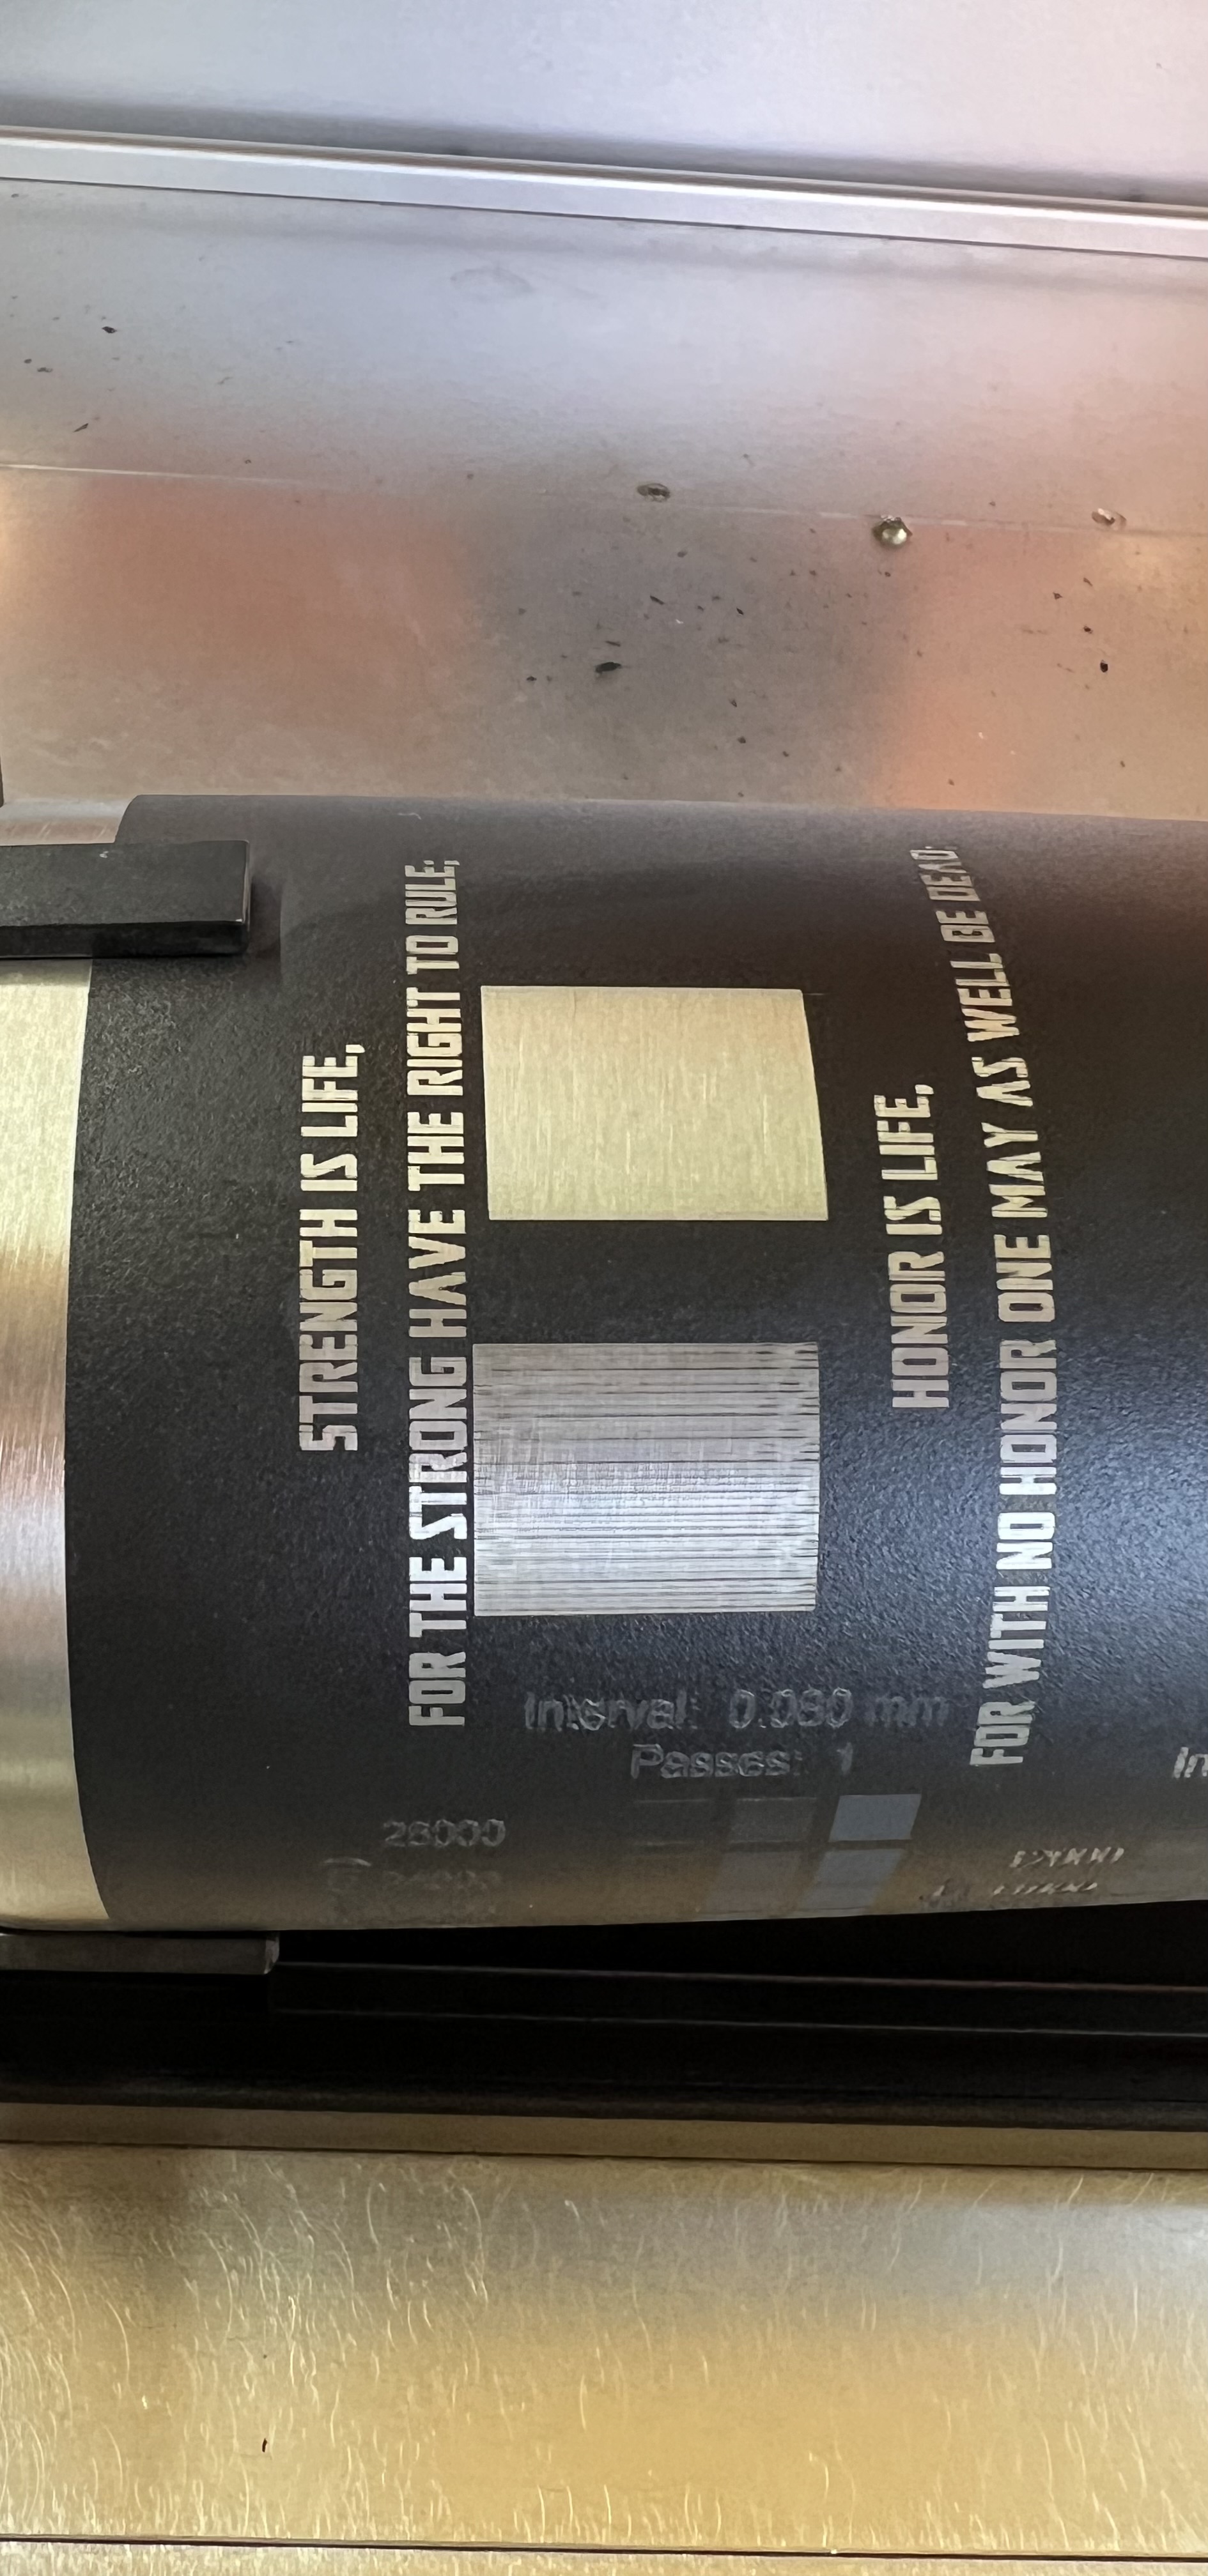
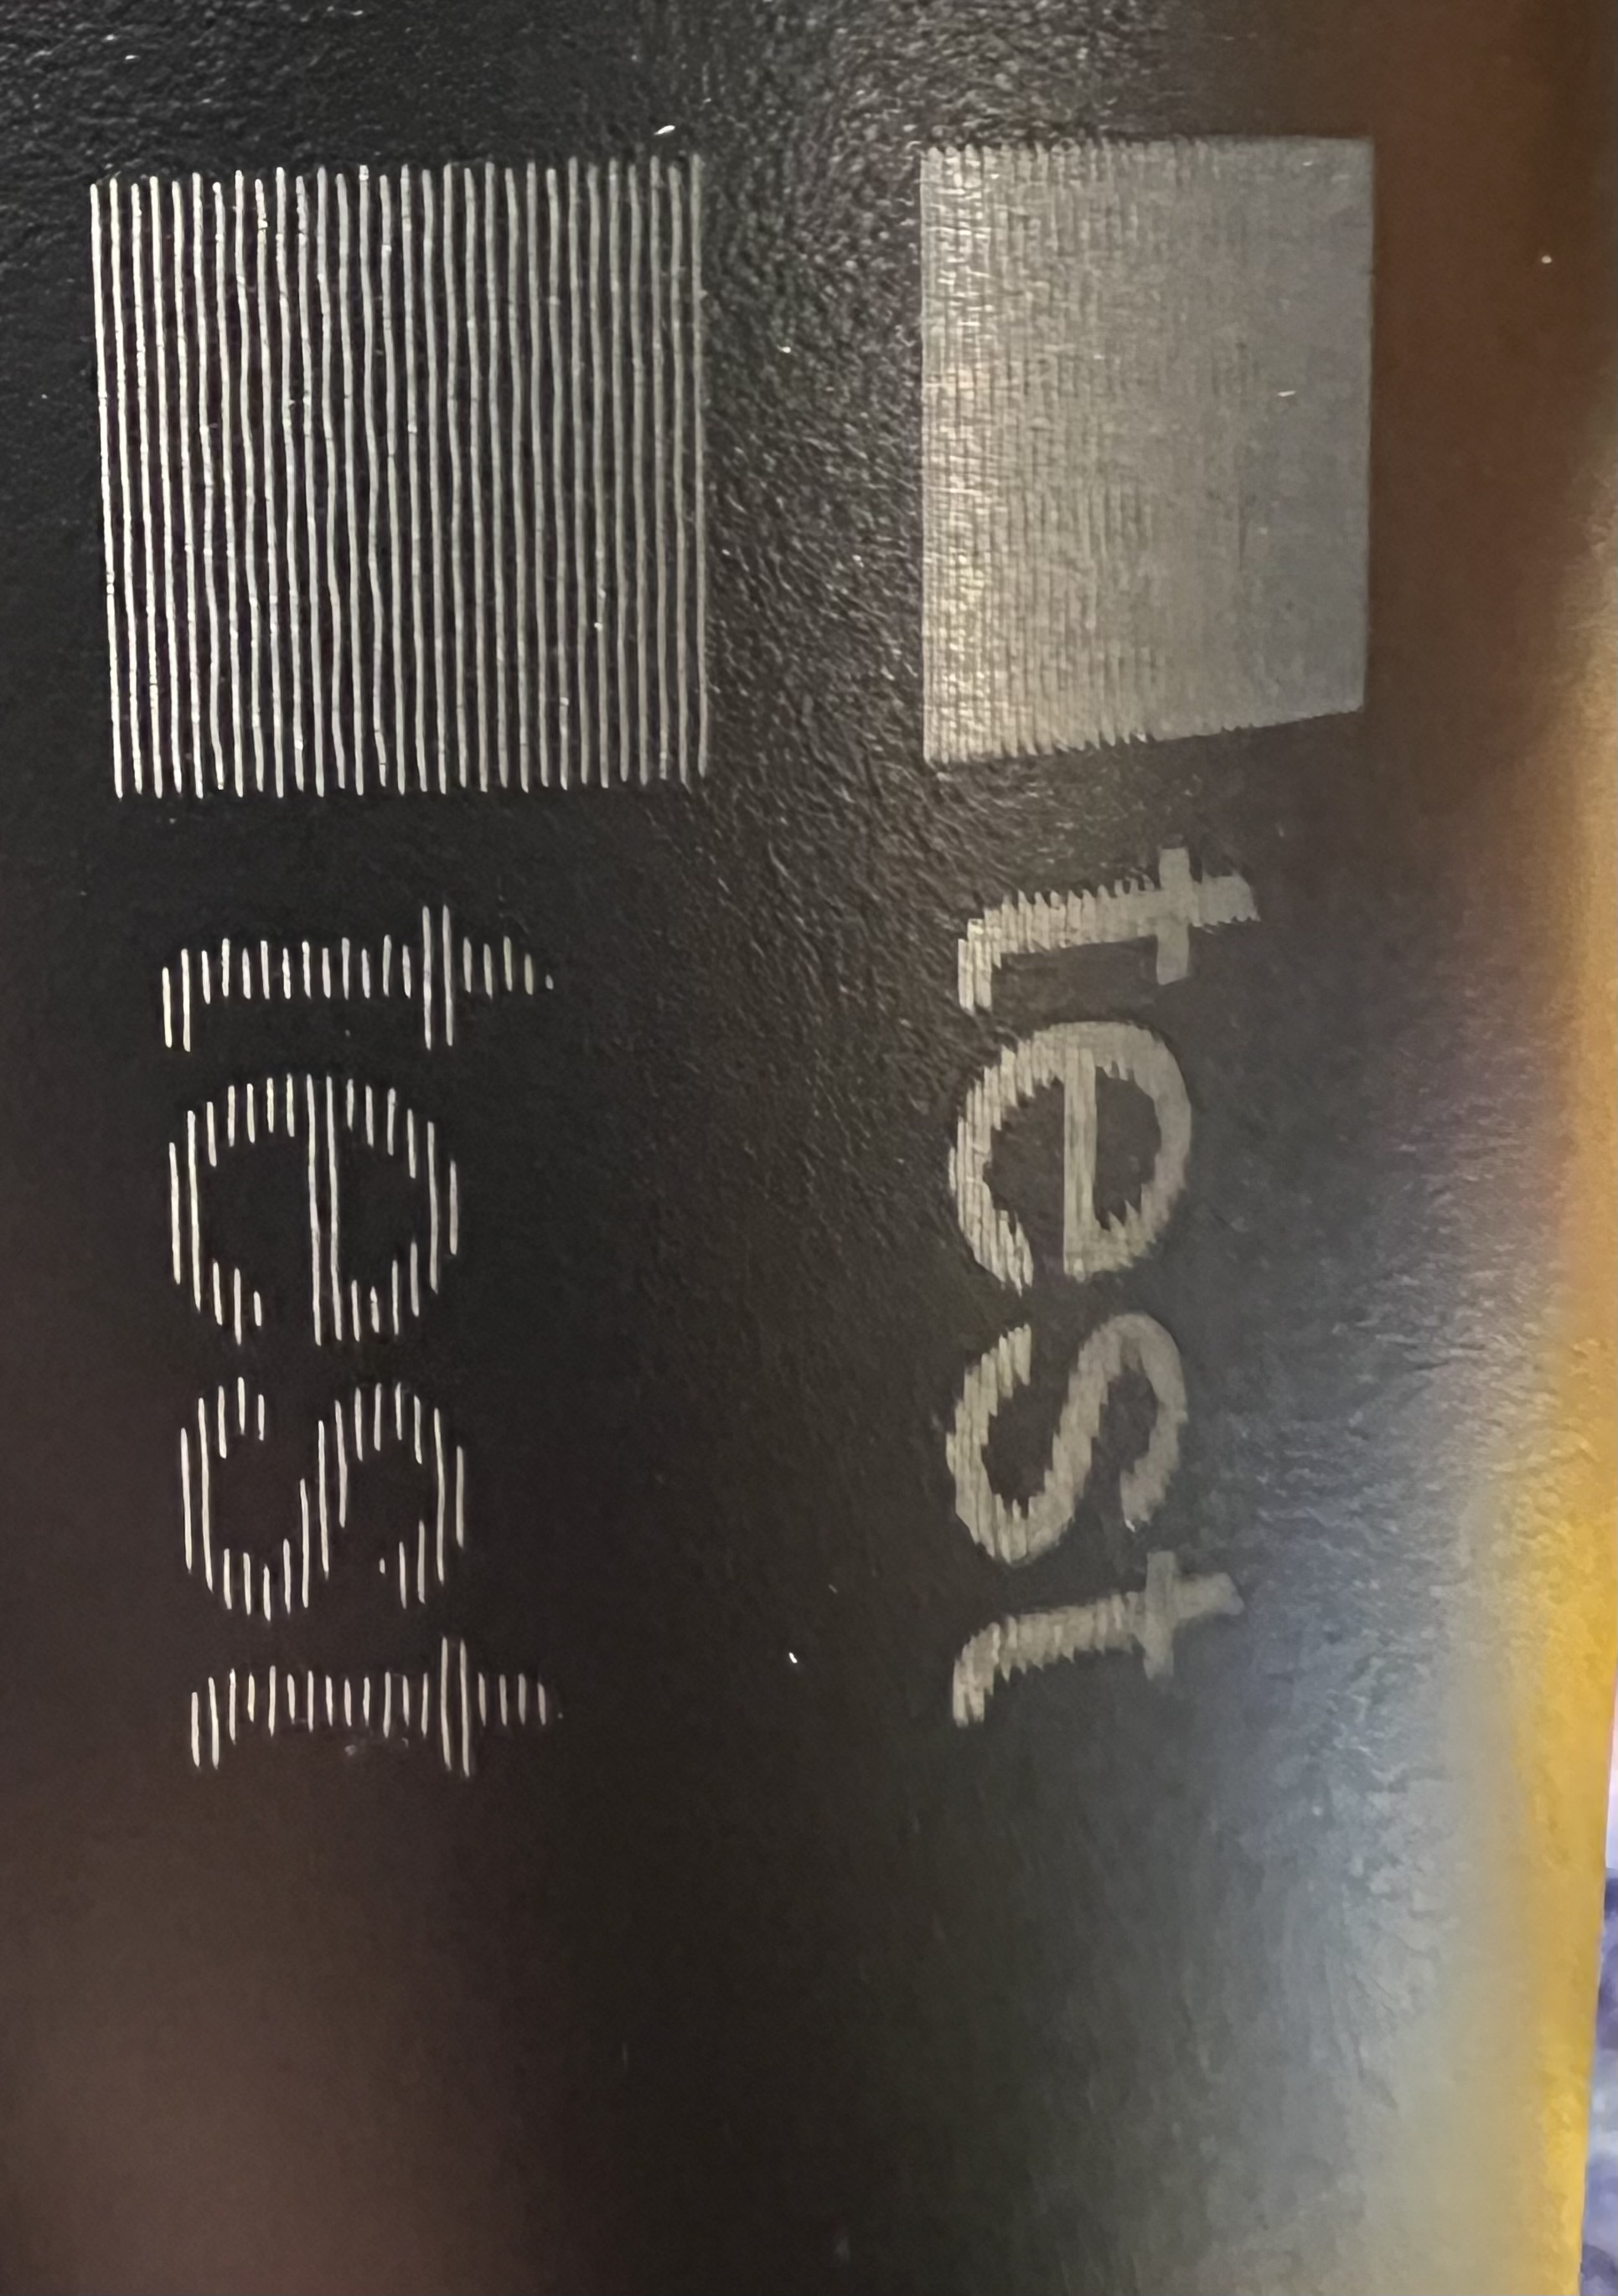
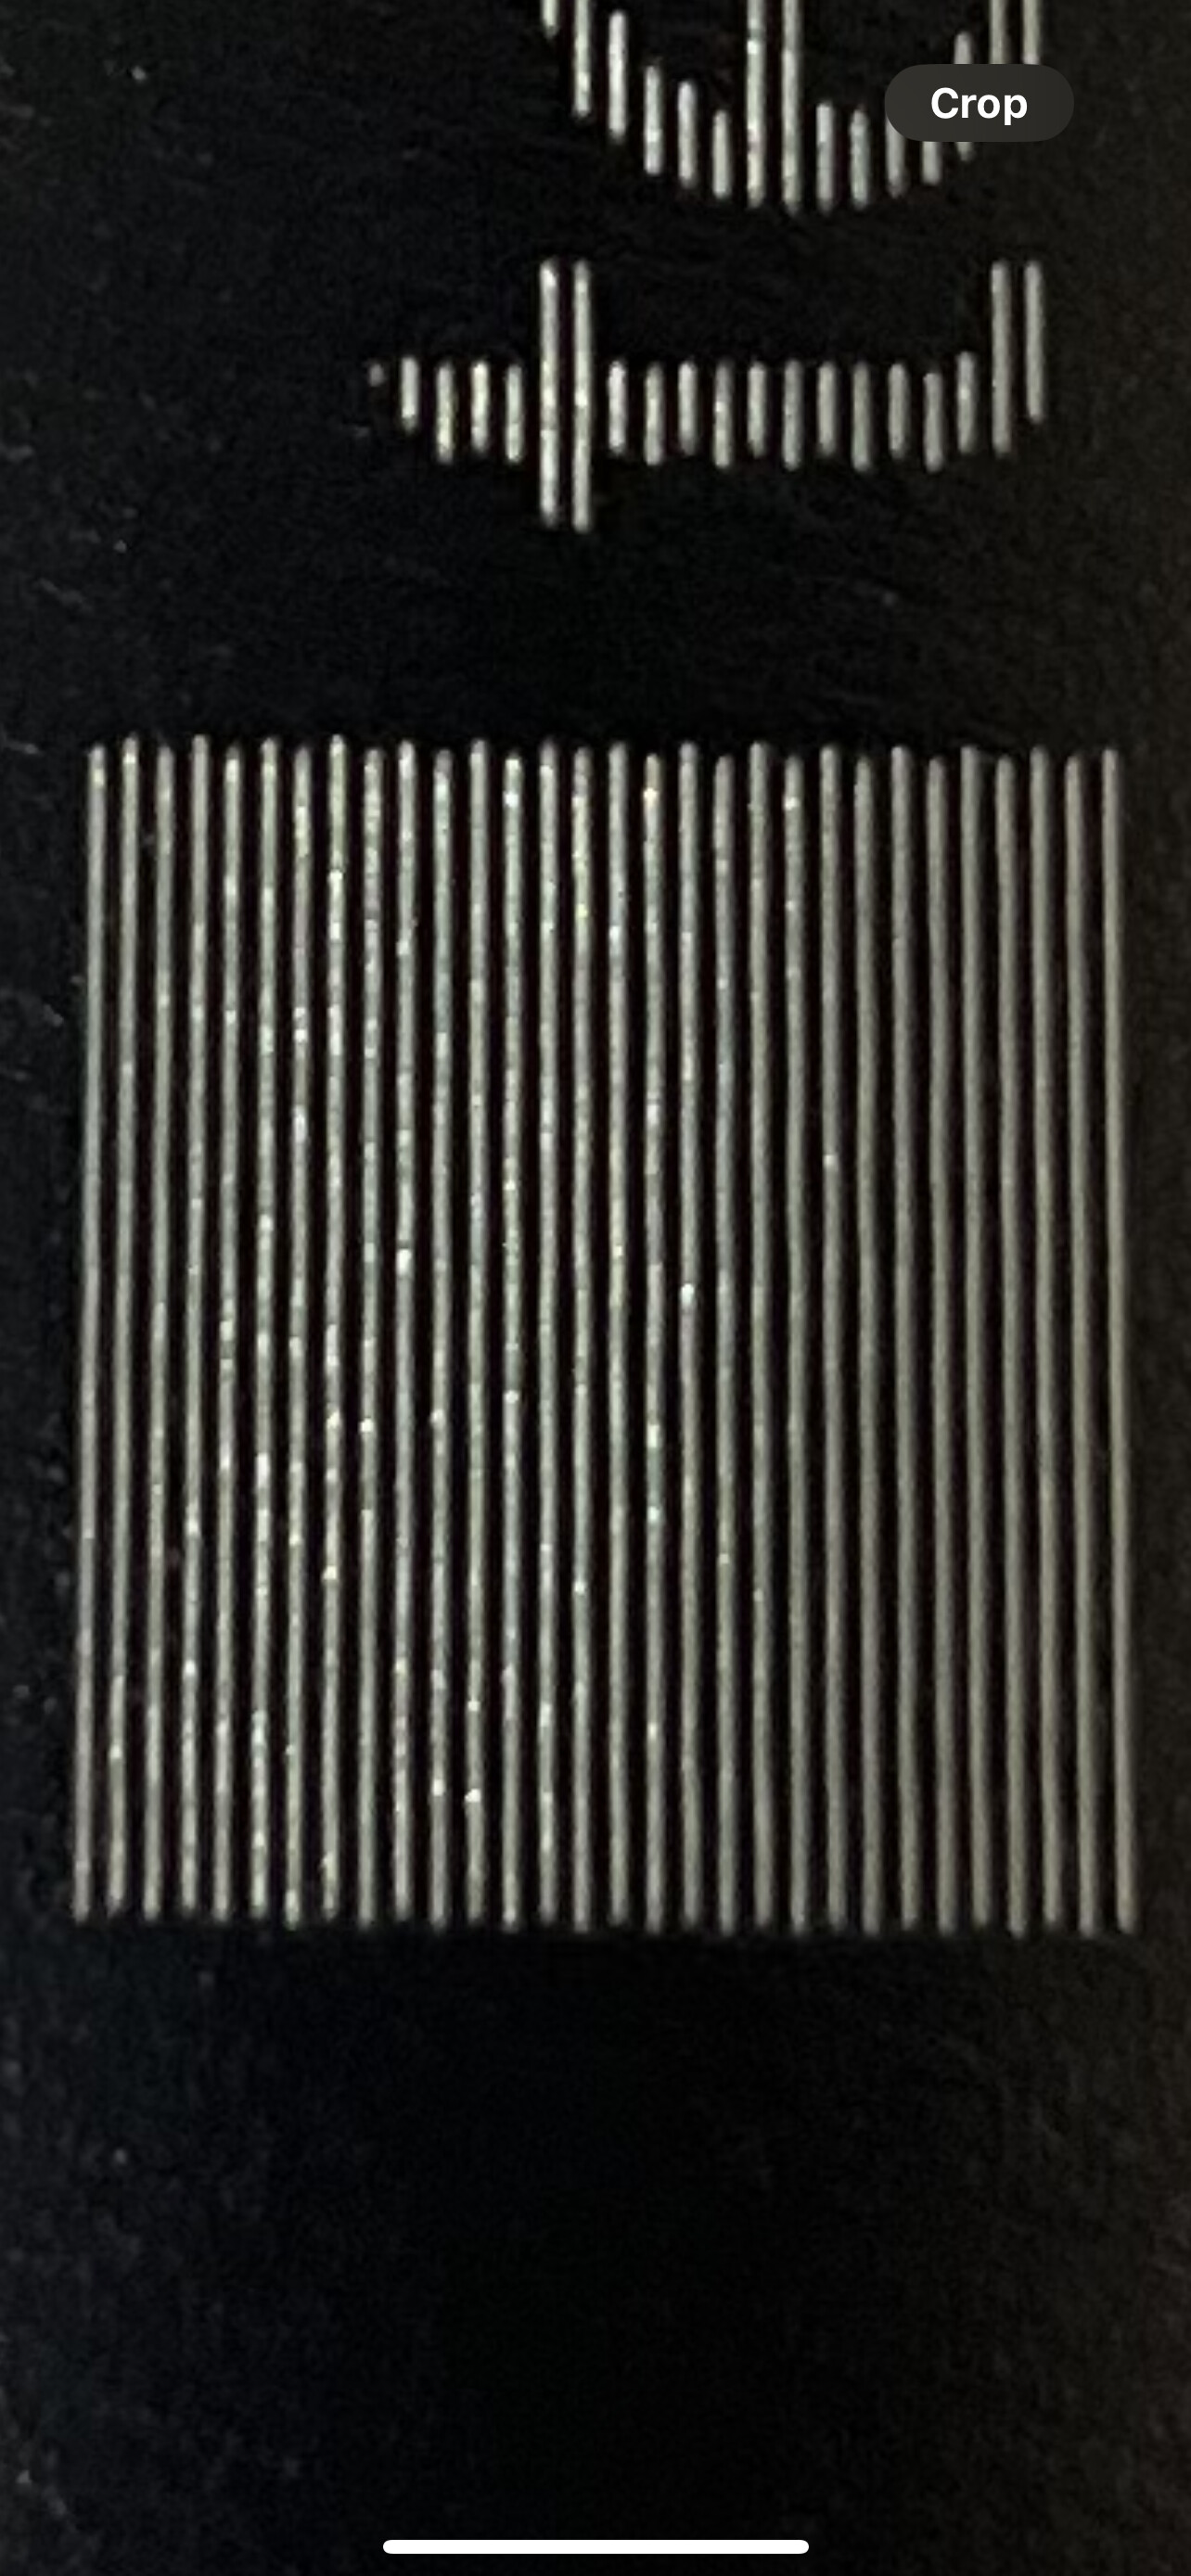
Here is an interval test I just ran. It goes from .1 down to .06mm. Starting from the top at .1 below int text and decreasing. Also, I’ve attached another picture with a higher interval so I can see what’s maybe occurring between the lines and it’s very wavy. Could this be causing that pattern of uneven columns to appear on a smaller line interval? I assume it’s would essentially give a clean engraving on the straight part of the line and then leave some gaps where the wavy part of the line is when engraving on a much smaller(tighter) line interval. Let me know what you guys think of this. Thanks.
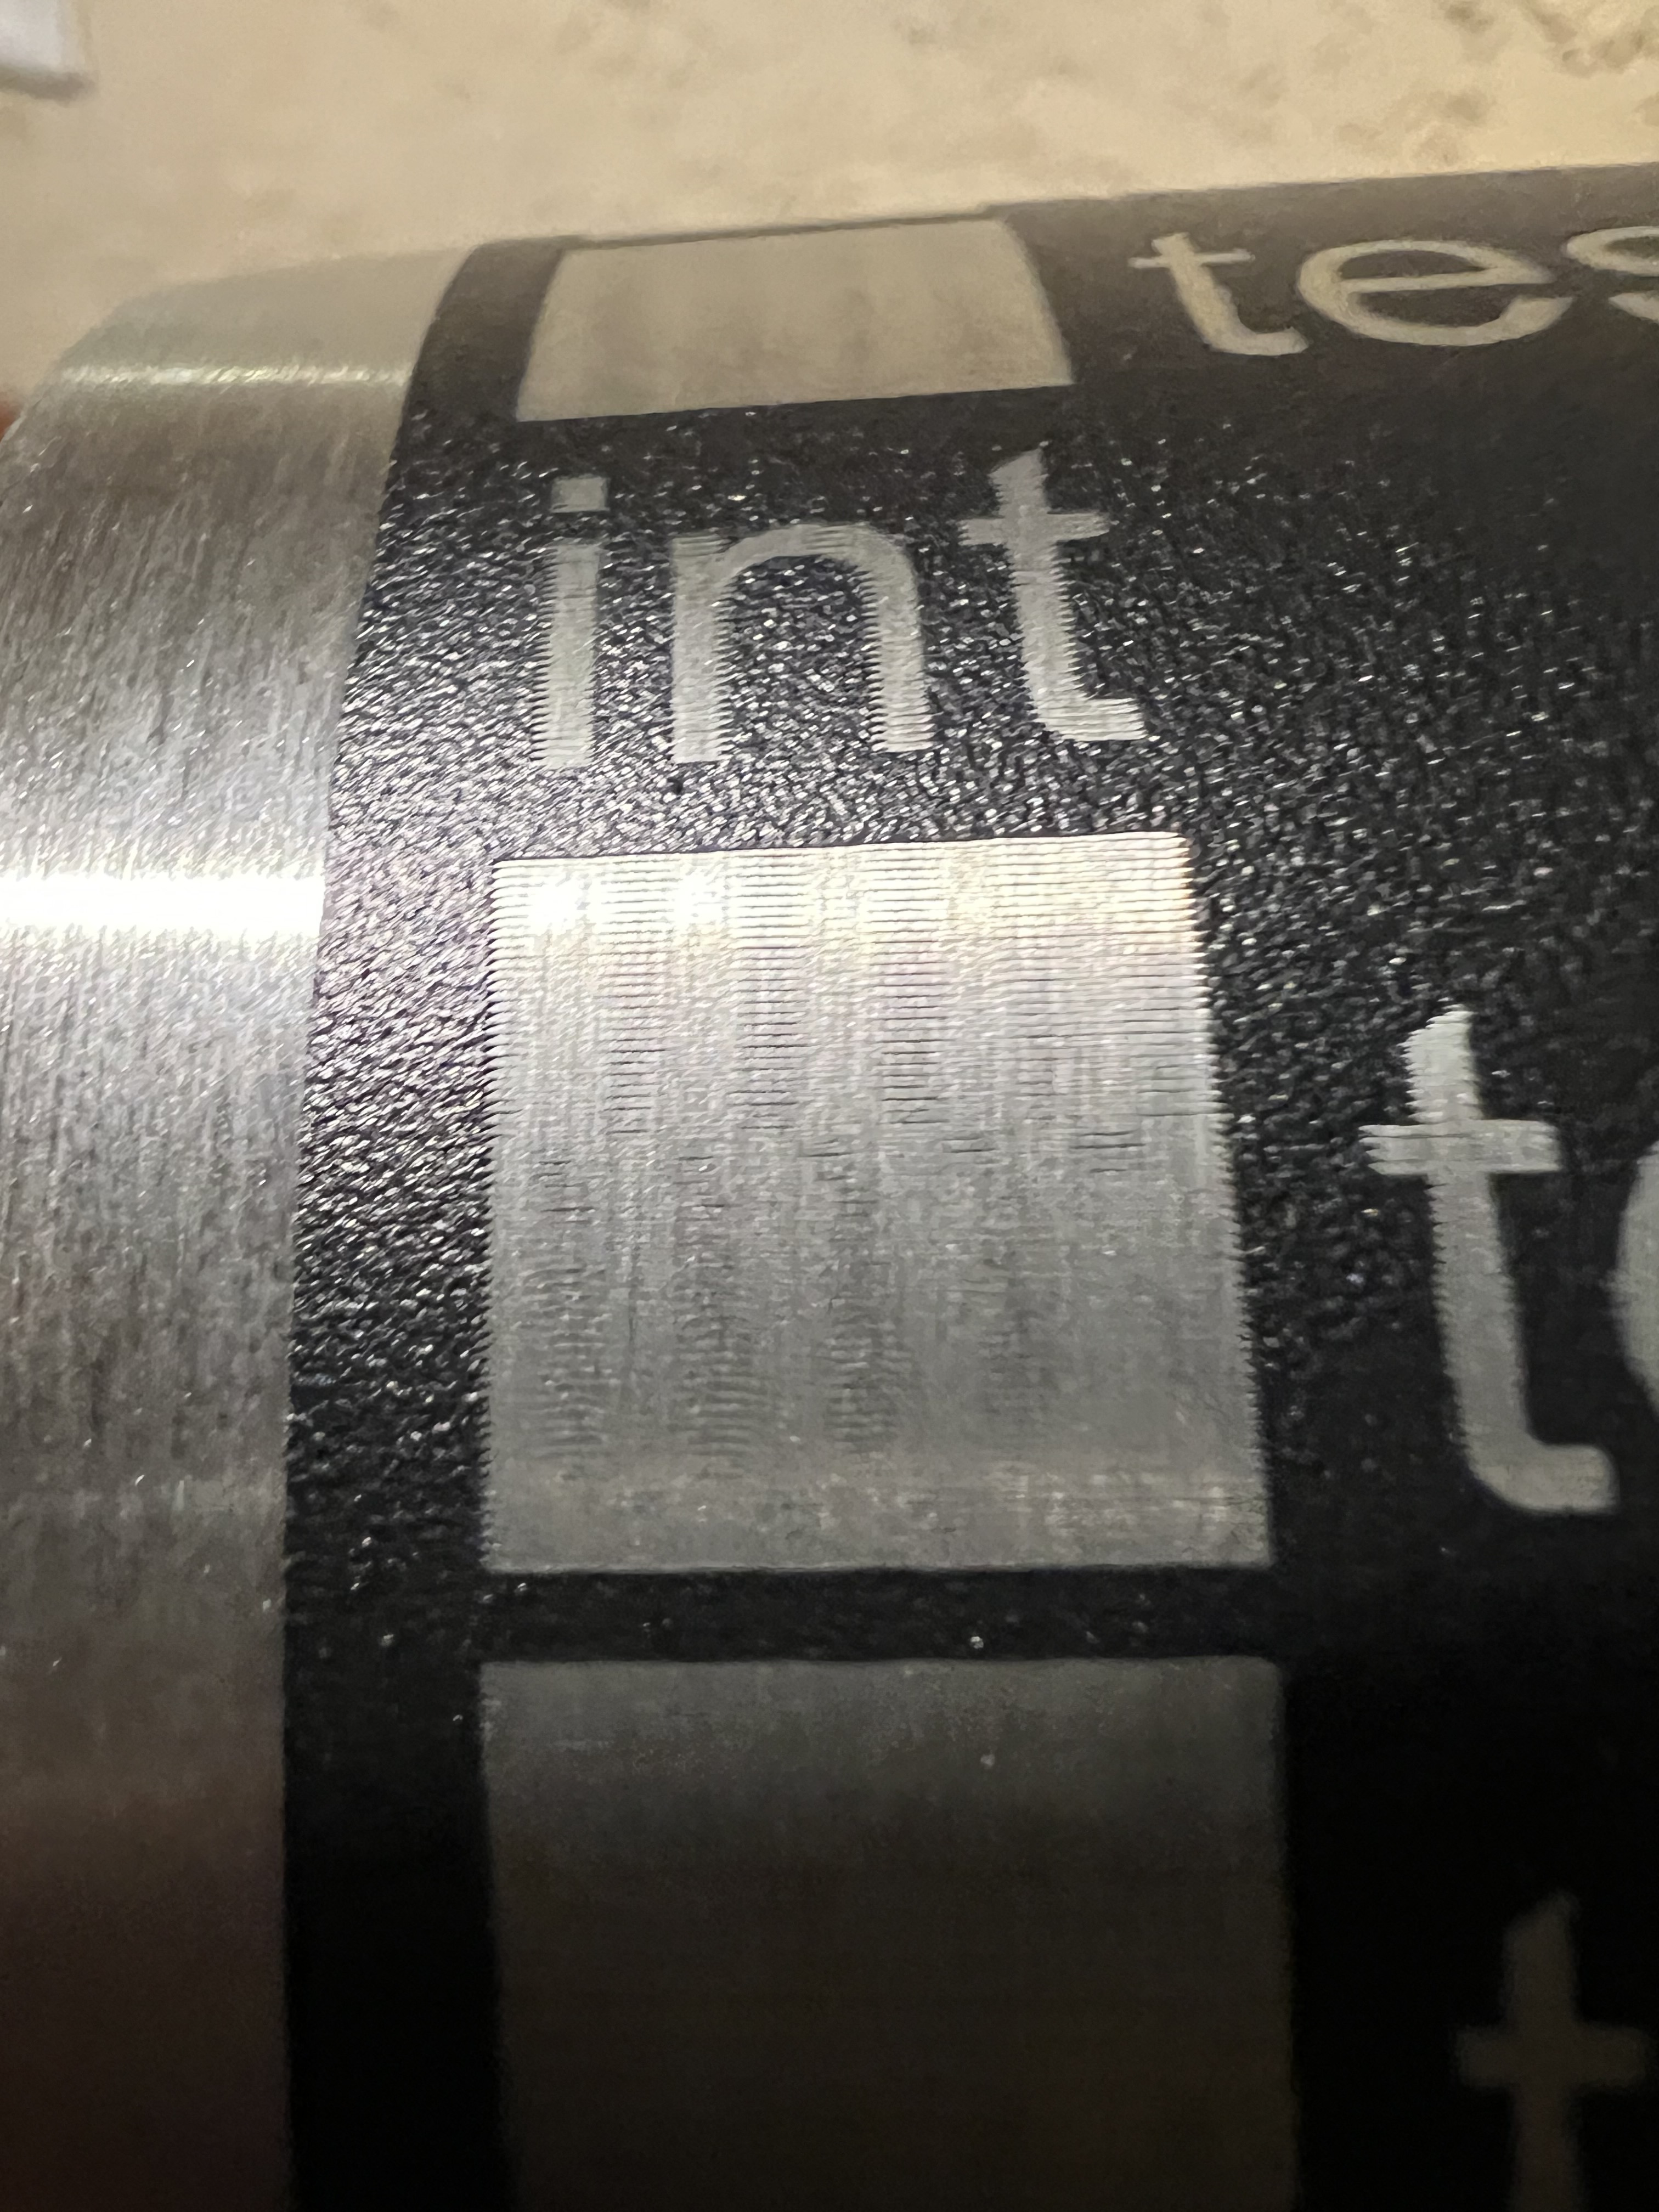

You have a couple issues that may be aggravating this problem.
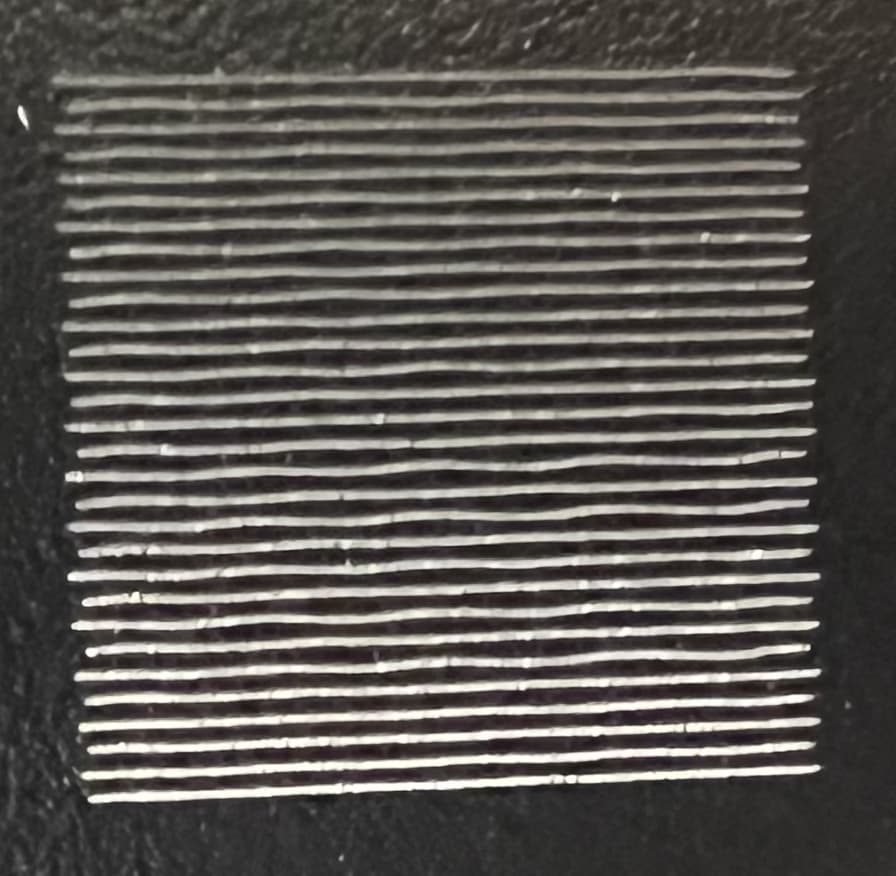
These lines should be straight, no wobbly… This is a mechanical issue, such as belts, which is the most likely
They should start and end at the same edge… this is a scanning offset and can be corrected in lightburn.
Good luck
![]()
3 Likes
That’s what I originally thought too. Maybe it was the belts, however I switched chuck rotaries and this same wavy line result doesn’t occur on the other.
I also ran the same test on a metal card, so I could remove the rotary from the equation, and no wavy lines which means it can’t be a belt issue or speed issue with the x axis bar shaking too much. I just would like to know what about a rotary would cause wavy lines like this. Would it be instability when turning? It’s a chuck rotary. Also, yes I need to fine tune the offset after looking a these squares. Still though, I don’t see how the wavy lines could make the pattern I was getting with the intertwining bars.
The black squares in the first post are from the heat transfer. Change you speeds and you will see a change in squares.
That’s what I thought too but then when I decrease the line interval they disappear and it looks like lines left behind are from the coating of the tumbler. So decreasing line interval gets rid of the coated lines but since the coated lines were originally only in specific spots that look patterned, when the line goes over the spot to again to clear the coating, it also goes over the bare metal that’s already been exposed. This then leaves behind the same look as in the first picture except it’s more of a dark metal haze that seems to occur because again it’s going over certain areas where the coating already was removed. I came to this conclusion because the pattern is inverted when the lines are cleared.
I am new so this may be nothing, do you have your steps per rotation set up? And have you played with overlap? If you are on the y axis leave the hatch at zero. Perhaps change rotary to x axis and see what happens
The rotary may be oscillating, possibly between steps? I’m not well versed on how stepper motors hold a position.
And that assumes the lines are PERFECTLY horizontal relative to the rotary axis. Any motion required could simply be “coarse”… large steps, rough bearings, etc.