Z axis is calibrated. Then manually moved down to 276 in the MOVE tab.
1st cut, c29 Moves table back to the top, 0
I thought this was supposed to be a relative offset.
So then I tried it with the MATERIAL(mm) set to 40 and the table comes up to 40 then cuts. So one has to measure the top of the material to the head when LB doesn’t need to know this. It should just accept my position and move down as asked.
Am I making sense?
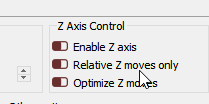
You need to enable “Relative Z Moves” in the device settings. Ruida doesn’t actually accept relative moves during a job, so the software reads the laser height when you start and makes all moves relative to that recorded value.
There isn’t a “Shape Properties” value, there are several, so I’m going to assume you mean power scale, which scales power in the same way that grayscale does, as a ramp between min power and max power. Most likely, you’ve set them both the same.
Ok, again, Power Scale is a “slider” between Min Power and Max Power.
If you set Power Scale to 0, you’re going 0 percent of the way from Min Power to Max Power. If Min Power and Max Power are identical, nothing you set in Power Scale will affect the output.
It works internally using the commands Ruida uses for grayscale to scale power between min & max. It works fine on lines too, you just need to set your power values appropriately. Any engraving, image, or cut will work with it, if you set Min & Max differently on the layer.
So I applied to just one line.
What would I expect here? I don’t see any difference in the cut except at the ends as usual. If I set min power to 0 then nothing shows up. I really don’t get this one.PowerScale.lbrn (2.1 KB)
I would expect the actual output power of that to be 5% of the way from 10 to 80. (13.5%) If you make a few of them, and set the power scale differently, it might be more visible.
Taking a different tack here, what are you trying to accomplish with this?
I was trying to accomplish dialing in a new focal length lens and made a bunch of lines to cut at Z offsets. The power was too much so I was trying to dial it down universally. When that didn’t work I was just trying to figure out why.
Will the max power part of the cuts then be that percentage? I’ll test more.
Well, I knew about that Focus Test but was trying to implement the Z-axis offset so that I could make auto depth adjustments on my now 104 a Layer piece I’m about to cut.
Much easier with a 2.5 in lens but interestingly I couldn’t really see the best cuts as the range is several mm or more. So I was taking a little off the Power Scale % to get fainter lines on ALL my layers as I backed the table down.
Turns out I can only cut 3-5 layers without excessive charring so with the dept range on this lens I’ll just adjust ahead of each cut group.