It looks like a “missing” tooth in the timing belt, or that the axis is skipping somehow. Can you drive a large square at different speeds without it happening?
I have had the laser mirrors setup by Dominic at Smoke and Mirrors. Unfortunately at the time Dominic visited the Z-Axis table was broken. Now repaired I am trying to calibrate the laser and get everything working.
The laser is fitted with Hybrid Servos and has the RUiDA LFS-ANM-T43-V2 non-metal distance controller. I am not sure if this has any bearing on this issue.
I have checked the teeth on the timing belts and all seem okay
I reconstructed the Z-Axis table and this is now 100% stable and accurate. The machine itself has been level using a digital spirit level and then plumbed with a laser level so I know these are well within any tolerances.
The lens I had an issue with - it was upside down and I am lucky I purchased a removal tool from Cloudray so managed to remove it, clean it, and secure it.
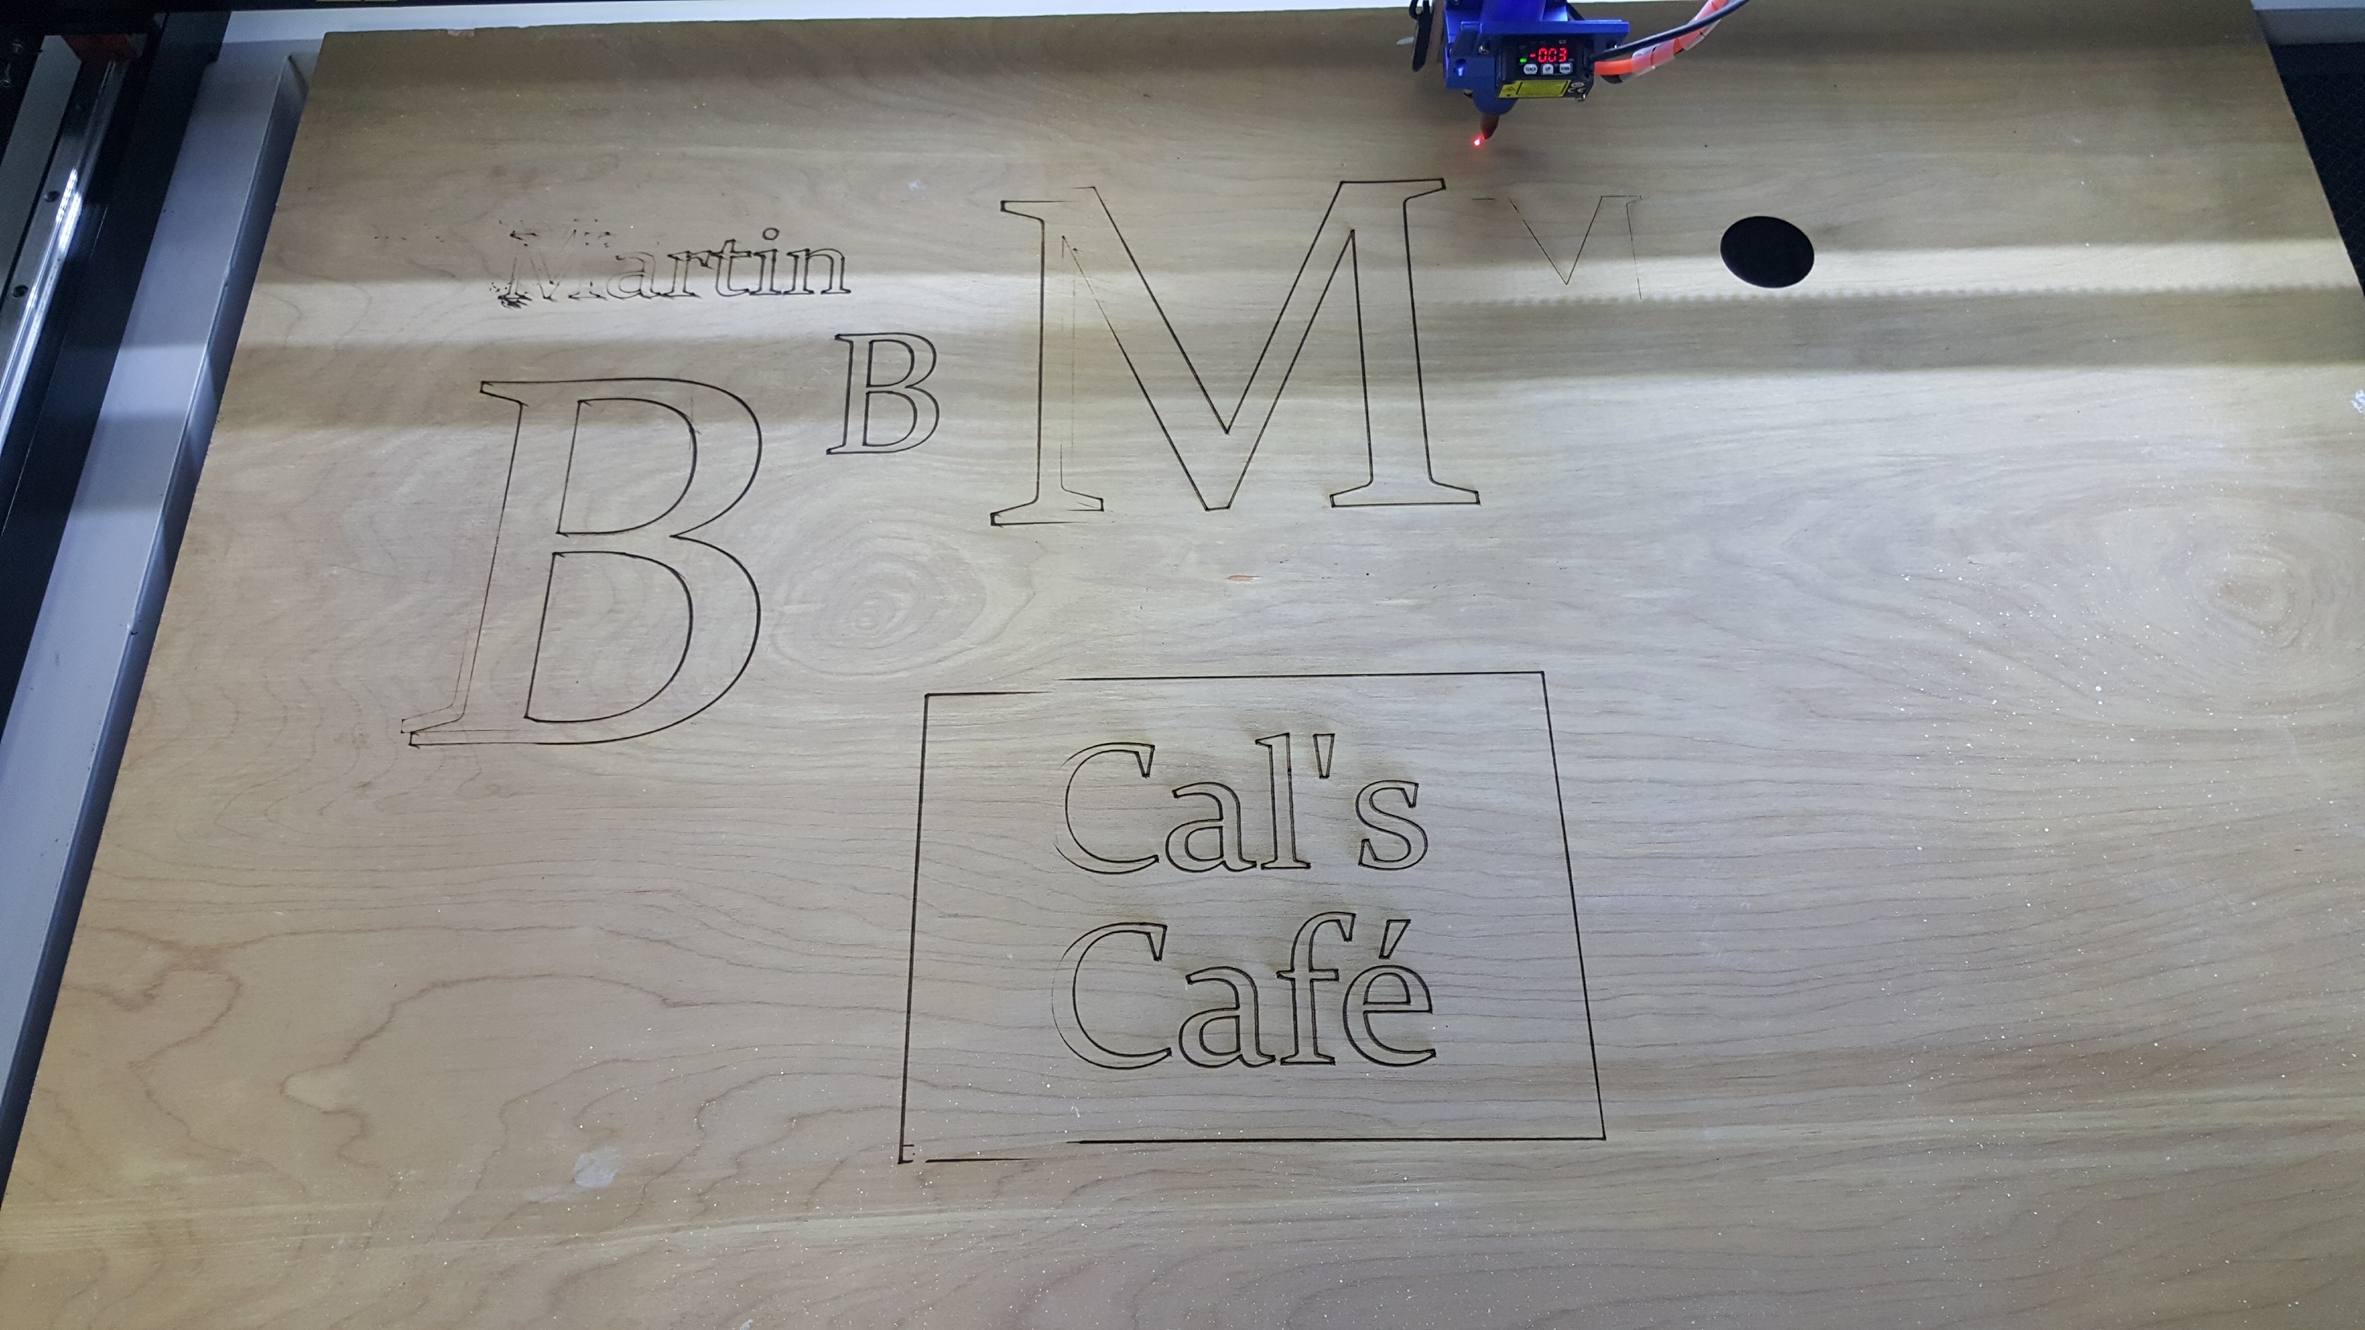
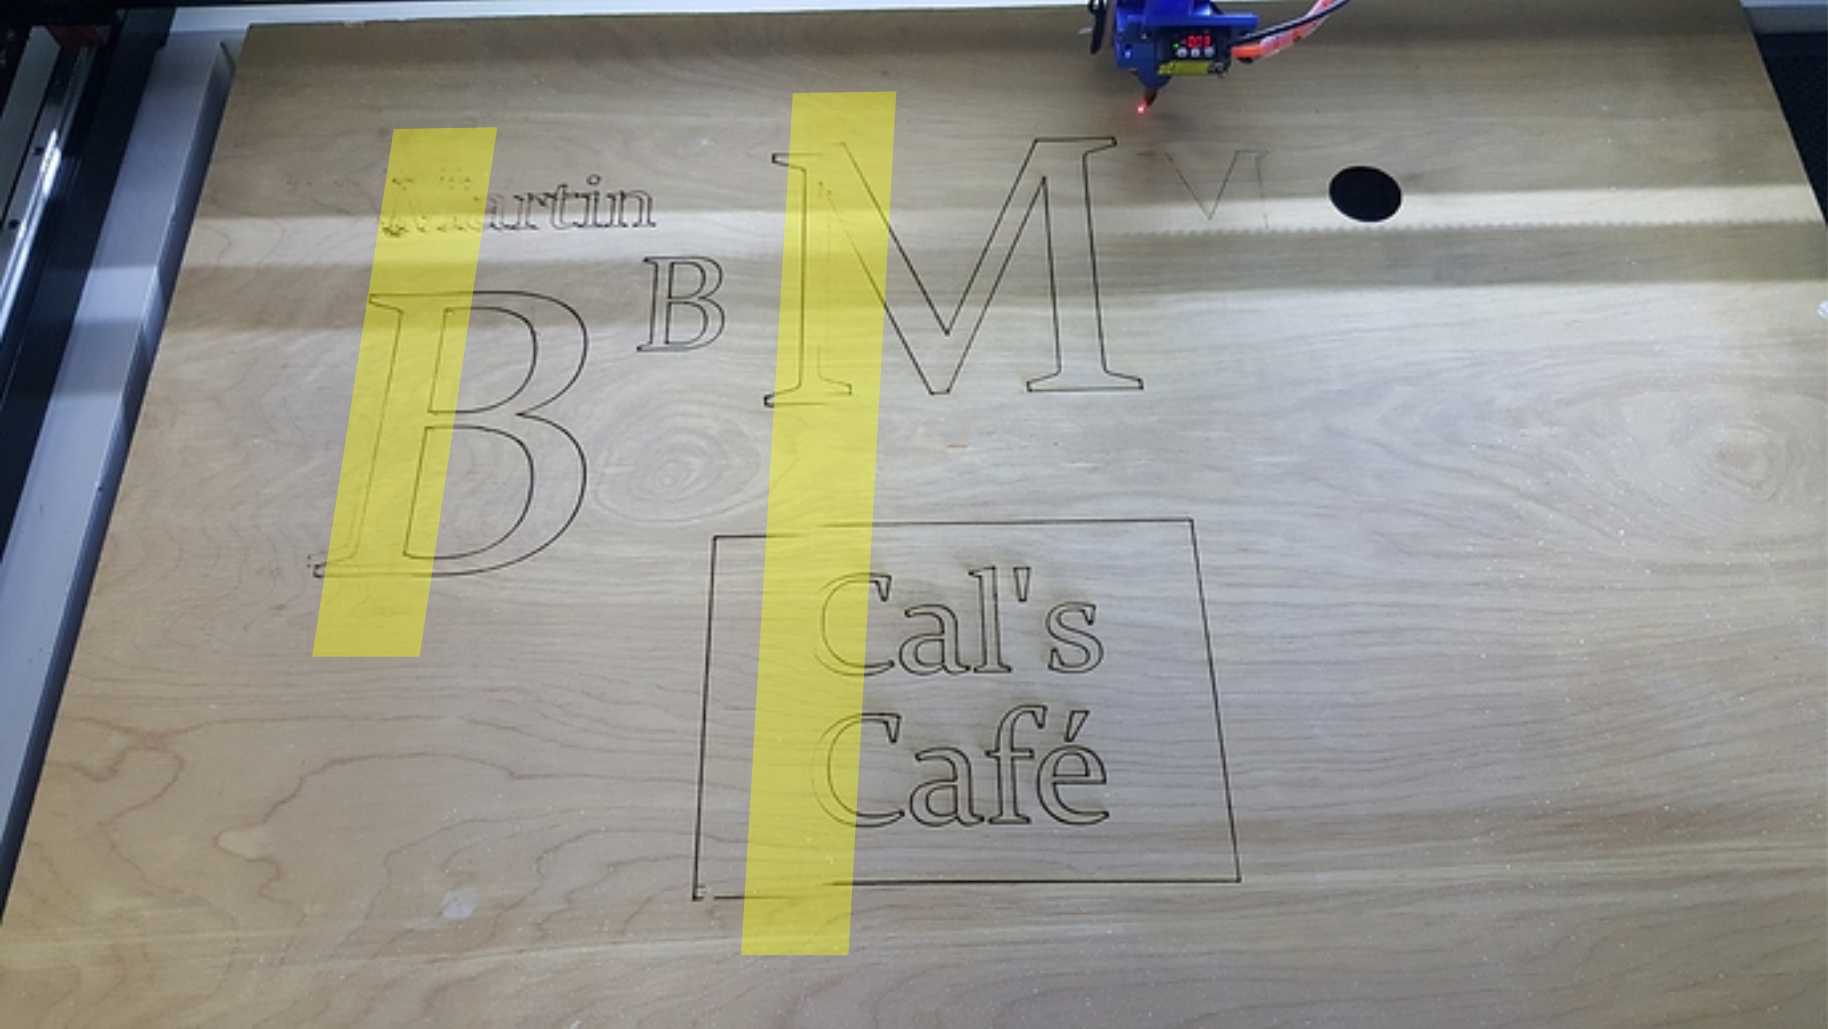
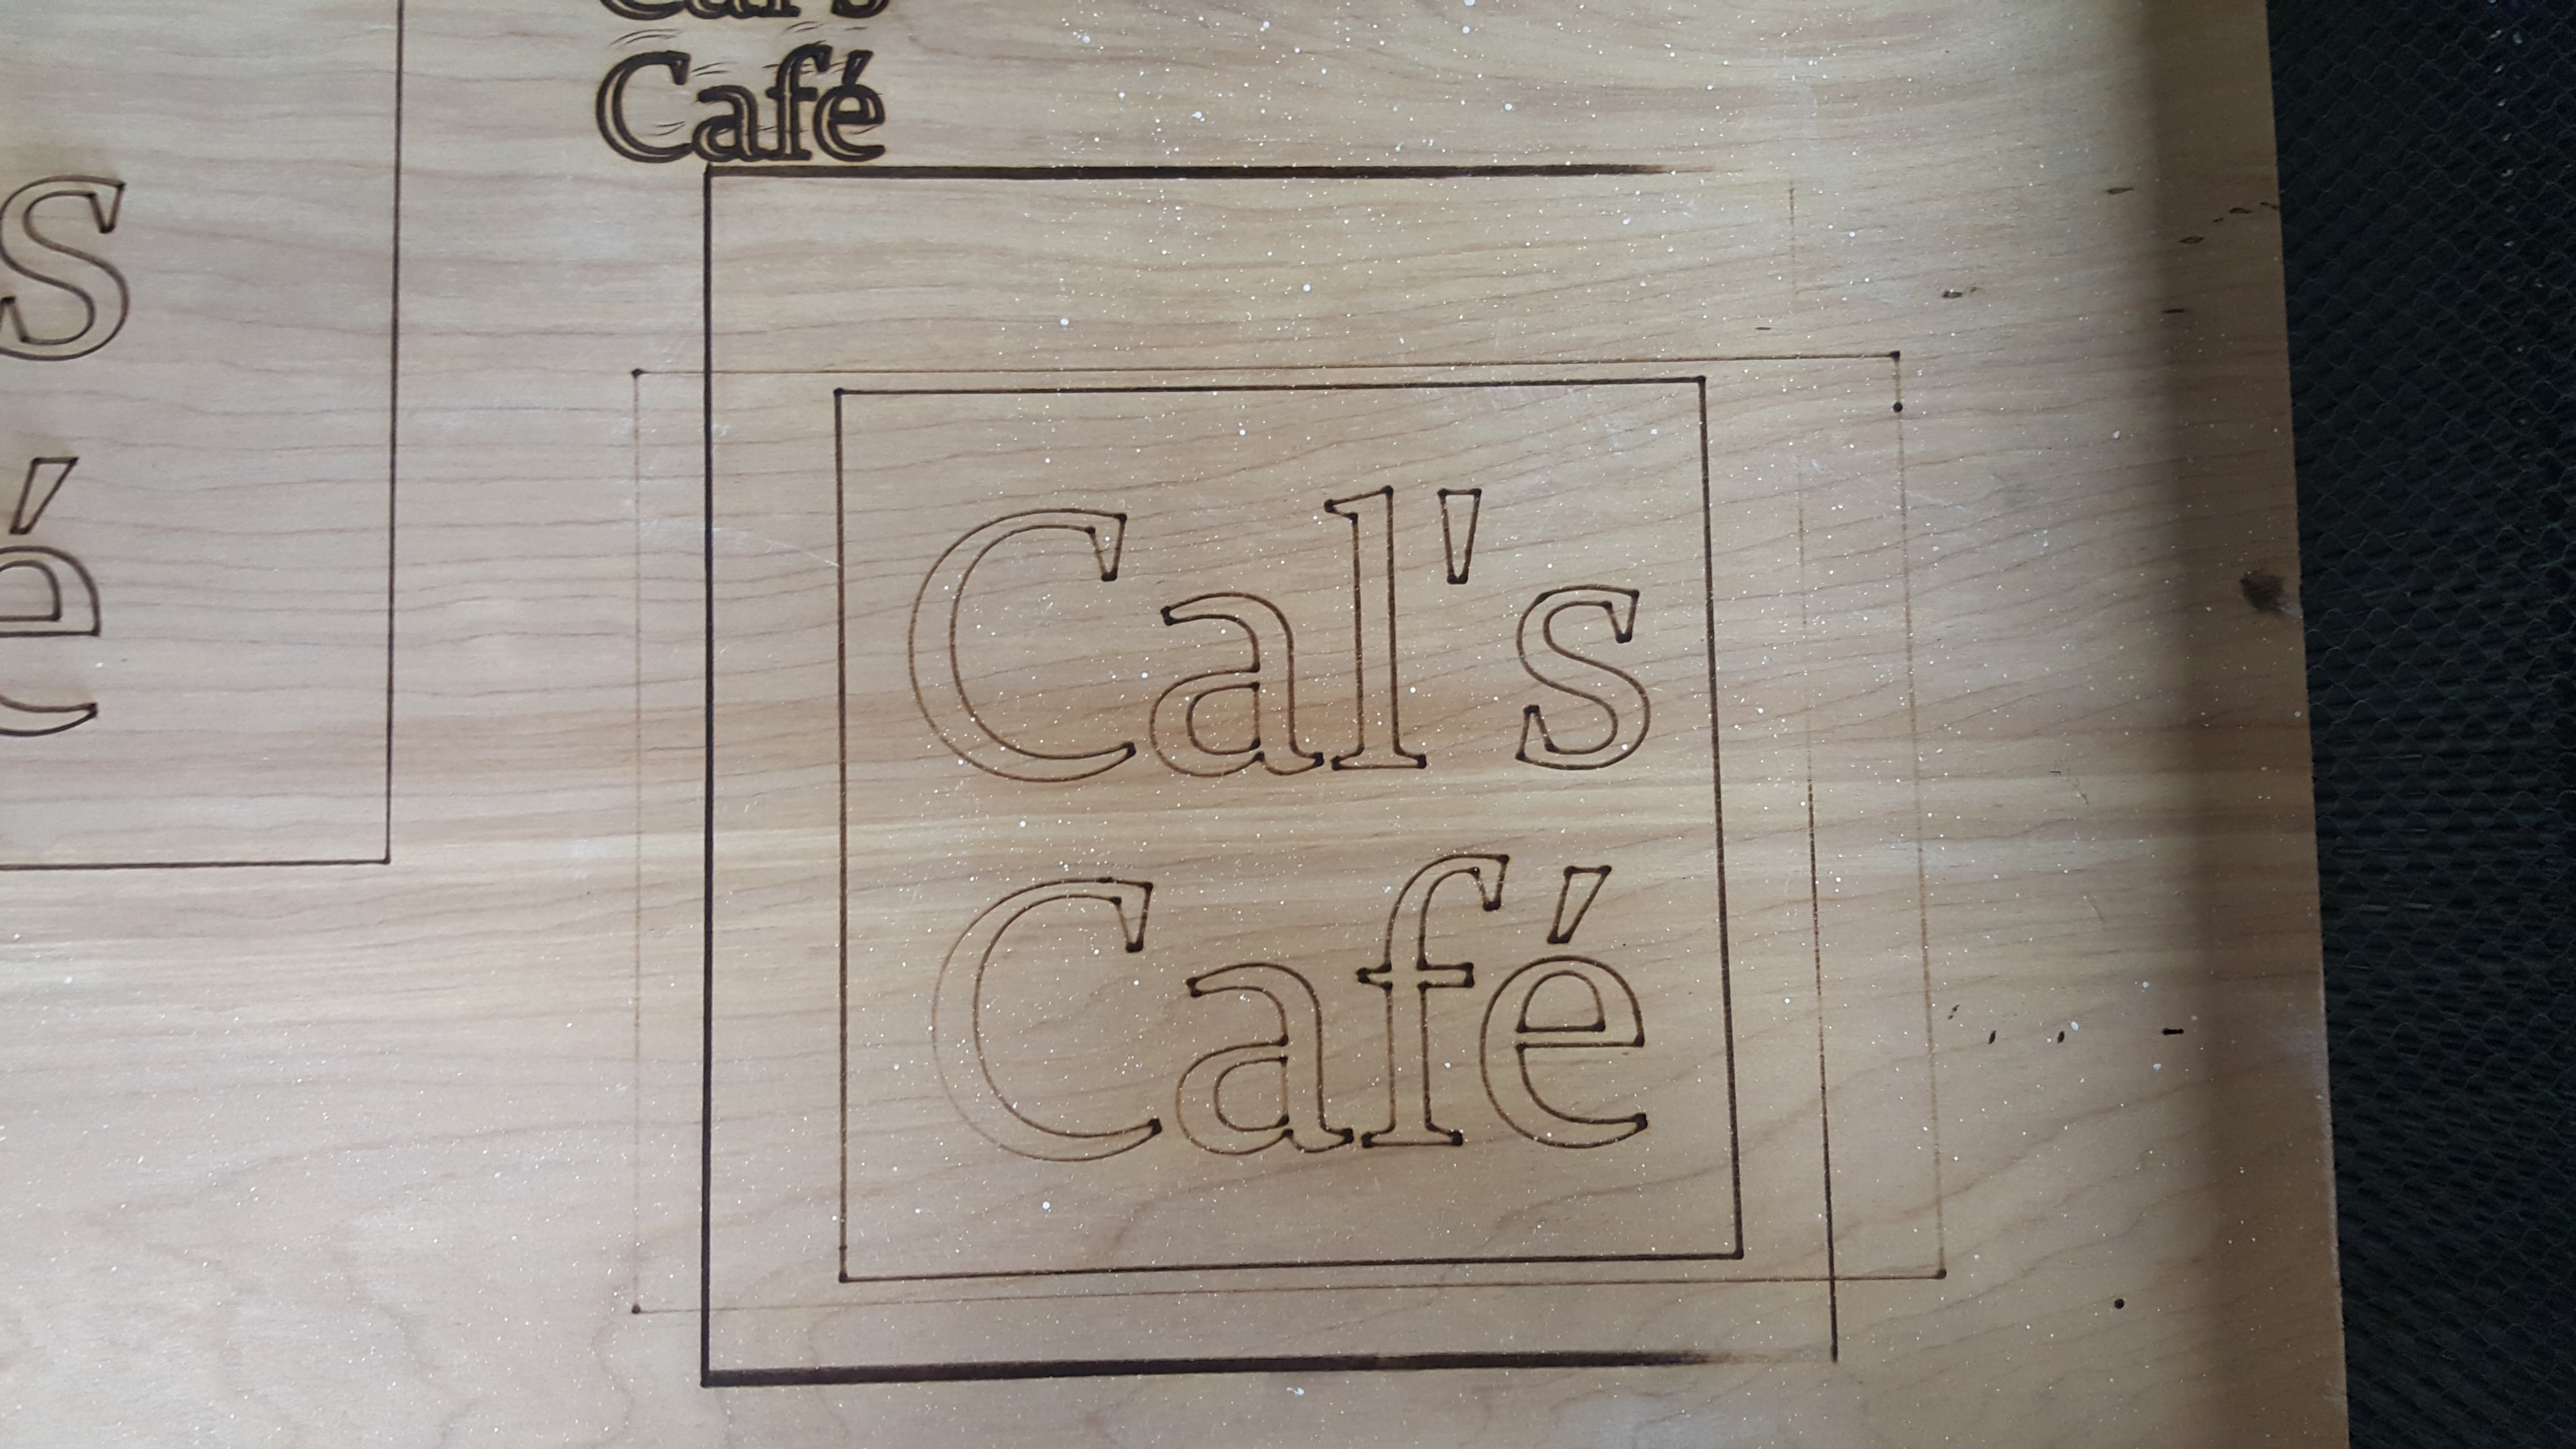
So I have adjusted ‘played around’ with Mirror 3 because I have noticed the laser beam spot does not seem to drive straight down at 90 degrees but off centre (see video https://flic.kr/p/2koDobJ ). Have no idea why this is happening and my adjustments have made no improvement. The square (see image) now has the issue on the right side and there is definitely something wrong with the laser ‘spot’ since it is now broader along the bottom and top.
mysterious, but I also think your laser beam is very wide at the bottom, or is it misleading in the photo? in the top square the lines do not seem so thick.
… and of course you have checked the lens itself, no stains or defects on the edge either … and it is not loose…
Martin, could it be reflections from the inside of your nozzle? Can you do a focus test, lowest and highest point of your Z (bet) to see if the two points hit the same spot?
Yes, very possible since the nozzle is polished metal. The spot ‘pulse’ is very clean now since I changed the lens (and have installed it the correct way up - flat side pointing down to the work surface)
Can you explain a little more detail about the focus test? The point of the nozzle should be only 8mm away from the work surface - The supplier gave me a bit of acrylic 8mm thick so I have just been setting this 8mm distance.
You need to do a ramp test, it is necessary to determine the exact focal point of just your setup. There are many videos on youtube that explain it better than I can, but it is very simple, you make a line in LightBurn, for example 200 mm. On the laser bed, place a piece of wood at an angle, approx. 20mm in height difference between the ends. Now you burn the line with moderate power and about 800 mm / min or whatever suits your machine best. The point on the line which is the finest indicates your best focus. Measure the distance from this point to the nozzle and you can compare whether the supplied gauge fits or whether you should make a new one.
But, that’s not what I mean when I say that you have to find out if your laser beam breaks in the nozzle, here you have to drive your bet all the way to the bottom, make a shot and raise it to the highest possible and shoot again , here there must be no difference, i.e., they must center both.
it must not happen, the laser beam must go straight through the hole or you lose focus and lots of energy. The nozzle also gets hot and you can ruin your lens.
So I have made adjustments to the Z-Axis as suggested, and this has solved the issue of the ghosting/double impression. I managed to laser engrave some wood, and the result is okay. But I need to have a smaller laser spot since my main aim is laser engraving photos.
From what I now understand the lens, I currently have 101.6 mm should be replaced with a lens such as a 25.4 mm. However, I believe I cannot mount such a lens in the head I currently have. Therefore is it the case I need to change the head, which will enable me to install a 25.4 mm lens?
The distance from mirror 3 to the lens is unimportant? The distance from the lens to the work surface is critical?