A few months ago I bought a Piranha laser cutter (1000x600 bed) that needed a new laser tube. Unfortunately the PSU and Tube were removed by the seller before I saw the unit so I’m stuck on the wiring!
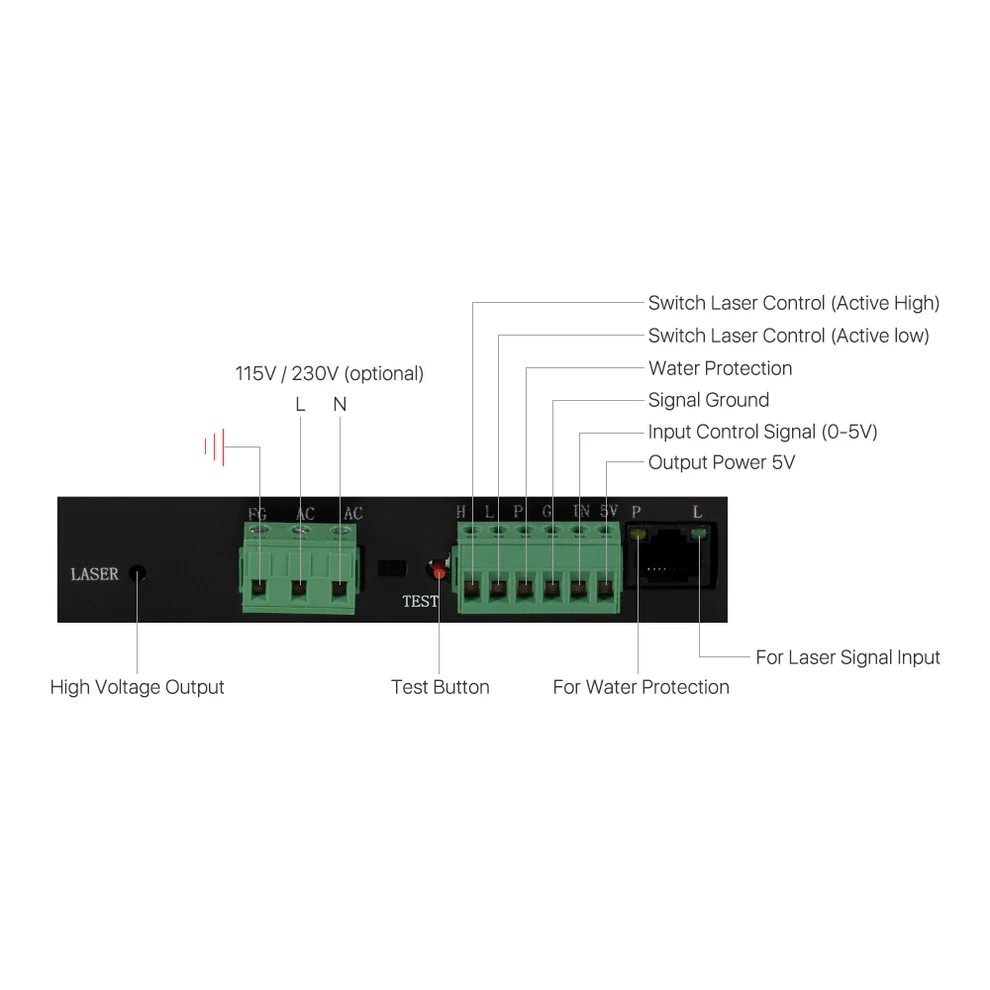
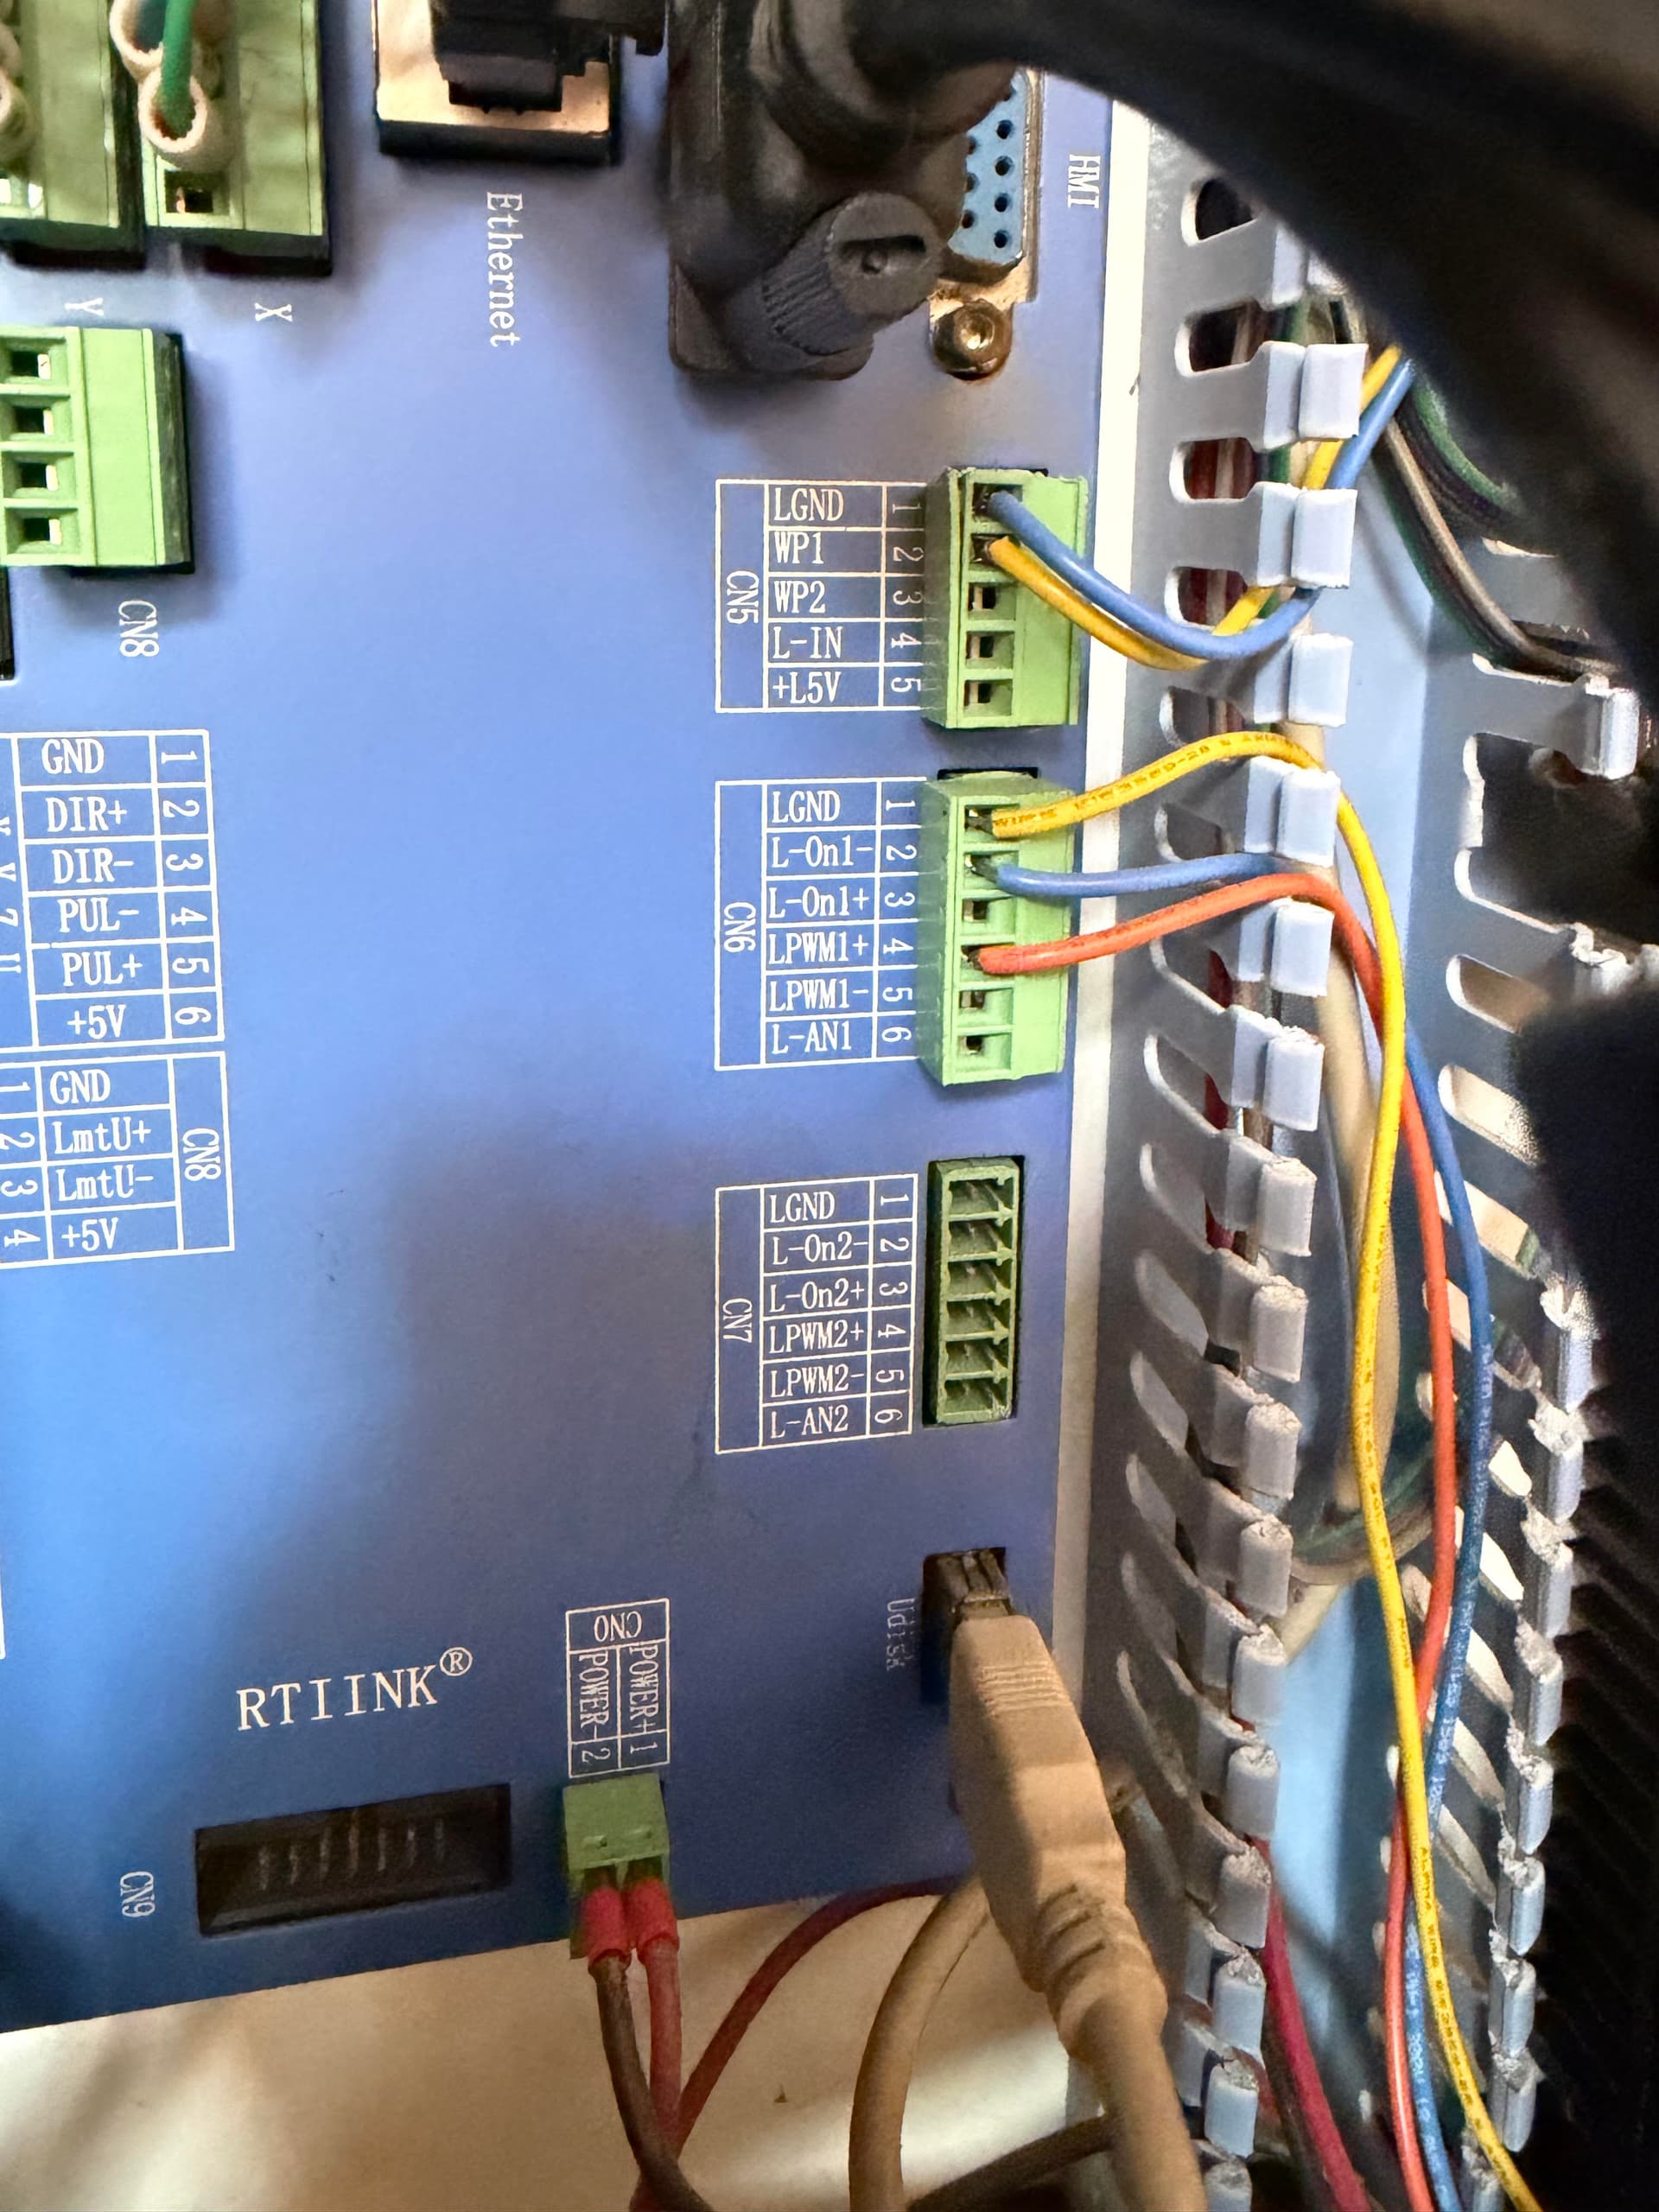
Can anyone confirm which wires I need to connect from the Ruida CN6 panel to the Cloudray M100 PSU?
The water flow switch is apparently connected to the controller at WP1, so jumper P to GND.
Then It Should Just Work™.
Assuming the supply or the machine has a milliammeter, verify that the power supply isn’t overdriving the tube. The current at 50% power should be half of the tube’s rated operating current (not its peak current). If it’s grossly too high (which is likely) or too low (unlikely), adjust the supply’s twiddlepot hidden inside a small circular hole as needed.
Thanks man, I’ll have a go and report back. The PSU comes with an external power reader via the ethernet port in the picture. I assume there’s nothing negative that can really happen from mis-wiring as it’s all under 5v and purely signal based?
Additionally - turns out my Laser has some incorrect branding and is actually a Bodor BCL1006XUF, not sure where the previous owners got the Piranha branding! On the In port, as is it a case that the L-An1 port supports PWM so in theory I could use either? Do you know the pros / cons?
Although the power supply IN terminal will be happy with either of those, the consensus around here suggests using the L-PWM1 output.
At least, I think that’s the case.
Be careful with the nomenclature: although it’s an RJ-45 connector, it is not an Ethernet connection. Cabling it to an actual Ethernet port like the one on the controller or, worse, on a router or PC, will cause heartbreak & confusion.
Just a quick update Ed, wired up as you described - she now fires via the PSU controller as well as the Ruida controller!
Now I have the exciting job of aligning the mirrors. I decided to replace the lens and 3 mirrors so it’ll act as a fresh machine!
That’s a job for a low caffeine part of the day, because you’ll need mellow and careful to get it right.
That external meter surely has a knob on it to reduce the laser power. Crank the knob fully clockwise = no reduction and epoxy it in place so that you will never spend days wondering why the laser doesn’t fire when you haven’t changed anything.
Thanks mate! As you say - it’s set to Max just in case! I’ll 3D print a mount for it as I don’t want it externally on the chance that someone knocks it!