Hi.
I am new to LightBurn and to lasers in general.
I have a Gweike G2 20W fiber laser. When I bought it, it was only supported by their Glaser program but in the meantime it became compatible with LightBurn as well.
I haven’t been using the laser up until now because of some personal/health issues.
Anyway, the instructions for connecting it with LB are saying we should enter the same parameters that we were supposed to enter into a Glaser program (they came with the machine, on a USB stick).
And I see that it works for the others (on the Facebook Gweike group).
But it doesn’t work for me.
When engraving using LB, the engraved objects come out stretched/deformed. I checked the parameters hundred times, they are correct.
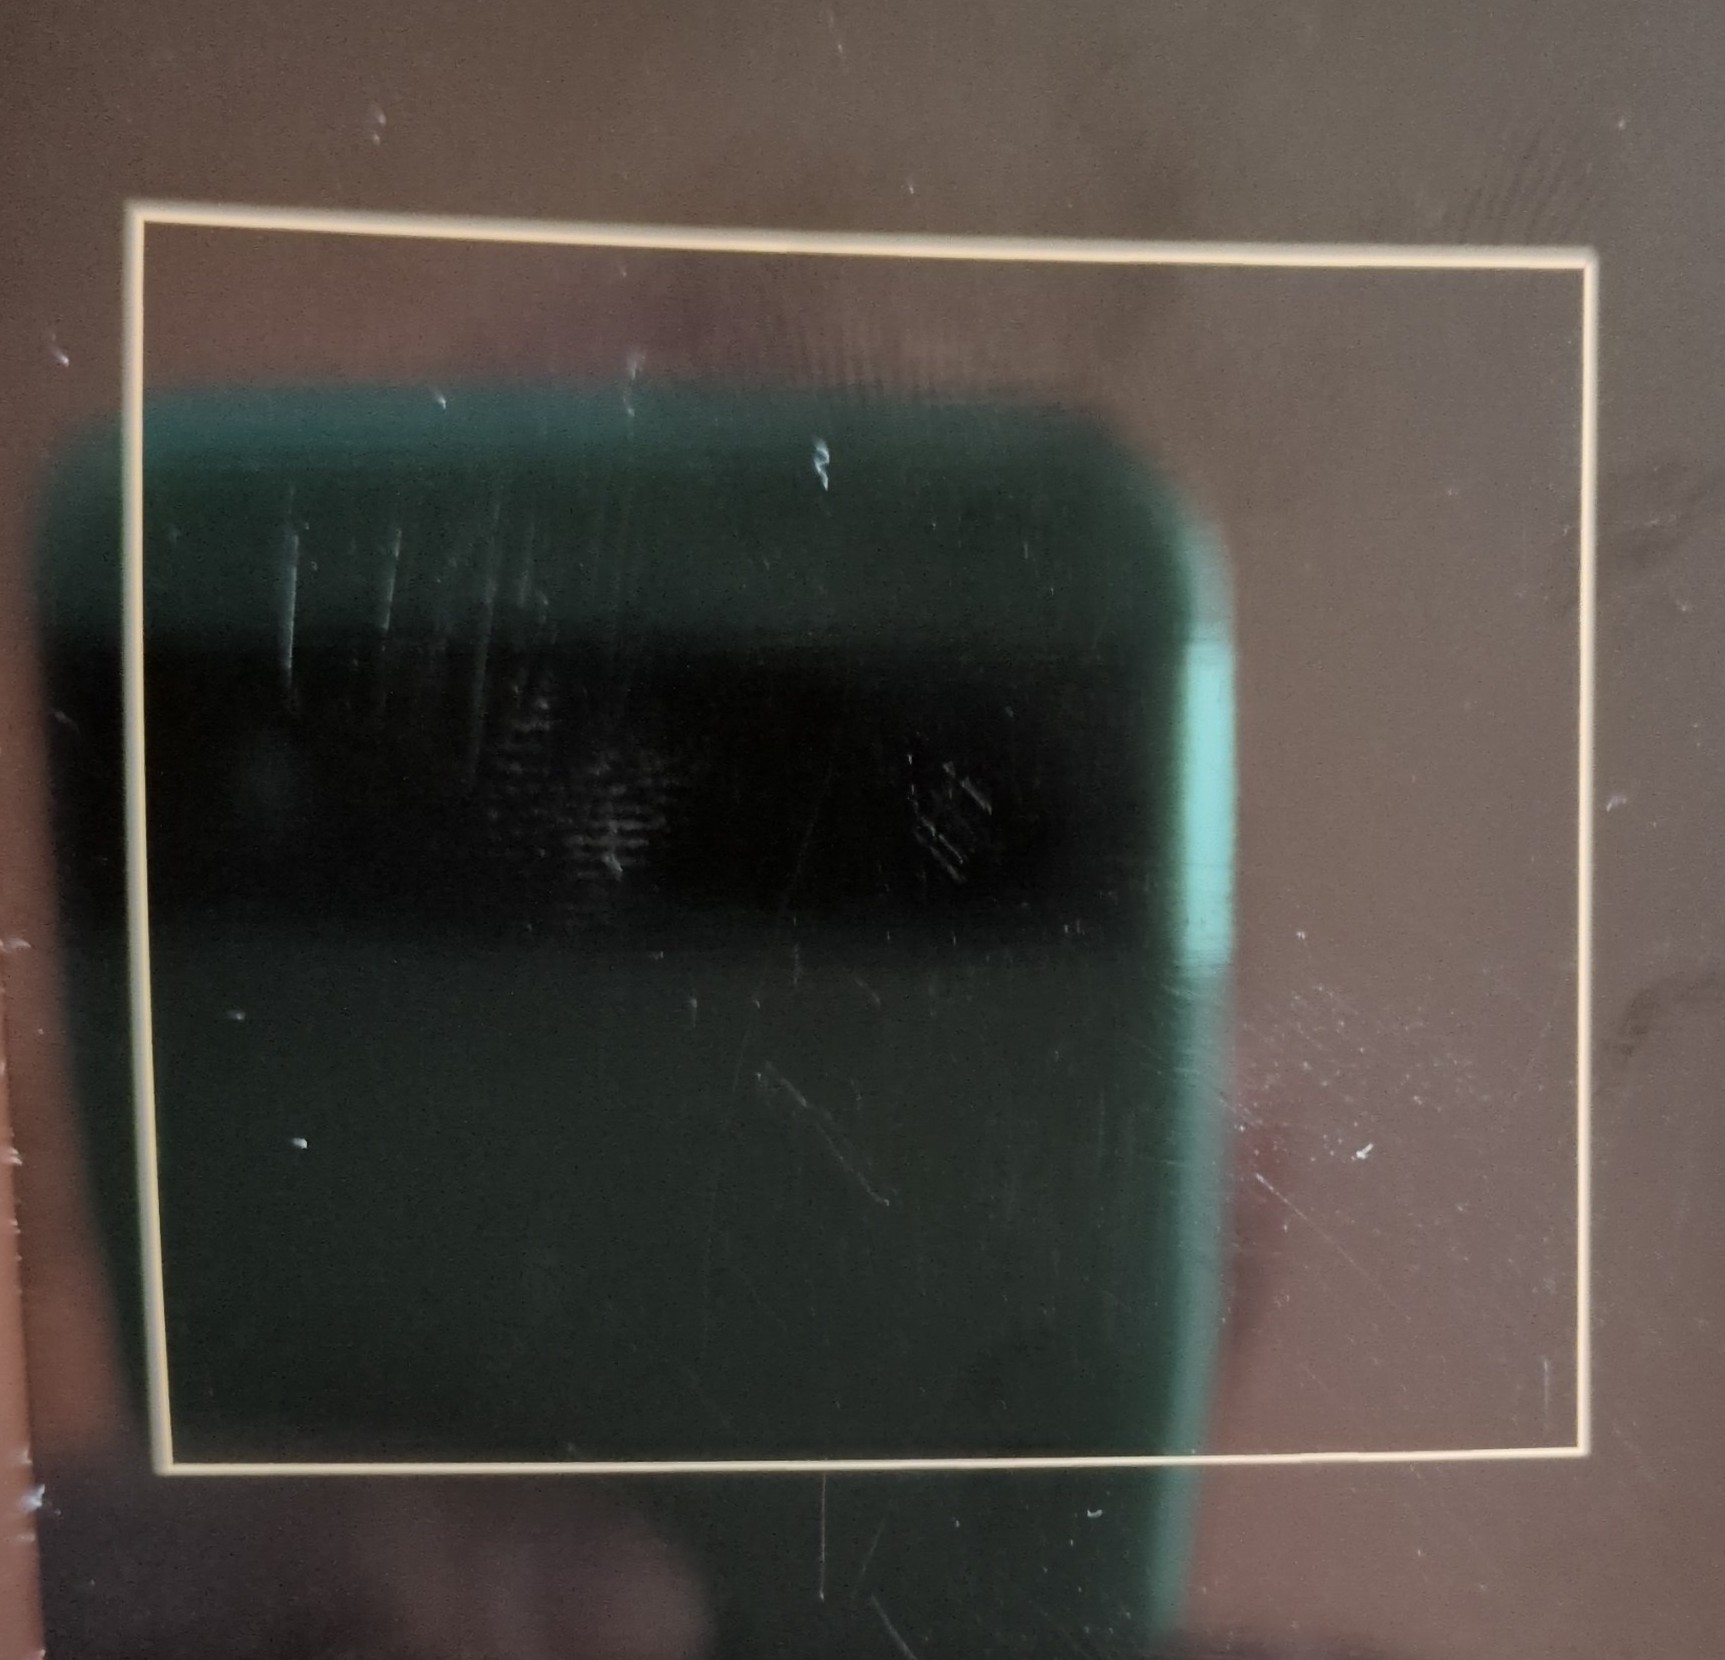
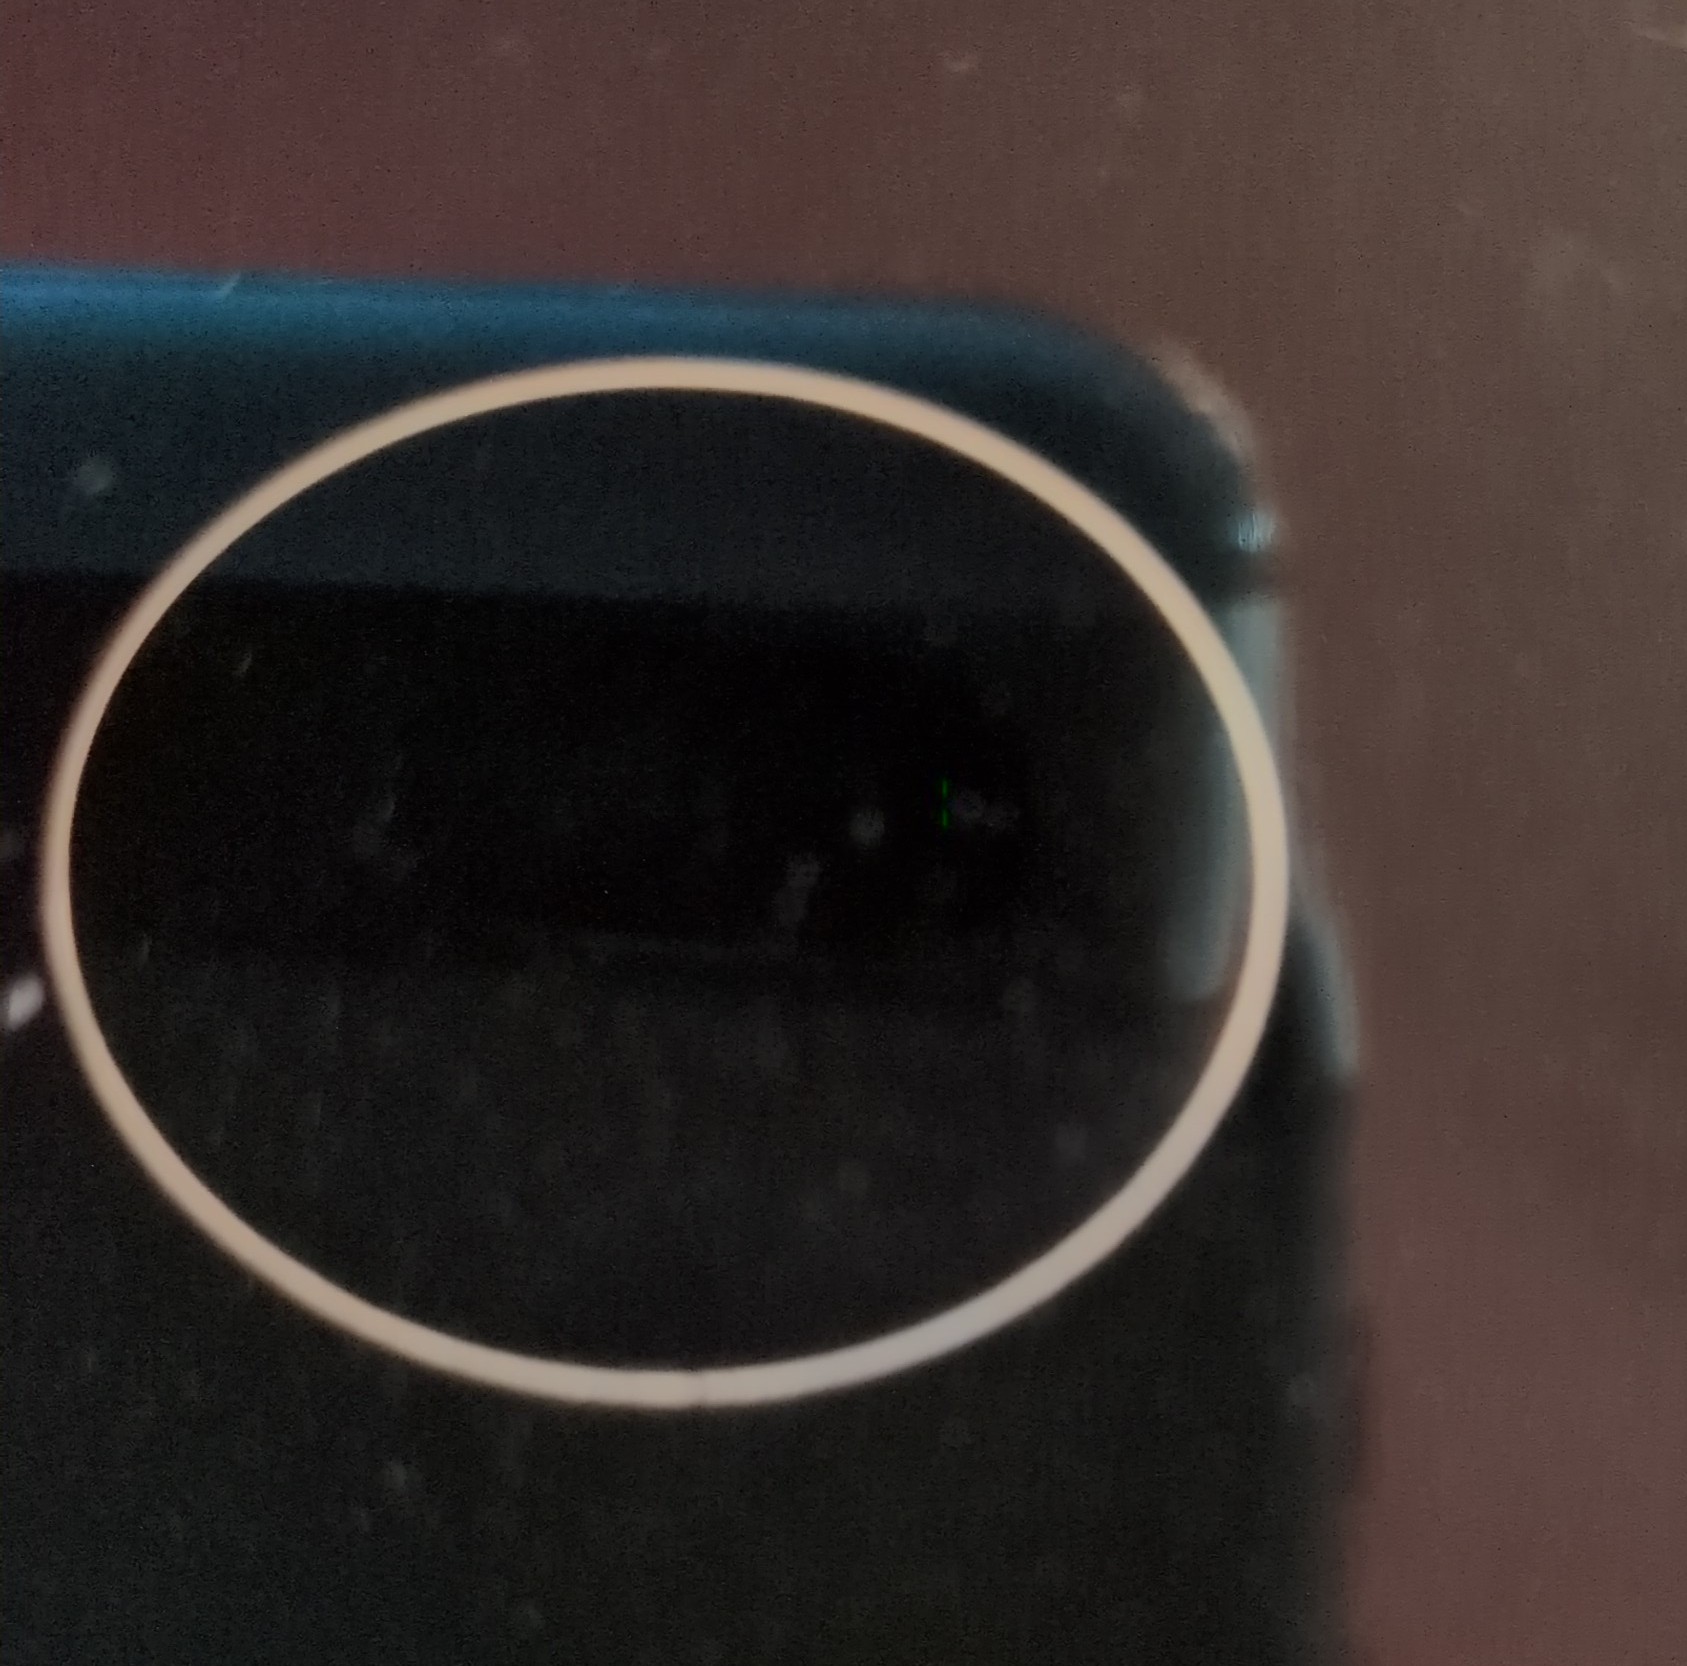
Here are a few examples of markings on business cards. The objects are supposed to be a square and a circle, but as you can see, they are not.
Any kind of help would be appreciated.
P.S. sorry for my bad English.
Did you import the machine/lens configuration data when you created the device?
I have a JPT MOPA and I think you use a different control board, but both need the configuration and lens correction data loaded into Lightburn.
![]()
Hi and thank you for your response.
Since I am new to this program and lasers in general, I am not exactly sure what you are referring to.
These are the only numbers I was told to change in the LB settings.
Did you had some other parameters in mind?

No Jack meant a configuration file that comes with ezcad2 normally. However your laser came with other software appearently. It seems that you found the settings to fix the problem but maybe you should run the 9 point calibration. You can find it under laser tools, Calibrate Galvo Lens
Thank you.
It came with Glaser software, which is, I believe Gweike’s own software.
No, unfortunately I still haven’t fixed the problem. Laser works good with those parameters in Glaser, but when I copy-paste them into LightBurn, it doesn’t work the same. I get the results like in the photos in my first post.
Ok, will try the 9 point calibration, thanks.
Calibration didn’t work. If anything, it made it worse.
This were supposed to be a square and a circle.

well if it is worse now you should do the math yourself, take the current value for the axis that is wrong and multiply by wanted size/actual size
Yeah, I think I might be too dumb to even try to understand what you told me to do, let alone do it.
Owning a laser sometimes includes an education. If I had that expensive machine, I would try real hard to learn everything I could about it.
What he is saying is to change the numbers you inputted by the ratio difference of the two squares.
That’s true. As I said, I’m completely new to all of this. It would be easier to learn the machine if it worked properly from the start.
And my math is a bit rusted.
I thought that the problem I have is a common issue that many have when connecting and setting up their machine with LightBurn, like accidentally checking/unchecking some option somewhere in the settings. I see now that that’s not the deal.
Guess I will have to brush up on my math knowledge.
Thank you
Is the height set the same as the width?
Yes. 110x110 mm
The red highlight covered the height setting, that’s why I asked. I hope you find a solution soon.
This site has a good tutorial how to setup your lens
And correct the values so that a circle is not an oval

Also be sure that the lens is in focal distands before you do the lens correction. Tutorial ![]()
This topic was automatically closed 30 days after the last reply. New replies are no longer allowed.