Hi everyone, I’ve been using Lightburn’s preview function to work out how long each job will take but am confused about some of the results.
I have a Redsail / Mainboard firmware version: RDLC-V8.00.47 (upgraded by Thunder Laser in the UK) and use Lightburn v0.9.11 to run it.
If I were to engrave a small square at 10mm/s and then do another at 20mm/s it halves the time. Exactly what I would expect.
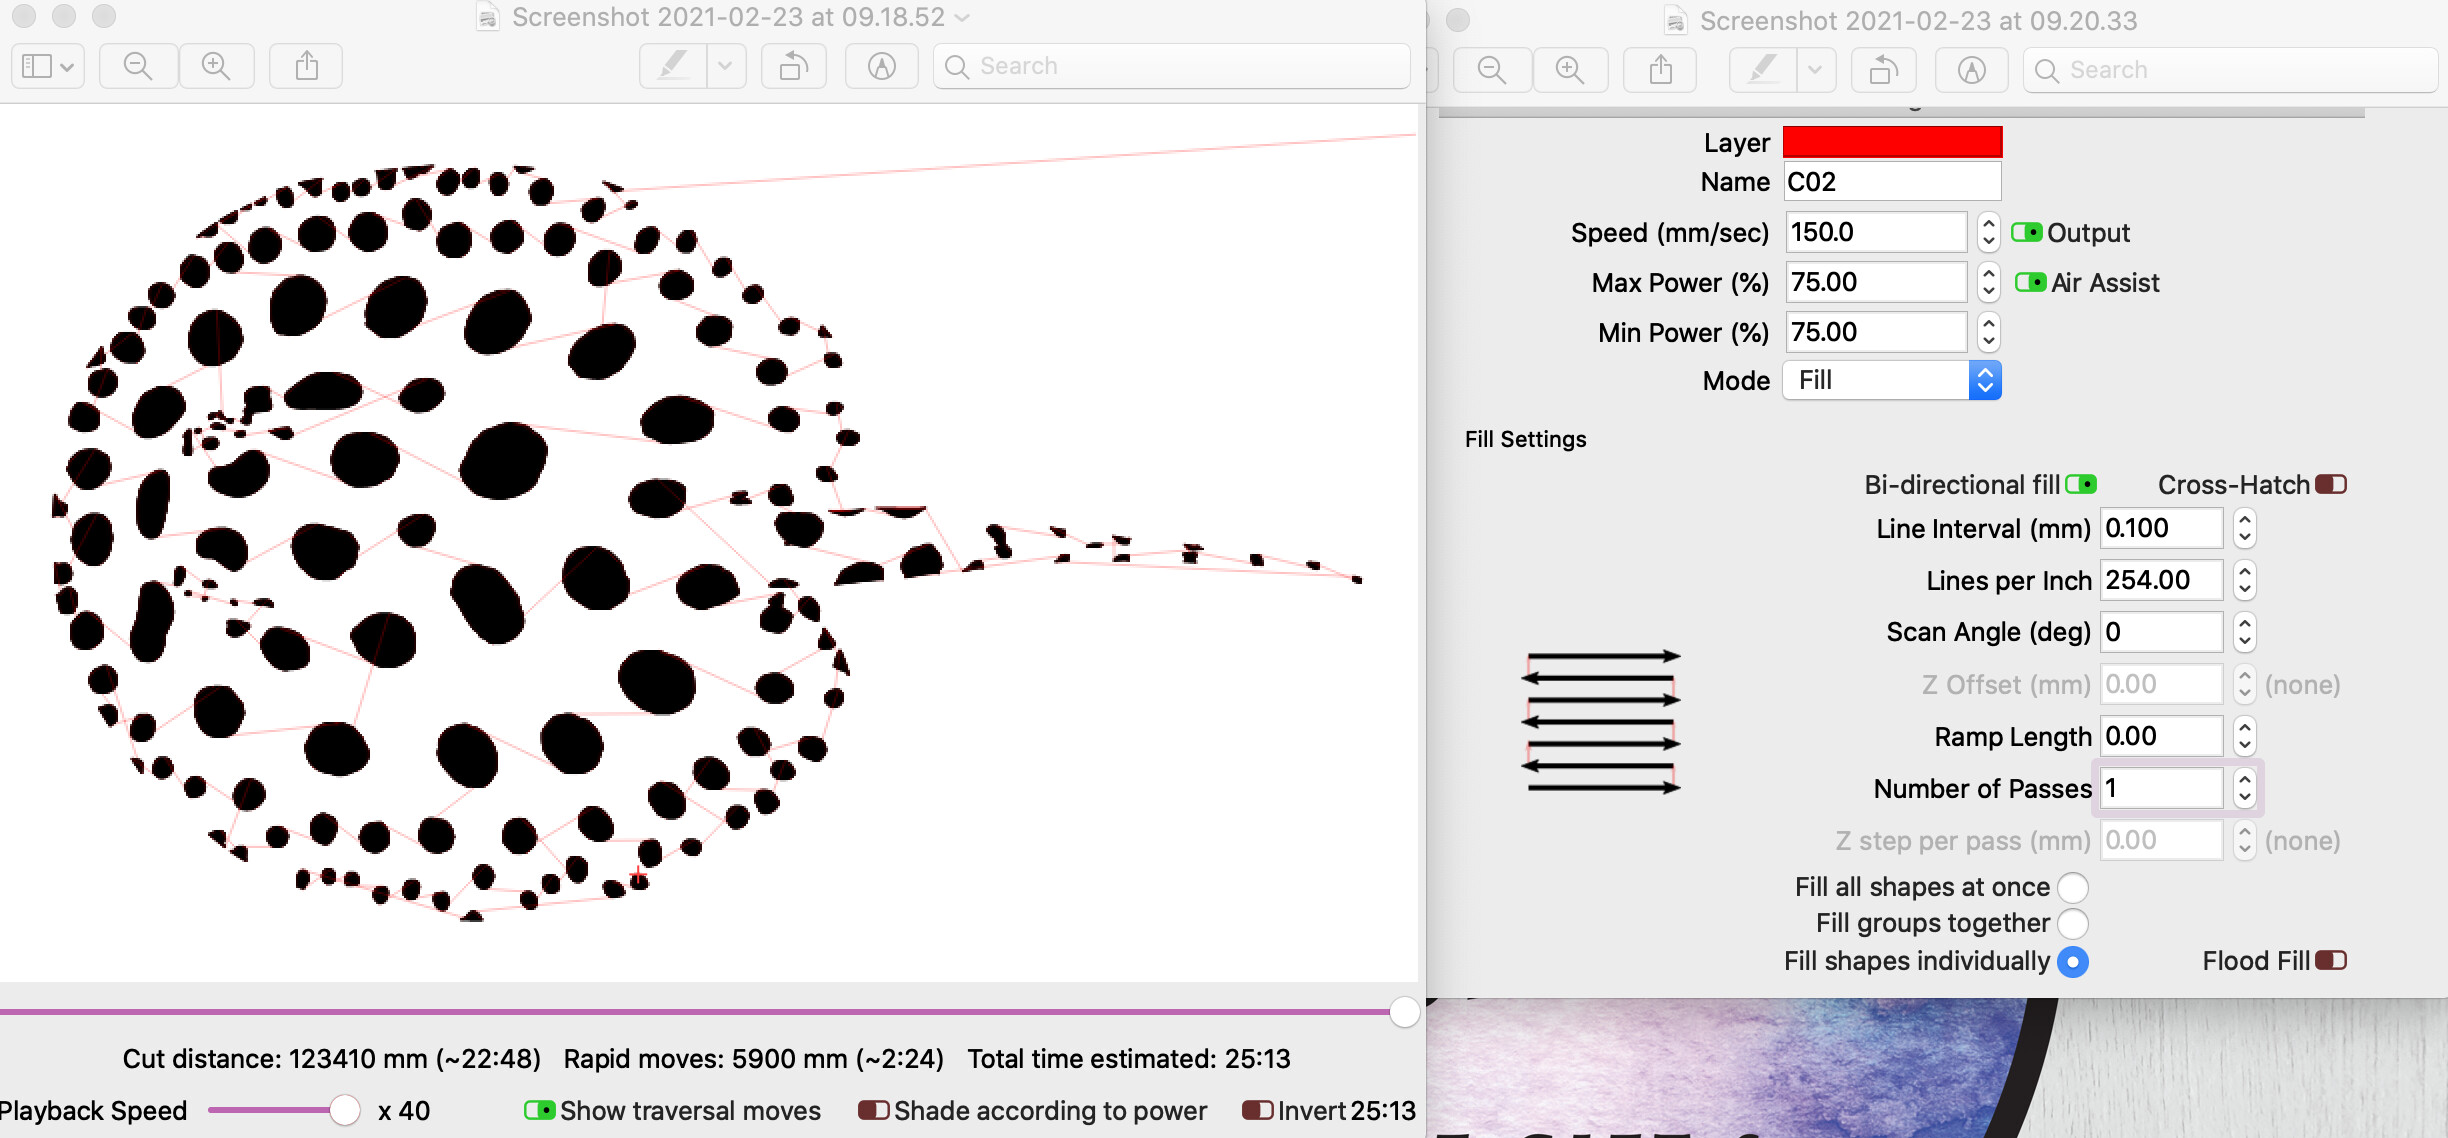
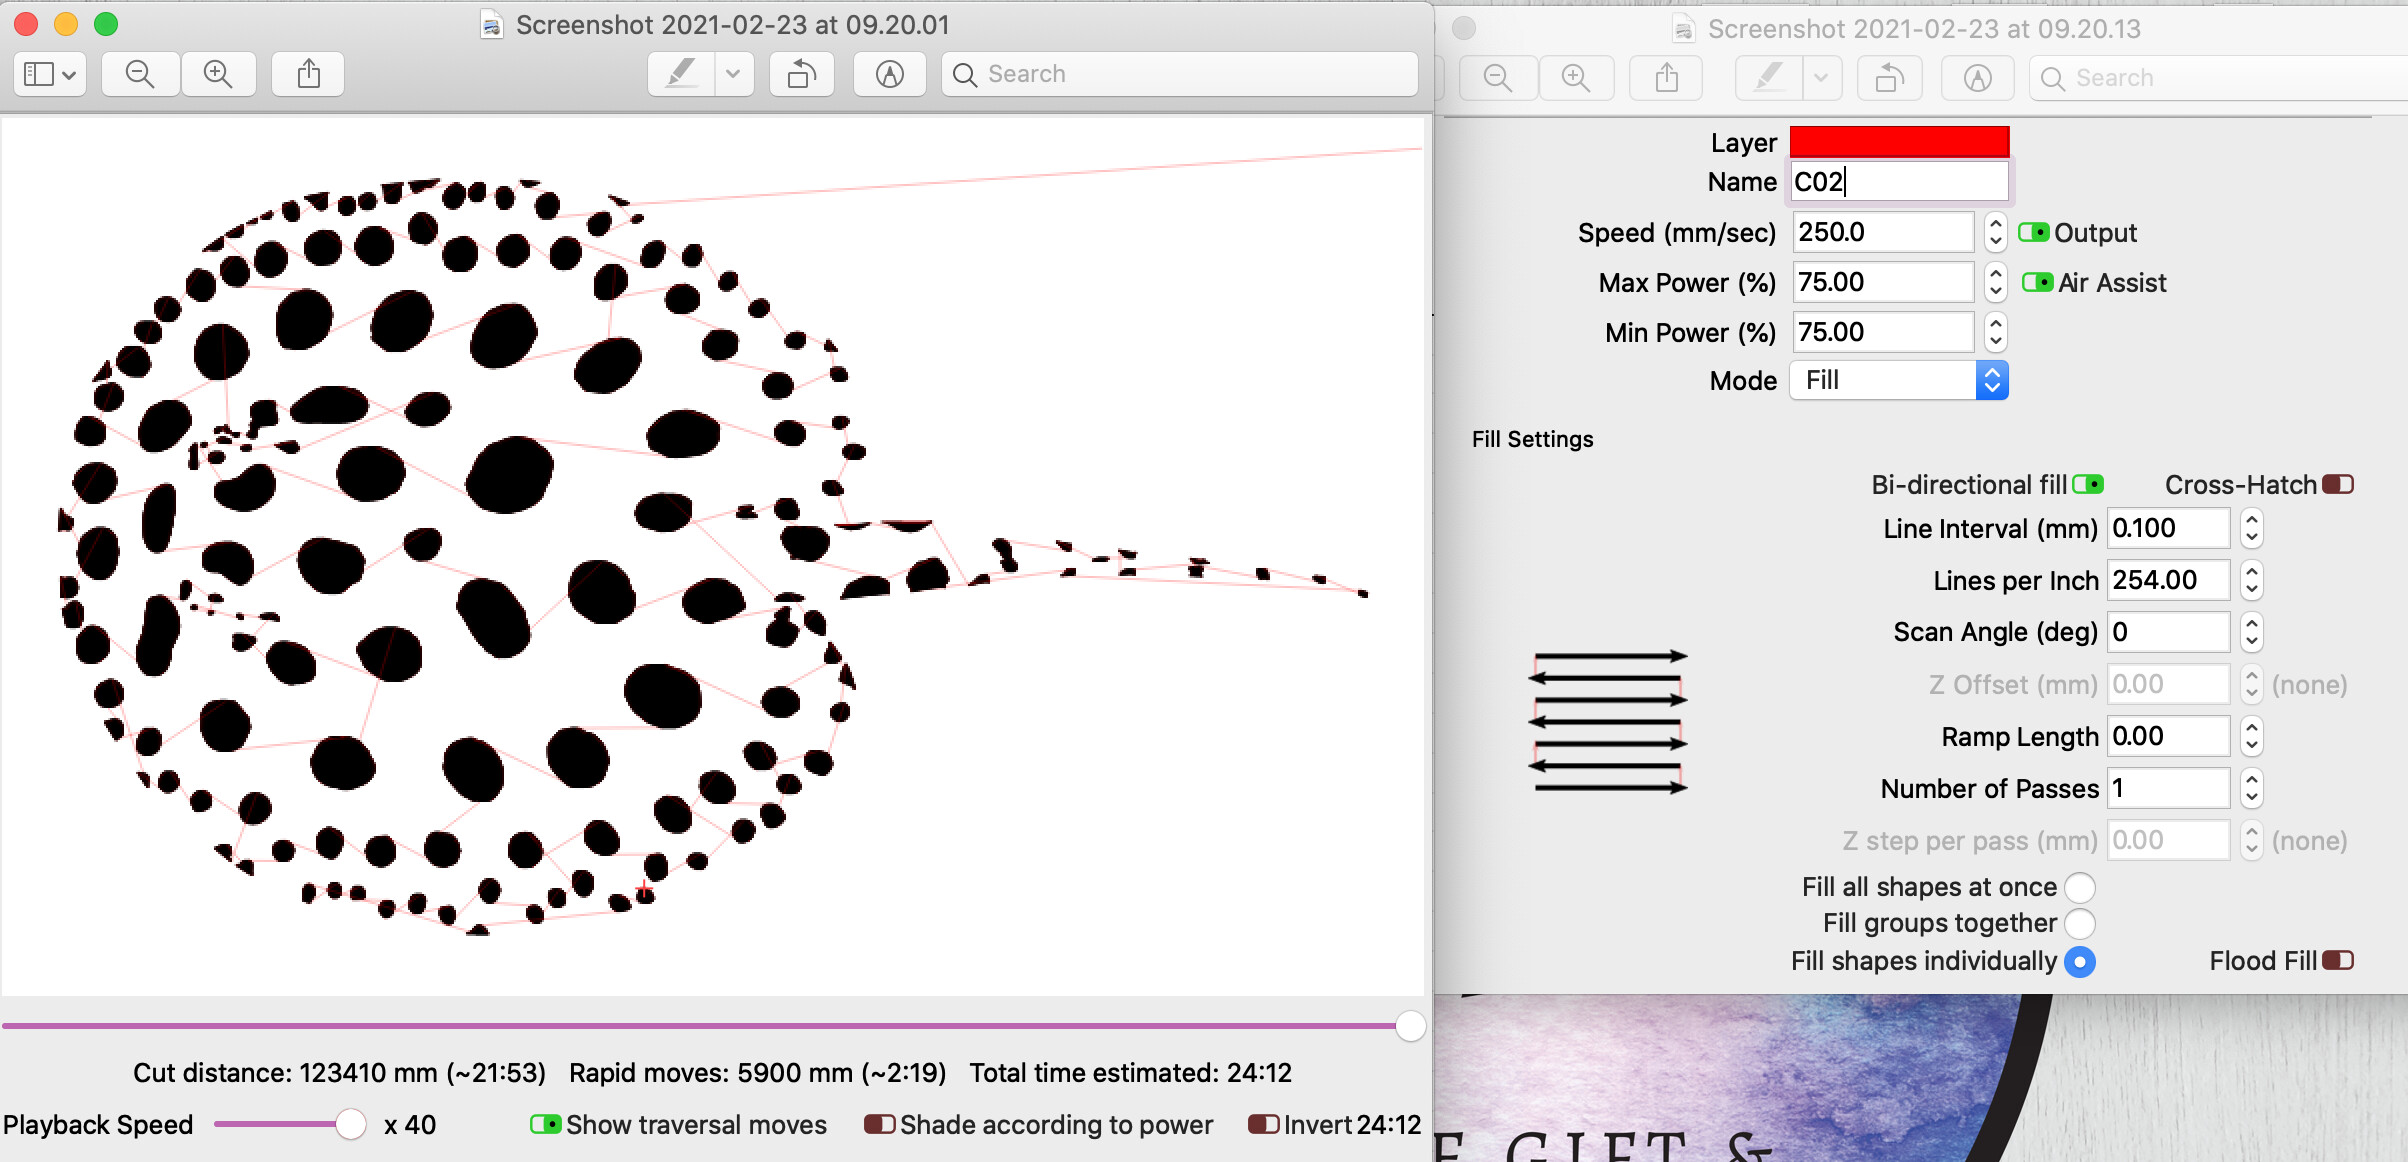
I tried a different job and set it to 150 mm/s (25mins) then I tried it again at 250 mm/s but it said 24mins, where I would have expected it to be quite a bit less.
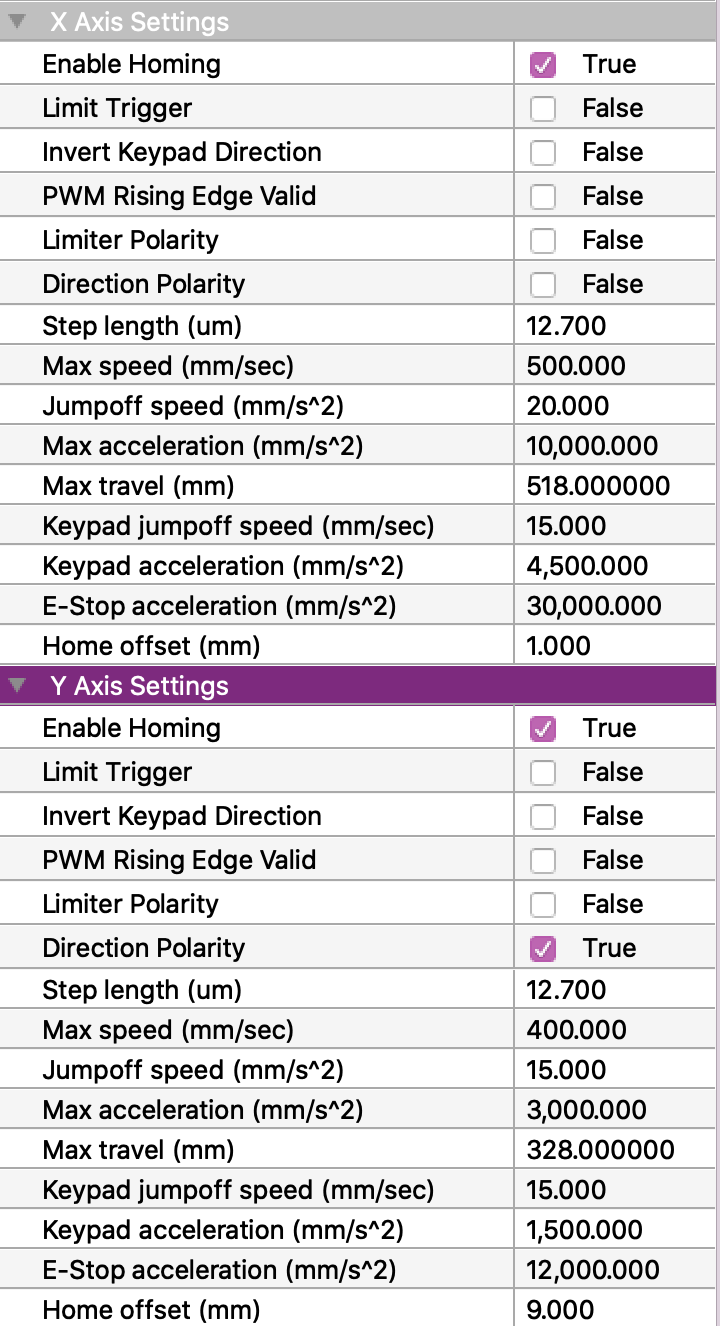
I’ve looked through the settings but I’m not sure which one might cause this. Is there a setting which determines the speed it moves from one engraving section to another and would it really make that much of a difference?
you shouldn’t count like this, doubled the speed, halved the time. if you specified a speed of 10, this is the speed at which the laser is on. But there is also acceleration and deceleration. The higher the speed, the longer the distance covered during acceleration and deceleration. For example: a 10mm line is engraved, the head travels 15mm, if you add speed, it travels 20mm. But it will burn 10 mm. These are not exact numbers, but so that you understand how it works
but you didn’t give any details on the job. It could be a long narrow rectangle for all we know and the machine is spending all its time on acceleration/deceleration. Without details on the job I don’t think anybody is going to be able to give much helpful insight.
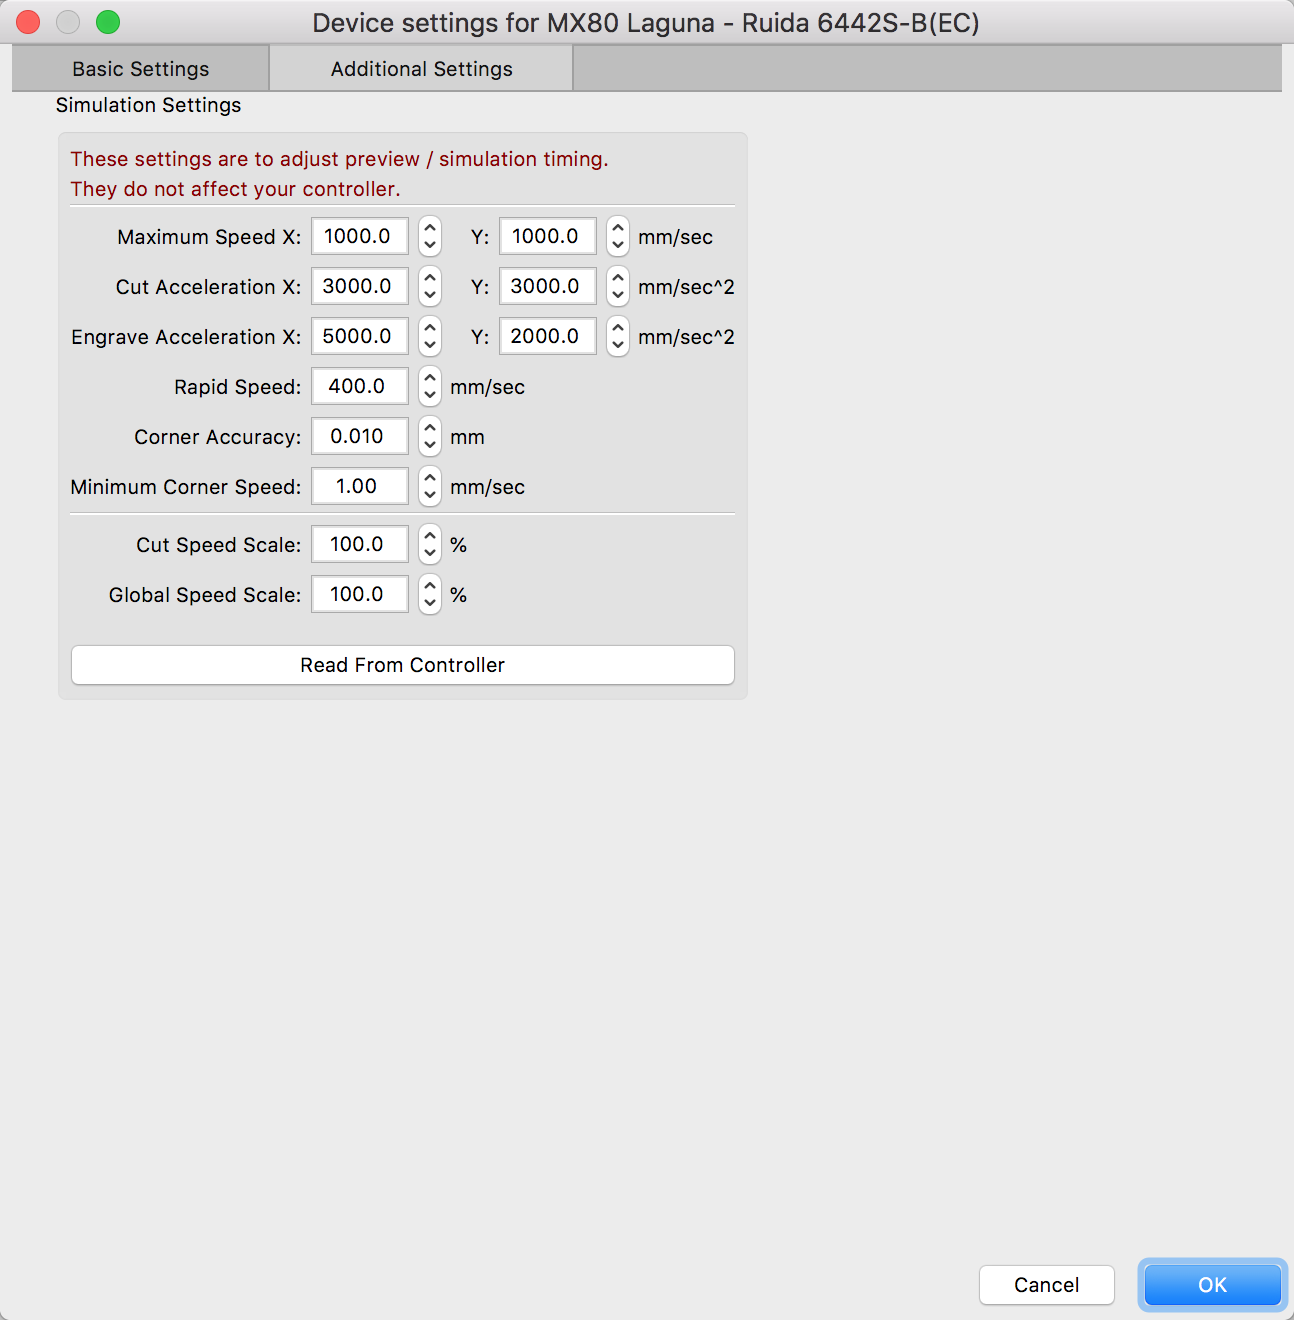
If you are referencing the Time Estimate shown in the ‘Preview’, you need to dial those calculations in to match that of your laser to get close to real-time estimations.
Adjustment for these settings can be found on the ‘Device Settings’→’Additional Settings’ page. These settings are used by the preview simulation engine to calculate acceleration timing, traversal speeds, and enforce speed limits when computing the time it will take to complete a job, and when simulating the job. These must currently be set manually by the user to match your controller settings, though our goal is to handle this automatically if possible.
Ahhhhh I see… Thankyou! I knew these happened but I didn’t realise it would make that much of a difference. Do you happen to know the reason for the acceleration and deceleration?
Good Point! Sorry, I should have explained better and shown you what I was trying to do.
It was more of a overall question as its not specific to this job but this would certainly make it easier to understand.
Heres the job with the settings for 150 and 250. Its 23 x 43 cm
Thank you. Sorry you’re right I should have specified. Yep I meant the time estimated. The times shown are great. They are literally out by maybe 1 or 2 seconds, on all jobs I physically run, which is why I’ve been using those numbers as accurate timings for each job
What I’m trying to understand is why putting the speed of the machine up by 60% only reduces the total time of the job by about 4%.
@GalkinTolik has said its to do with acceleration and deceleration which wasn’t something I had really taken into consideration. So now I’m trying to understand why and by how much this effects the timings.
Hey Rick, Yeah no worries at all…
It’s very possible I just need to go back to the basics and get a better understanding of acceleration and deceleration to really understand what’s going on.
Stacy, it’s the difference between city driving and highway driving. Not only are there direction changes, but the laser cannot always get up to full speed, (like getting to highway speed in between stop lights), so despite your speed settings, it will not reach them depending on the circumstances of the file. There are several YouTube videos about using the settings in Lightburn to maximize the time for engraving. Those settings are just about moot for cutting, but they’re a big difference for engraving.