But i strugle to set my laser so it does not bumbb the x axsis against the frame and to calibrate the laser any advise will help. Rdc6445s ruida
Do you have homing switches and how are they hooked up?
Your profile says you have a grbl machine… We all like to see diy stuff…
![]()
I saw your other thread with the pics on the same subject. I’m going to merge them.
So my laser is bumping the laser nozle to the front rail and i dont have a limit switch but i need help to set my laser to not bump the front rail.
Thanks
Before you start lightBurn, manually move your nozzle to the 0,0 position.
Which are you referring, home or limit switches…?
Does this mean it doesn’t home when powered up?
If the Ruida doesn’t home, it sets it’s x, y and z if enabled to it’s maximum number (3000, I think).
Nice build ![]()
![]()
Naked tube scares me! But then after quick search in this clip apparently it is OK to run number of lasers in the same room with no eye protection at all! I’m not sure about it. Or these are IR blocking glasses? They are looking perfectly clear to me, no blue tint. Appeared no side shades!
Type of controller not stated. Your profile says "GRBL. for that:

I believe they are working with homing cycle disabled, but 0:0 is at the point where power is applied.
You still need to home somehow, by hand or to have home switches, then Max Travel set properly will prevent from bumping into hard stops. Or limit switches at all ends, then you do not have to home.

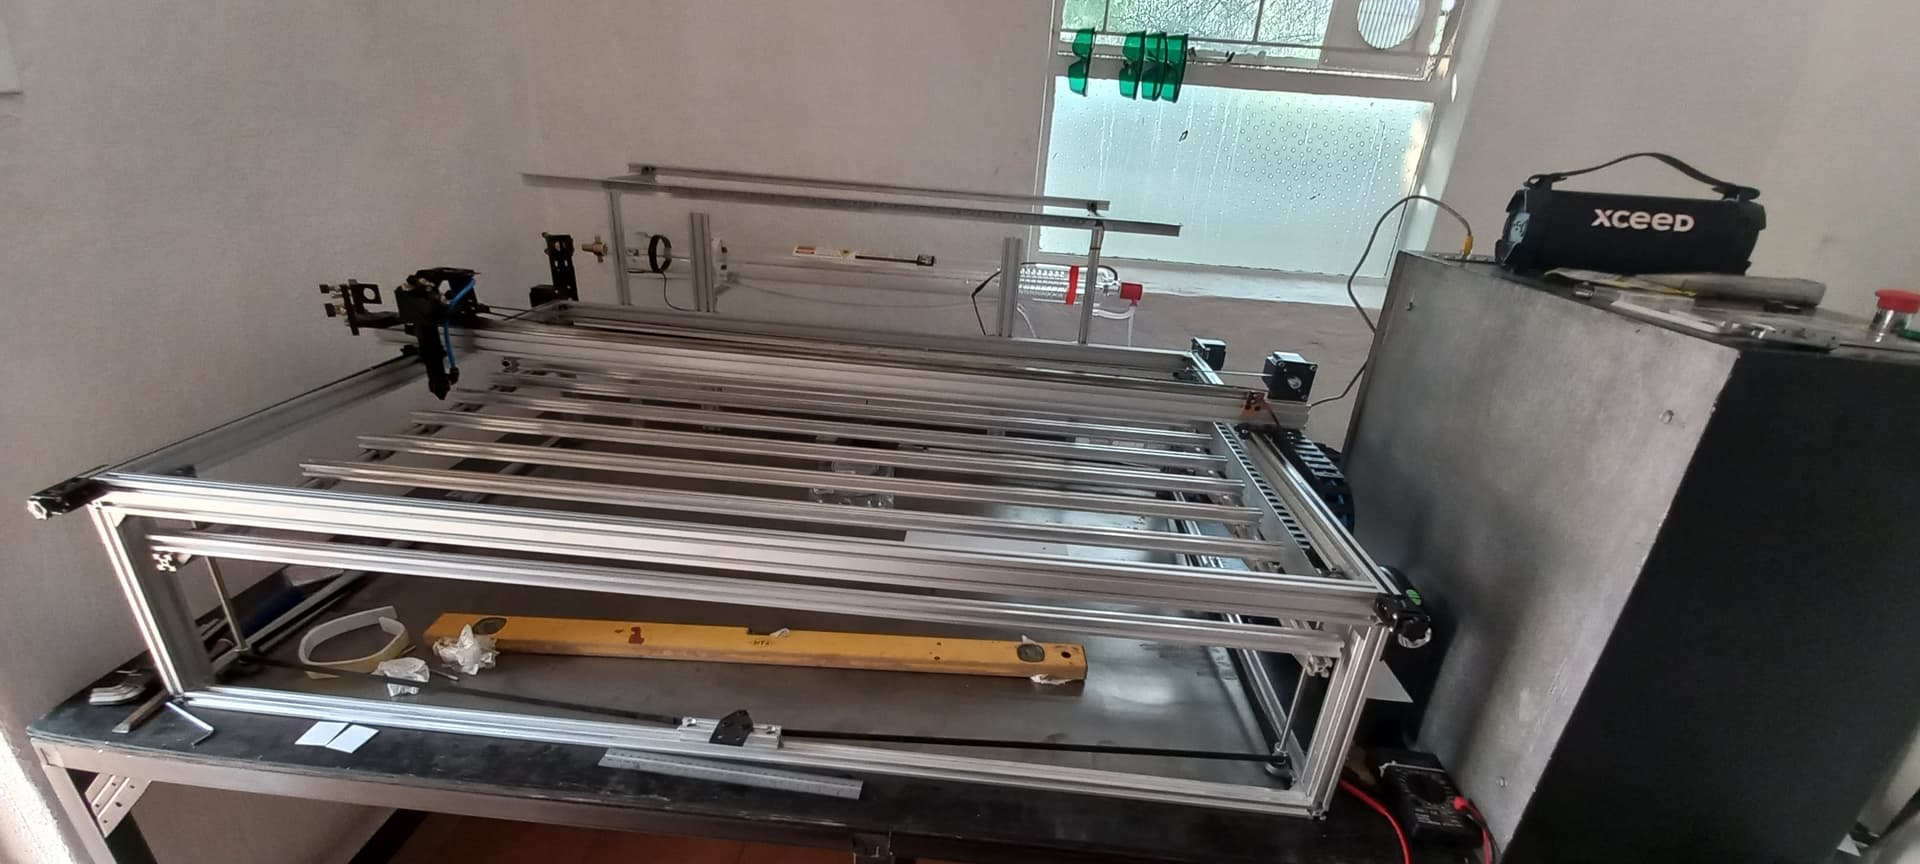
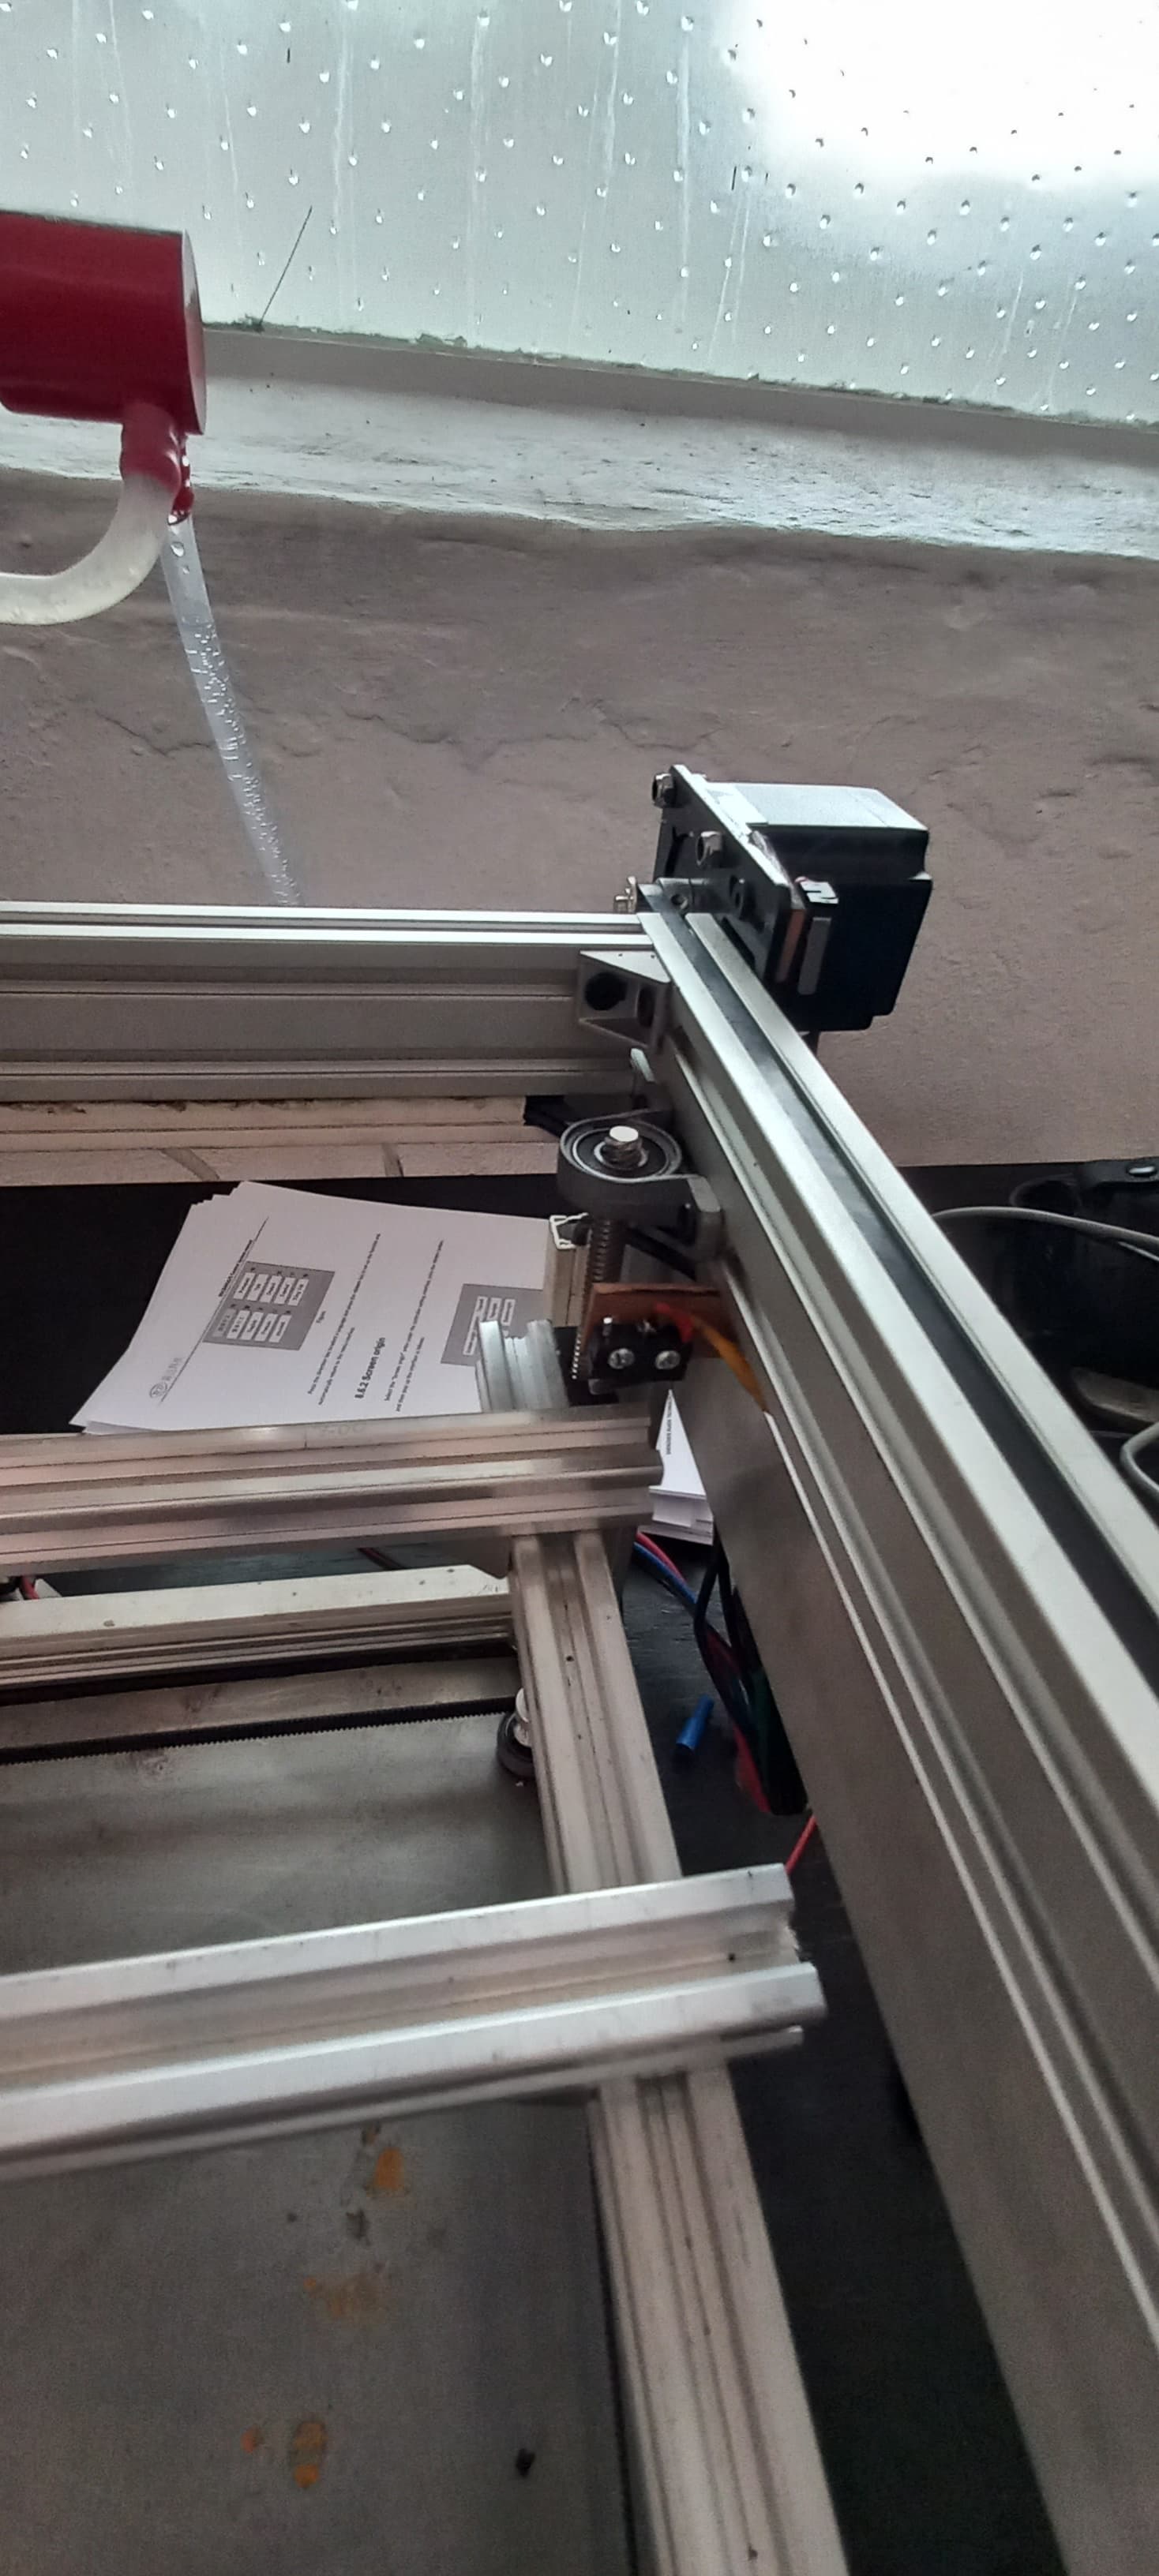
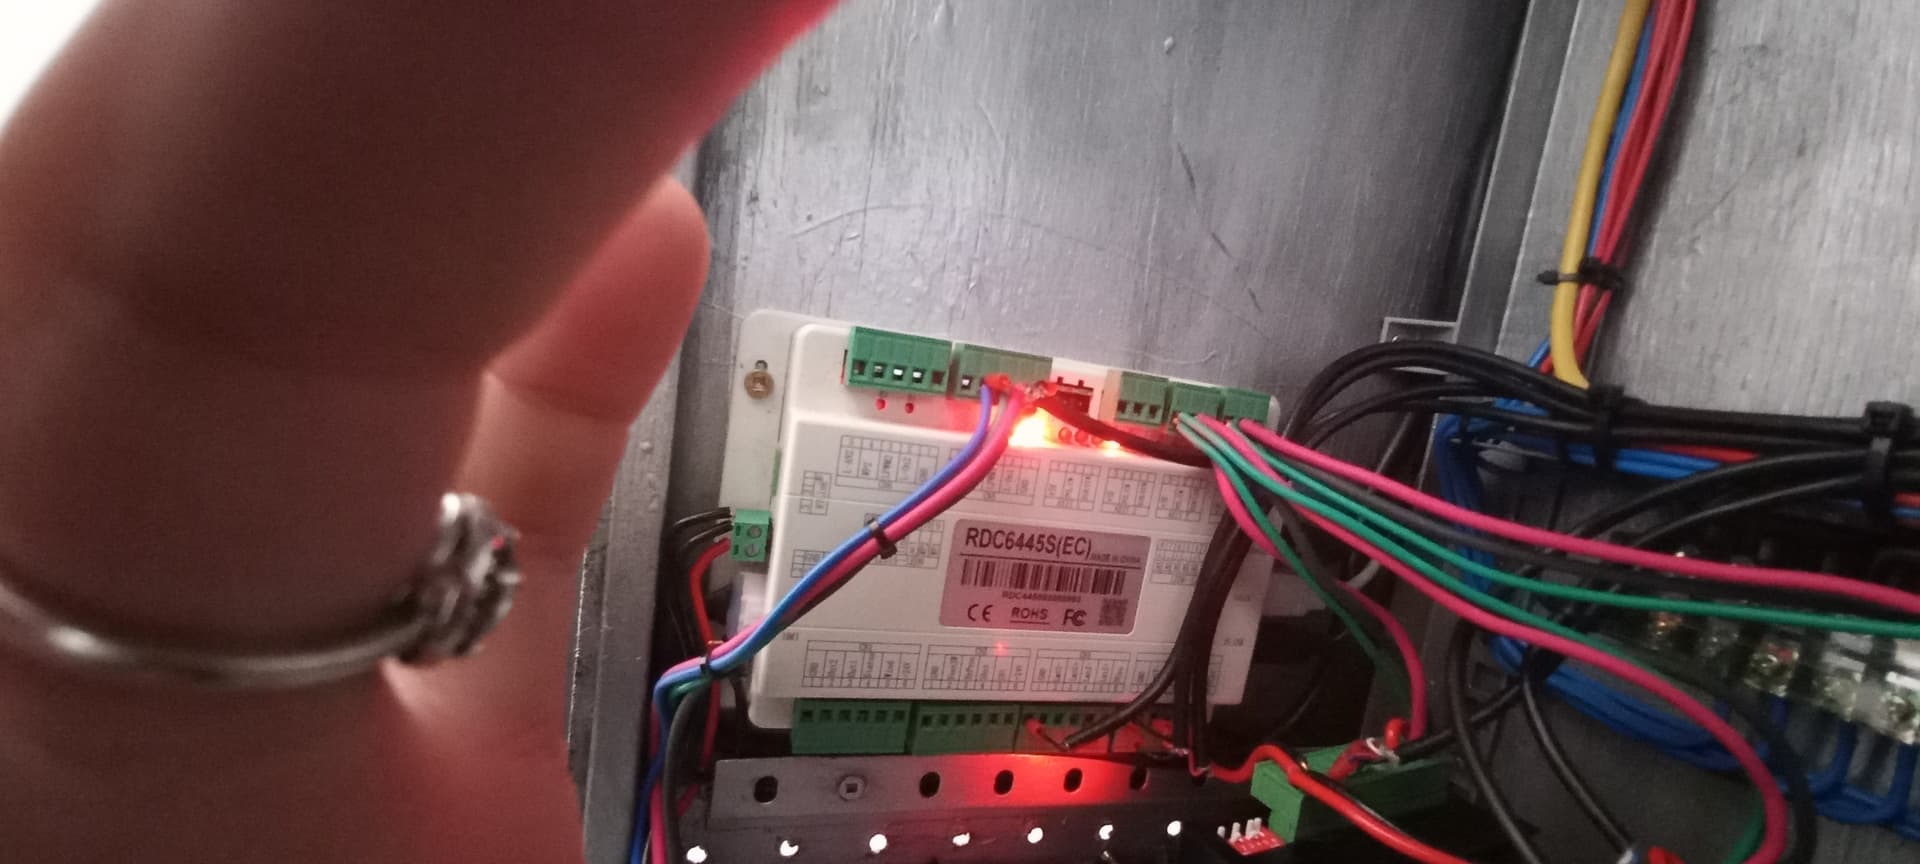
Ok so the laser wont be open completly we are stil busy it has a box will send pix, but we were strugling with the Electronics and i was strugling to get the program and machine to speak to each other so that is sorted, now im strugling to set my mesuerments so the laser nossle does not bumb on the front rail and to calibrate the machine. I have a limit switch on the right hand sight if i stand infront of my machine and the my x and my z and my y but only one on the left hand side

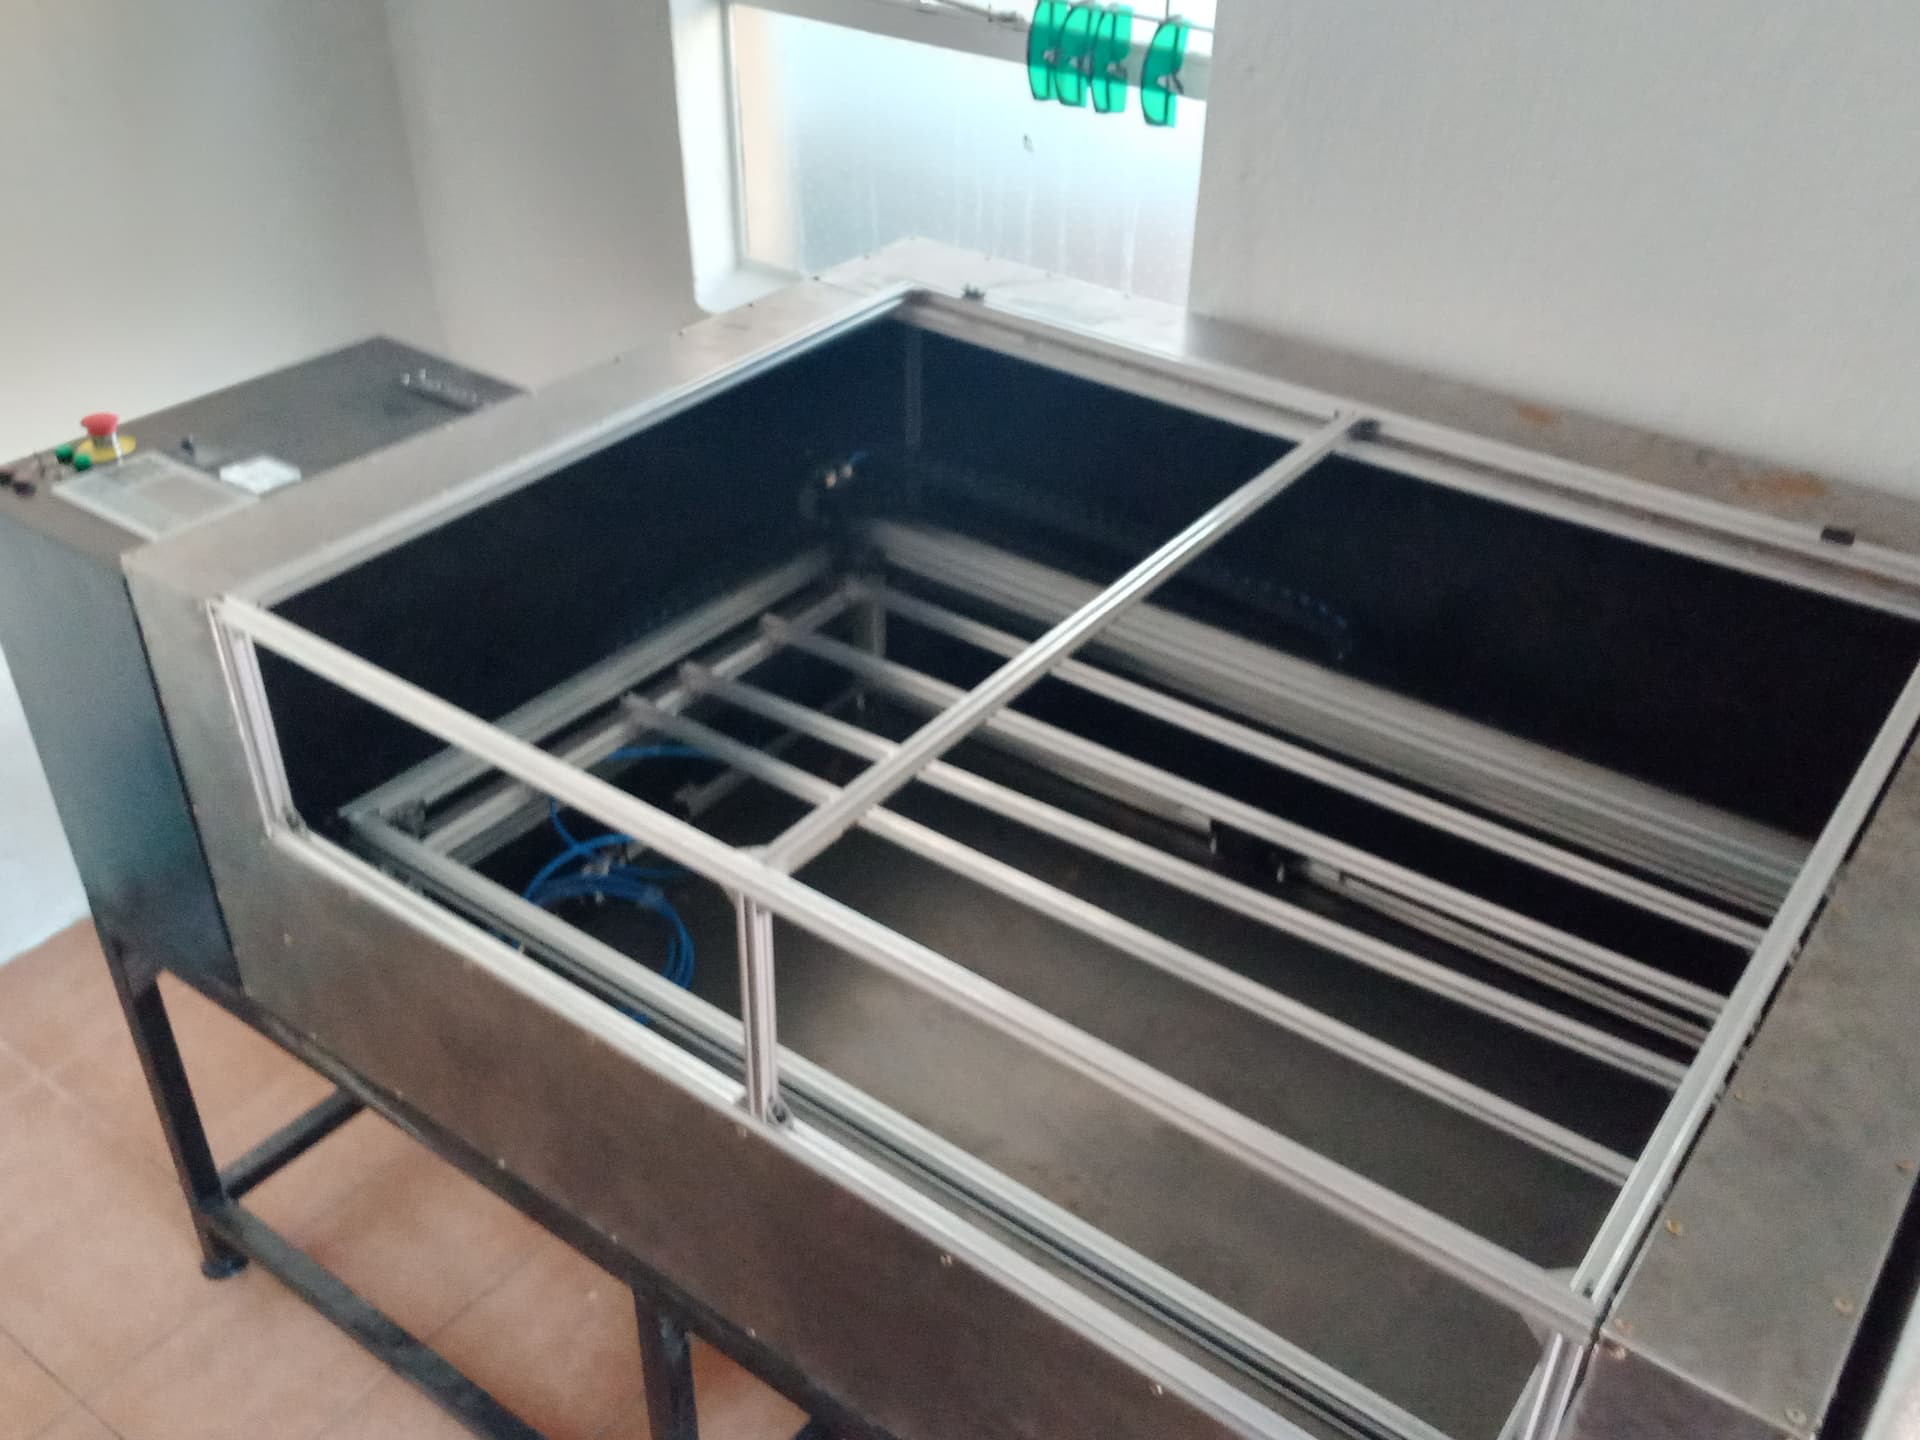
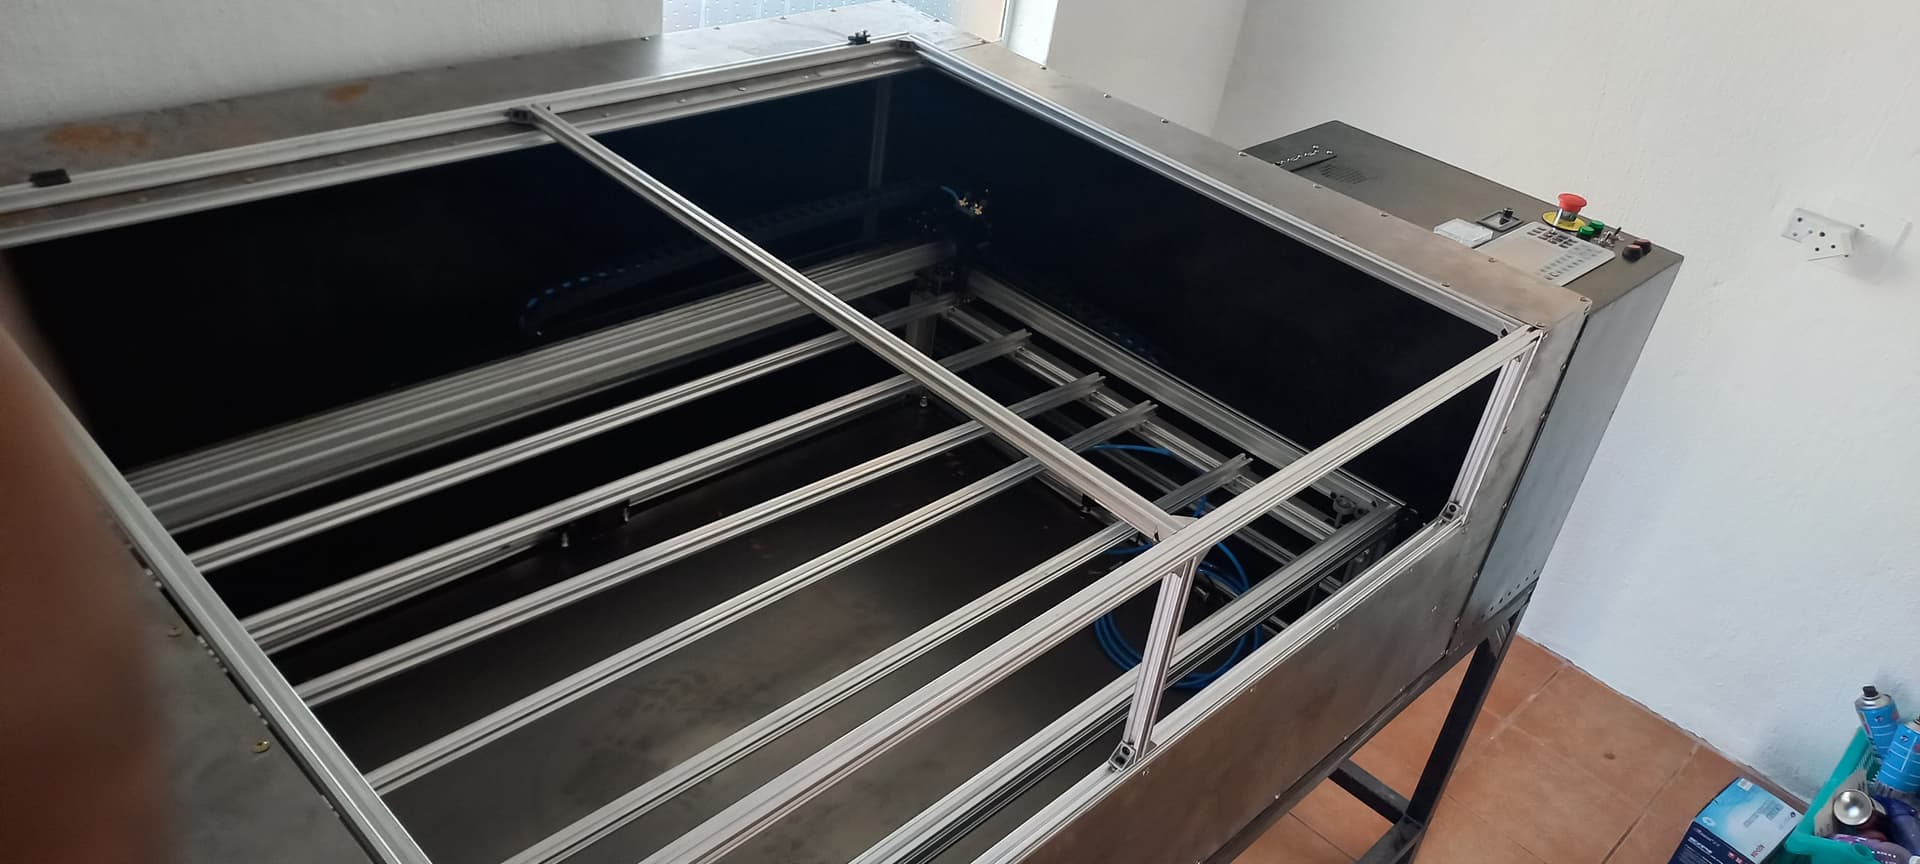
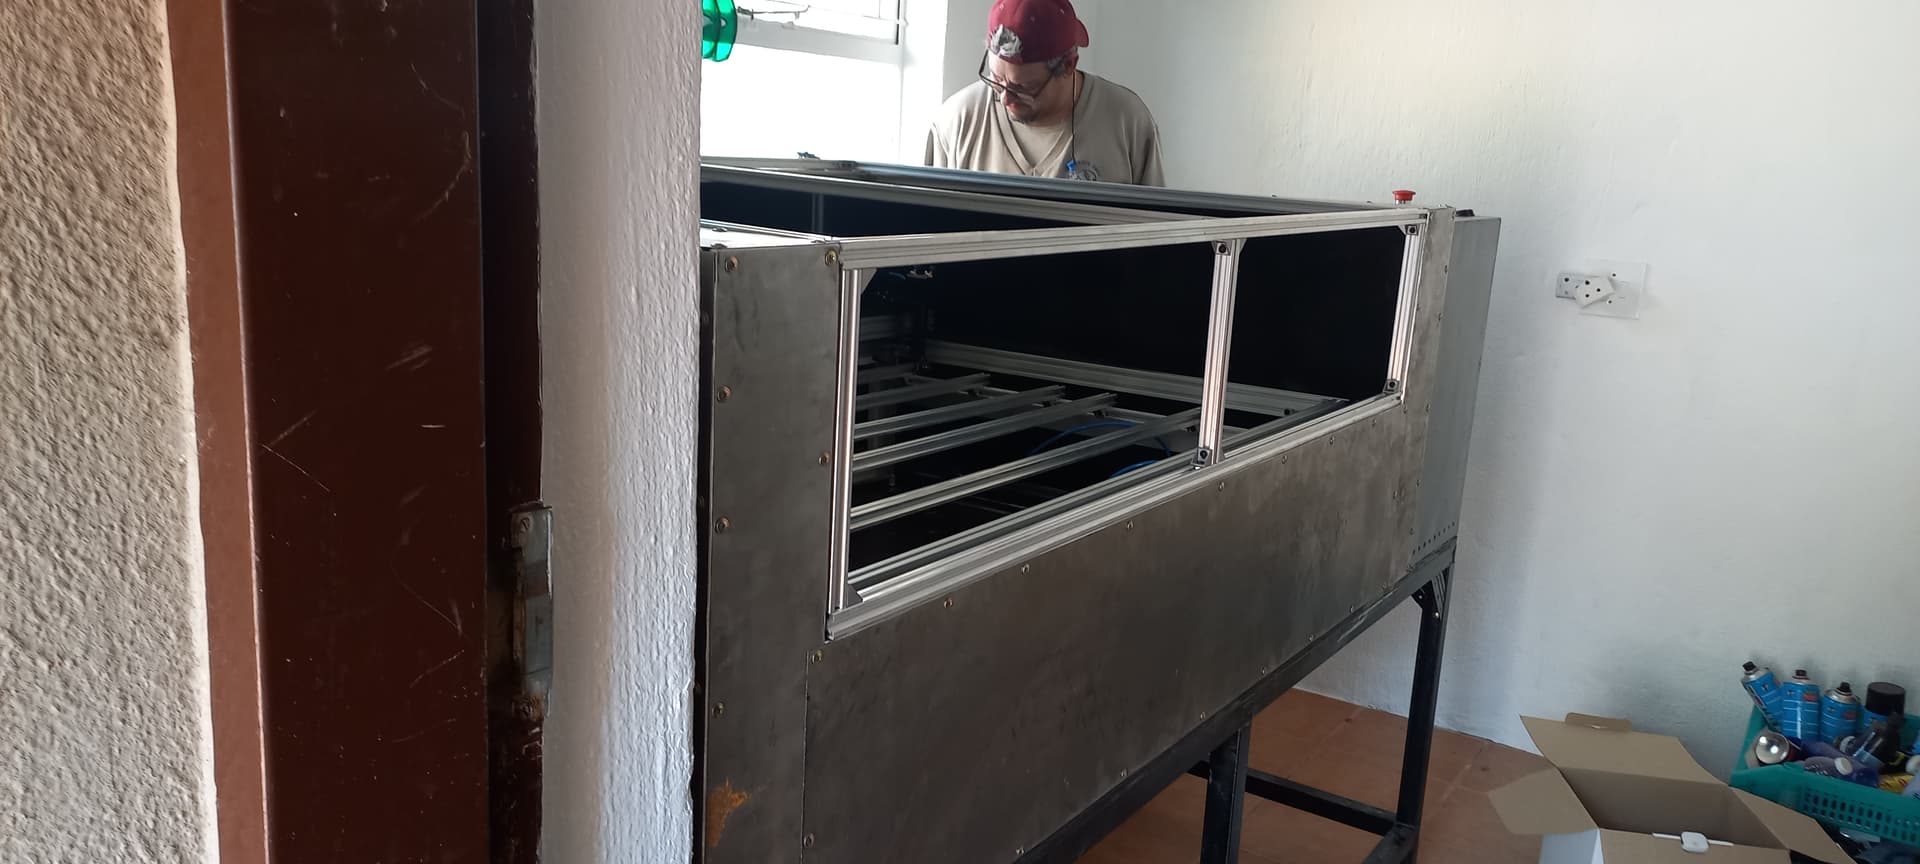
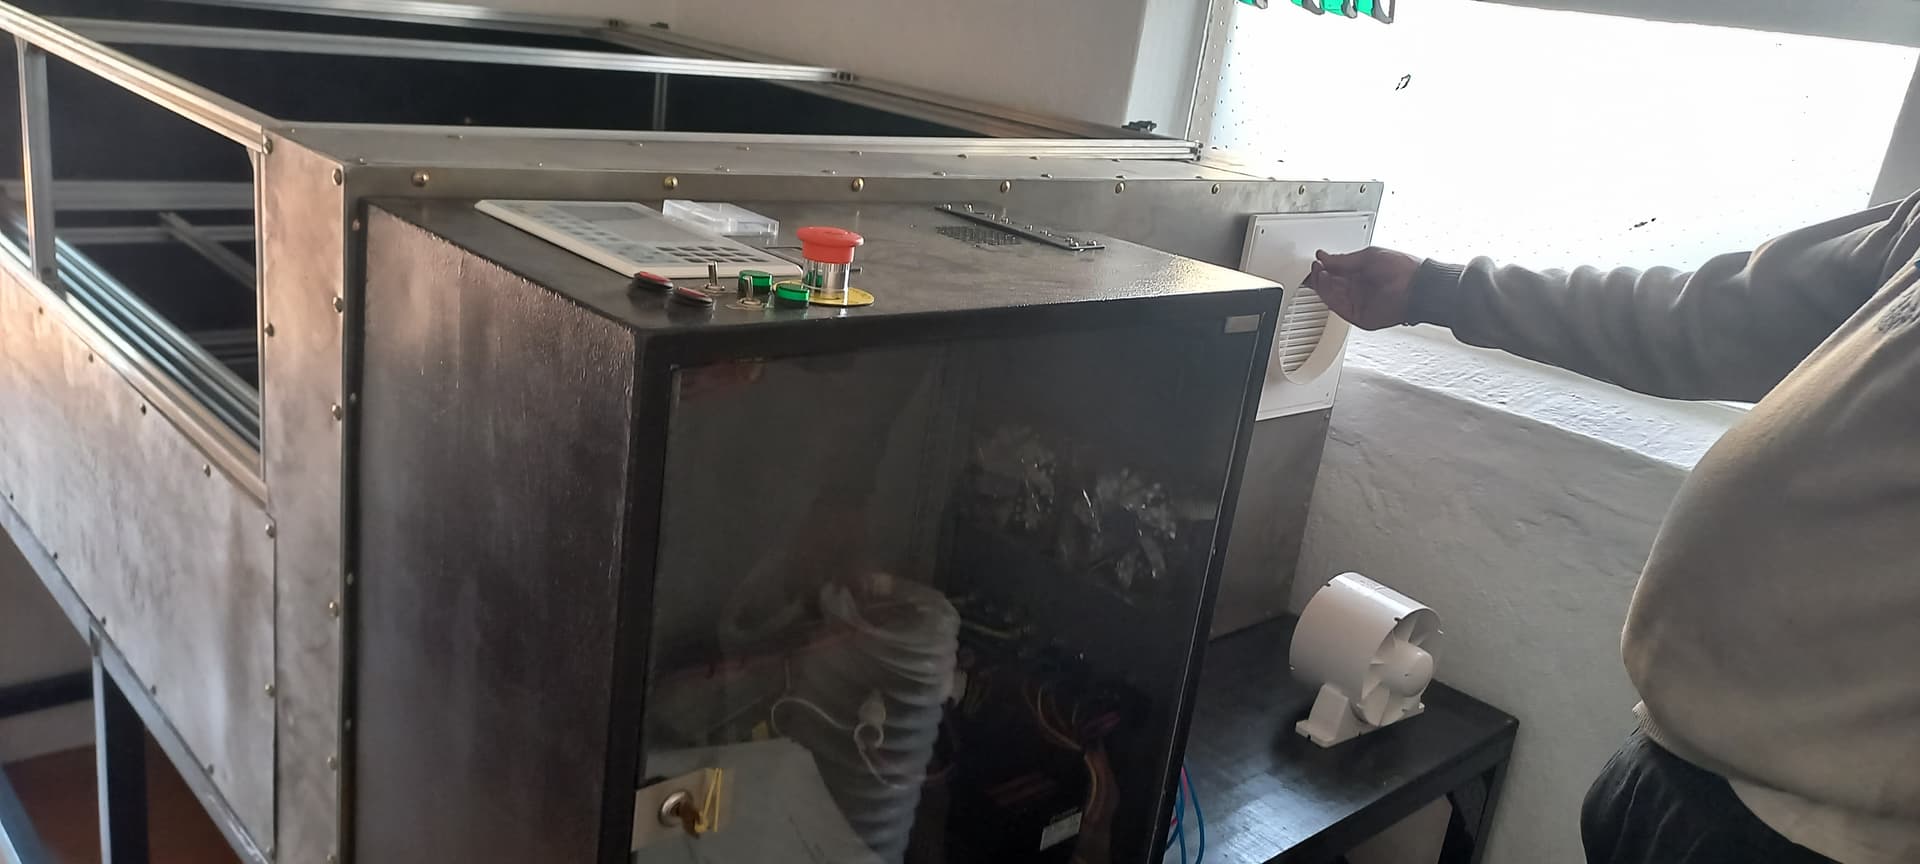
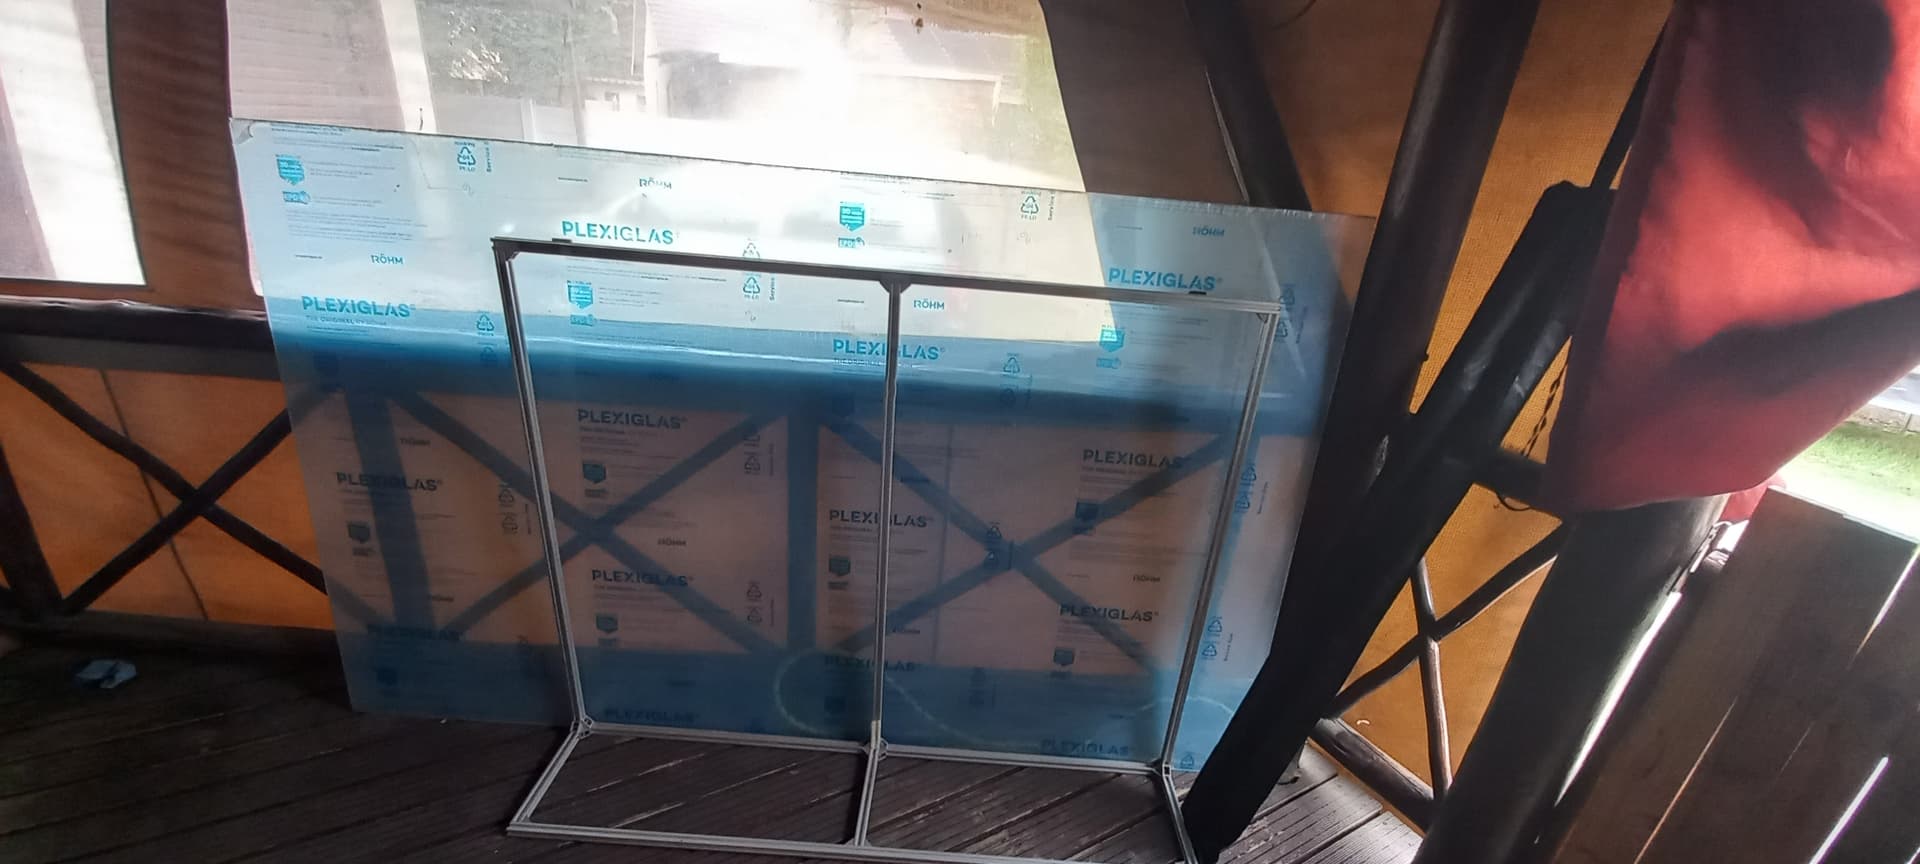
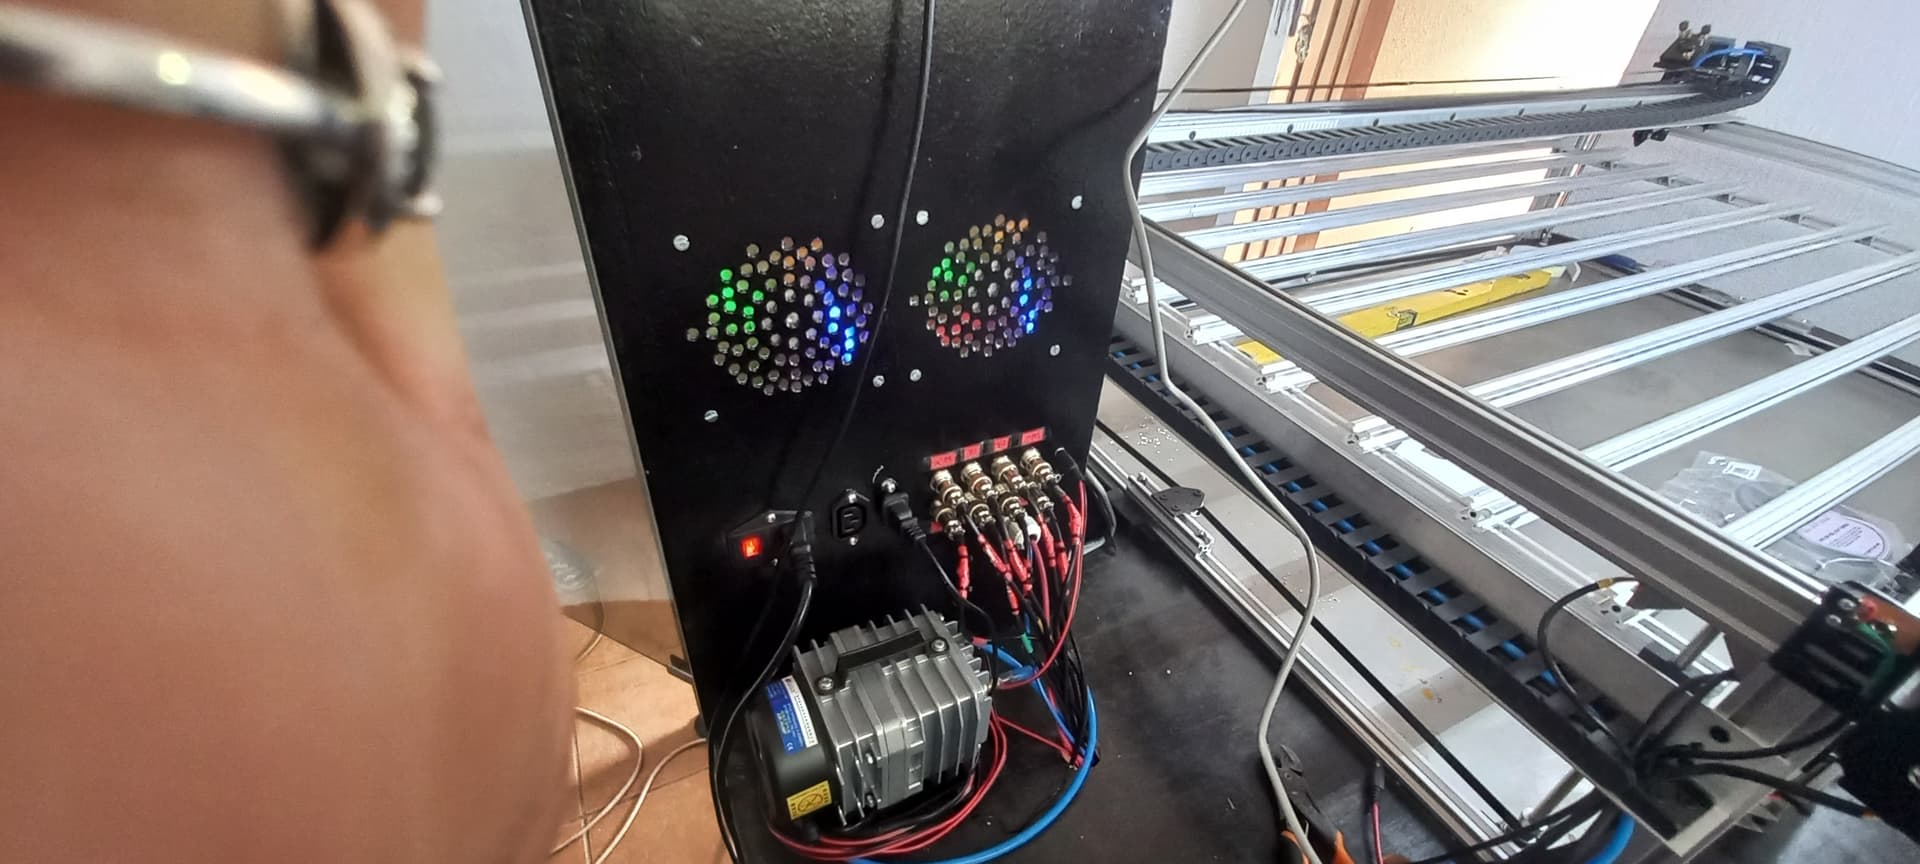
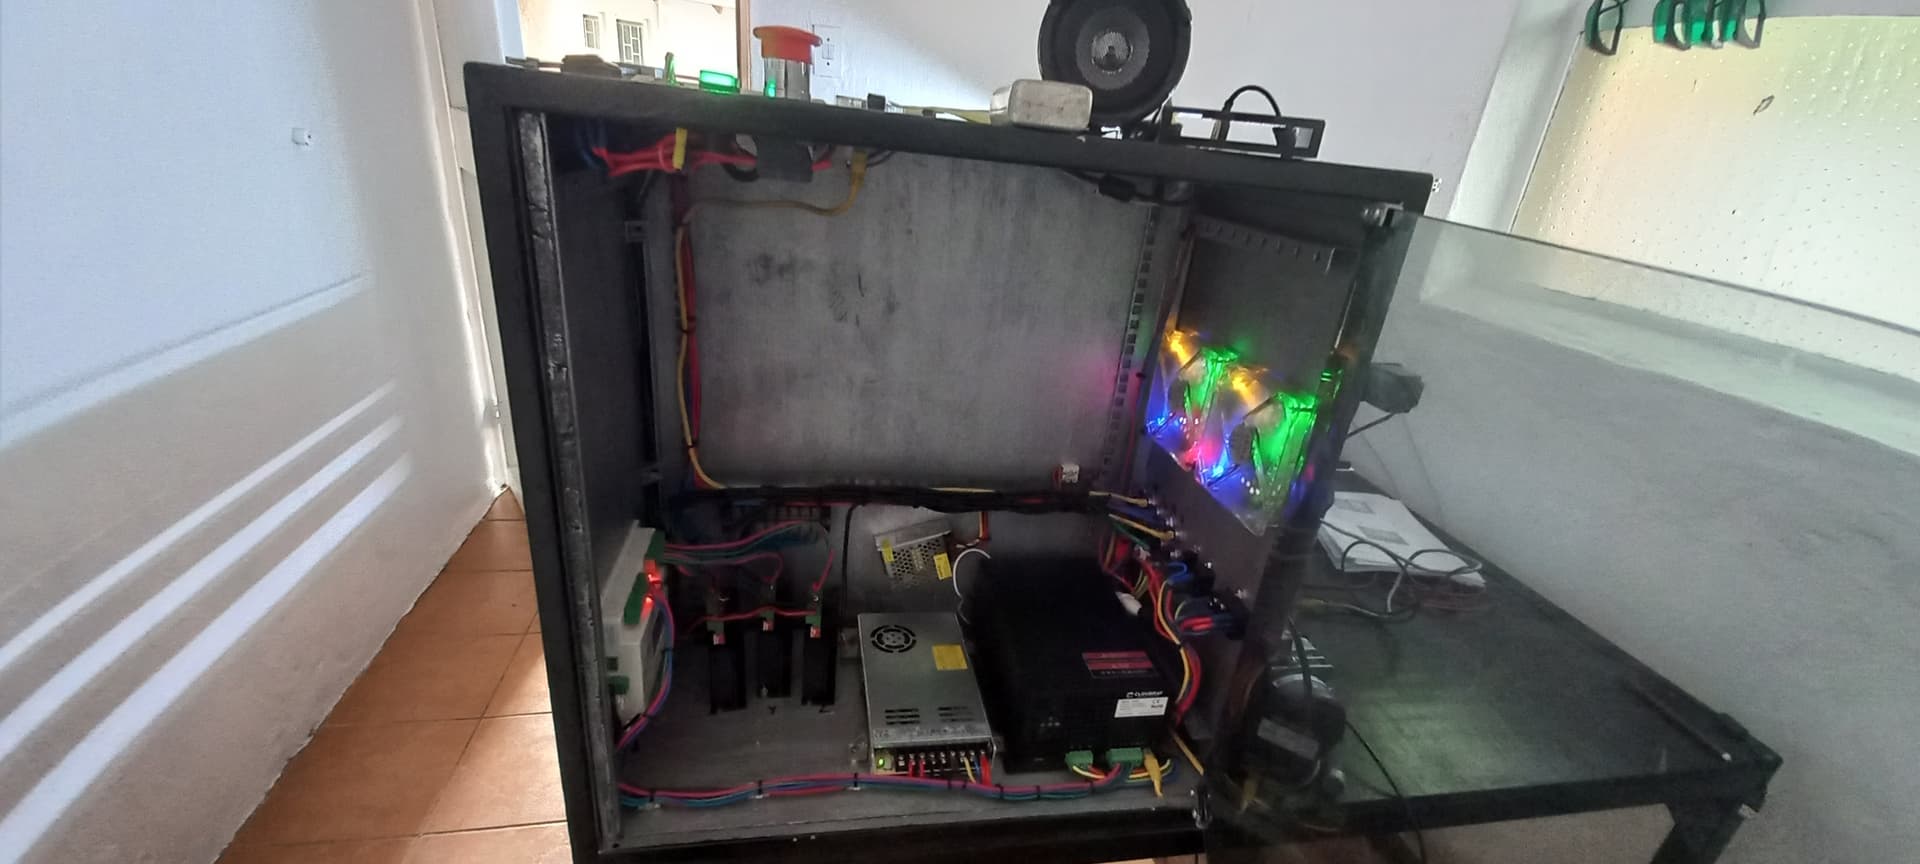
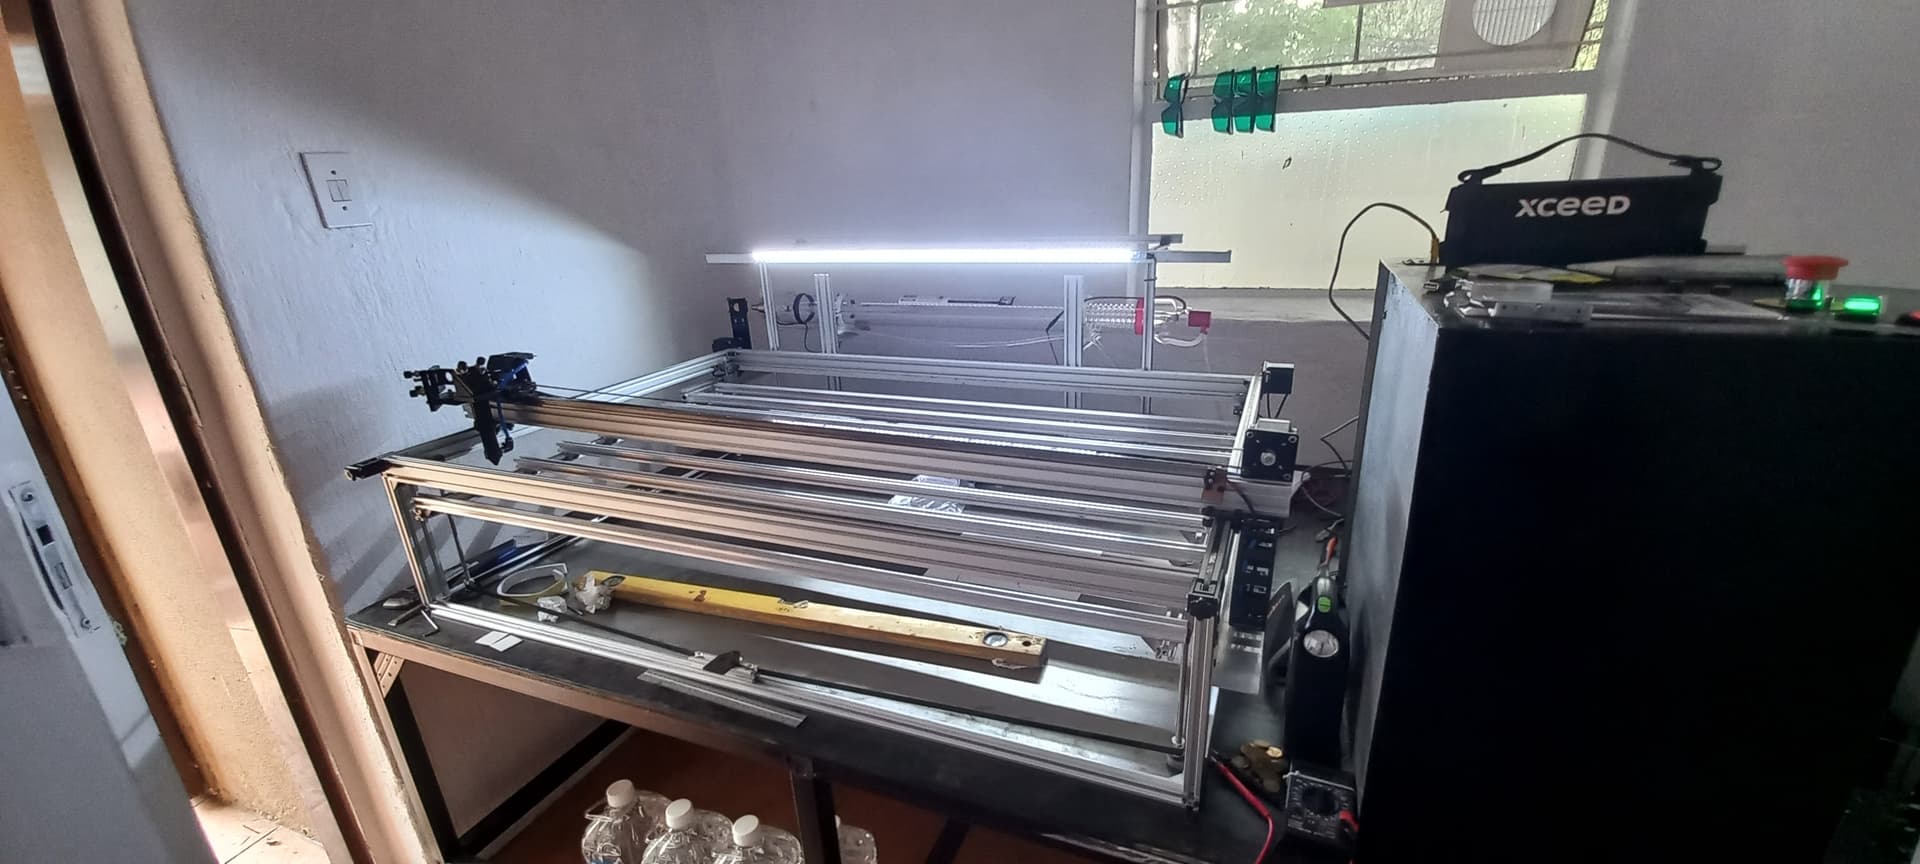
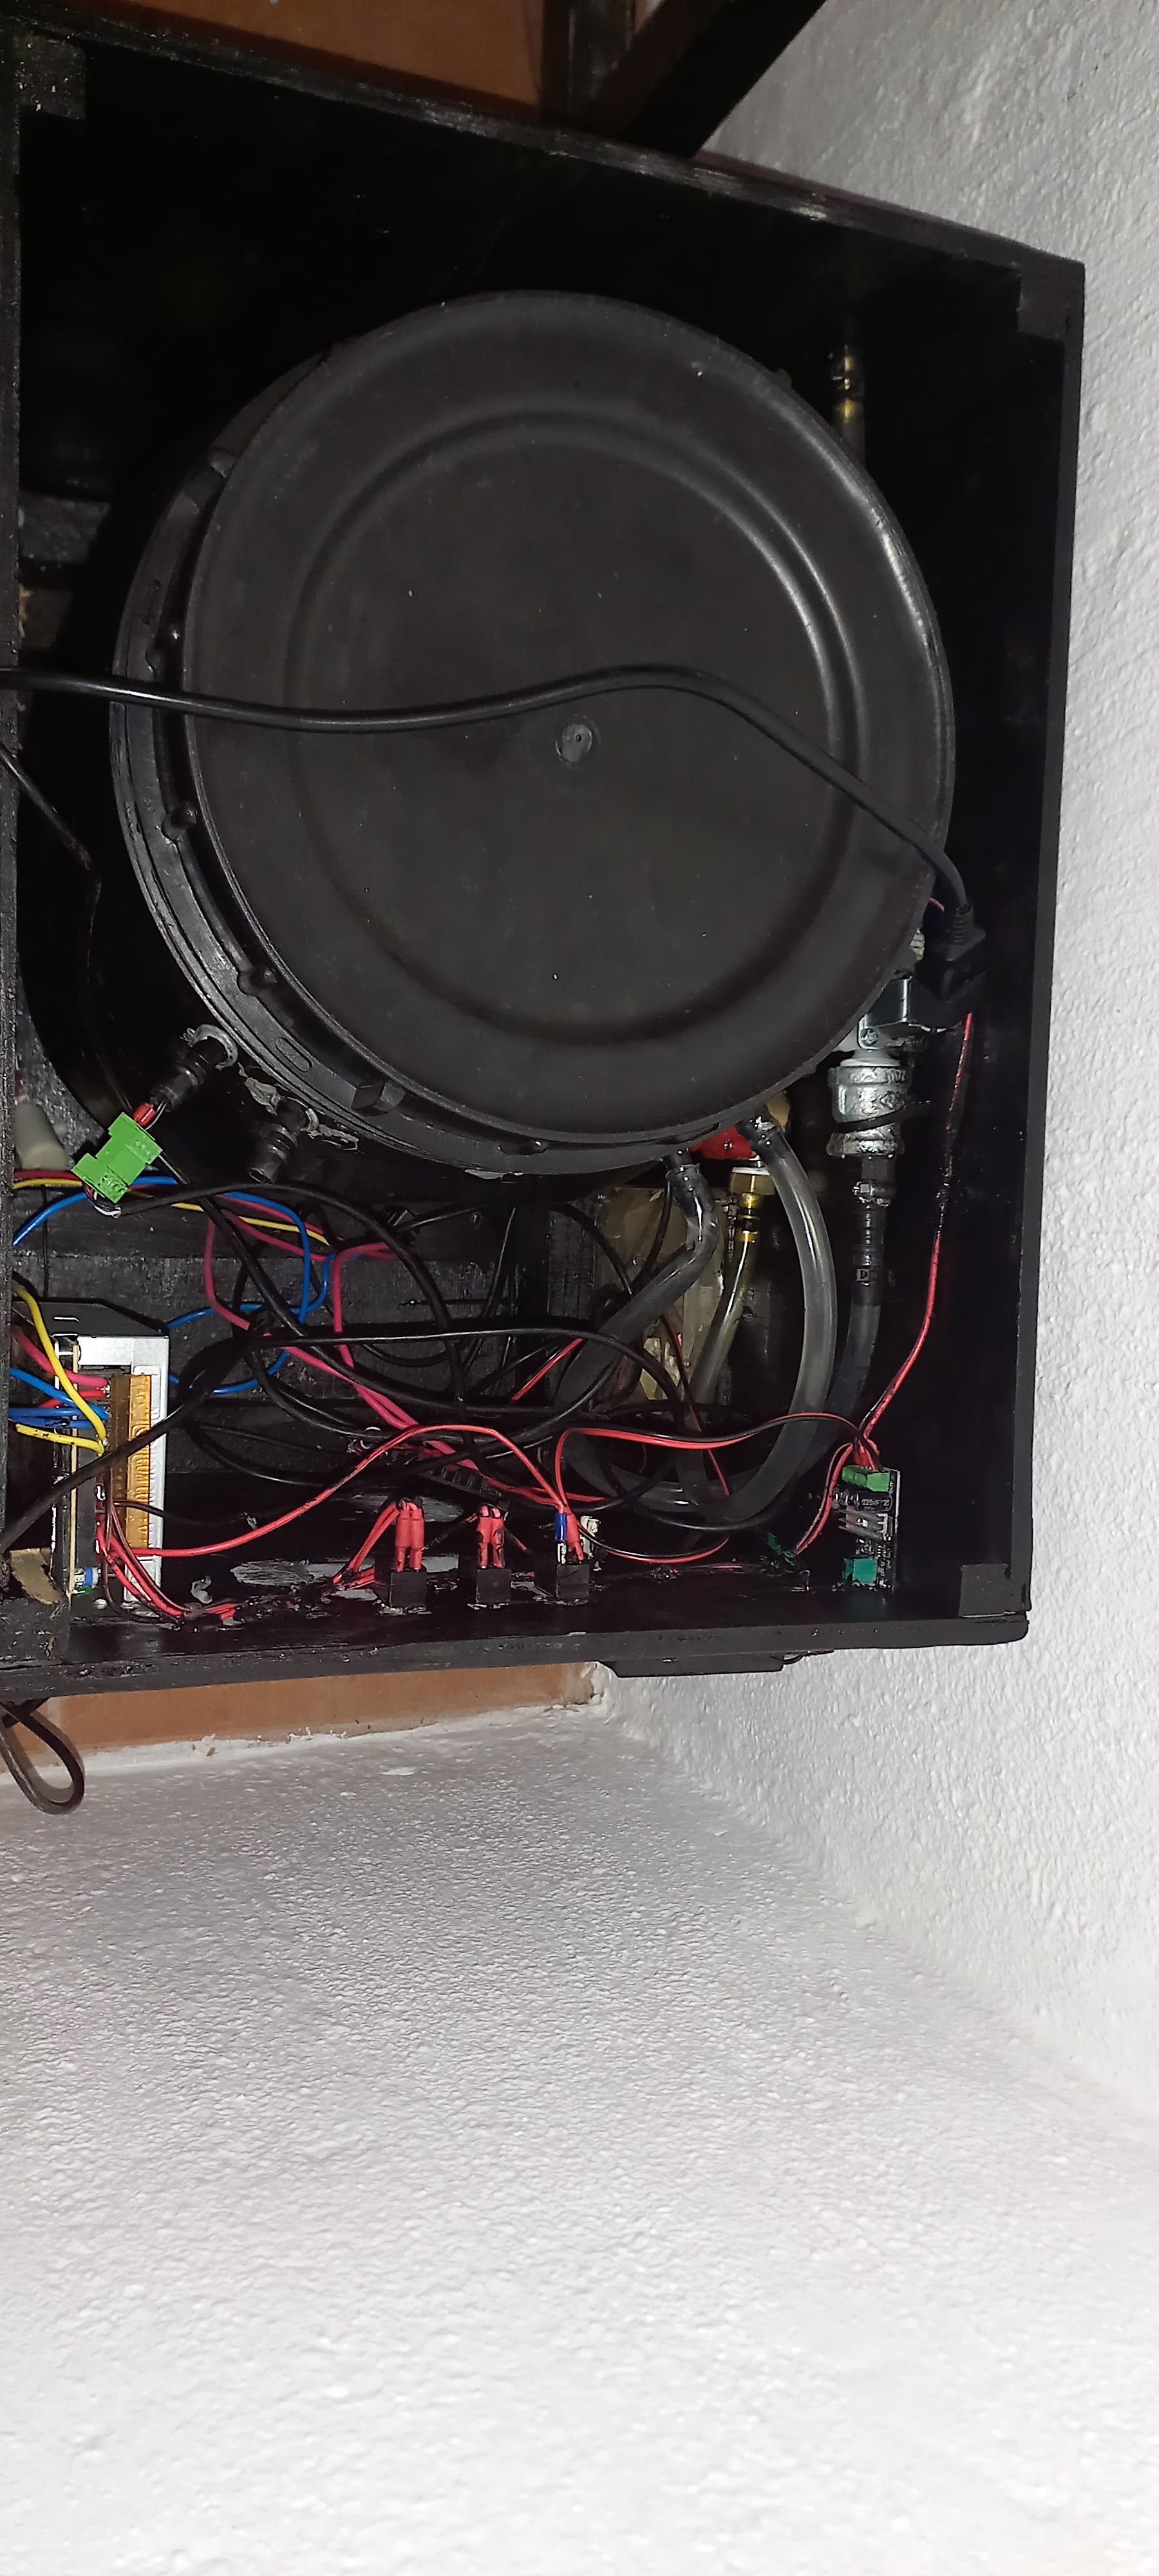
This is the enclosre that wil go ontop of the machine and then the exstraction fan must still be done and the door of the machine witch will get plexi glass on it so it will be closed
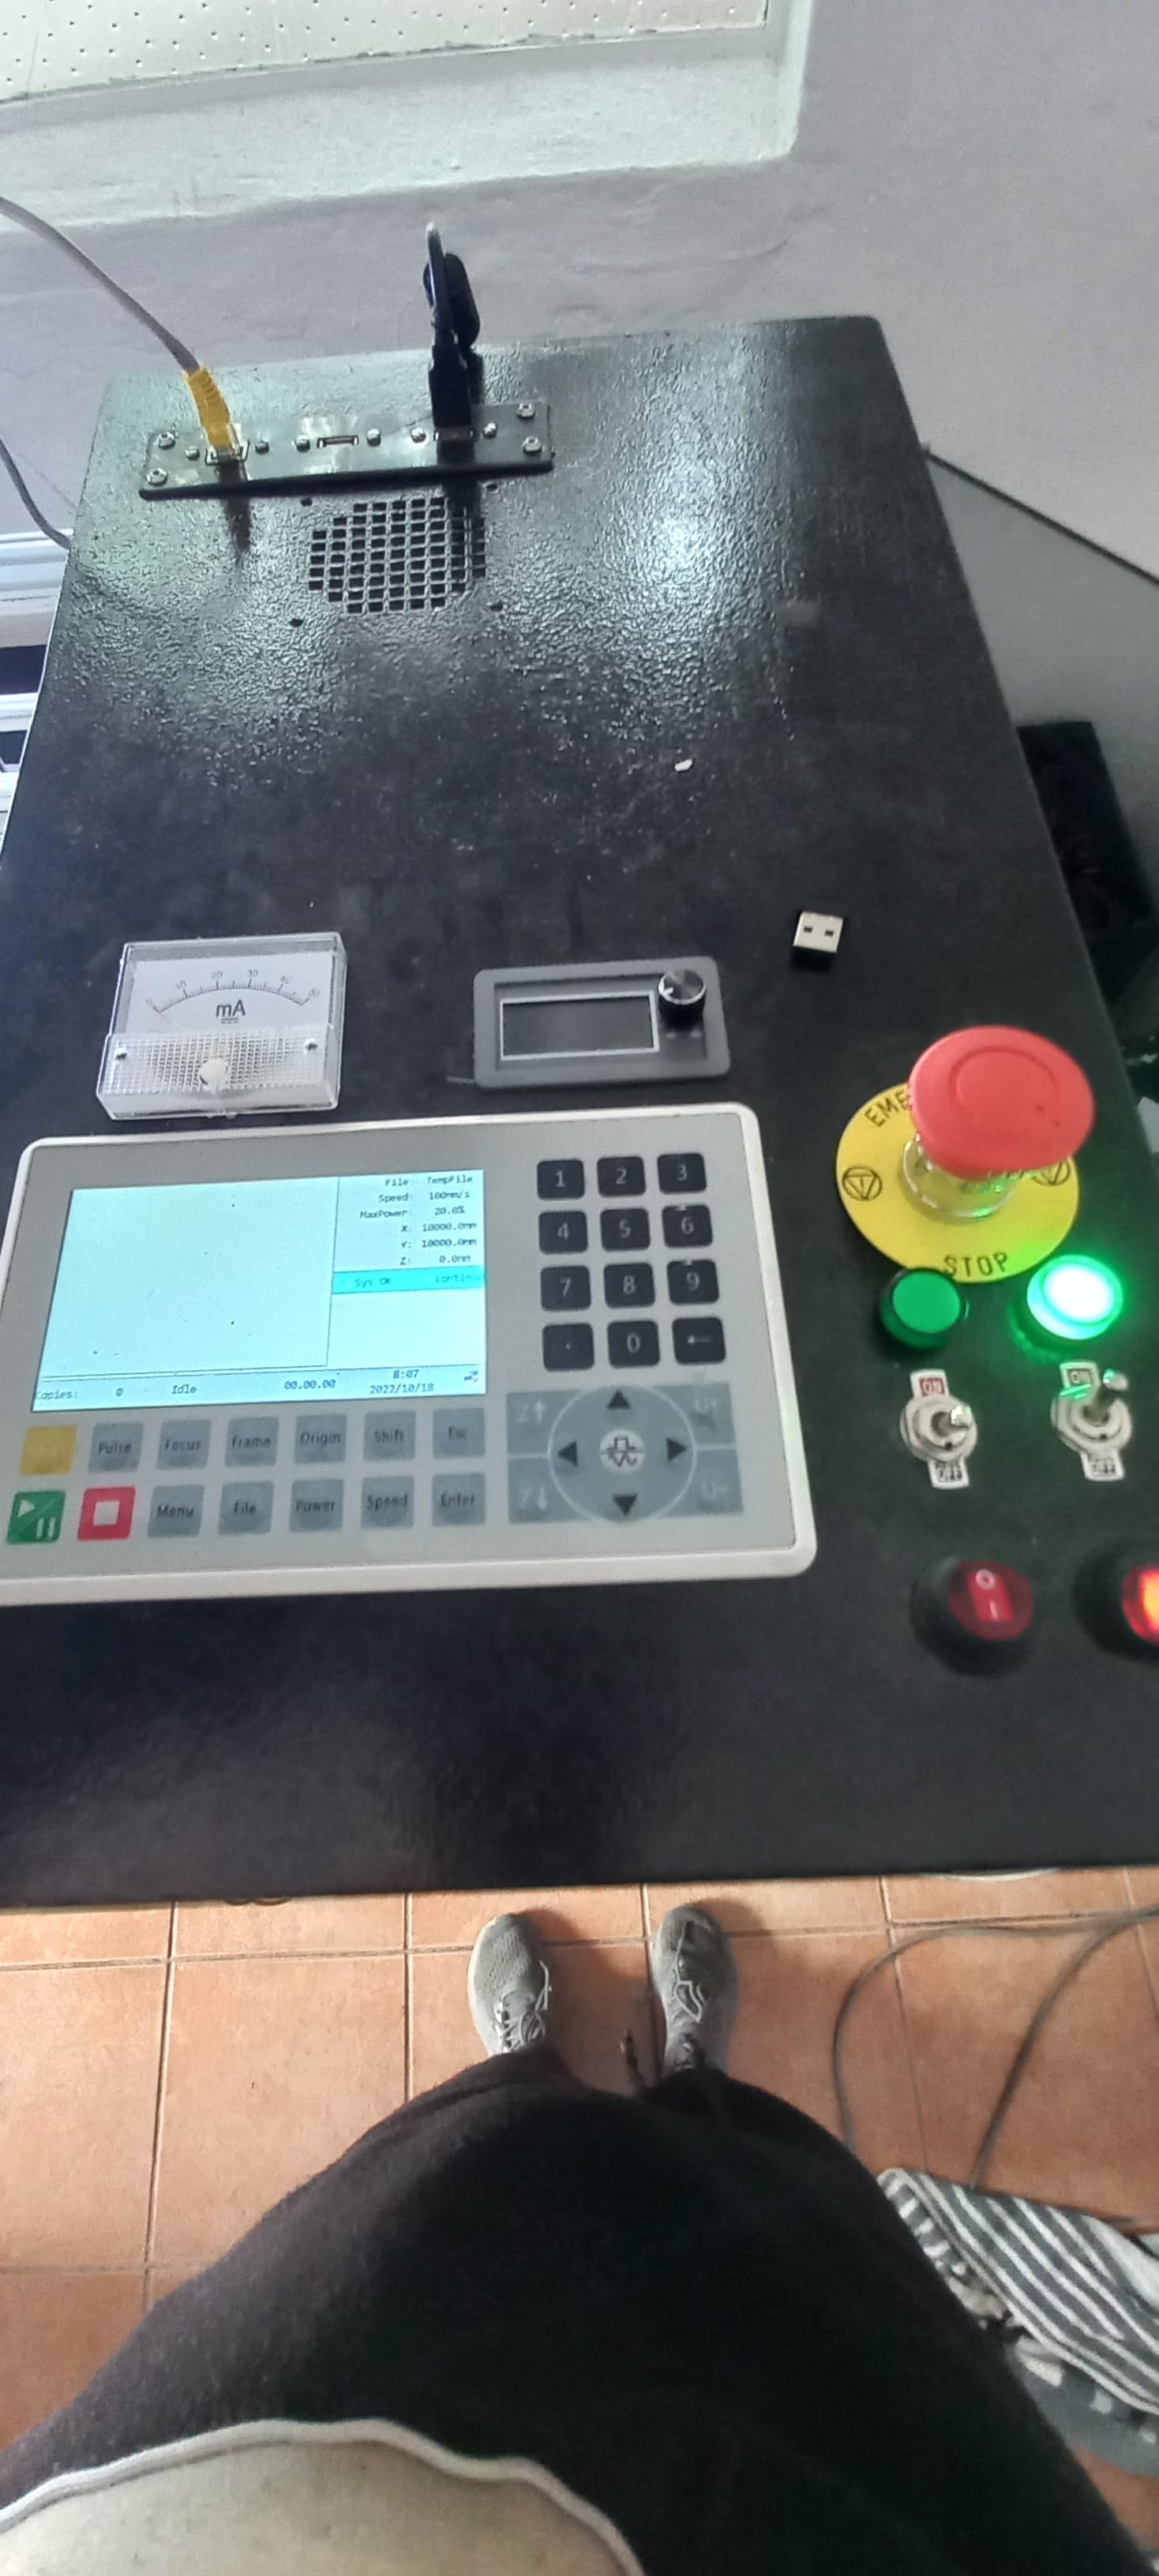
Im not using grlb i work with rd work and light burn but i did not conect light burn yet reason light burn wanted me to download a dfx product or difenrent one and i dont have a r 1000 at this stage to do so
Thanks my hubby worked hard to give me something to bring in money.
I only have one limit switch the left hand side of my machine and. Not in the front so i only neet to set it to not bum my laser nozle on the front
If you tell me ho to add the vidios i will…
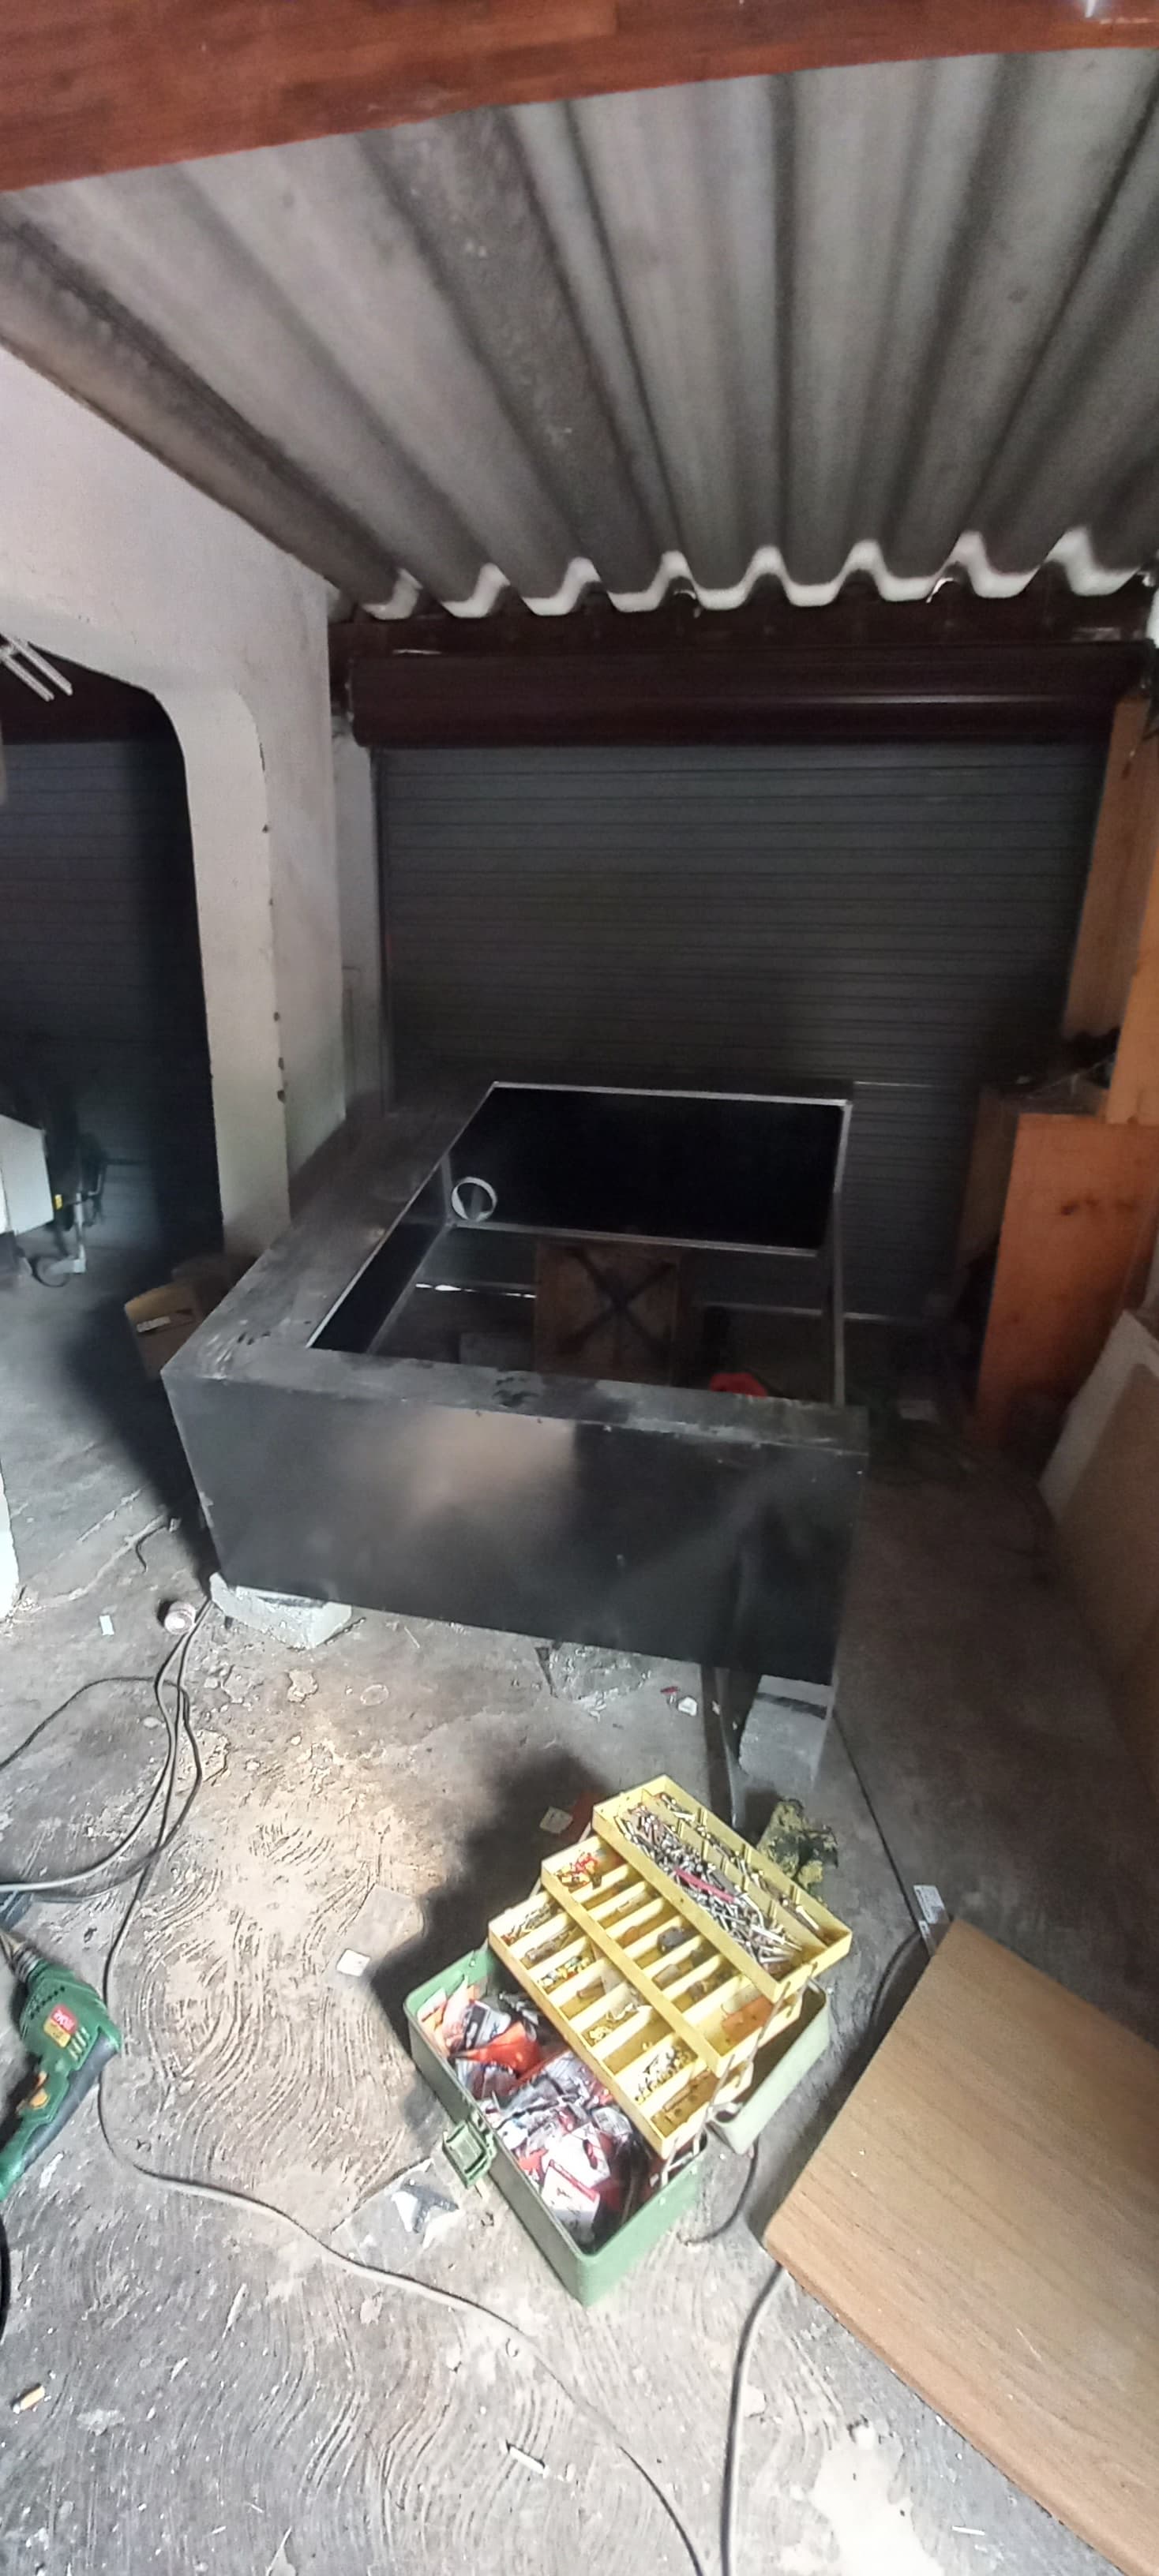
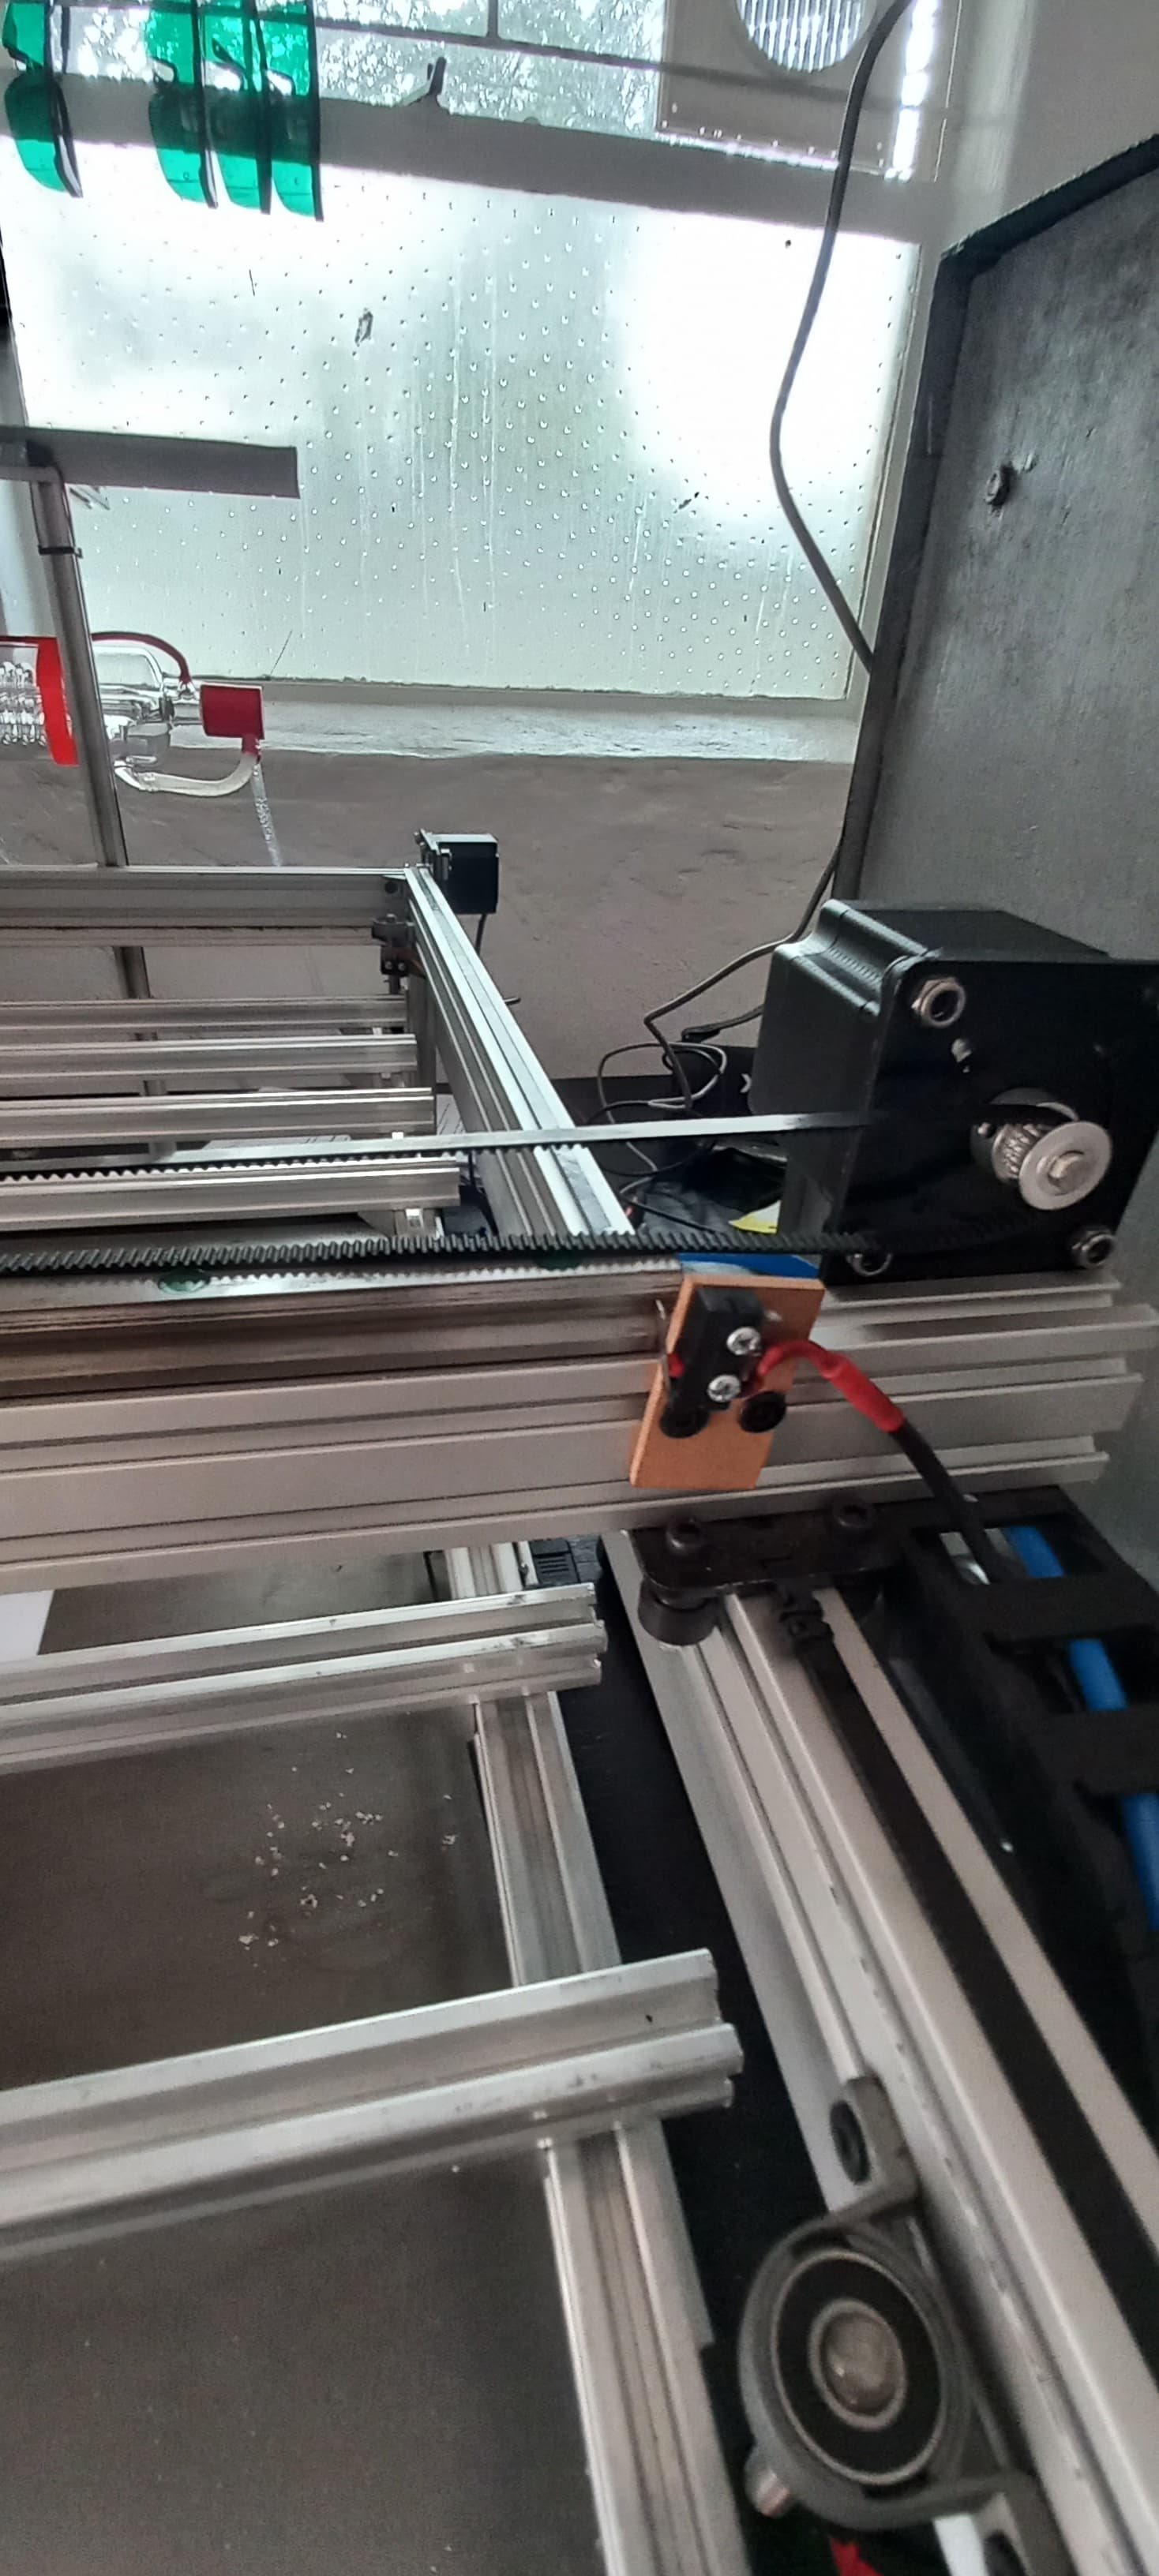
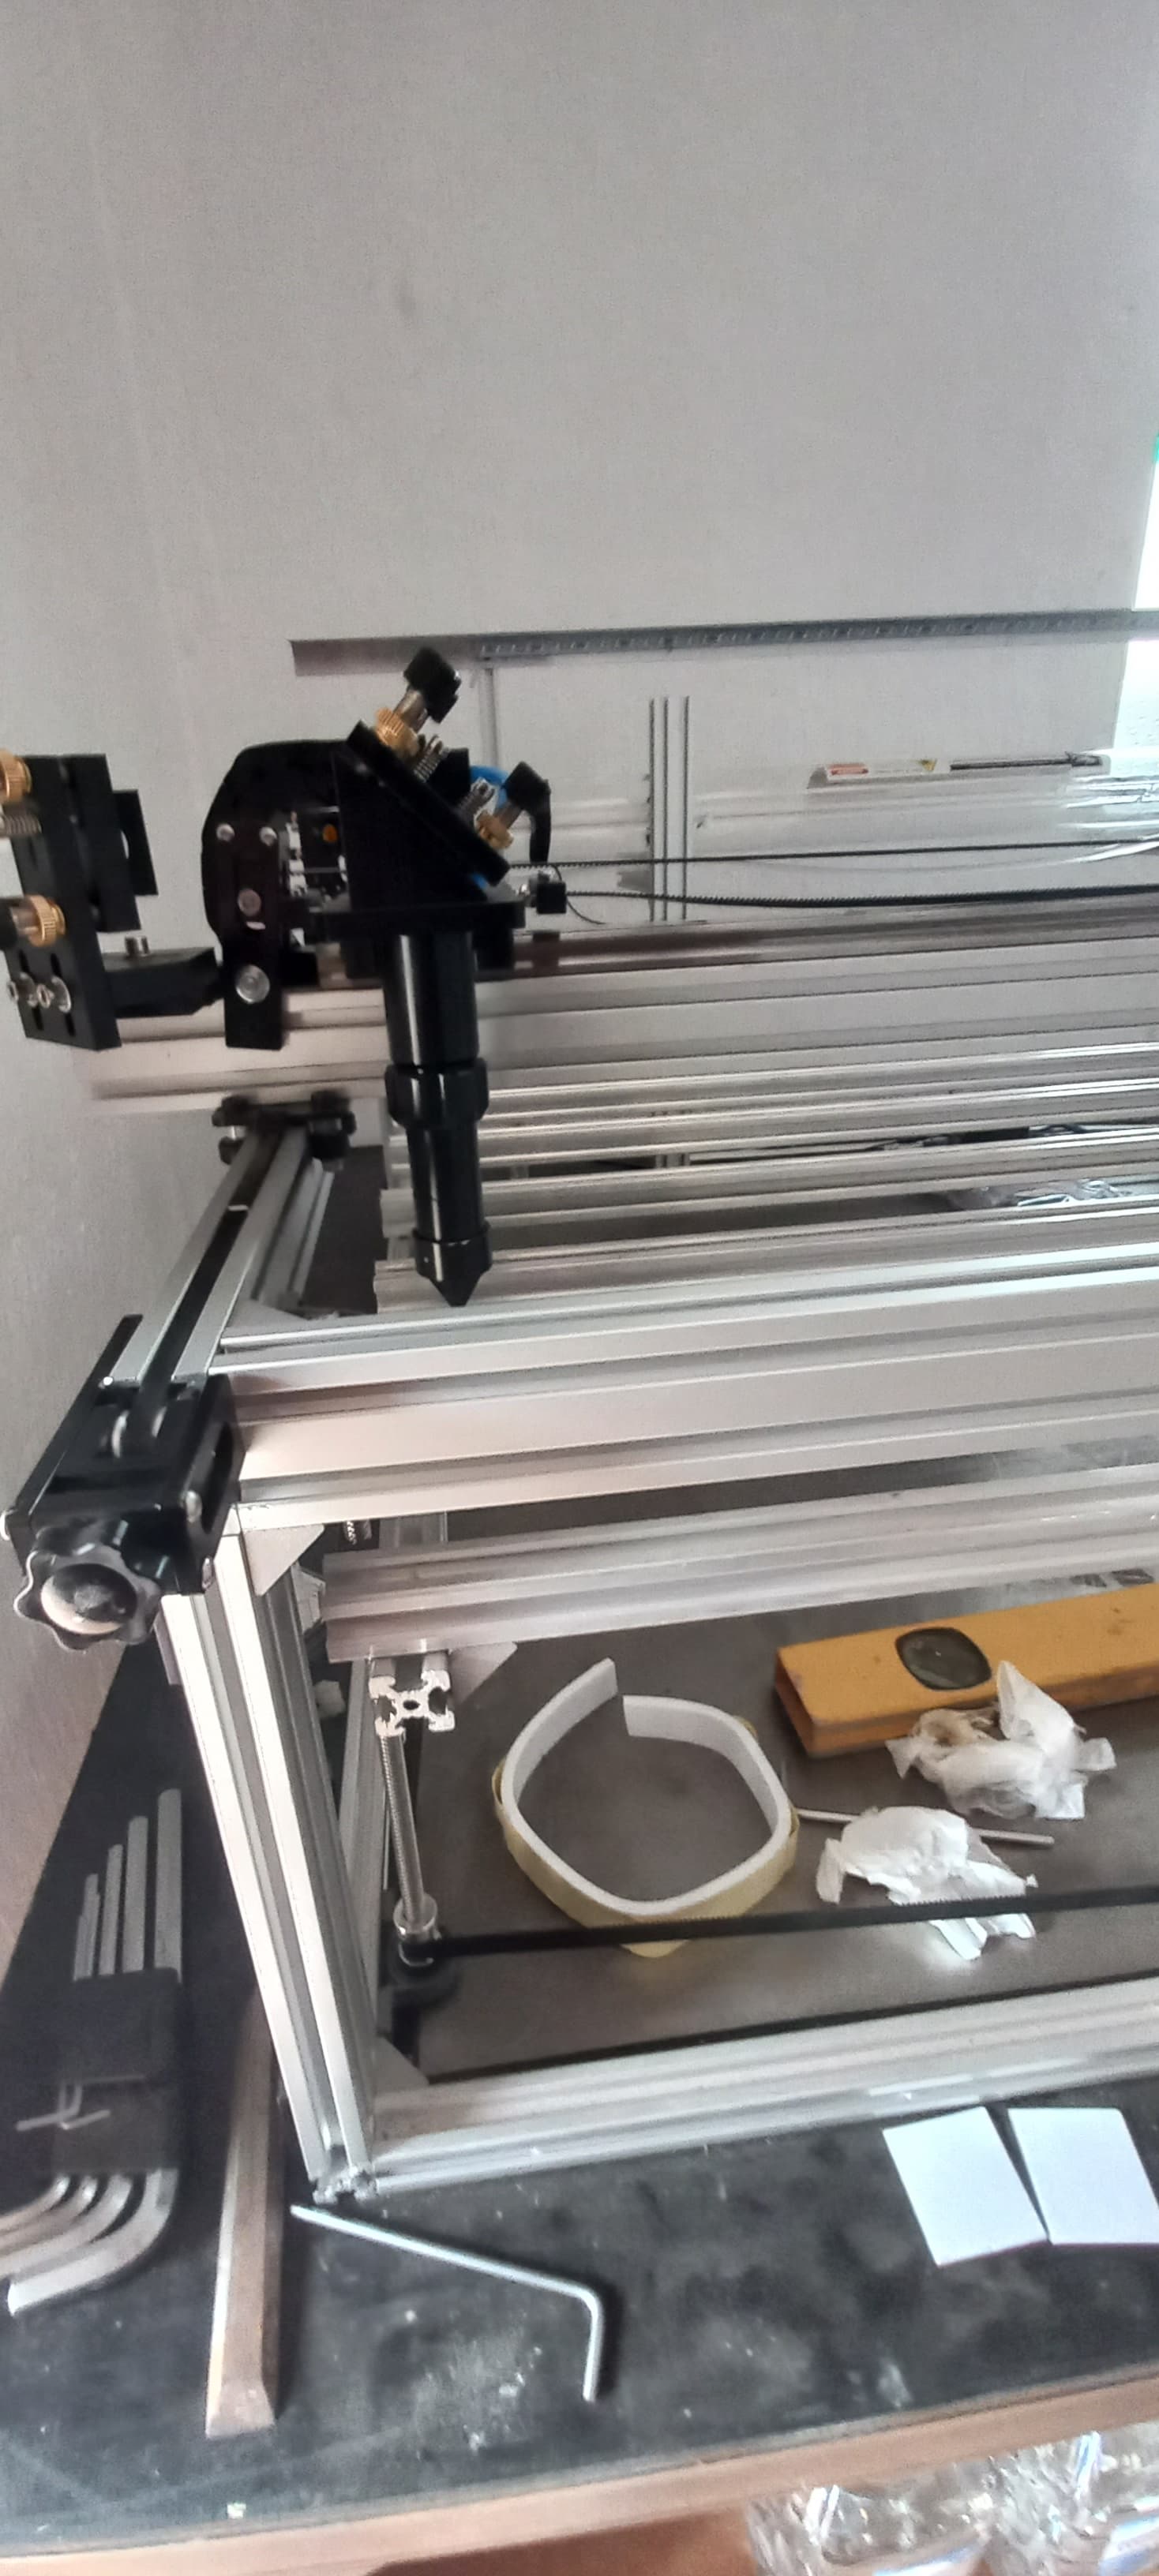
Im addin sosome photos and just bare in mind we are still busy we need to do some stuff still
First post…
In the photo they are all wearing glasses?
Regular glasses are made from polycarbonate, it blocks ir, so they are fine for safety glasses when used with co2 lasers. That’s all I wear when working with mine. I have some cheap safety glasses from Home Depot I keep around for visitors, although I think there is little danger.
Don’t follow you here… Lightburn should work without any dxf files…?
Also here, I’d suggest you setup the Ruida like it’s supposed to, with home switches and progress from there. The machine will need to home to be useful.
If you get it working manually homing it then put home switches on it, it might not work quite like you expect. Sounds like you have 50% of the switches maybe more.
IMHO, I would question how you intend to handle air flow?
That is probably the hardest thing to control. I end up leaving my lid up about an inch to allow for air intake and my exhaust is in the rear center of the machine.
- Pick a good place to ‘draw’ the exhaust/debris out of the machine
- Air from outside needs to get into the machine.
- You want air flow across the material, hopefully in a direct line from the air intake to the exhaust.
When I engrave, I do it from front to back, the debris flows over material that has not been engraved so it’s a cleaner job…
Just don’t forget to take this into account. Proper ventilation is really a requirement.
The ‘air’ supply, you will find to be inadequate for doing anything really useful. I had a ‘home’ compressor, but the noise drove me nuts… I now have a ‘quiet’ model… good thing for your spousal unit to get you for Christmas… ![]()
60lbs of pressure works wonders when you’re cutting…
I purchased this one, which is great, but pretty expensive. They have many and at lower cost…
https://www.aircompressorsdirect.com/California-Air-Tools-CAT-20015HPAD-Air-Compressor/p81916.html
I replaced my honeycomb bed with a rolled steel bed. It allows me to drill locating holes in the bed and is much more easy to clean than honeycomb. Honeycomb really messes up the air flow. You would expect it to work great but it really doesn’t.
When you can spare 15 minutes watch this video by Russ Sadler on honeycomb beds…
One last question where are your home switches connected to the Ruida and are the NO or NC switches?
Congratulations on the build, it’s a very beautiful job.
I think your spouse could have used larger wires … lol… these are all signal level and even the solenoid sinks only allow < 0.5A, so smaller wire would be much easier to ‘man’ handle around and route through the machine.
Good luck
![]()
Based on the photos it looks like you have switches meant for homing to top-right. Can you confirm? Does the machine home properly to top right at startup?
In that case if you are crashing to the front of the machine I assume you haven’t setup the max travel limits of the machine on the controller. This defines the software dimensions of your work area.
LightBurn documentation shows how to do this. This assumes using LightBurn but the same machine settings are available in RDWorks.
Configuring A Ruida - LightBurn Software Documentation
The limit switches you have at max travel should be seen as a safety feature but I don’t recommend you rely on them exclusively to define your work area.
I don’t think they use limit switches. They are home switches as far as I can tell… That’s why I asked about how they were wired and type…
Safety feature?
So it can’t home at this point… at least that’s my understanding.
Hence my suggestion she gets that worked out first, at this stage…
![]()
I only saw two switches in the photos which I took to be the homing switches, one on right side of X gantry, and one on the back right for Y axis. @Laserworl mentioned other switches that didn’t fit the photos so I took those to mean additional limit switches.
I couldn’t see a switch on the left in the photos and took the “right hand side” one to mean one at the front of the machine so interpreted these to be limit switches. I may have misinterpreted.
@Laserworl, can you confirm the total number of switches you have on the machine?
I think @Laserworl needs to clarify if they are actually home or limit. You would normally put limits on both ends of all monitored axes or it’d be rather moot to have any…
How they are wired and the type, NO/NC…
We need to make sure the hardware is wired up right, or it will be problems down the road…
![]()
It limit switches
Thanks i will set up the lightburn today