Hello everyone.
I’m running in a particular problem while engraving.
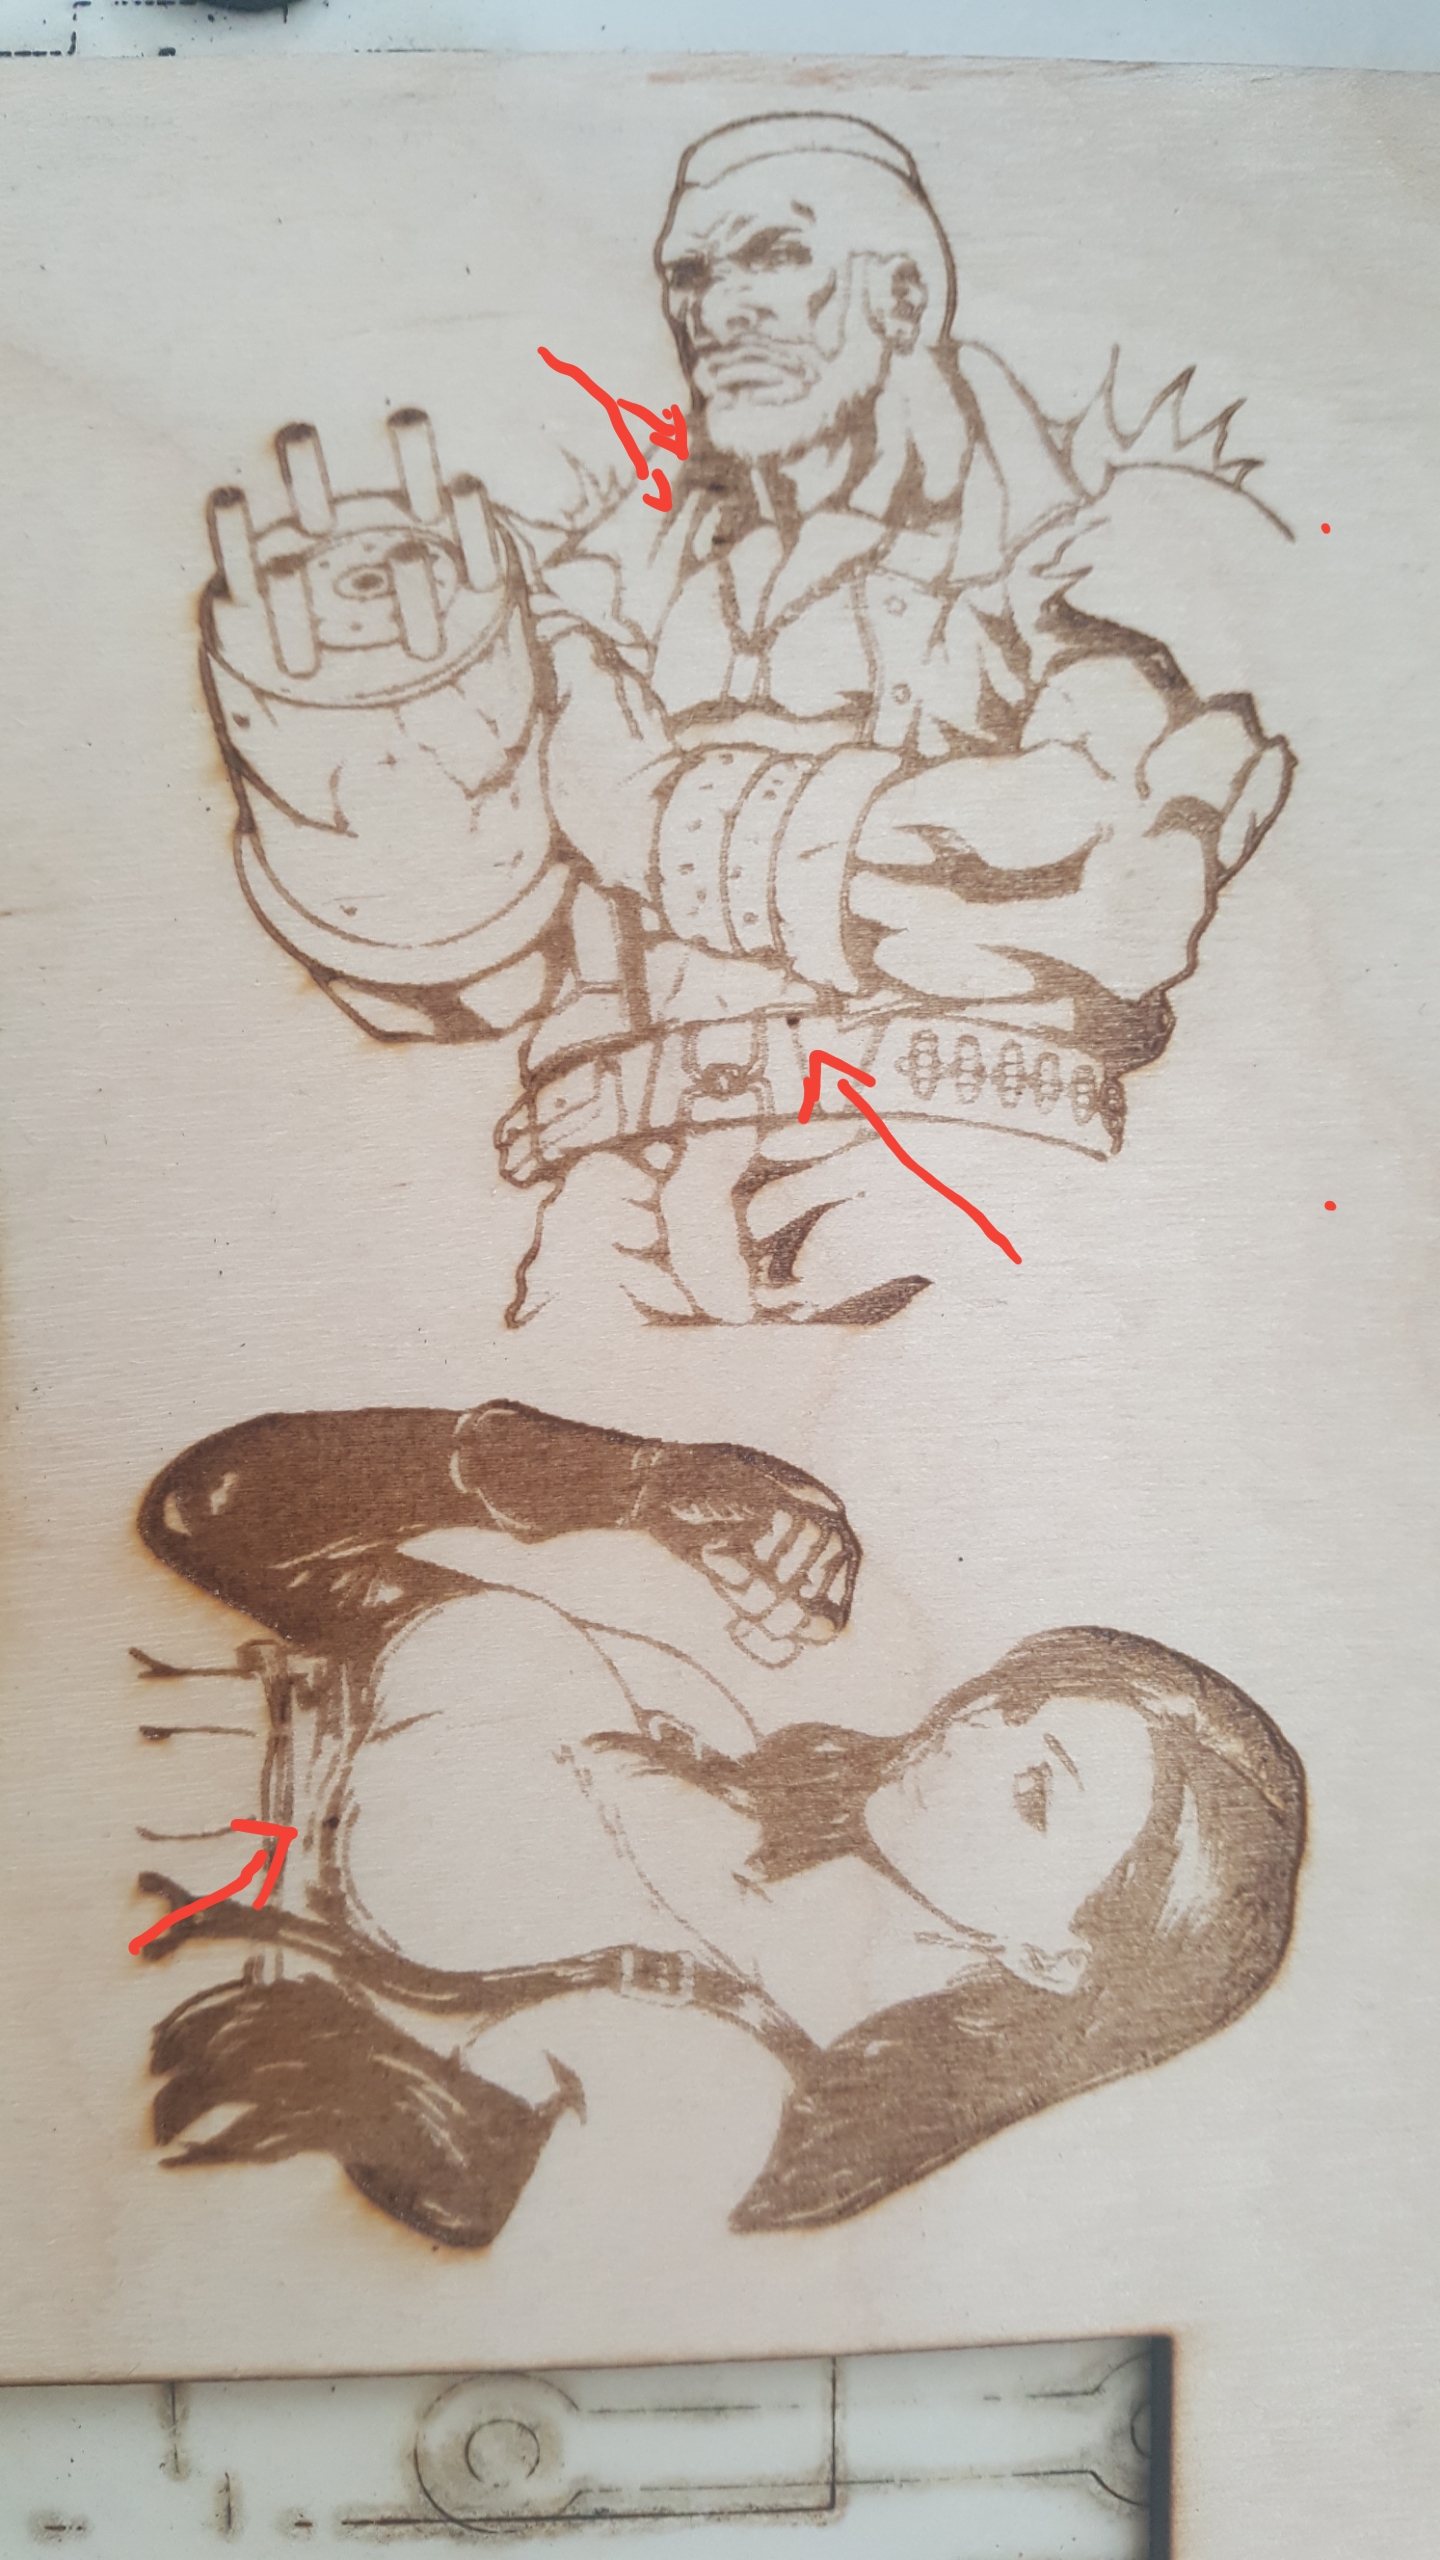
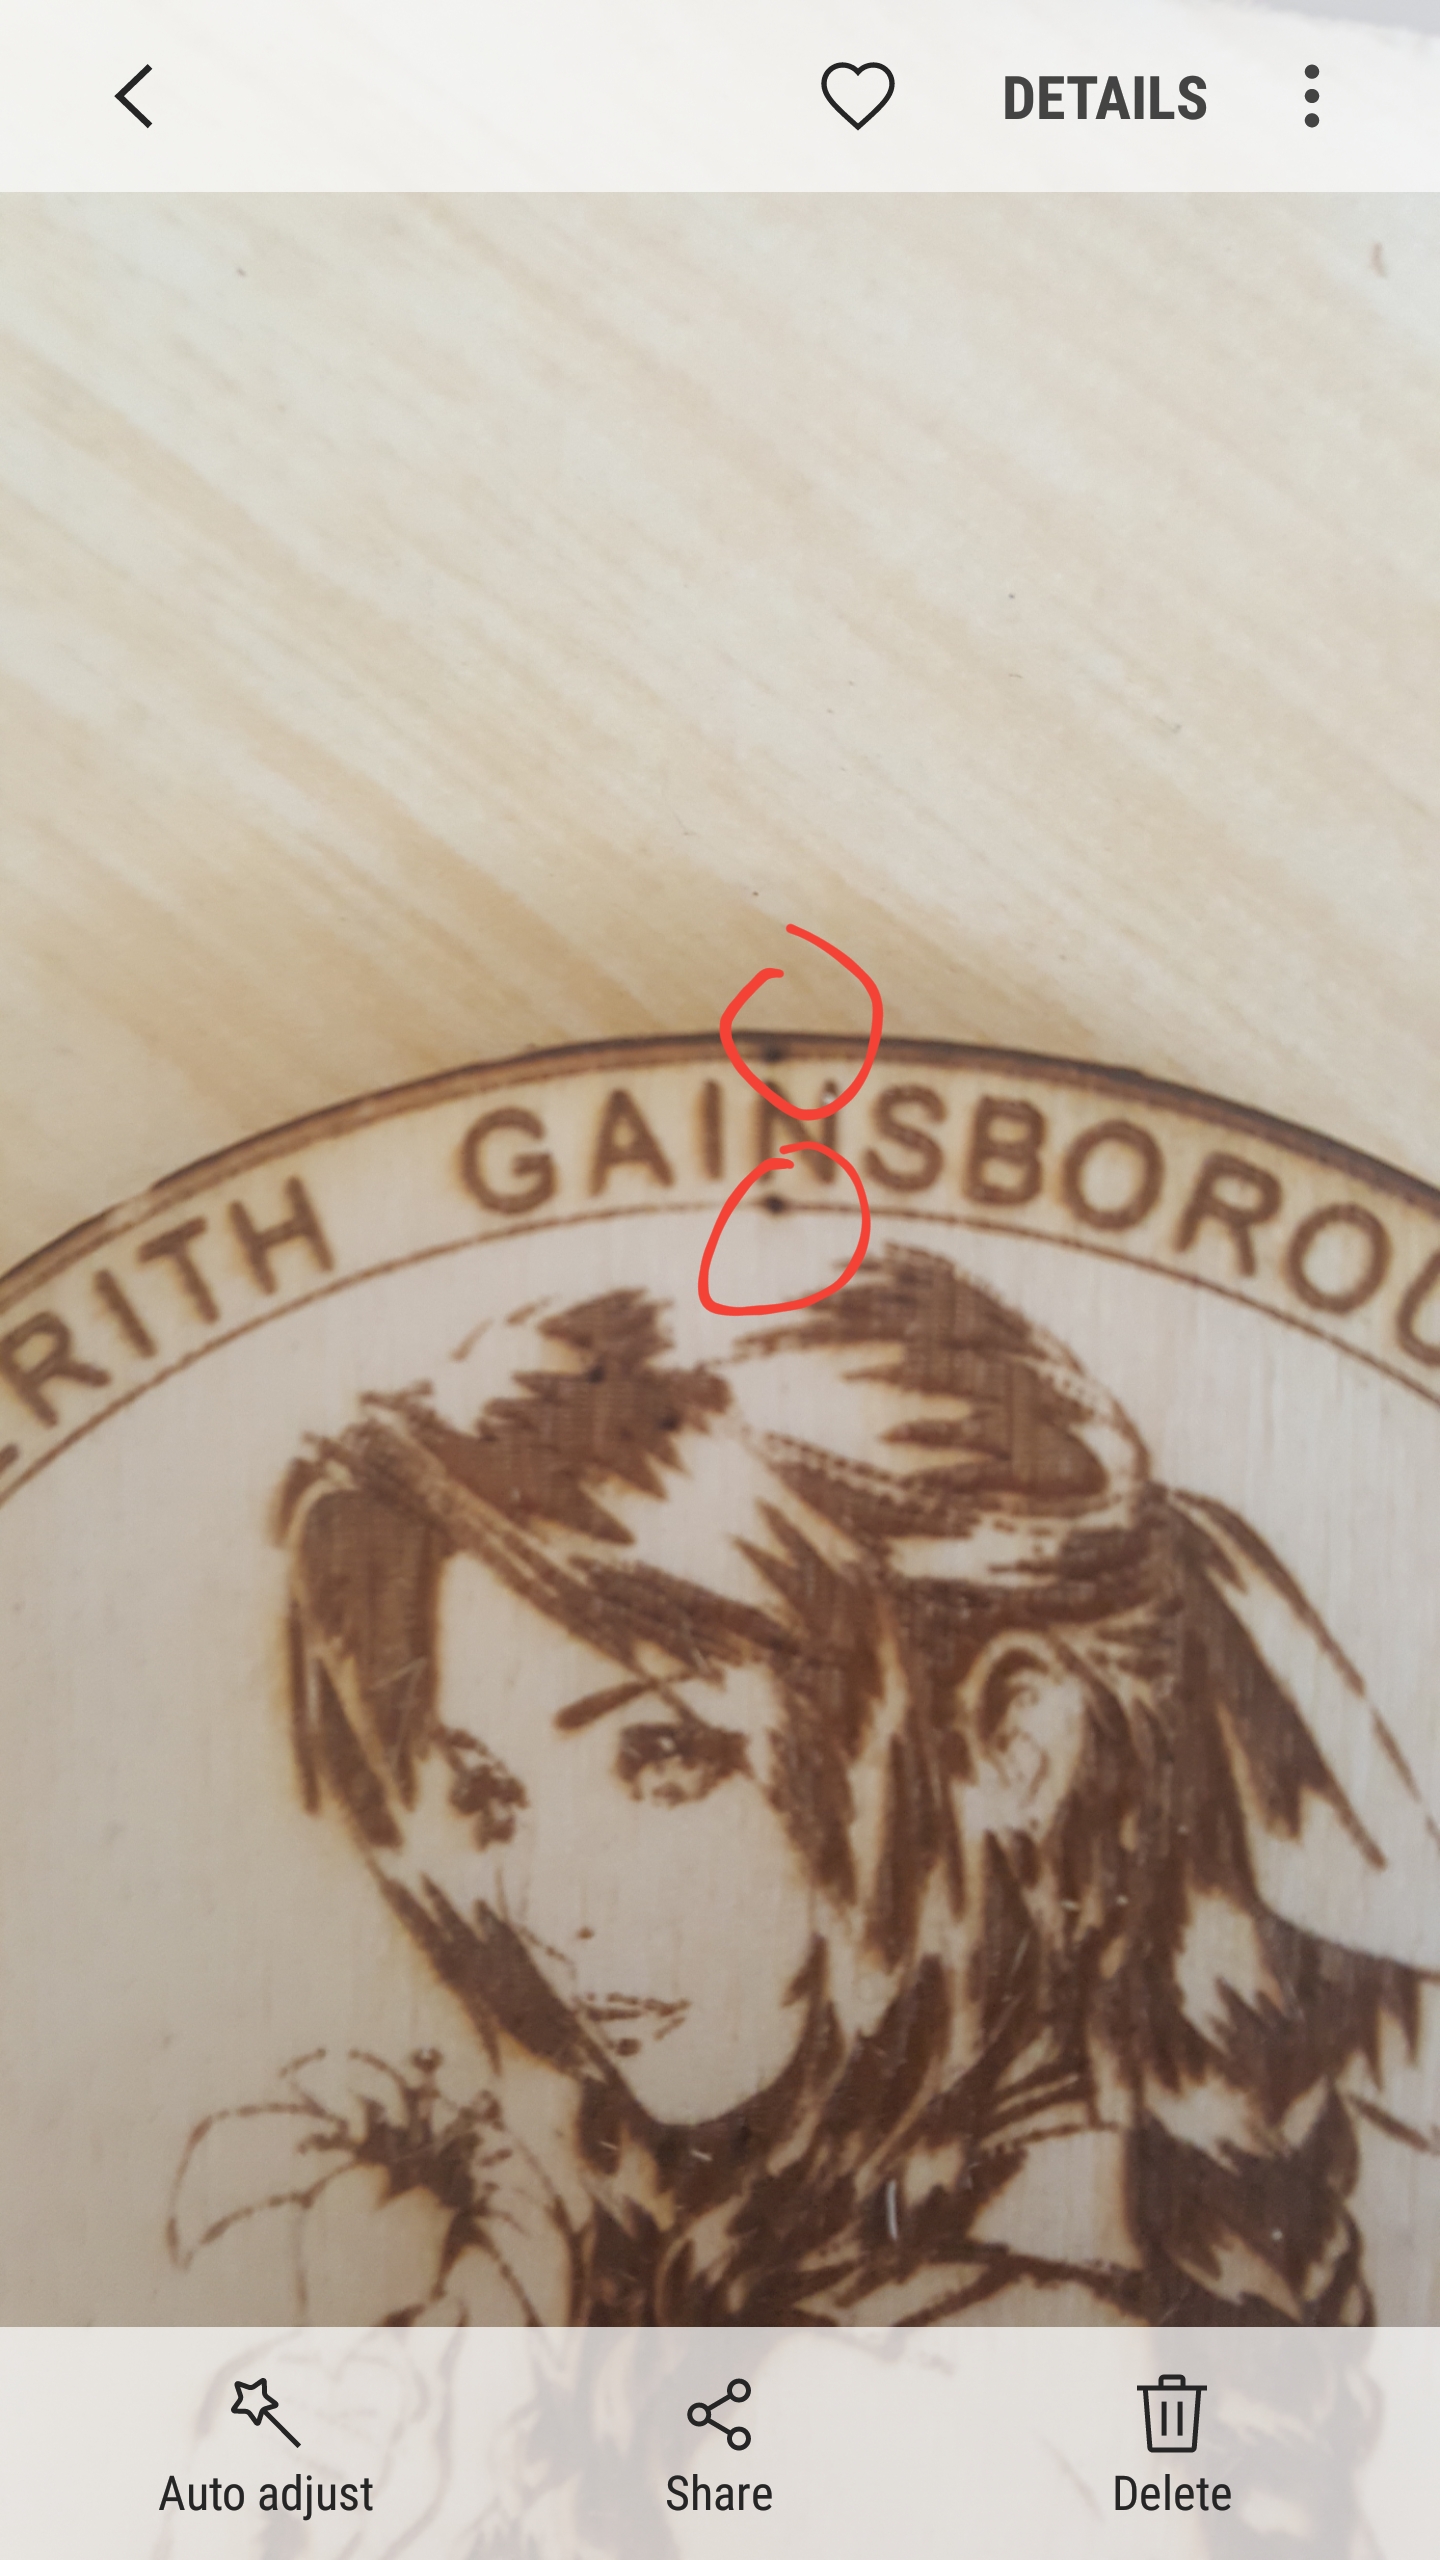
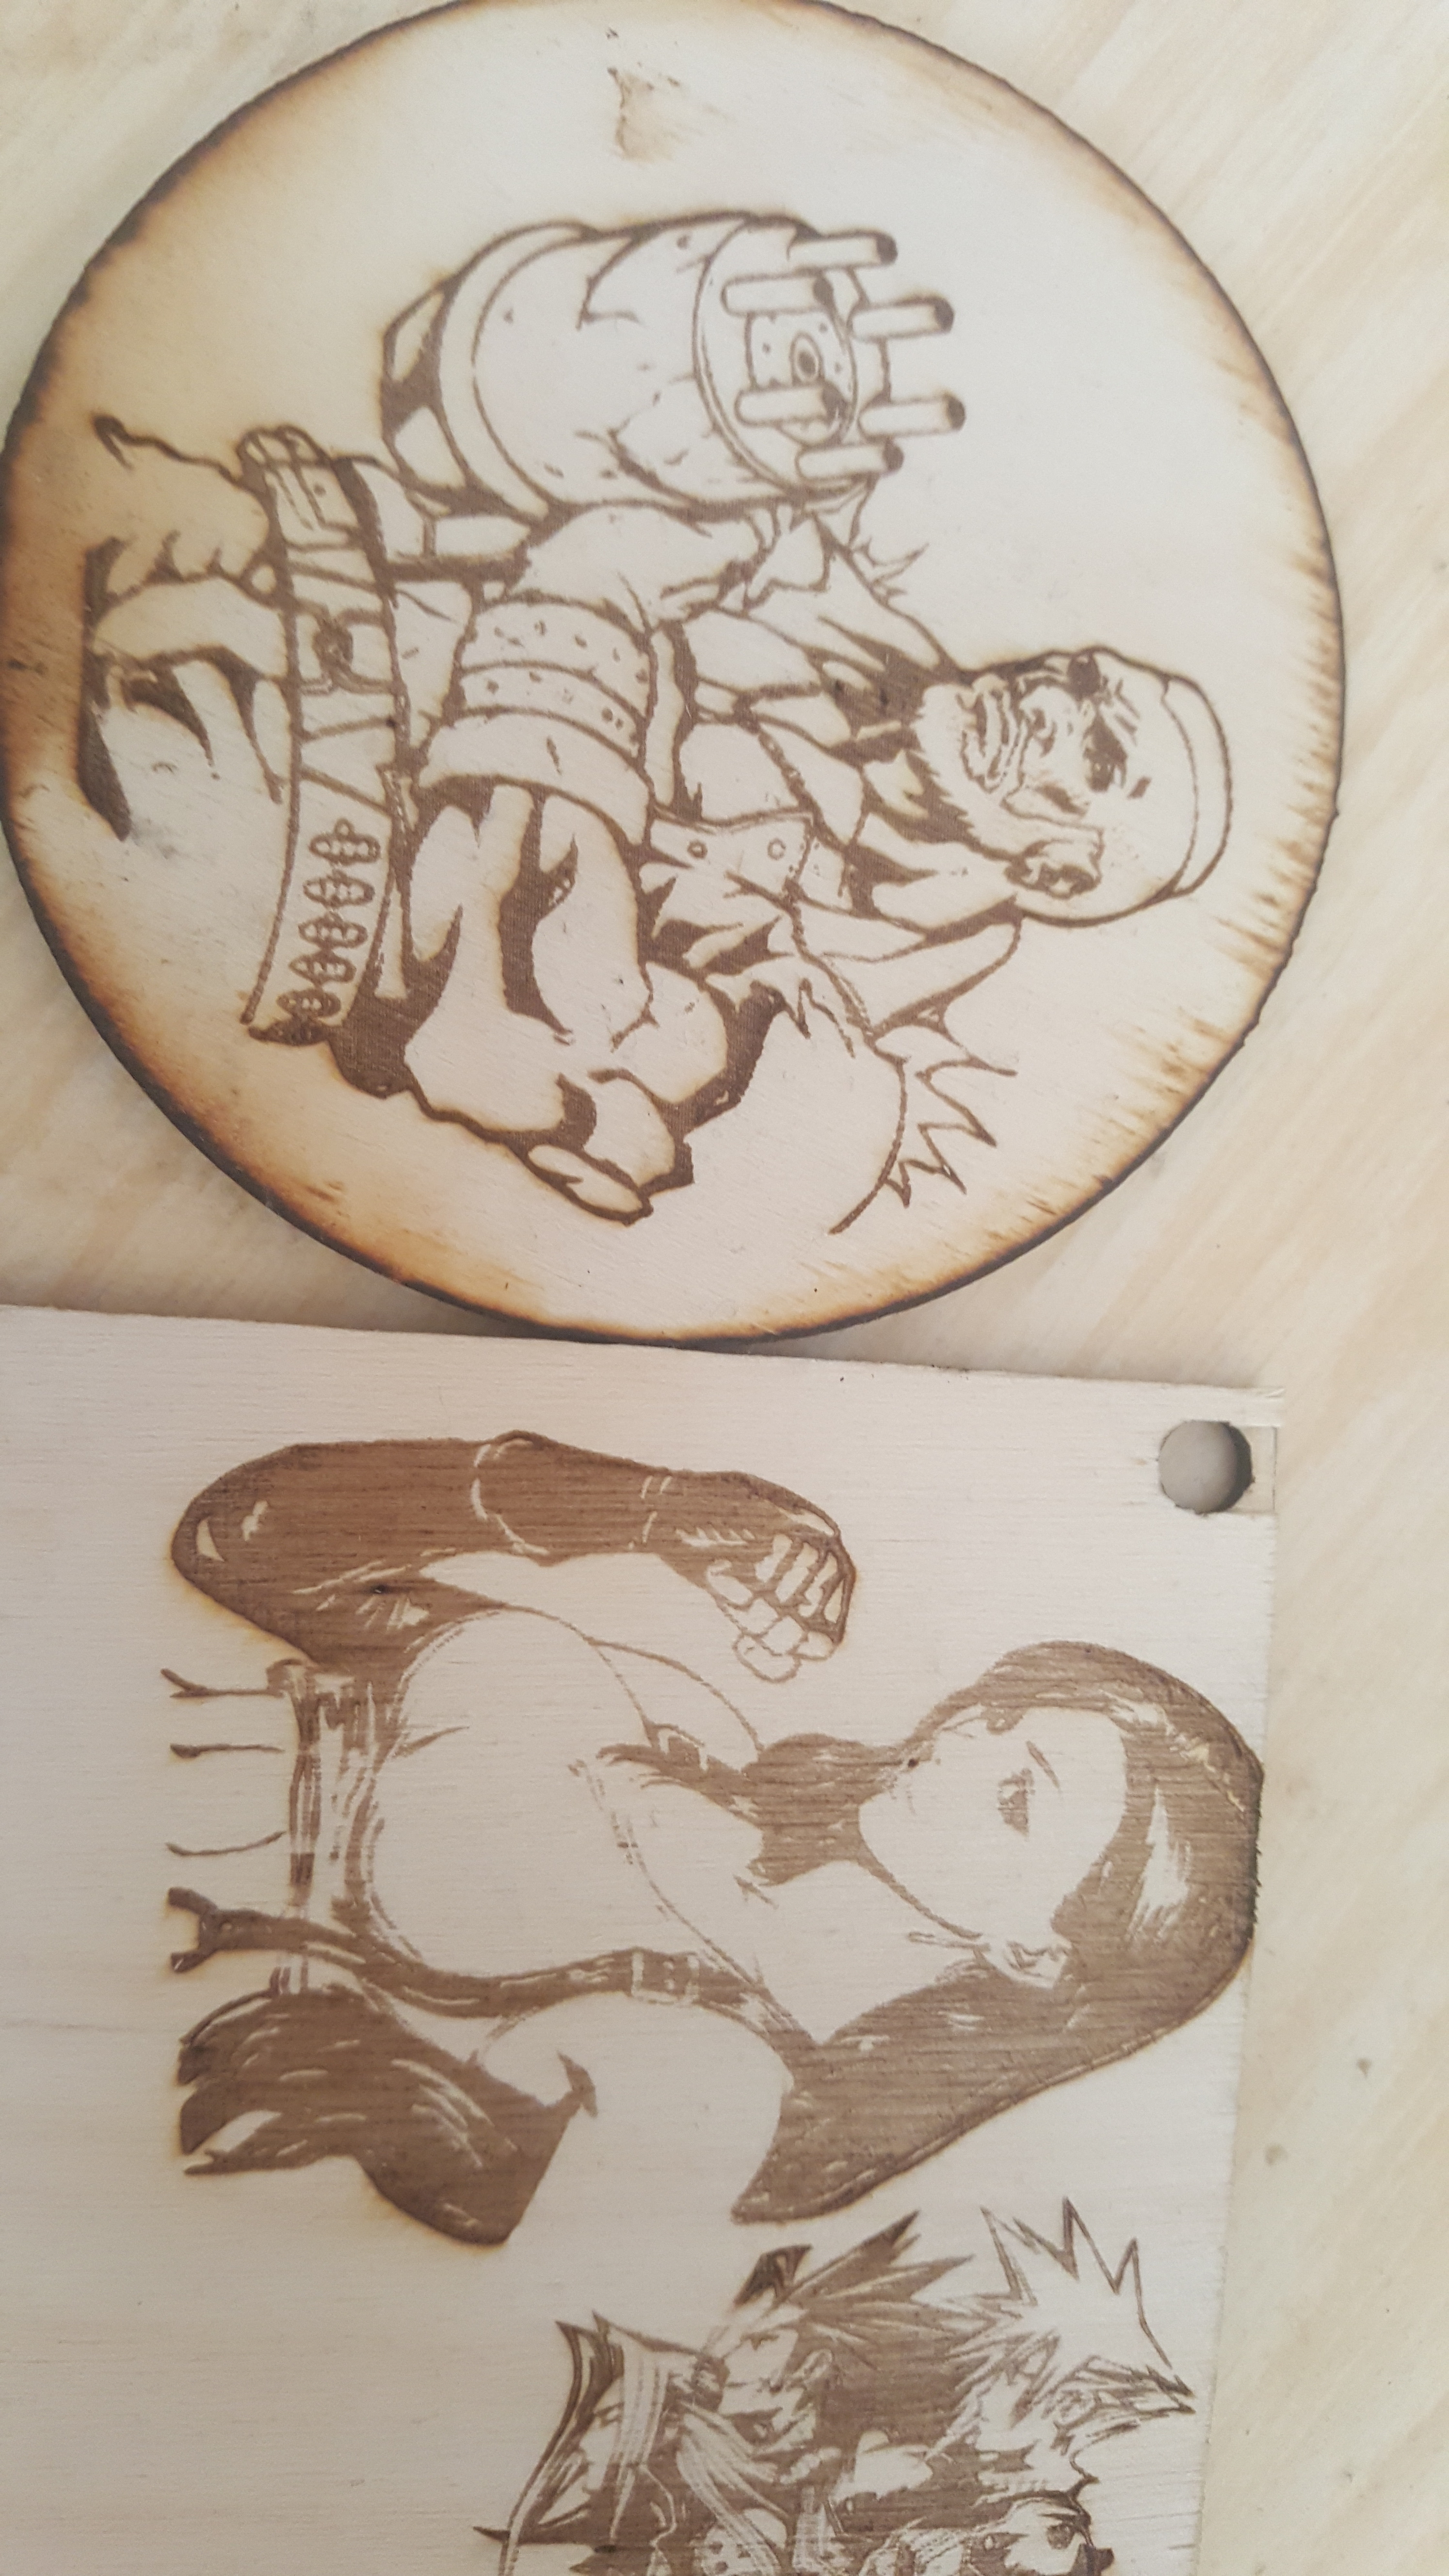
As you can see on the images, I have some deep dots. That’s not pictures files formats . I used a trace image tool before engraving. I thought that trace image tool created some dots, so the laser stops and firing again in a short period of time… But the drawing looks alright… for example there is nothing wrong on the characters belt (tracing image attached) But I’m getting a hole there constantly also on the guys neck 2 holes. While I turned the girls image 90 degrees I got the dots in completely different spots, by the lips and on arm… I’m running an adequate setting… like 50mm/sec and 60% power (since I have a week diode laser) I do overscanning 2.5% . Directional fill, Line interval 0.1 by default 254 lines per inch. Didn’t touched anything else.
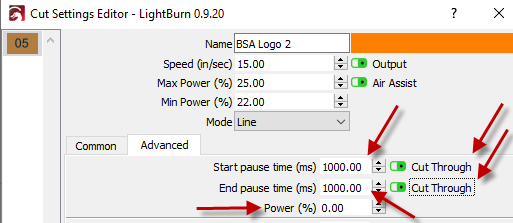
The other less minor problem is the 2 spots in a circle. I do a 50% power Line (cutting) mode with 80mm/sec so it will mark the wood without cutting it. But I got that marks on the spot where the laser start firing. I understand that there is more power at the very beginning, that’s why It get overburned… do you know if there is workaround for this problem.
While the second problem is understandable. The first problem troubles me a lot and I can’t understand why this happening. I read here and there that maybe a lens got dirty. I tried cleaning it but nothing changed.
Edit: After observing the whole engraving process. I noticed that the head stops just for some ms (like getting confused what to do next) then continues. So when this happens the deep burned mark appears
The mark appears at the same spots. Even after scaling the object but keeping it at the same position in the software.
The marks appears in different locations if I relocate the object in software.
Thanks in forward for your advice

 .
.