Merhaba arkadaşlar, bu işte çok yeniyim ve acemiyim. Bir asistanım olmadığı için tek başıma yapmaya çalışıyorum. Çok başım ağrıyor. Lütfen bana yardımcı olabilir misiniz?
Hello friends, I am very new and novice in this business. Since I don’t have an assistant, I try to do it alone. I have a terrible headache. Please can you help me?
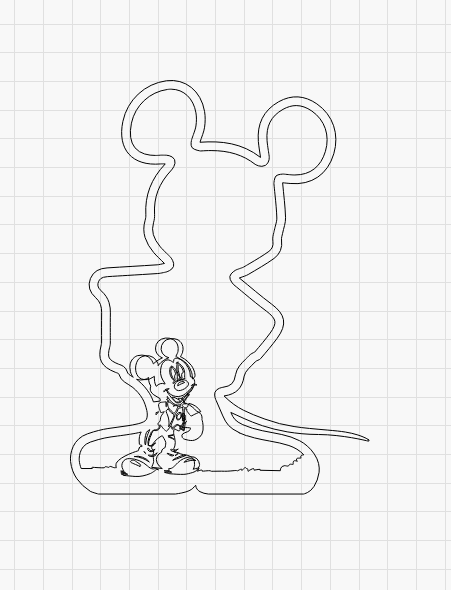
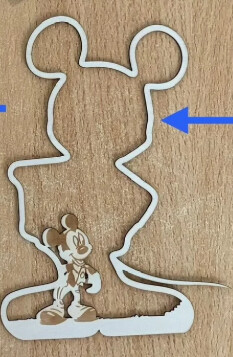
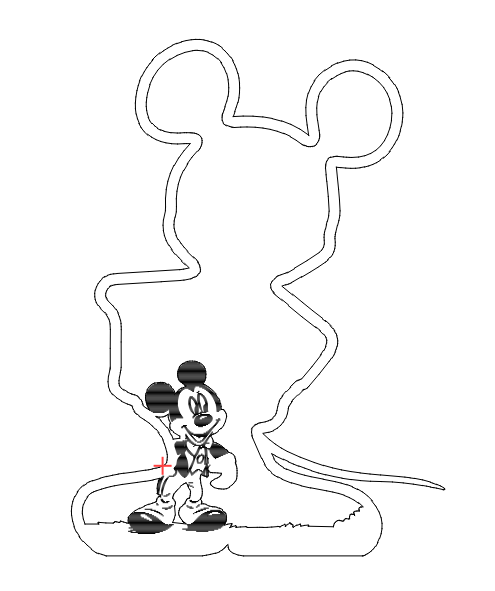
How can I make the object in the first picture like the one in the second picture? This might be really easy for those of you who know, but I’ve been thinking about it constantly and my brain is stuck. Is there anyone who can show me this in action?
You need to put everything that needs to be engraved on one layer and everything that needs to be cut on another layer.
You can upload your file here and I will try to help you get started.
This is my sample file. I will make other models that will be like this, so I need to understand the logic of this thoroughly. I would be very happy if you could show it in practice.
To be a bit direct, your file is not particularly suitable for what you want as a “beginner”. To be able to make that file usable, it requires knowledge of node editing and even with that the result will not be good, in my opinion.
There are many displacements of what was once several layers, which must be manually found, selected and moved to the original place.
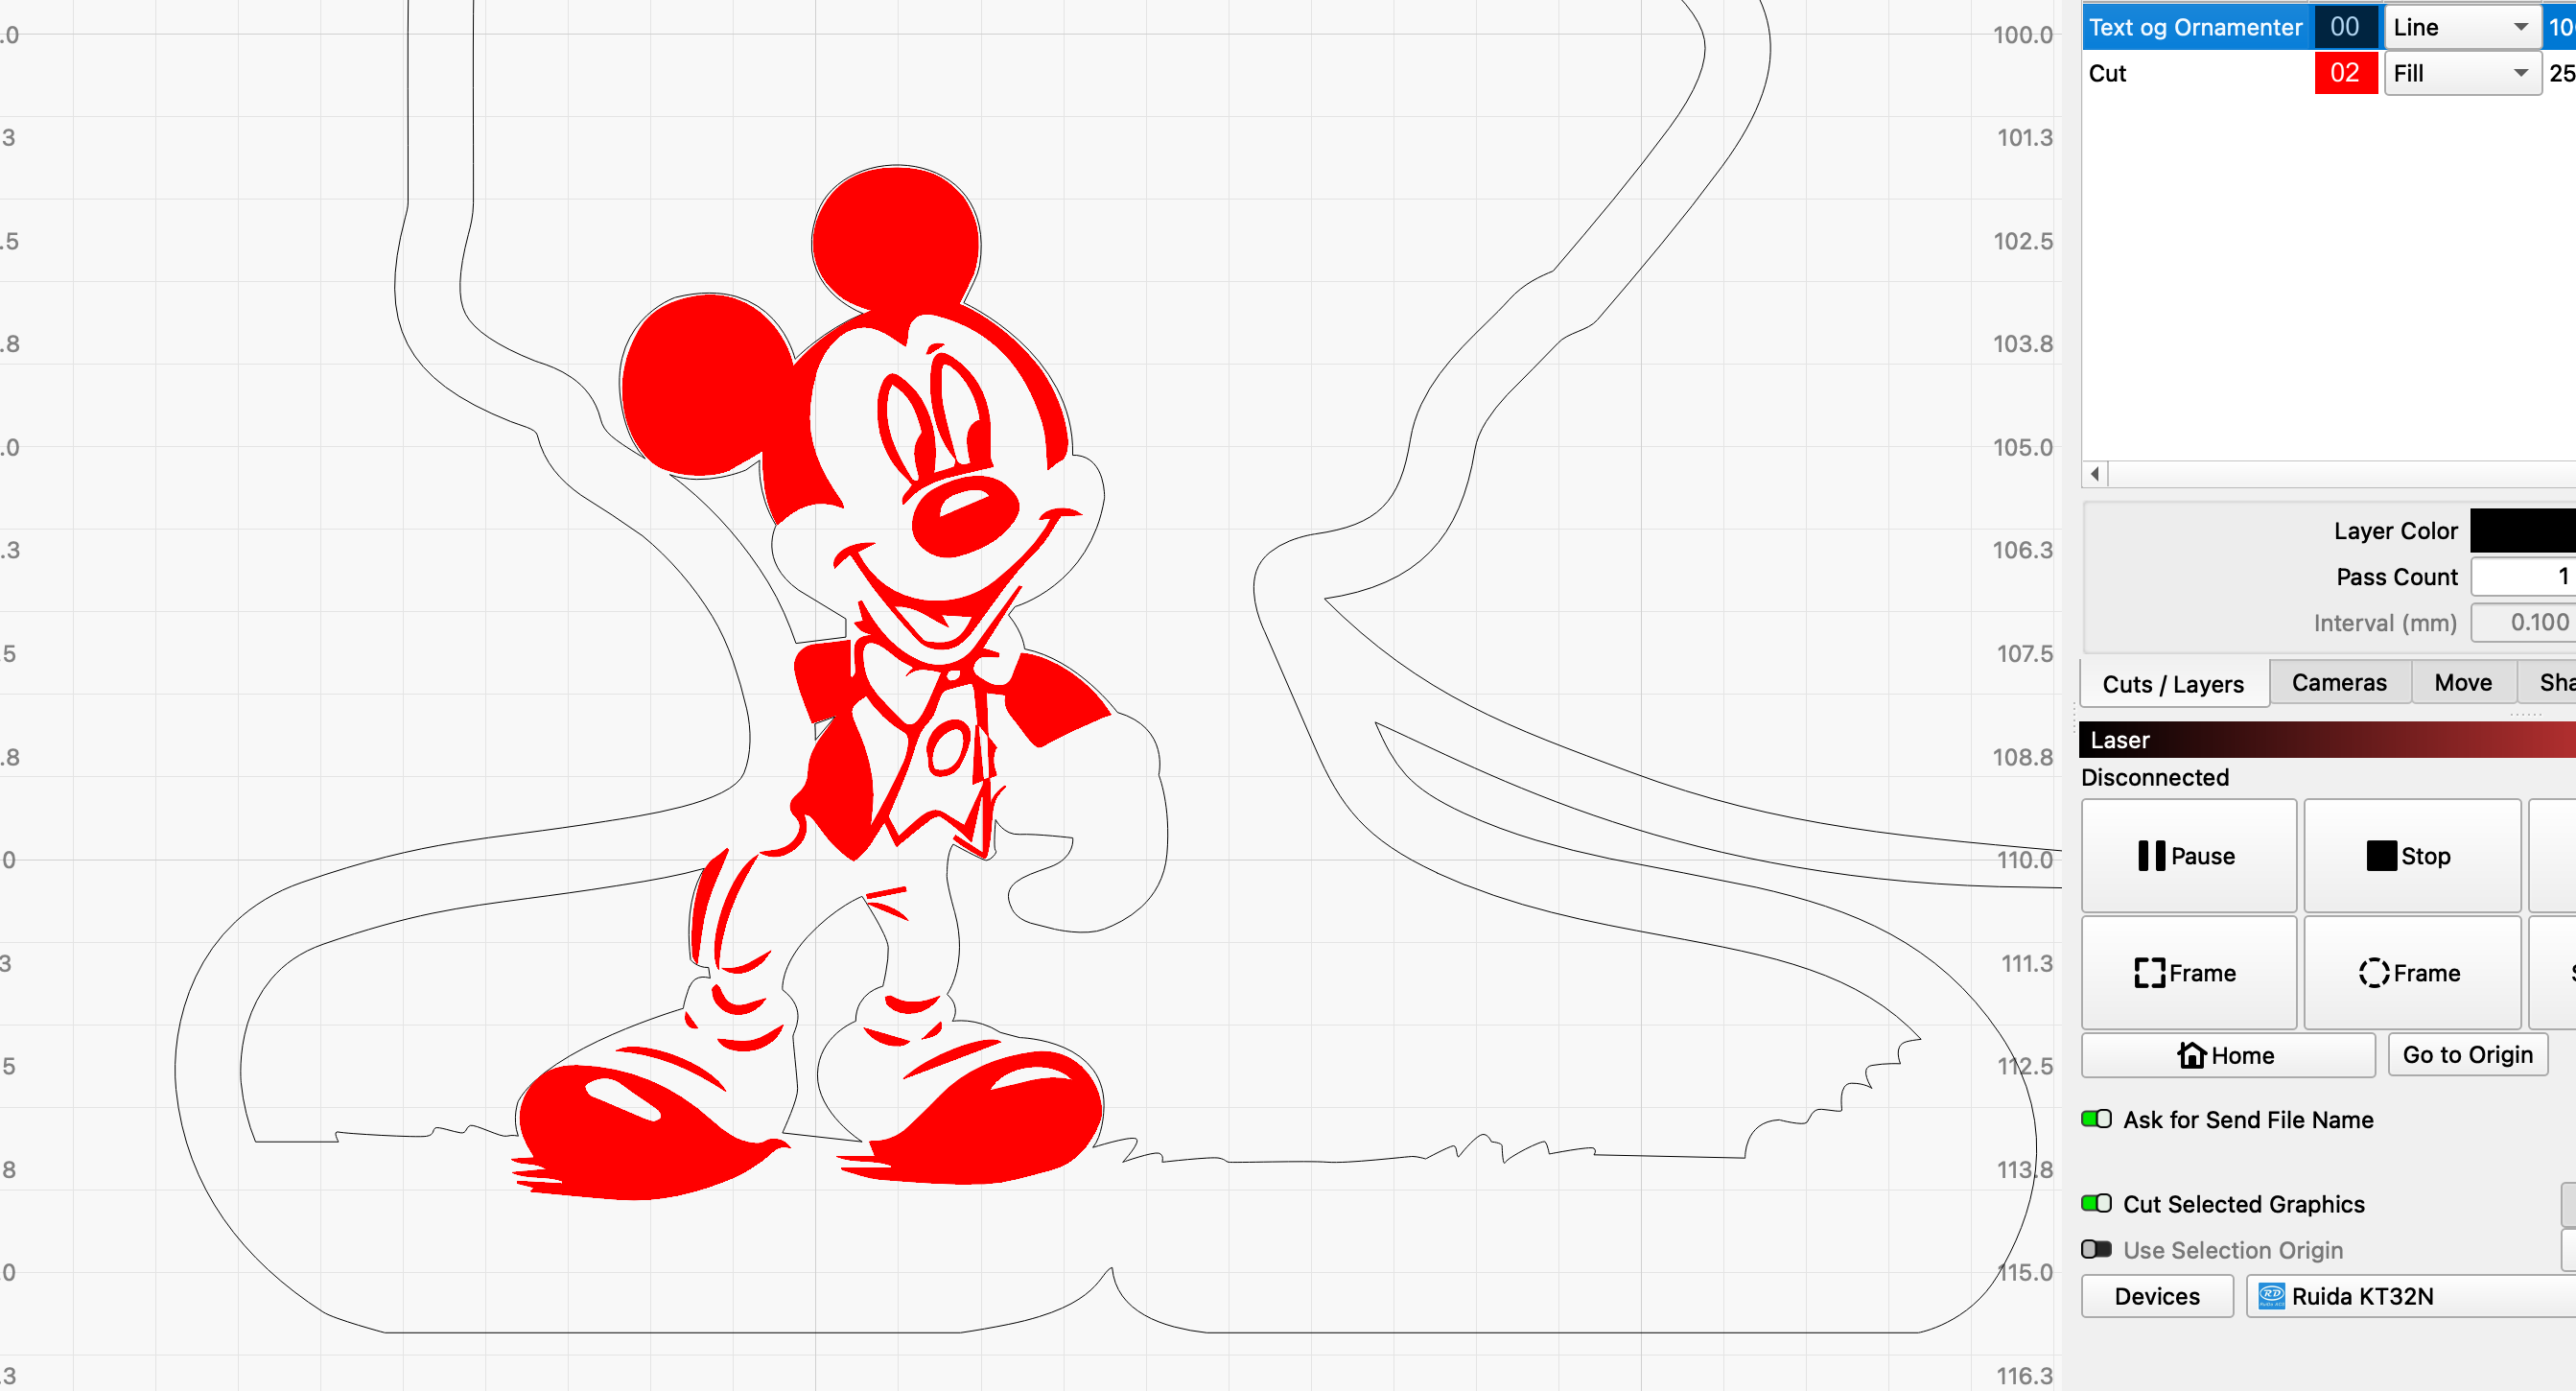
If you compare the one figure I have started working on and your original, you can see that there is quite a difference.
I would recommend you to find a better starting material.
This is my sample file. I will make other models that will be like this, so I need to understand the logic of this thoroughly. I would be very happy if you could show it in practice. Thank you. My goal was to learn the logic behind this, namely, increasing the filling speed and power, scraping the inside of the mold, and leaving only the figure. This is a sample work; the goal here is to separate the layers, combine them, and pour epoxy inside.
LightBurn isn’t an image (picture) editor. There are some image handling tools to engrave images or to mask-off the parts of an image that you don’t want to send to a laser.
LightBurn has excellent Path (joined ‘vector and curve’) editing tools that would work well for the cut-out or for ‘welding’ a name into an ornament.
To make these two different concepts work together as a laser ready project, you can use the trace tool to trace an image. This generates one or more outlines where edges are detected. The outlines are closed shapes and these allow you to take the project apart. You can adjust the closed shapes as needed and reconnect them with the Boolean Assistant.
The file is an svg type and can easily be used in LB, it’s just of a terrible quality. I’ve downloaded and separated the file but, as I said, it’s not good.
I think I need to research and learn the tips and technical information thoroughly. It is best to follow the experts for secret tips. I am open to any advice and information you can give me, I am also looking into the forum and researching.
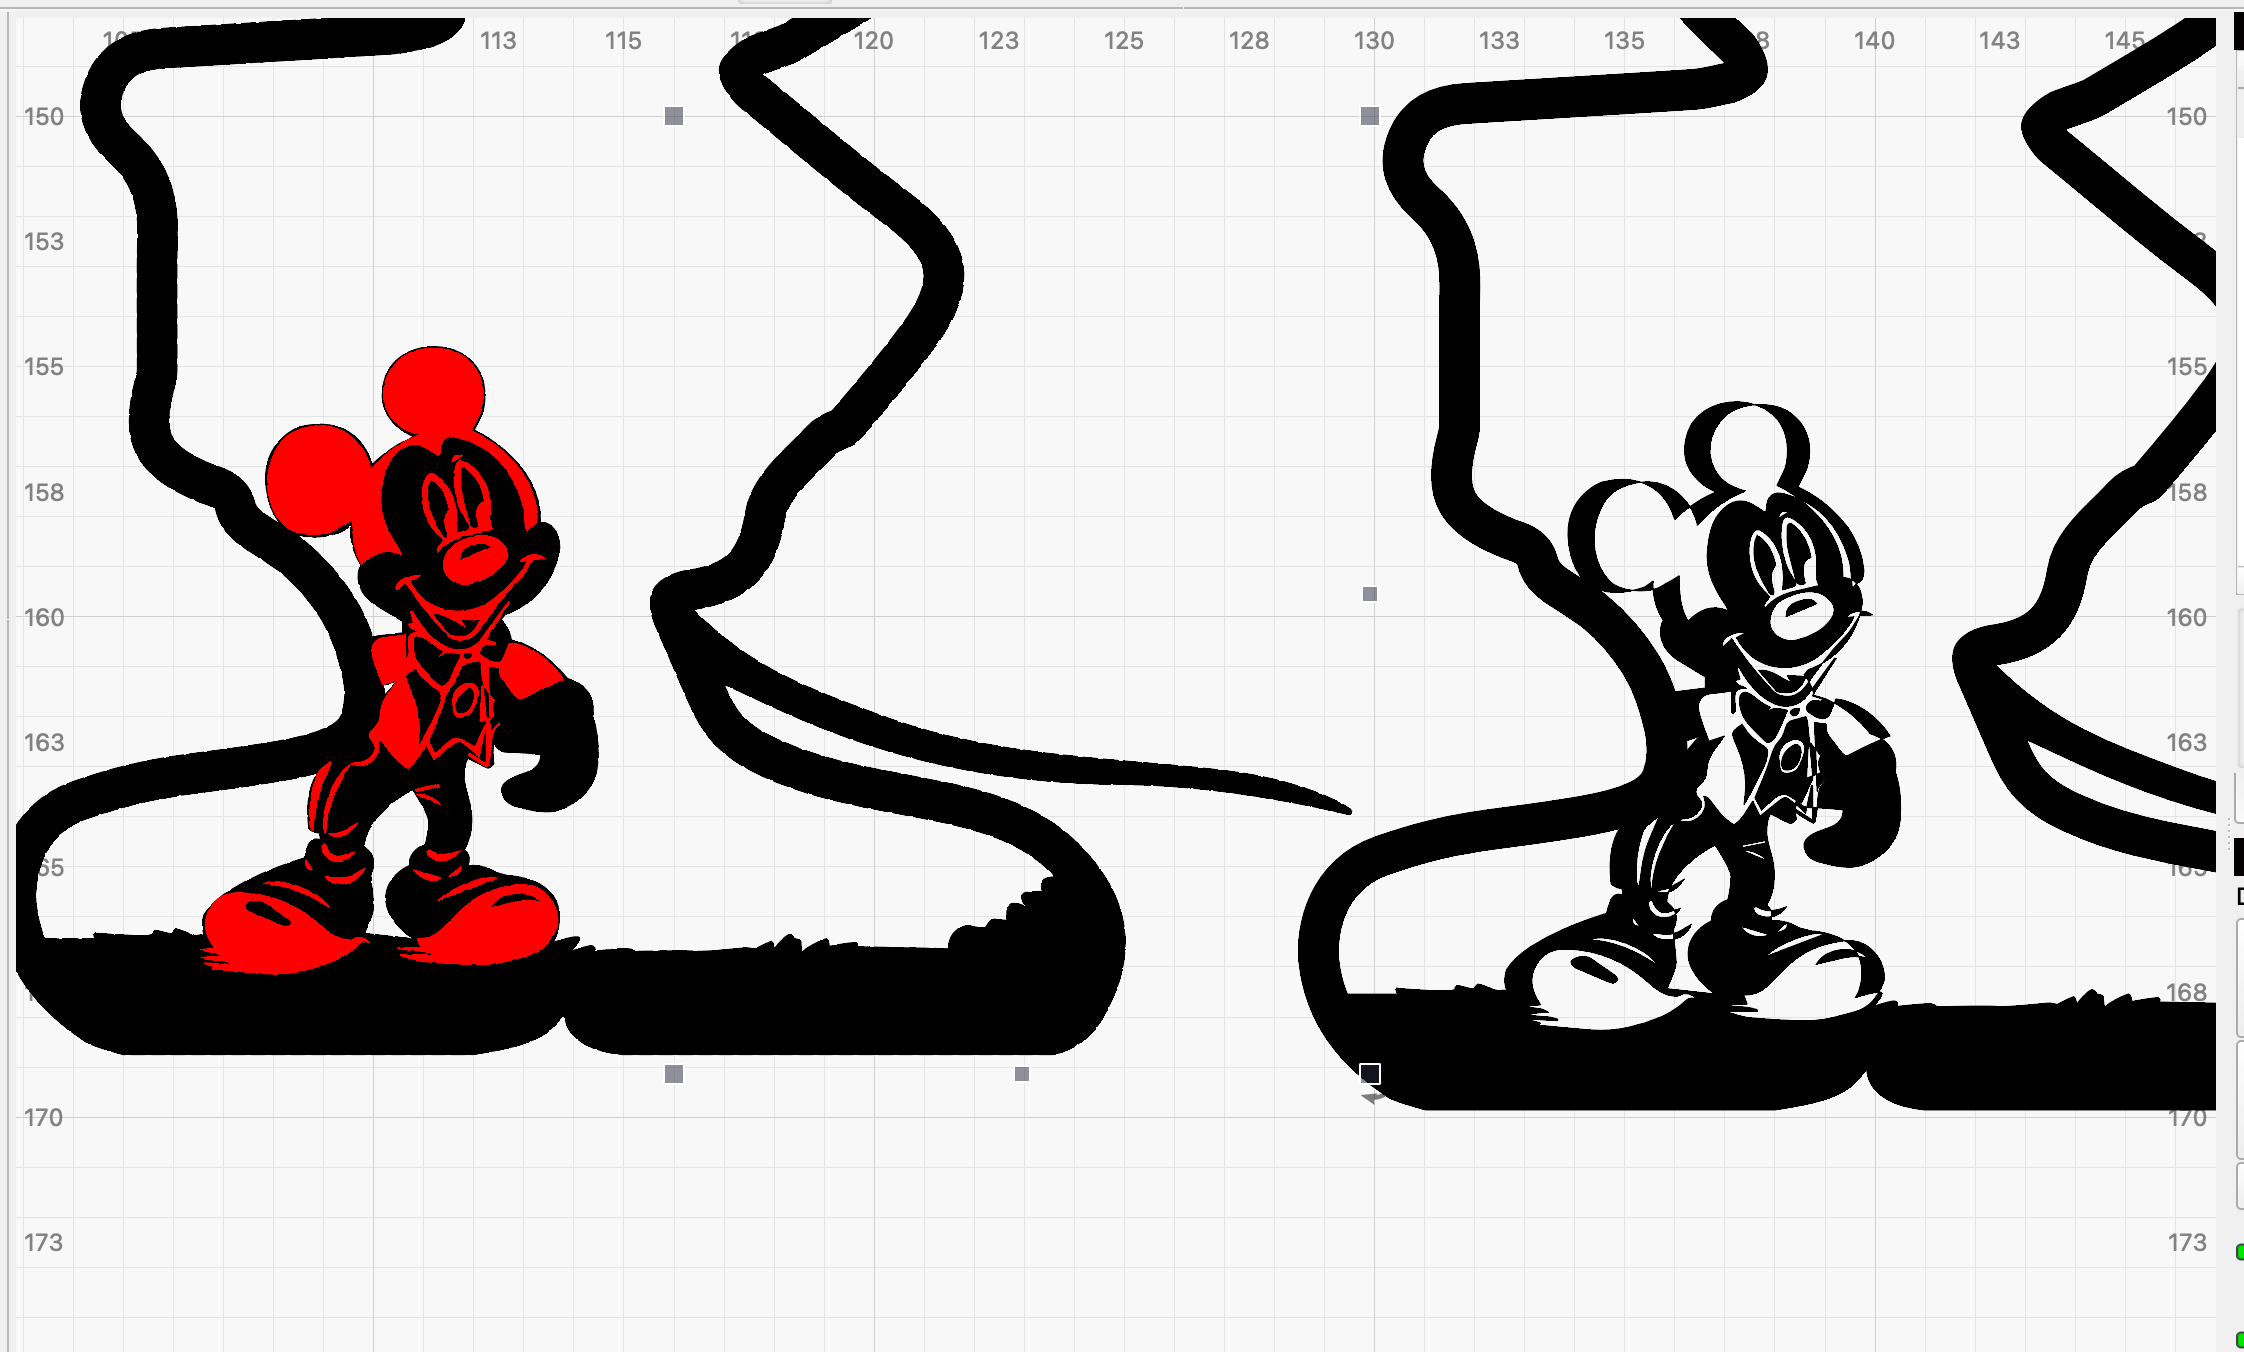
This is what I came up with. I just selected the outlines and set them to a cut layer. The rest I grouped together and moved to align with the cut. The small cutout to the left of his head I resized and moved to line things up.