Probably a dumb question, but I have a file that I created, and it will take over 5 hours to complete. I’ve started the session and can’t stay for the whole time, and I don’t want to let it run without being near it in case of any issues. How can I stop the session midway through, turn of my computer (or maybe I only put it to sleep) and then come back to it the next day? Is there a way to remember the last location and phase that it completed, so that it doesn’t start from the beginning?
I have a Genmitsu L8 laser engraver, GRBL, HP Envy laptop with windows 11. Not sure if this is important to know to answer the question above.
I appreciate any help anyone could give me. A video link would be helpful if there is one available.
Thank you.
You can try to find a significant point in the file where you can stop the current job. By using the preview window and the “Start here” button, you should be able to continue without visible overlap. But of course you must not touch/change the position of your semi-finished product in the laser.
The best way, however, is to divide a big project already in the design phase into several segments and use a rig with repeatable coordinates, then you can in principle continue a product when it suits you.
Thank you. I’ll try your suggestion. I appreciate your assistance.
Have a great day.
Bernd-
I am new to laser engraving, and I need more help. I don’t know what you mean by “use a rig with repeatable coordinates”. What is a rig?
I also, I don’t think I have a preview window in my version or with my laser. I do have the camera view, is that what you mean by preview window?
I also don’t have a “Start Here” button.
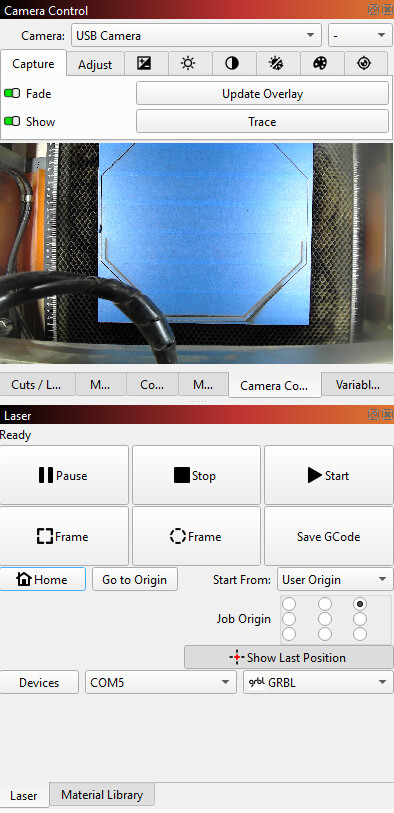
Here is an image of what my desktop looks like.
When I came back to my project this morning it lost connection and started back to the Home location. I’m not sure how to get it back to the same place it left off. Maybe it’s too late for that now, but anything you can help me with would be very much appreciated.
I’m reading the Lightburn manual but I’m not finding what I need at the moment.
Thank you for your assistance.
Cathie
Hi Cathie,
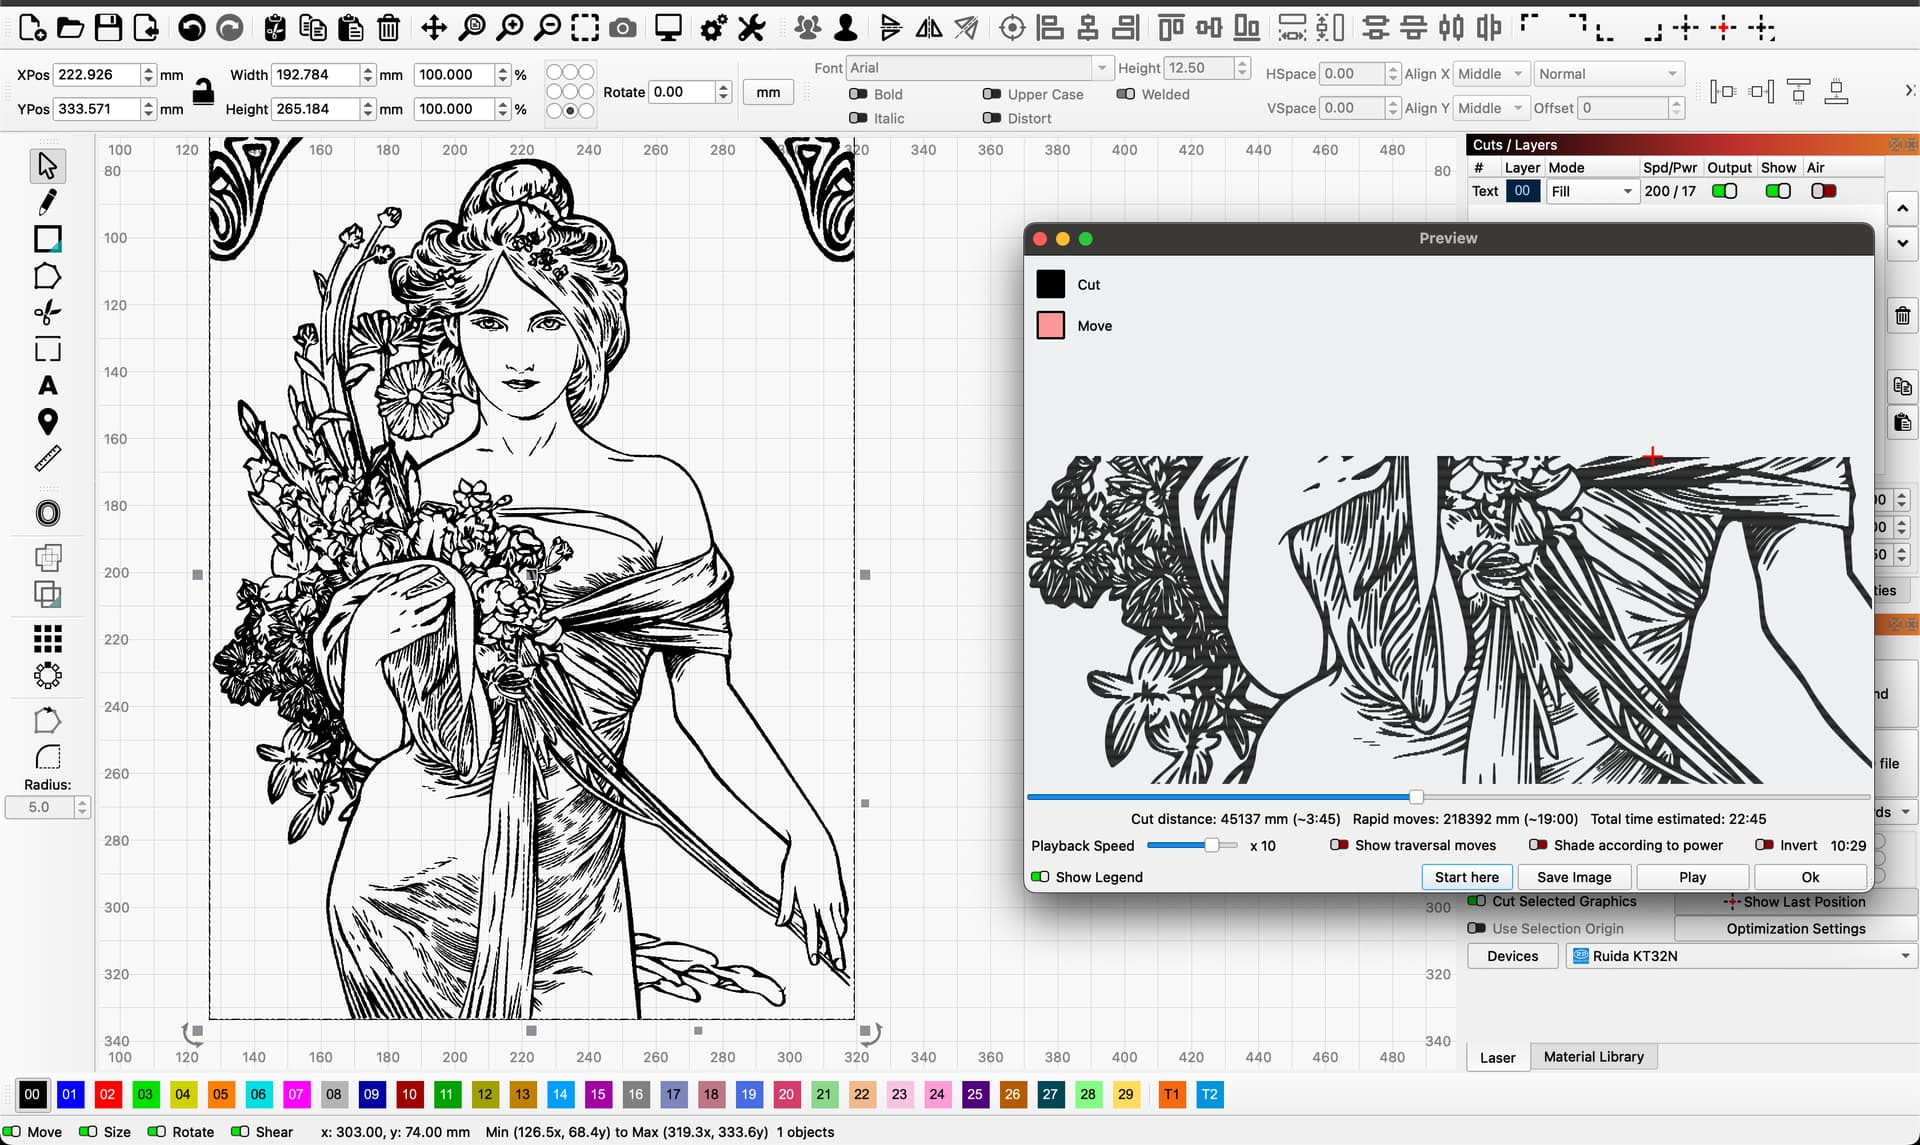
Let’s start from the back. In my picture you can see the preview window on the right side with a slider that can be used to manually simulate a scan/cut process. If for some reason the process was stopped, it could be during the cutting operations that the laser did not cut through all the wood…, then you can move the slider to the point from where you want to start again - “Start here”.
This function and display is there in all LightBurn versions (for fiber optic galvo machines, I don’t know if the functions are also used, it is a fairly different process though)
It’s probably more correct to call it a jig and not a rig, but it means the same thing.
What I mean is that you should have the ability to fix your material/part in your machine - on your machine bed, so that you can continue a job by placing it in its original position, if you need to continue the same job or make a 1 to 1 copy.
By using a fixture (rig) and absolute coordinates, you can use a project you have made before and fairly quickly start making new products again.
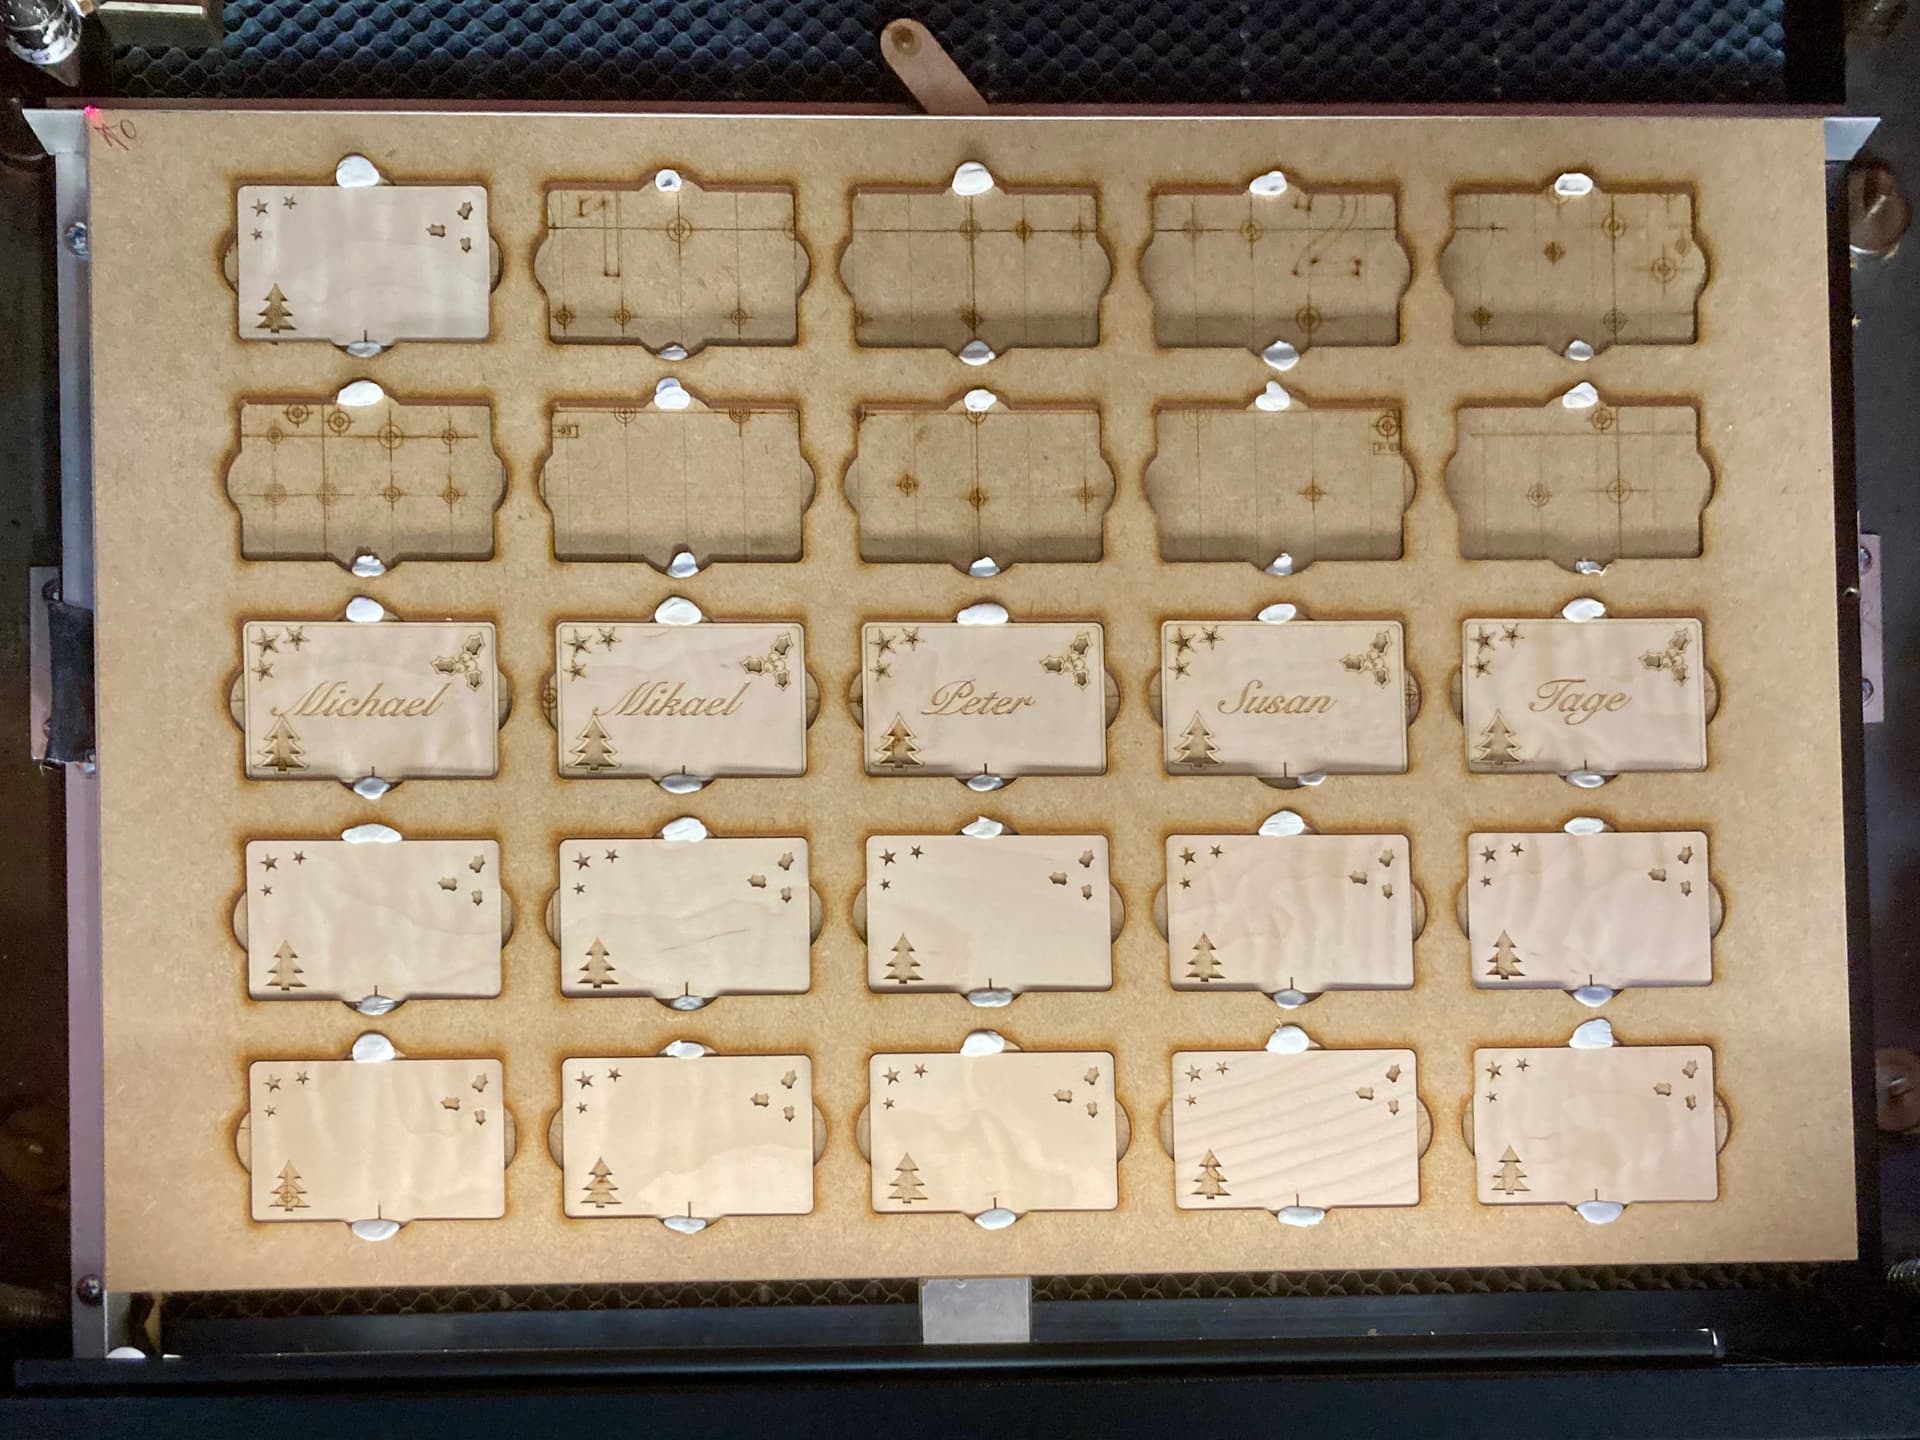
In the picture you can see a rig to hold place cards.
I have mounted 2 pieces of aluminum angle, which are exactly 90 degrees to each other. By using material that typically (should) have at least a straight 90 degree angle, the material is placed very precisely with the left top corner in the same position. The template for the cards refers to a LightBurn file, all I have to do is insert new cards and use a file with names to automatically make new cards. When the front is finished I turn the cards and change the motif and continue.
A template / rig is characterized by being able to fix material precisely and repeatedly.
The LightBurn file must always be adapted to the specific template / rig.
Bernd -
Thank you so much for your really helpful tips and the images, that was super helpful. I was able to locate the Preview window and the Start Here button.
I scraped my cut, so I’ll play around with what you suggested and the rig, that’s a great tip. I really appreciate all your suggestions.
Have a wonderful week.
Cathie
Cathie, you might also find our video guide on this subject useful:
How to Restart an Incomplete LightBurn Job
You are absolutely right to be present, but 5hrs seems like a long time on a 400x400mm machine?
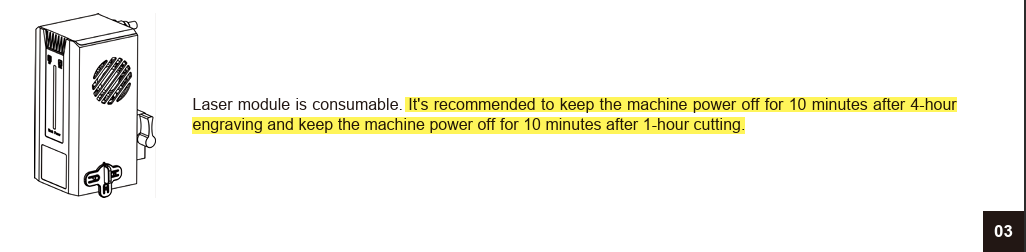
The manual does not recommend long periods of continual use, so breaking up the job into two or more parts is a very good idea. This is not so easily done for a single large engraving though, (if that is what you were doing?), where it might be better to first look at changing engraving settings to reduce the job time.
The other thing worth mentioning here is that the time remaining in the status bar in LightBurn is just an estimation, and if you haven’t already done it, in your Device Settings, click on ‘Read From Controller’ to update LightBurn with more information about your machine so the estimation can be more accurate:

See also: Get Accurate Job Times in LightBurn
Another “trick” to complete an interrupted image job is to set the Scan Angle to 180 so it will scan from the top down. You then stop it when it reaches the original burn. Of course, this means the part must be in the same exact position as the first burn.