Do I need to fix ? weld the lines shapes to the existing lines or can I leave them floating also how do I make the saw handle a bit more rounded its a bit blocky at the moment
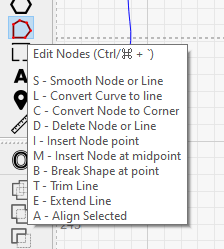
You can make the lines much smoother by using the ‘Edit Nodes’ tool. Select the line, select the tool then hover over a point and press ‘S’ on your keyboard. This will make that node smooth. Repeat for the other nodes. You can then adjust the curvature with the node ‘handles’.
It might be worth reviewing the documentation to get a better explanation of the tool that I could ever give!
Thanks Marcus - does this look like it will work - the offset looked weird so I just did 3 passes not to sure this right but the preview seems to look OK. I really appreciate your time and expertise - I will try not to bother you again - I do a fair bit of woodturning and I would like to make you a pen as a way of thanking you - my email address is gsh99@sky.com let me have your address and I’ll make one and post it to you - best regards Geoff
ms-saw-logo.lbrn2 (332.2 KB)
forgot the file !
You’re welcome, it’s really no bother at all. The only real way to tell is actually running it on something. Making 3 passes will make it deeper but it probably won’t be any wider, hence my offset suggestion. Anyway, when you try it out for real you’ll know that’s an available option if you find it’s not wide enough.
BTW: A little tip when trying to get smooth curves is that ‘less is more’. The fewer nodes you have the easier it will be to make your curve(s) smooth ![]()
Out of curiosity what material are you planning to make this from?
That’s a very generous gesture but there’s really no need to shower me with gifts!! ![]() . It’s also probably not a good idea to publish your email on a public forum as there are all sorts of nefarious individuals out there! It’s best to send sensitive information in a private message.
. It’s also probably not a good idea to publish your email on a public forum as there are all sorts of nefarious individuals out there! It’s best to send sensitive information in a private message.
I used to enjoy a bit of wood turning (mostly bowls) when I was back in school (1970’s) and would love to have a nice workshop to do woodwork, metalwork, electronics etc. The only machinery I have now is my Ortur Laser and a Formlabs Form2 SLA 3D printer but that’s plenty to be thankful for.
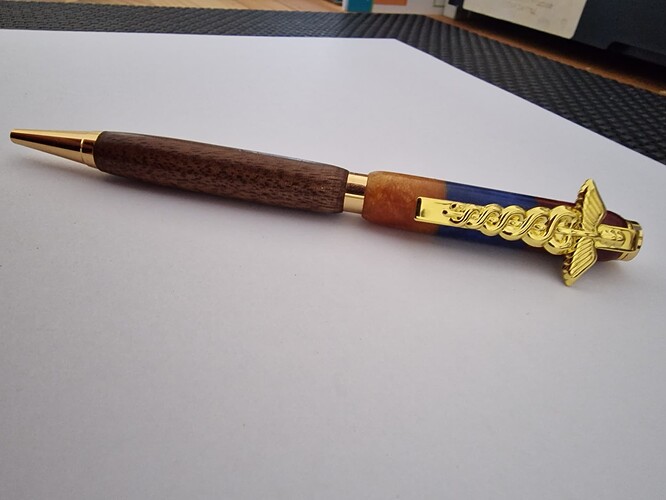
Hi Marcus - Thanks for the safety tip - I’ll have a play with the nodes and take a few out - I was wondering if making the line thicker if that would work - I’m going to make out of 3mm Basswood - just small rectangle to give out at meetings etc - I have a small shed 12 x 8 I have a variable speed Lathe , 10" Band saw, SIP Sander and loads of hand tools plus lots nice wood to turn - I have just started pouring Resin to make pens the phot shows one I made for the local RAMC association for a raffle prize -
Lines in LB don’t have a thickness so the best way to achieve an equivalent effect is to offset it by half the desired thickness (hence my recommendation ![]() ).
).
I do have various woodworking power tools but I just don’t have the space to use them at the moment. Back in the 80’s when I was living at my parents’ I had an 18" swing Willson slant bed metalworking lathe which started me on my engineering career (centre-lathe turner, then CNC Programmer/setter (lathes and mills) and onto CAD (AutoCAD then SolidWorks, and Fusion 360)). Design engineer is my day job working from home. It’s great being able to 3D print stuff I’ve designed but I really miss my lathe ![]()
Anyway, it’s past my bedtime so I’m off to bed now. Goodnight!
Oh, nice pen ![]()
Hi Marcus - re the line fill the ?problem (at least on screen) looked like a round ended rectangle and quite wide no matter what setting I used I couldn’t get I it get thinner (User error I’m Sure) - I got thinking that using the rectangle tool set say 1mm width might do it - this might be a workaround if I can’t crack the offset - My machine arrived yesterday - I put it all together without any problems then found I’d put the bar with the limit switch the wrong way round so had to dismantle and start again - Numty! still I’m a wizz at building these machines now.
Hi Geoff, Yes, you will get rounded ends but you can go in and edit/delete the nodes to make a square end.
After offset:
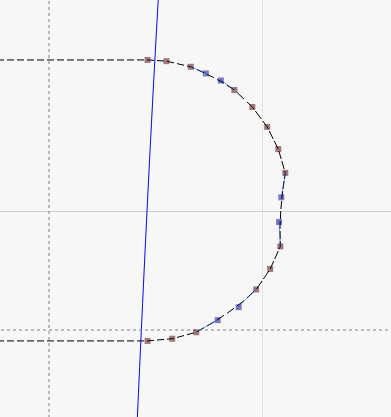
After deleting unwanted nodes and moving nodes to match outer edge of saw.
Hope this helps.
Nice to see you’ve got your machine I’m sure it will provide many hours of fun.
Happy Lasering!!
Hi Marcus - Thanks for that - The width look quite “fat” can I set the off cut to somthing like 1 or 2mm?
I wont be doing any on the laser just yet I am waiting for a vented enclosure and honeycomb to arrive then I need to pipe it outside the shed - I believe the Laser creates a lot of smoke and my shed isn’t that big - better safe than sorry.
In my example I had only offset the line by 0.25mm but you can set it to anything you like.
That’s a bit frustrating (having to wait for other stuff to happen). I don’t have any forced ventilation, I just leave the garage door open and I find that enough for the stuff I do. I’d recommend getting an air compressor (if you’ve not already got that in hand) for air assist as it helps a lot when cutting.
The machine came with Air assist which was a bonus apparently because the output is 20w you really need it - I just tried to edit the nodes - the round end has nodes with handles when I select on and delete it the whole of the offset disappears I have tried selecting just one and multiple node with same effect very strange any Ideas?
If you select the nodes you want to remove and press the ‘D’ key, that should delete just those nodes. If however you press your ‘Delete’ key it will delete the entire vector object. BTW, when doing your offset, if you select ‘Corner’ rather than ‘Round’ you’ll get flat ends, which will save a bit of node tidying.
Well done, that’s perfect thanks for your help I have learned a lot with your help - now I must watch a few more videos - I quite like the LA Hobby Guy both his videos & his Bulletin Board - Cheers Geoff
No problem, you’re welcome. You’ll find everyone pretty helpful here.
Hi Marcus - Well after a bit of fettling I am pleased with the result - what do you think? -
ms-saw-logo.lbrn2 (337.0 KB)
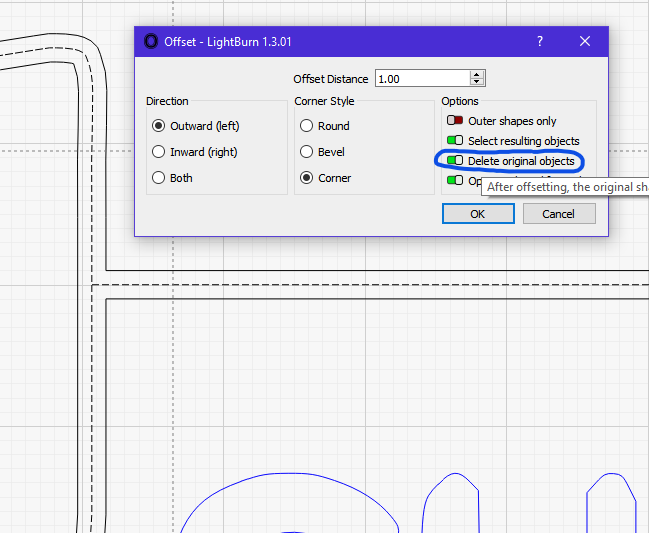
You might want to delete the original lines you created the offset from (see screenshot below of Offset dialogue to do this automatically) and I expect you’ll want to change the layer mode to ‘Offset Fill’. You might also want to weld the areas together, otherwise you’ll get some ‘missing areas’ where the regions overlap.
Another little tip: It looks like you selected one line then offset it then selected the other line and offset that. This results in two separate overlapping areas which will need welding (see above). To avoid this extra step you can select both lines then perform an offset on both at the same time. You end up with one shape like this:
Other than that it looks fine to me! The real test comes when you laser it.
Done that and it looks good - I notice that in the cut/layers there is a line marked greyscale if I change it to show it fill the image with black can I get rid of this line or just keep it checked off
That “Grayscale” entry is for any raster (ie non-vector) objects on layer 00. In this case it’s the original image(s) you started off with that we created the vectors from (via the Trace tool). If you don’t need the original rater image(s) you can delete them and you’ll see this entry disappear. It won’t do any harm to leave it in though as it’s not set to output.
You might not get any more replies tonight as I’ll be off to bed in a minute, I’ve got to get up a bit earlier tomorrow!
This topic was automatically closed 30 days after the last reply. New replies are no longer allowed.
