I did a circle test today and came up with these final figure cuts.
All belt tensions are correct everything else cuts perfect. Is there a area to fine tune the circle like I did with the over scan? speed 12% / 40% Pwr. Controller Ruida 6445
circles are perfectly round just over sized.
On the screen in light burn./ Actual cut on laser.
If you have already verified through axis calibration that X and Y steps are dialed in properly, you may want to verify that your laser’s lens tube is plumb and not ever so slightly slanted. If it is, that could be cause for circles being slightly off at least in one direction.
How do you check that portion for plumb and level.
I did check my tube and it was way out of level.
My tube is part of the gantry it moves and not stationary. How should I check to see if its out first before messing with it.
Maybe you just need to do an overall check on optical alignment throughout the entire path (lasertube, mirrors, lens holder) and at all extremes of the bed (every corner) to confirm alignment is parallel.
I just spent 4 hours doing just that everything as if it was just being put back together.
After all that ran a 23.00" circle and it came out 23.375"
So I tried a negative kerf offset of half of the .375 and it came out perfect.
Still scratching my head on this one.
Rudy
It’s possible that the belts have stretched slightly. You can calibrate the X & Y axis in Edit > Machine Settings. You draw a large square in LightBurn, run it on the machine, measure the resulting size, then use the Calibrate Axis feature in Edit > Machine Settings to tell LightBurn what you asked for, and what you got, and it will adjust the step size setting accordingly.
Just an update on all that helped me.
well its finally tuned in perfect when you said to use a large square i never tried that i always used a 100mm x 100mm square so today i cut a square 36.00" x 36.00" and sure enough it was so far out i never noticed it in the small squares. I recalibrated everything and now my circles are dead on even the 23.00" ones.
Thanks to everyone and HAPPY NEW YEAR!!!
It’s possible to do with small squares, but you have to measure in a way that cancels out the kerf, and be as accurate as possible (IE, use calipers).
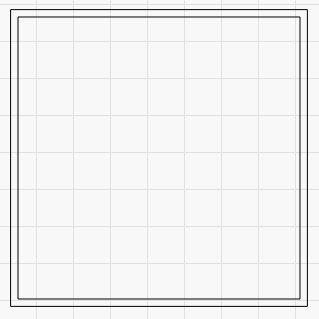
If you cut out a square, the cut line has thickness:
If you measured the piece that fell, your values would be too small. If you measured the hole itself, the values would be too large, so you measure both and take the average. Any amount of error in your measurement will be multiplied by the size of whatever you cut, so if you cut a 100mm square, and made a 0.2mm error in your measurement, then cut something that was 500mm, your 500mm cut would be out by a full mm (5 times the 0.2mm error).
Doing the calibration measurement with larger shapes means that error happens with a much larger initial scale. Since most things you cut will be smaller than that, the introduced error will scale down as well.
Yes sir thats what I did I ran the 100 x 100 square again took a measurement and rechecked it i was out . +.009 I think that is close enough.
Thank you.