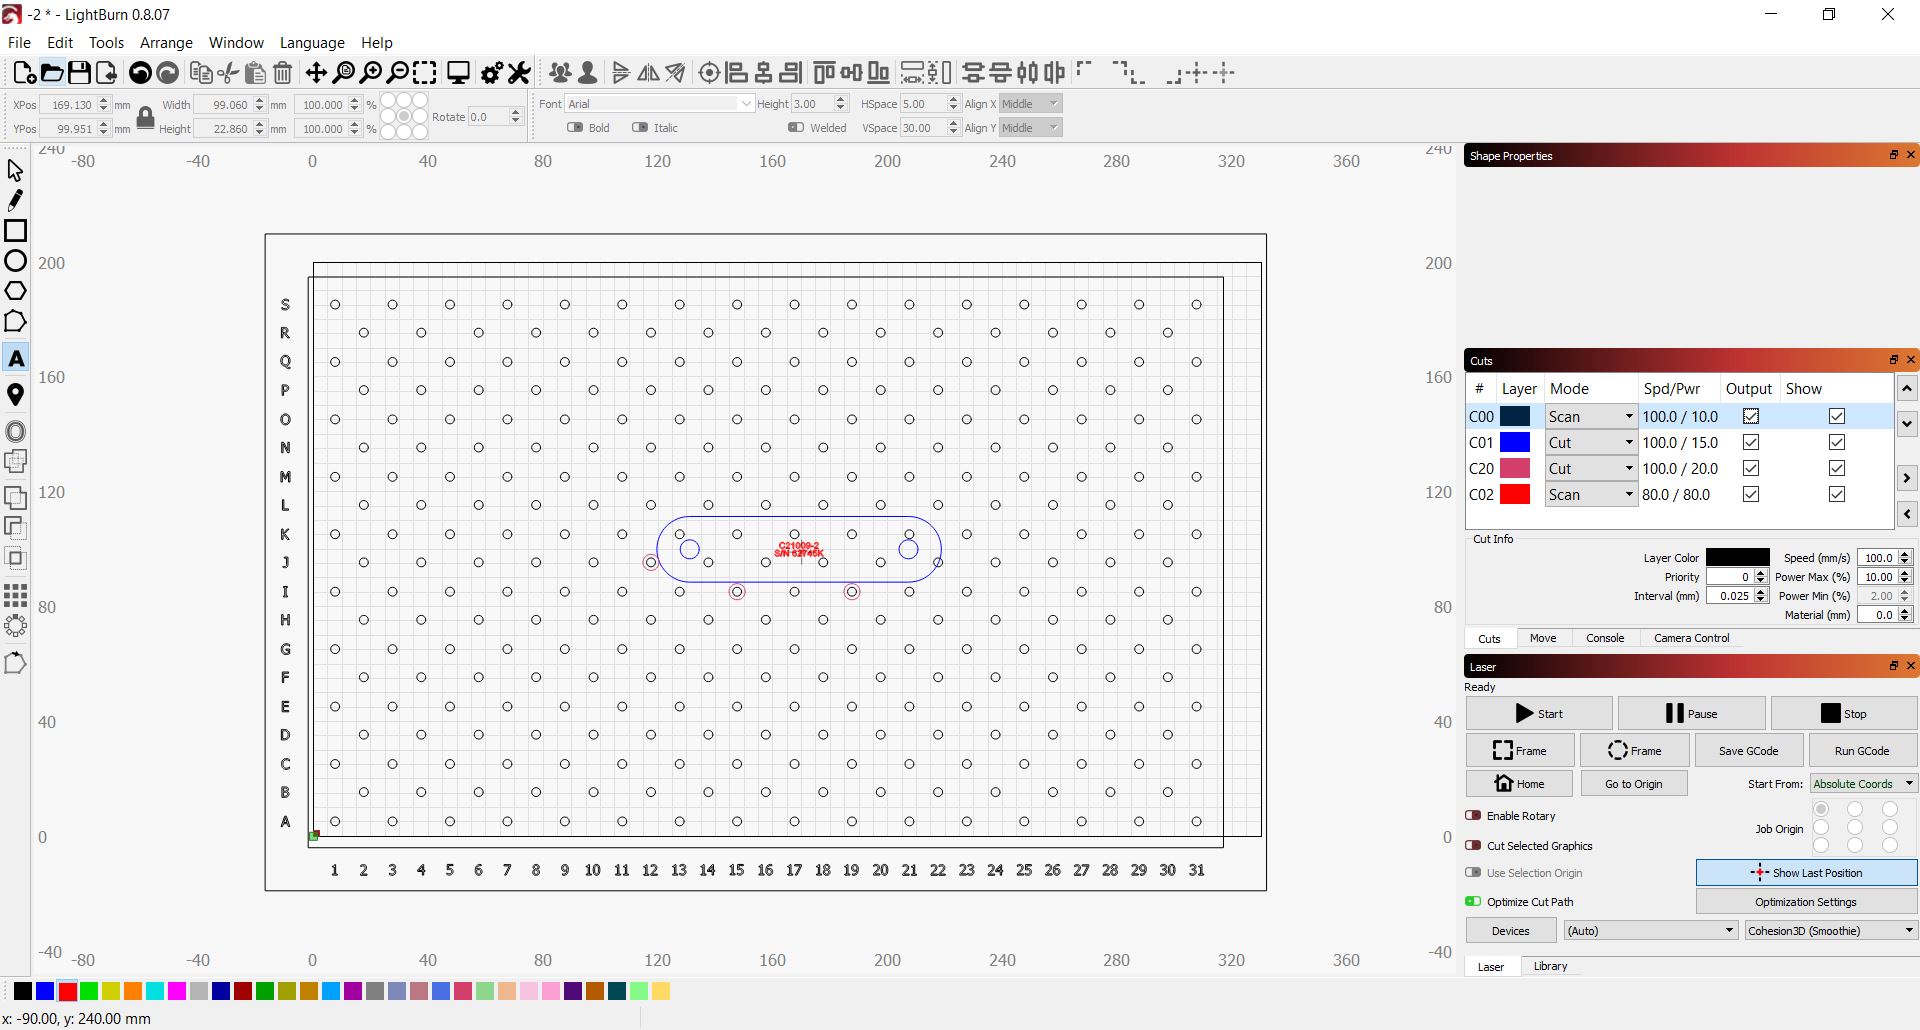
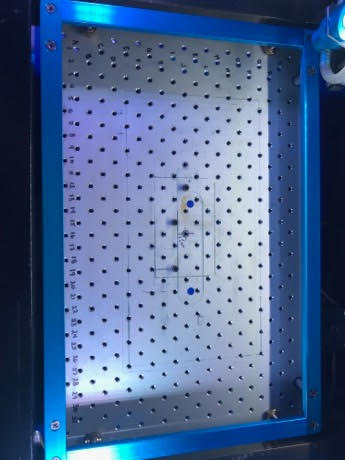
As you can see i have my whole z bed drawn up in LB on the black layer, with each little circle representing a threaded hole i made on my zbed as you can see in the second image, i saved that as a file and just open that one instead of just the plain LB program. Then i draw up my part im engraving in blue. Then i place some bolt heads, represented in this image by the dark red layer, then i move the part around on screen to butt it up against the screw holes. Finally i place my engraving where i want it to go on the part using the bright red layer.
My only issue with doing it this way is sometimes its very accurate, sometimes its off. Im sure its just because the K40 is not made for doing the kind of accuracy, but does anyone have any tips or tricks to improve the way i do this so its more consistent and accurate?
It depends on whether it is a production run or a very small batch. For running the same product I have screw holes in the bed and screw my stock down in the same place each time. A reference frame like Steve’s would be the same. The LB job is set to use Absolute coordinates and is positioned to put the job on the stock. The position is as accurate as you machine.
For small jobs I use “Current position” as the origin and simply mark a dot or cross in the centre of the stock. Use the position laser function in LB to drive the laser to the centre origin of the job and then put the stock under the laser. (I have a red dot laser added). Or you can use the frame option with absolute coordinates and the laser will stop in the bottom left corner of the job and I stick the corner of the stock under the laser + a 10mm margin and off we go.
I’m almost always working on top of a vector table so I grab a piece of posterboard or matboard, tape it down and cut a placement template.
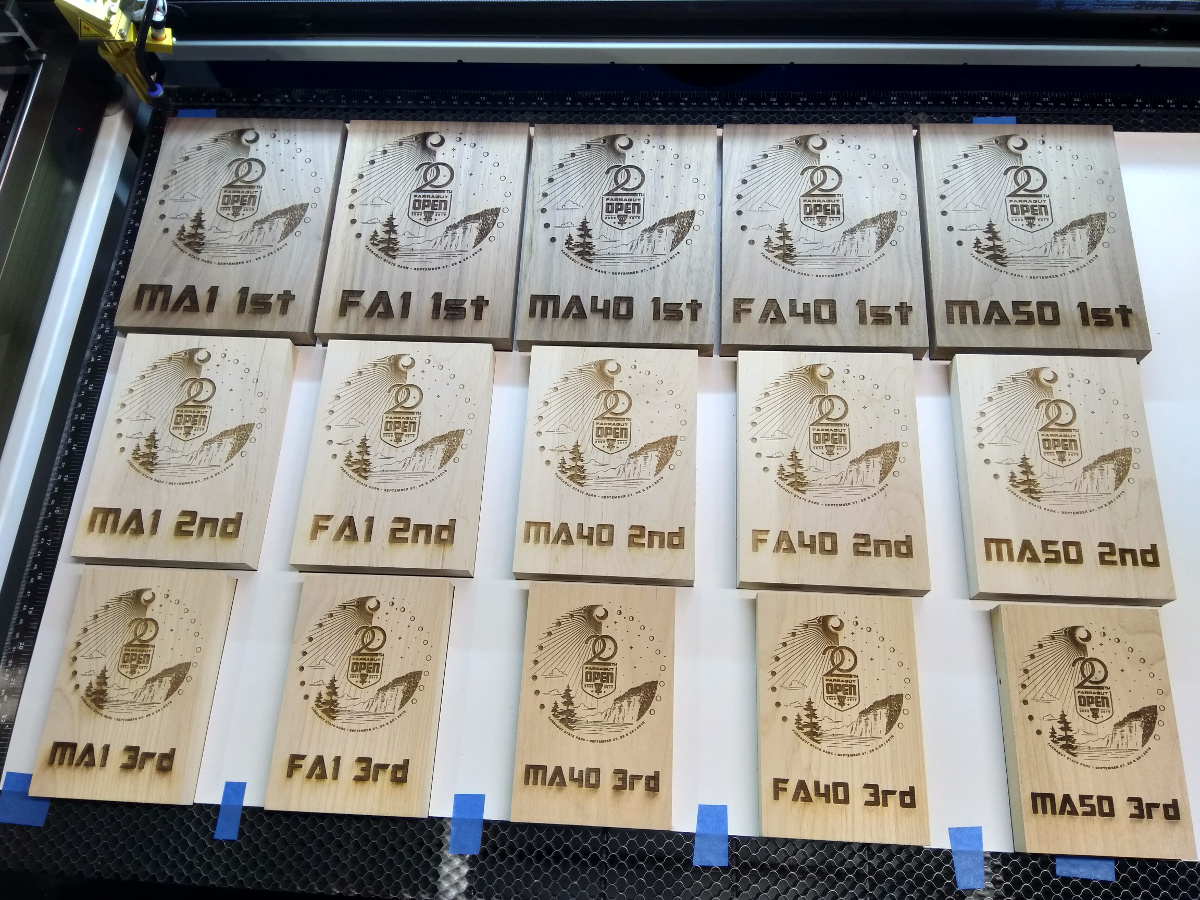
Just did a bunch of award plaques so here’s a photo using white posterboard. The various sizes are 6x8, 5x7 and 4x6. Cut “pockets” an extra 32nd wide and 16th long. Load material, select job and go.
I use a similar bed with threaded holes for my Ostling marking laser and it works well, but I’m not sure it’s a fair comparison - the Ostling has a fixed laser with mirror galvos, and the working area is only about 4 inches across.
On my little Roland mill/engraver, the limit switches don’t have good repeatability. If you leave the machine on you can get excellent repeatability, but once you turn it off and back on again and it goes through its homing process it’s going to be a bit off. I haven’t measured it, but I expect the same is probably true of my big laser.
I’d say check that first as a source of repeatability error. Maybe you can set the origin by hand using a feeler gauge of some sort against a solid part of the machine, or perhaps you can change the limit switches to something with a sharper, more consistent closure.
Spoilboard (like grabbing a bunch of coroplast Bandit Signs - THEY WORK GREAT) is the best way to go for 100% precision accuracy. Draw a box the same size as your object (or just use your drawings outline if it is accurate to the object). Pretend it the box is 5 x 5 and layer color green set to line.
Secure the spoil board on the bed. You can use magnets if you have a steel bed, tape if you have alum bed, or tape on a knife bed. Now move the laser head where you want to cut the index. Hit the orgin button on the Ruida HMI (to keep that coordinate in case you need to move the head later - you go back to that exact coordinate by escaping twice on the HMI).
Set origin in light burn to current position. Cut Selected graphics. Use Selection origin.
Now move your engrave work into the 5x5 box. Center the text or whatever for example. The point is. Now toggle off output on the green layer that you used for the index BUT KEEP IT as part of the file / job. Place object on index that you cut out. Oh… so nice it just plugs in and hold the item secure.
move the laser head / z height accordingly to focus the laser. Escape on the HMI to move the head back to where you indexed. Now select your text and index box. Start job.