After having read a few threads and watching some videos I think I have an answer to my question but not the one I desire.
I have a project that will take a several hours to complete and I don’t have so much time in a row to monitor the development of the project. So I need to stop the job maybe 4 or 5 times.
I know using the preview window I can restart the job (theoretically) where I stop. As this project is engraving a picture in canvas I need to start as close where it finish as possible to avoid make two passes in the same area.
Do the job in two times was a hypothesis but I don’t have time available. That option was start the job, stop and then restart on the opposite direction until the second part reaches the first one.
So,… there is anyway to identify the axis exact coordinates where I stop the job and reinsert them (a few steps before) to start again from there?
Consider using the Cut Shape feature to segment your job into rectangles that can be cut as individual jobs which will have runtimes to meet your needs.
That is correct. I have used Cut Shapes feature to do this with line and also fill shapes with success. Look it up in the online LB documentation for usage instructions. I recall there being slightly different and intended behavior of its use with line vs. fill shapes; in the case of line shapes being cut the operation will create two open shapes from the cut, where as for fill shapes it will create two closed shapes; I suspect you want the fill shape case with the image.
I suggest you do a test of the method first using a smaller overall image to make sure the abutted edges of the segmented shapes are not gapped or over-burned and thus visible in the final lased result.
The solution presented by @bLouChip should work nicely.
As to the theoretical, I might do some testing. Using the ‘Start here’→’Save job for running later, from here.’ option, you can check and see if this would be accurate enough to serve this use case. When you can, please let us know the results and what you choose for production.
Thanks for your feedback.
If I interpreted your answer well (my English is rusty) and due to the little experience I have with the “Cut Shapes” feature, I’m afraid that in the specific image it won’t work very well because it’s not an image with well-defined parts. As the whole image is a blur of color, I’m afraid you can see lines where the “cuts” were made. But I will not fail to try a project with your suggestion.
Thanks for your suggestion!
In fact I think this will be great part of the solution that I am “sleeping on it” (thinking about).
My only concern at the moment with this, is I can’t stop the laser head at the same time I stop the preview. Maybe create a few files before burning,…
As i mentioned above, I am kind of a little reluctant with feature “cut shapes”. In the type of picture in cause and engraved in canvas,… Maybe,… but I have to try to be sure.
For now I having difficulties using “Cut Shapes” because I am working with an image. And it seems “cut shapes” don’t work as well with images. I only can do one cut at a time. (Still learning how to do it)
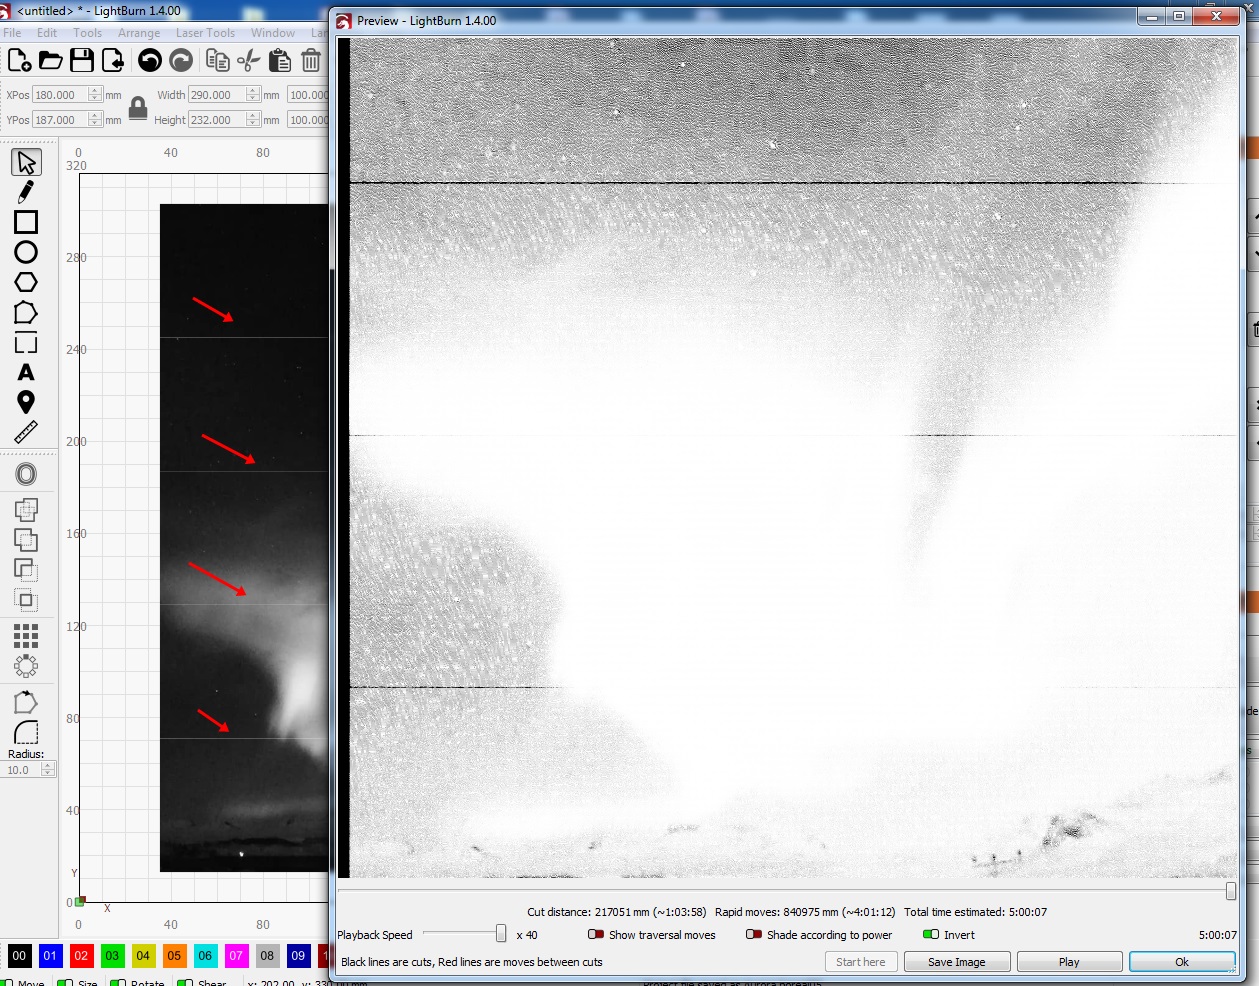
Ok,… I already managed to separate the image into 5 equal parts with the “Apply Mask to Image” feature.
However, in the preview, lines appear where the sections join. And no matter how far I zoom in, the lines remain in preview window. In the LB “working screen area” (I don’t know the correct term for the LB desktop or any other software. ) those lines disappear zooming in.
(I just need to test it engraving, but I can only do it at home)
After digging some “youtubes” the process was:
Open Image, draw a square with the same width of image and 1/5 of the height. Select it as “T1” frame and create an array with 5 rows 0mm spacing apart. Group them and centre with the image (now I have 5 frames perfectly framed with the image.) Ungroup the frame, select the first frame and image and use “Apply Mask to Image” feature, next right click and use “Flatten Image Mask” feature and Save As “whatever01”. (I don’t delete the frame tool as experience and perfect alignment when mounting them together.)
Next undo everything until image with 5 frames perfectly framed. (three steps back ) and repete the steps for the following frames saving them upwards.
Next,
Open a new project where I import all the 5 sections and delete the frames as they are imported. As I don’t change any dimensions, as they open, they line up with each other perfectly. Next assign them different layers to be able to burn one at a time.
If this works I will try to do a video or something like that.
Here’s the file sectioned. Aurora boreal_5…lbrn2 (456.0 KB)
If anyone could run it I would like to knew if it appears as in this seat.