Any help would be greatly appreciated. I would like to create a t slot / key slot / hanging slot. The type you find on the back of wall hangable things. You know where you screw a pan head screw in the wall and your creation just slots on.
I know I’ll need a T-slot or key slot bit, but how would I create a tool path?
I could do it manually with Z down 6mm then Y up 5mm.
I wondered the same thing. I even have a Dremel router bit that is the right size and shape. You will need to retrace your Yaxis travel before retracting.
Your cutter needs to have blades with 2 diameters. Larger for the bottom cut and smaller to break the surface. The upper blades will set the keyhole width. The bottom blades set the screw head clearance.
Can be confusing. Refer to Y as + and - (preferred), or forward and backward.
I know the bit I need. Just wondered how to create a tool path to get the desired effect. I know I would need to retrace the Y travel. If not it’ll just be a pocket (which is easy LOL)
Agree about the Y+/- way to relay movement rather than up / down. My bad.
Anyway, still none the wiser how to create the key slot thingy (What is the right word for it?) unless I move manually
I make a rectangle with a height of 3/4 inch and a width of .001 inch. I then Convert it to a path and remove the bottom line then crate a profile cut along the line. I do a plunge to 3/8 inch, this causes the bit to plunge straight down run up the line across the top and back down the other side then rise out of the project. With the width only being .001 it is impossible to identify.
How I did it was use a keyhole bit, Then you need to find center mark on material then make a plunge cut to the depth you want. then make a northbound path as long as necessary. (depends on cutter diameter and thickness)at the top of northbound pas go either left or right, doesn’t matter and go a very small distance. As small as yo can go. Then go back south to where you started. I you draw these instructions on apiece of paper large size you will see what it looks like. The bit plunges goes up the reverses and retracts.
You’d have to draw the path as two lines - One from start to end, and one from end back to start. We don’t have the ability to set retraction speed in the software, so it would do a full speed lift at the end of a single-direction line, and that would be too fast, so you’ll want it to come back out the hole it went in.
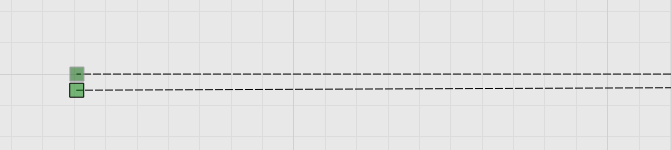
If you want to guarantee the entry point, use the ‘Start Point’ tool and click on the start. The blue arrow is the starting point:
Do a profile, ‘Along Line’, with the Final Depth and Depth Per Pass set identically, with a Plunge entry.
In the preview it will look like a slot (we don’t handle undercuts), and if you’ve done it right you’ll see the entry and exit lines are the same, like this: