How to fill a surface with engraver & penholder?

It is not the complexity as much as the lightness of some colors. Here I am showing your image imported into LightBurn and using the ‘Trace Image’. This will require tracing a few times to adjust and get the details you’d like. It can be done, but you have not picked a simple project to accomplish here, but it can be done.

Indeed, it’s not a very simple example, but did you succeed in separating the different parts?
I have made it in Gimp, manually.

Perhaps, if I could do it directly in Lightburn, the different parts would be drawn exactly at the right position!

I’ll try also with Inkscape.

I did not try beyond what you see in my post. I wanted to show that you can try to do this within LightBurn as well. It may take a couple tries using different settings to get all you want. Editing will be required either way so whatever tools you are most comfortable using. Good luck, please do keep us posted on how you get on. Show us your results when you can. :slight_smile:

Ok, Thank you for your help and your patience with me!

Hello,
I have tried once more preparing the parts of a drawing with GIMP and have encountered an other problem:
So I have “dissected” the drawing in its parts, I have imported them into Lightburn, and traced the images.
However, when I make a preview, in some images there is a frame and the whole background is filled, and in others only the parts I want, and I don’t understand what makes the difference!
Here attached 2 JPG files and 2 Lightburn files resulting from them:
The file Leaves is without the frame, the file flowers with a frame, although they have been treated, in GIMP as in Lightburn, in the same way!
So, these are ok:
Leaves|256x256 .
Leaves.lbrn (28.3 KB)

and these aren’t:
Flowers|256x256
Flowers.lbrn (6.3 KB)

What might be the problem?

Kind regards
Aloha

These are all OK, and working as expected.

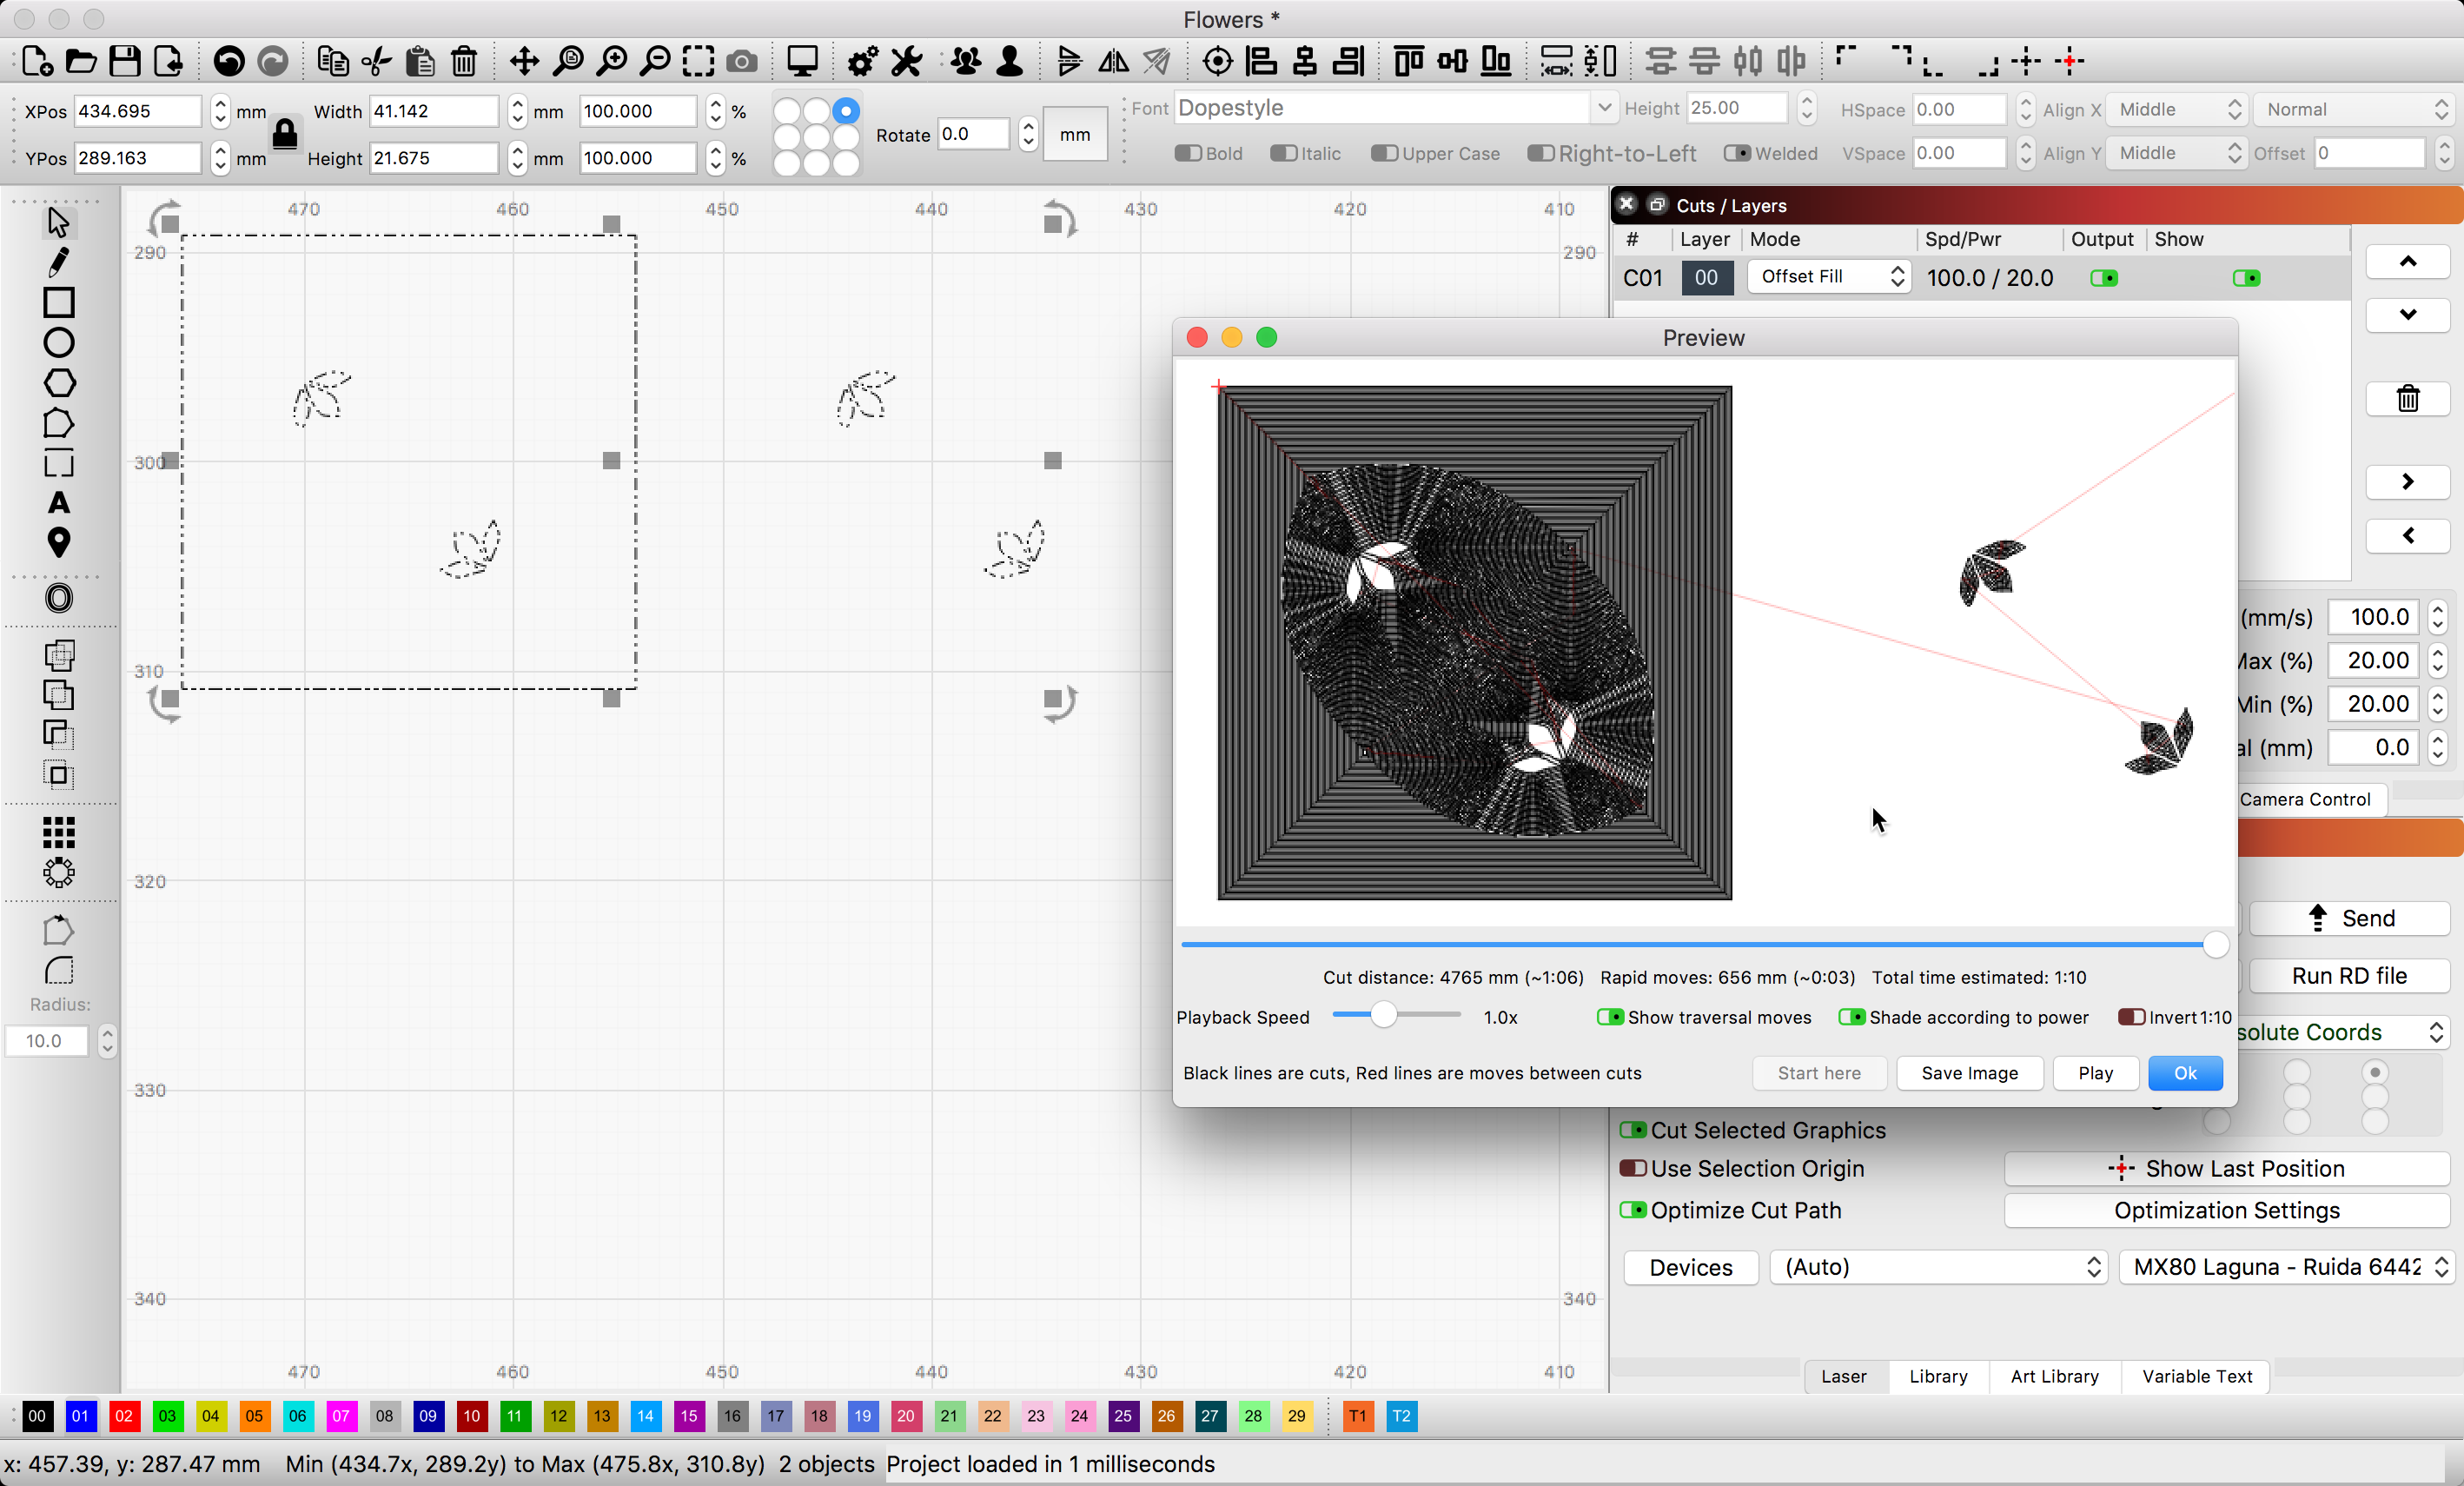
Having an understanding of how LightBurn uses path boundaries to determine the shapes to be filled, is a requirement.

With and without the border.

Reading this post should help.

Hello,
Thank you very much!
I have problems to understand that procedure. Is there perhaps a video tutorial explaining it?
Kind regards
Aloha

No not with this as the focus. I suggest you just play. Start with one circle set to fill. Look at that in ‘Preview’. Now add another circle around that one, or inside it works the same, and have that also on the same layer set to fill. Now ‘Preview’. You will see the effect. Do again, adding another circle and Preview. You should see what is happening from playing around a bit.

I have played around with the components of my flowers: trace image, ungroup, select one element after the other and attributing the same layer to the elements in one color, but there are some elements that I may not select: if I do so, the whole drawing is selected.

All the elements.lbrn (94.8 KB)

I am not seeing what you describe. Here is your file with all shapes selected (CTRL-A to select All) and you will notice nothing has been grouped. Note the selection marquee (marching ants) to see they show only dash lines. If something is grouped, it would have a dot-dot-dash marquee. You would also see the group reflected in the icons at the top-center of the screen (marked in red square).

I see you have a layer set to not output and also notice the outermost rectangle is also on a fill layer, so that is going to a fill for the entire rectangle, turning off the fill as it hits the first shape boundary found on that layer, then back on again as it crosses the next shape boundary.

How is this suppose to look / produce? If you mark the areas you want filled and the places you want cuts and I might be able to help you sort this.

I may not select the element around which I have drawn a frame. If I do so the whole drawing is selected.
I had neglected the mode the layers have to been drawn. I had planned doing that after having isolated all the elements and I was stopped by the element I could not select.
What is rather strange is the fact that on the image below those elements are represented by “ants” but not in Lightburn!
I think it’s right to attribute all the elements that have to been drawn in one color the same layer number!?

Selecting that one shape selects everything on layer5 because it is all one item.
Look closely at it.

image

I am sorry but your wording is not clear, and I am not understanding what you are saying.

In the image you post, I see a single path / shape selected. I do not see the “whole drawing” selected and am not finding that in the file you sent either.

I am trying to understand how you envision the final output to should look. Here is my stab…


Note: If you want to then cut this out, using the outside rectangle frame, set that shape to its own layer and set that to ‘Line’ cut with appropriate settings for your system.

Hello,
I am well aware that my manner to express myself is not perfect and I apologize for it. That is because my English is not perfect. I am living in Europe, Luxembourg, and here we mainly speak Luxemburgish, German and French. I have learned English at school and I don’t have a lot of practice.

I understand what you mean in your first post; it is obvious, but I don’t understand how to cut that line.
To be more clear I have scanned the original and indicated which elements I want do be drawn in which color.

And while dissecting the elements and distributing them to layers, -elements of the same color on the same layer- I was blocked because I could not select the element framed in my previous post (reason of it explained by Hank). When I select it the whole drawing is selected, although most elements are free and don’t touch other elements.

Update: I have just tried once more: when I select the framed element the whole drawing is selected, whereas I could select all the other elements separately.

An other question:
What can I do to make the elements more visible? Some elements are so pale that one has problems to see them on the screen.

I have to agree that I have some problems understanding that procedure!

Here how I want to colorize the drawing:

You are doing great. :slight_smile: Many Americans have difficulty with the English language, and they too went to school. Feel free to write in your native language to help, and we can translate it here.

Oh, my native language is Luxemburgish and I don’t think that you may translate it!
I may write in German, a more “translatable” language when I have problems expressing in English.
Let’s give a try:

Also, wenn ich besagtes Blatt auswählen will, dann wird die ganze Zeichnung ausgewählt, obschon ich die anderen Elemente separat auswählen konnte.

Eine Frage: kann ich alle Operationen, um zu dem Resultat zu kommen wie auf meiner Zeichnung sichtbar, in Lightburn ausführen oder ist es vorzuziehen, ein Programm wie Inkscape zu Hilfe zu nehmen, um die Zeichnung zu präparieren?

So, if I want to select the said sheet, then the whole drawing is selected, although I could select the other elements separately.

A question: can I perform all the operations to get the result as shown on my drawing in Lightburn or is it preferable to use a program like Inkscape to help prepare the drawing?

The problem isn’t going to be better in InkScape or other software - the problem is that your vectors are a single, continuous line, not several independent shapes. You can use the Edit Nodes tool (or other tools) in LightBurn to break those into different parts that you could then edit or change independently.

Okay, I have learned something about editing nodes.
Back to a question in a former post: how may I make the elements more visible, with more color, or by changing the color.? There are some elements that are so pale that I have difficulties to see them.

Select an item and click one of the color entries on the bottom palette bar to change to that color.

But by doing that, I put the element on another layer no?
And even if I choose a more visible color, the lines are so fine that it is still difficult to see the elements and to work on them.