I’m aware of festi.inof/boxes.py but I’m looking to make tabbed connectors for something other than a box or better put something that isn’t on festi. I want to learn the process of creating tabbed connectors and or making an object that connects via like 2 sides (right angle, not opposite sides and not with all the tabbed slots)
I hope I’m making sense, essentially I want to know how to make them by hand using LightBurn
Can you elaborate on where your gap in knowledge is now?
In some way I feel like you may be over-mystifying this. In principle, you need to design how the parts should connect, and then draw that design in LightBurn. The design part of that will take a little creativity and the ability to conceptualize in 3d. They component that you’ll need to keep in mind as you design this is the planned nominal material thickness. The drawing aspect of it is just using the tools available to you in LightBurn. There’s nothing unique about it being used for connectors.
So if I create lets say 2 pieces that connect with 4mm wide/tall tabs (not sure the right term there is) and 1 side is 4mm (male) the other side is 4mm (female) what do I set to make them fit together, do I make one a tad bit smaller like 3.9mm or something like that? I’m a complete noob at this and have only had my laser a short while and done a couple of cuts but from a template only, and a couple of etchings… Sorry to sound dumb but its all new to me.
This process will stress your understanding of woodworking (assuming you’re using wood) and your knowledge of laser manufacturing.
Every species of wood and every cut will have its own properties that you will need to adjust for. The primary thing you’ll be dealing with on the laser side is the concept of kerf. That’s basically the amount of material lost in the cutting process. This results in cut shapes not matching the designed shape.
I’d suggest starting simply. Pick a material you know you can cut well. Design for 4mm, make no accommodation for kerf, and burn both sides of the joint. Test the fit. Take measurements on both sides and make notes on how the material behaved. Experimentally adjust sizes until you get the fit you like.
As far as how you achieve the design changes you have 2 approaches:
Manually add-in the size adjustments and hard-code them into the design. In other words, if you find you need to design a 3.9 mm hole to result in a 4 mm actual measured you actuall hard-code that in the design
Design for nominal dimensions and then use LightBurn kerf offset in cut settings to account for kerf.
I suggest you start with an online box generator like the website festi.info.py to see how they make the tabs. That site also has a test you can perform to find out the kerf with a given lens, board, speed, and power. After a few boxes, you can do a search on YouTube for “laser cut wood tabbed boxes,” and there you will find many good ways to do boxes on your own.
The one that makes 4 tabbed squares with different sizes on each side, I made one of those last night and if I did this right it is a 0.06, gonna play around today and see if I can make my own.
The problem is that when you change material thickness you are probably going to have to change two dimensions on the artwork.
If the material is 3mm, tab 4mm tall x 3mm deep (this is the material thickness). If you change that to 4mm then the ‘slot’ size in that dimension changes as does the depth of the ‘tab’, if you wish it to be smooth with the outside.
This type of design is usually done with some type of software that allows you to change one thing and it will be applied throughout the design, called parametric… This has to be designed into a program and you find it in many CAD programs. I use Freecad for this when needed.
You can design proportionally and just scale the drawing, but the size of the object changes also…
I have to cut materials to find the actual kerf for a specific lens and material.
IMHO, find the kerf, and apply 1/2 as your kerf for the cuts. This may not allow for enough clearance, but it’s seems a good starting place and many times has works well.
Stay away from different kerf for interlocking parts. It’s easy to get a part that needs to match with a different kerf…
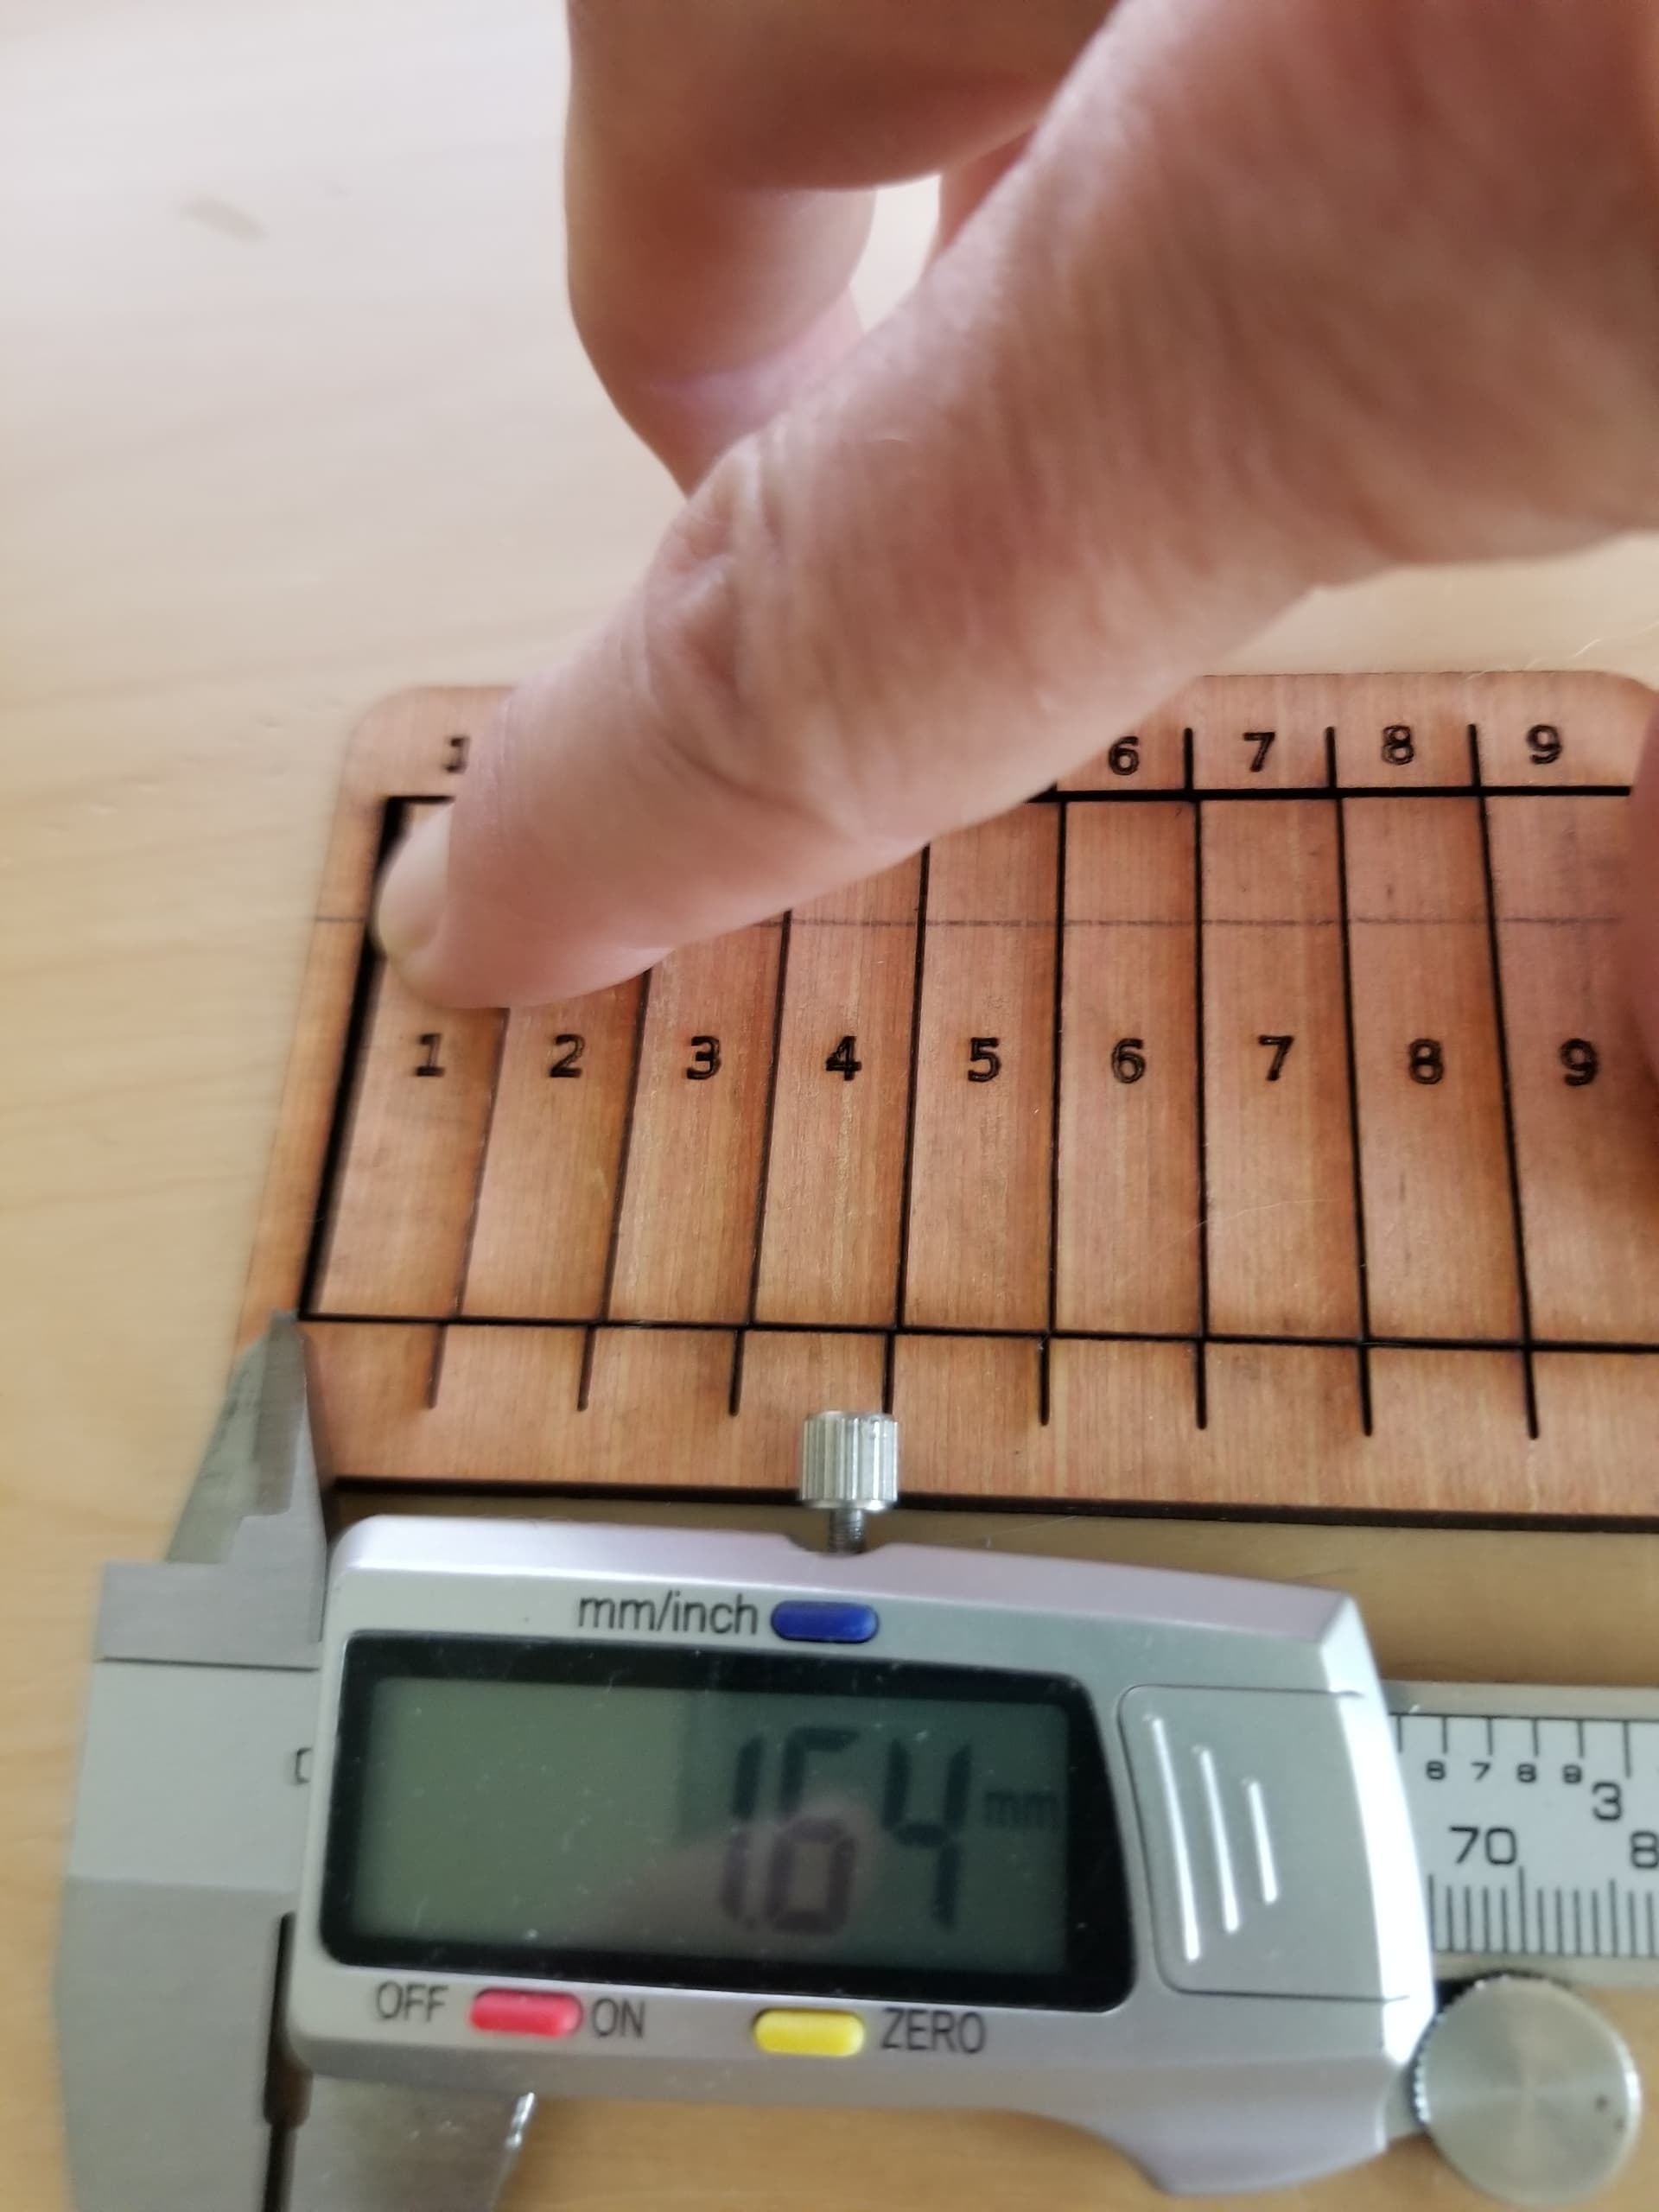
I use this for measuring kerf, don’t forget to divide by 10… this is 0.164mm kerf
I use Onshape CAD and a script called Laser Joint, that runs in Onshape, to make my boxes and custom jointed shapes. Works a treat and you can customize the tabs and slots for material thickness and kerf size. Both Onshape and Laser Joint are available for free, though the free version of Onshape is intended only for hobbyists. Commercial use requires to buy an annual license for $1500. I’m just a hobbyist so that’s no problem for me.