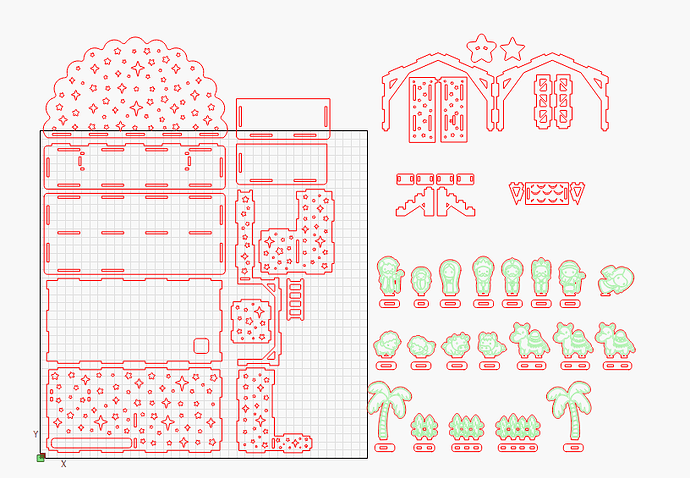
Hello. I can’t figure out how to organize a XMAS ornament project that uses two materials. I have all the vectors in one project, on various layers, but I need to be able to process them individually. In vectric software I use sheets to accomplish this. The only approach I’ve figured out so far is to manually show/hide/output toggle individual layers. Is there an easier approach?
Activate “cut selected graphics only” and select the shapes you want to send. The rest doesn’t get sent. Activate “use selection origin” as well, this will ease things further.
Oh! So that’s what cut selected vectors does. Thank you.
So… how would you handle this project? It’s all the same type of material, but I need multiple sheets.
Ultimately, I’m looking for a way to bang out a given project, without having to move vectors between cuts. Again, in vectric, I set this up once with however many sheets are required, arrange the vectors and I’m done.
I think I would do one of 2 ways. Option 1, make a tool path the size of your material and arrange whatever pieces fit. Group the pieces to the tool path and move aside. Repeat until all the pieces are assigned to a tool path. I think this workflow is similar to your sheets.
Oprion 2, make a tool path the size of your material and arrange whatever pieces fit. Select those pieces, group them and place on a separate layer. Move them out of the way and repeat.
I think the first option is better because you don’t have to be concerned with ensuring all the settings are identical between the layers.
So, are you saying that the layer doesn’t matter? All the videos I’ve watched try to use red for cutouts, blue green for etching, etc. Or, something like that. So… ignore that and just use a layer per operation?
Also, so I hide/show layers, because they’re all in the same origin/workspace.
It is an “unwritten defacto” that many use red as their cut layers. But all layers can be used for all features you decide for yourself.
Like Bernd stated, those colors are the unwritten standard, but yes any layer can be used for any purpose with the exception of tool layers, T1, T2. Those are for framing purposes and are never output to the laser.
You can certainly do that. Stack them on top of each other and turn on/off layers as needed. Like I said previously one issue is ensuring the same settings on the different layers for using the same material. This would be a good argument for using the Materials Library.
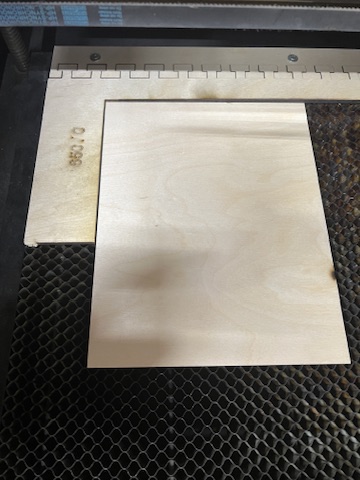
I tend to move items off the work area rather than hide them. I typically run in absolute coordinates and use the positioning numbers to place items where I want them. I have a fence system for positioning.
I get that, but only the simplest of projects can adhere to that. As soon as you need multiple sheets …
I don’t quite understand what you mean.
But I will pack/optimize your project so that as many parts as possible fit on one sheet. It is secondary whether they are only to be cut or also engraved. When the workpieces are most efficiently distributed to save material, the laser starts with engraving, cutting inner parts and finally the outer edges of all parts. It is all saved in a project file with all information about layers and can be “reused” again and again.
Here’s how I do it:
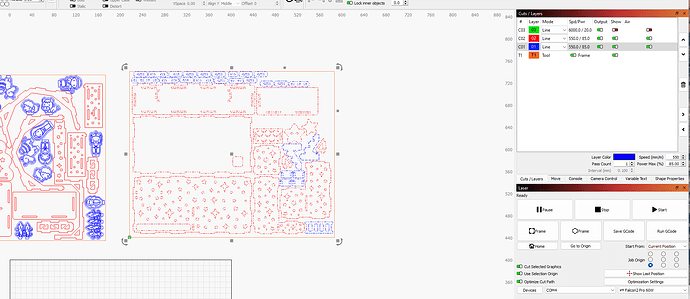
I use squares drawn on the tool layers to depict the size of my workpieces. Then I order the shapes into such pieces and use the options you can see in the laser window.
I usually use plywood plates in the size of A4 and A3 (letter size). Since I have “cut selected graphics only”, I can select what I want to, and only that part of the file is sent to the laser. The layer settings are not relevant at all, in this case, orange is cut and green is engraved.
(in this screenshot, the shapes are not aligned for best workpiece usage, it’s just as an example)
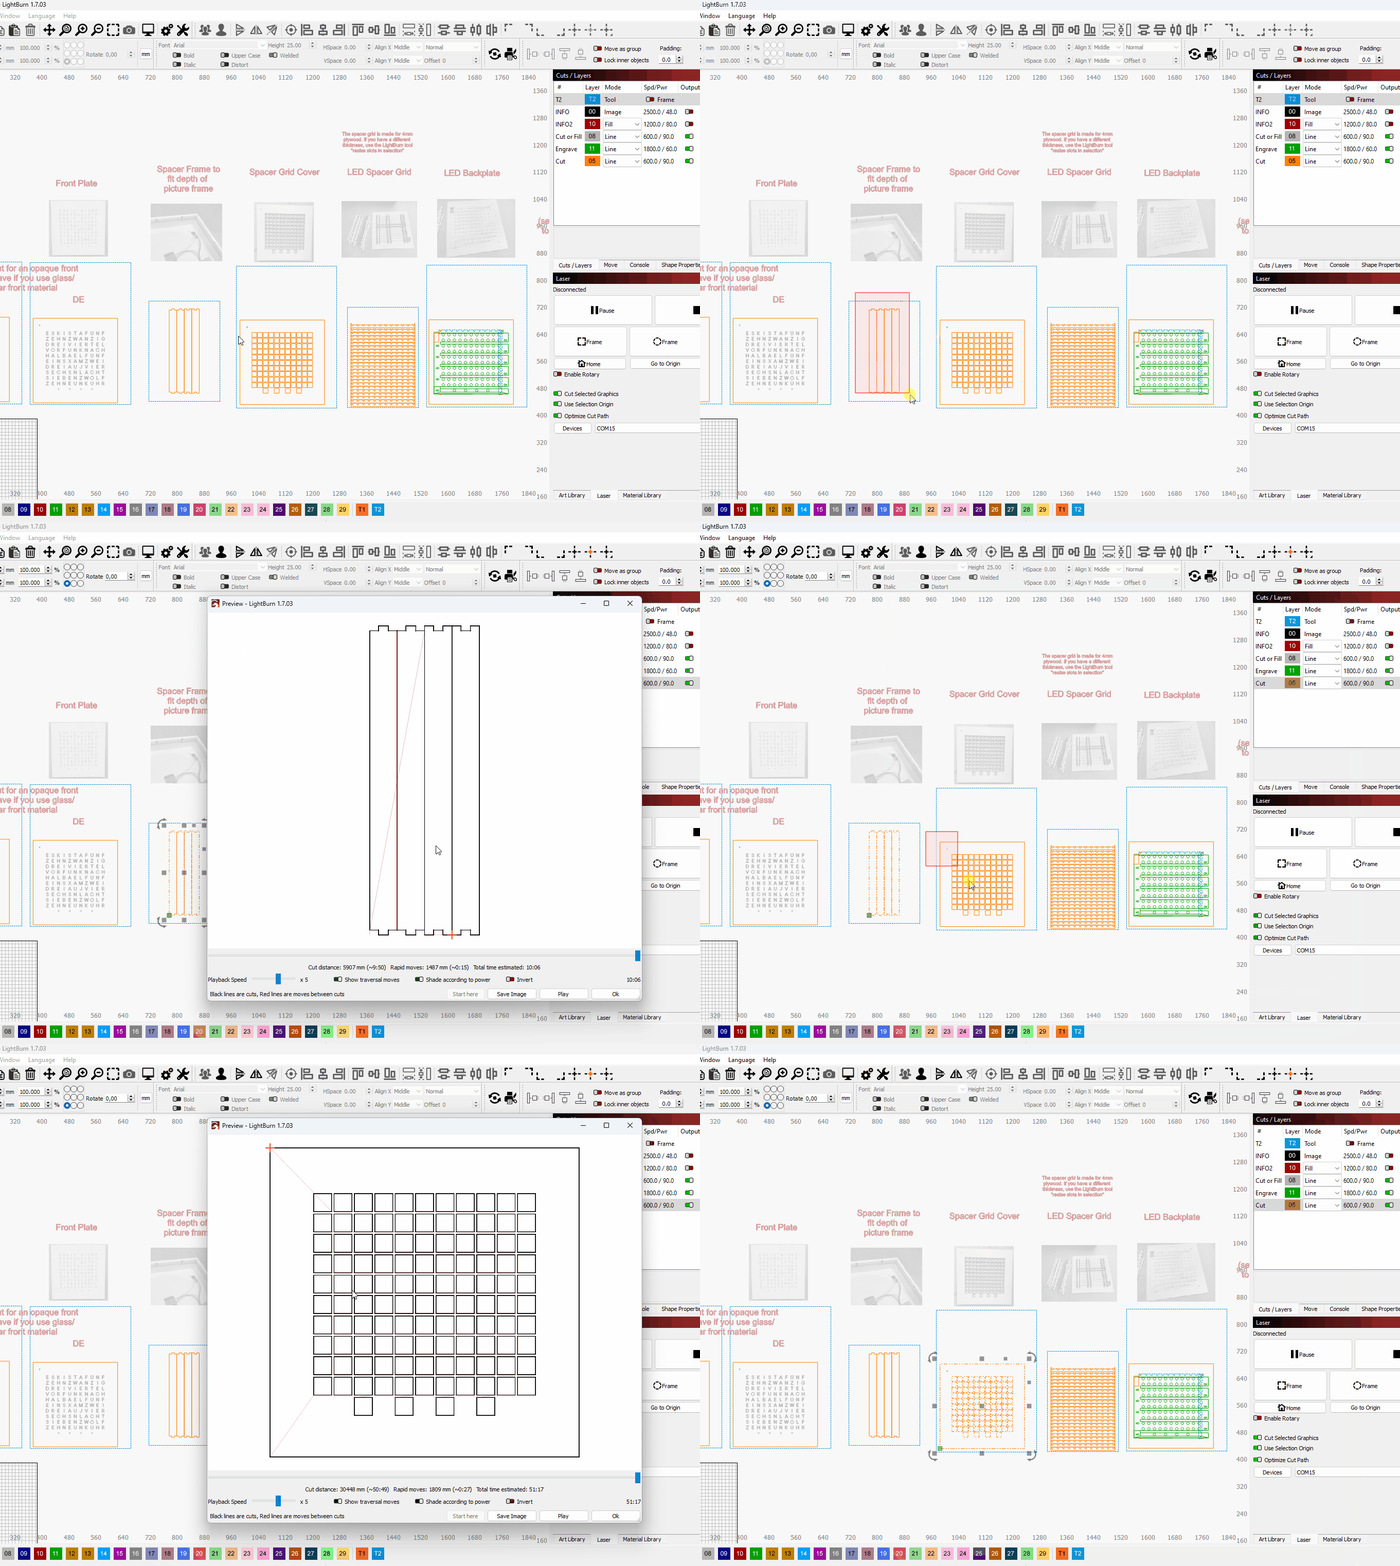
This is very interesting, indeed!
After messing with it for a bit, I think I’m making progress. I found that in order for it to relocate the parts to the bed, I have start at home, select “current position” for the “start from” and also enable “use selection origin”. Does that sound right? I just looked up “user origin”, so I could do that, as well.
Thanks for that fantastic help!
That’s one way of doing it. Yes, you can use user origin as well. Using Selection origin will help with consistency.
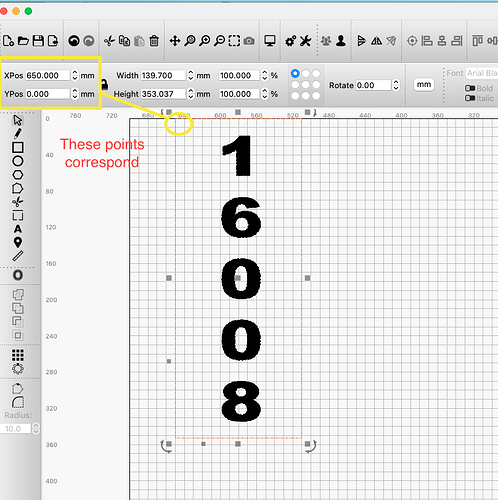
The way I do it is I use Absolute Coordinates. I have an L shaped fence on my machine with the corner at 650/0 coordinates. I use the top left anchor point on my tool frame and place the graphic there by using the positioning numbers. Then I locate my workpiece against the L fence and send the file. It is always positioned exactly where it needs to be, no framing or fiddling needed.
Yes. That’s how I do it. Then you can position the laser at a corner of the workpiece (even by manually moving it there) and just click on start (or frame first).
That’s also possible, of course, but it means that you need to drag around the objects in the workspace. That can be quite annoying depending on the project. If you use current position and use selected graphics+origin, then you just select what you want to send and that’s all. No dragging and positioning. But of course, this might have other drawbacks as well.
I can’t thank you all enough! I’m on my third project working with this new system and love it!
Question … what about different sheets, meaning, if I have different thicknesses and settings? Again, I see people choosing a color/layer to hold the cuts, for instance, but let’s say that I have two materials? Does that mean I just need to choose one for RED and another layer/color for secondary materials/settings?
You keep the layer colors that you have determined and save them separately in your material library under the different materials and thicknesses.
When you have to work on a new project, you retrieve the saved settings and your red layer (for example) is still your cut layer, just with a different power and speed setting.
I’m thinking of multiple materials in a single project. I’m actually working on one such now. It uses wood and acrylic. I don’t want two projects, since the pieces are based off each other.
Just put the different materials on different layers.
I am also working with acrylic and plywood in the same project.
All parts are on my LB workdesk, but divided into two blocks which are in each tool layer T1 T2 boxes. I change the material settings with my material library and make all acrylic parts first, then I get the settings from the material library that fit my plywood. It works fine for me.
After the introduction of Multilayer, I actually only use 3 to 5 layers on average in my projects, rarely more.
