Hi, I’m trying to do the same positioning in LightBurn that I normally use in RDWorks.
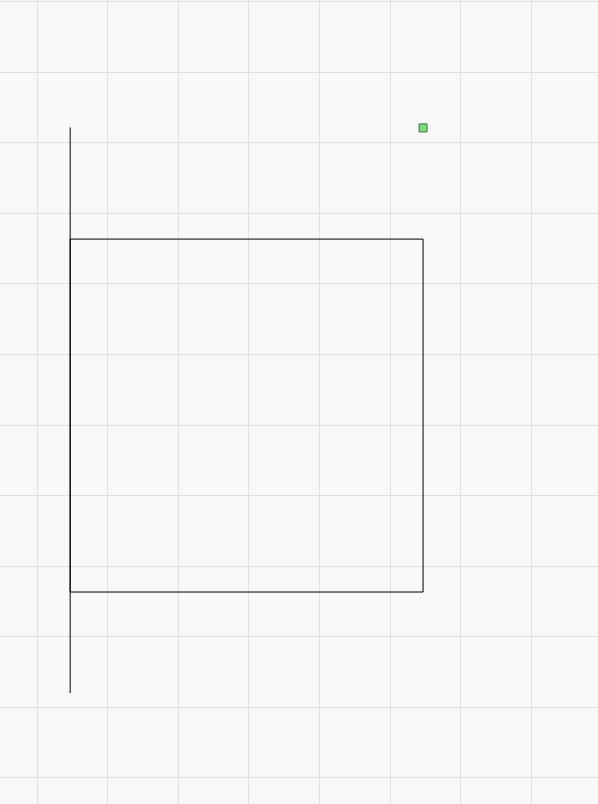
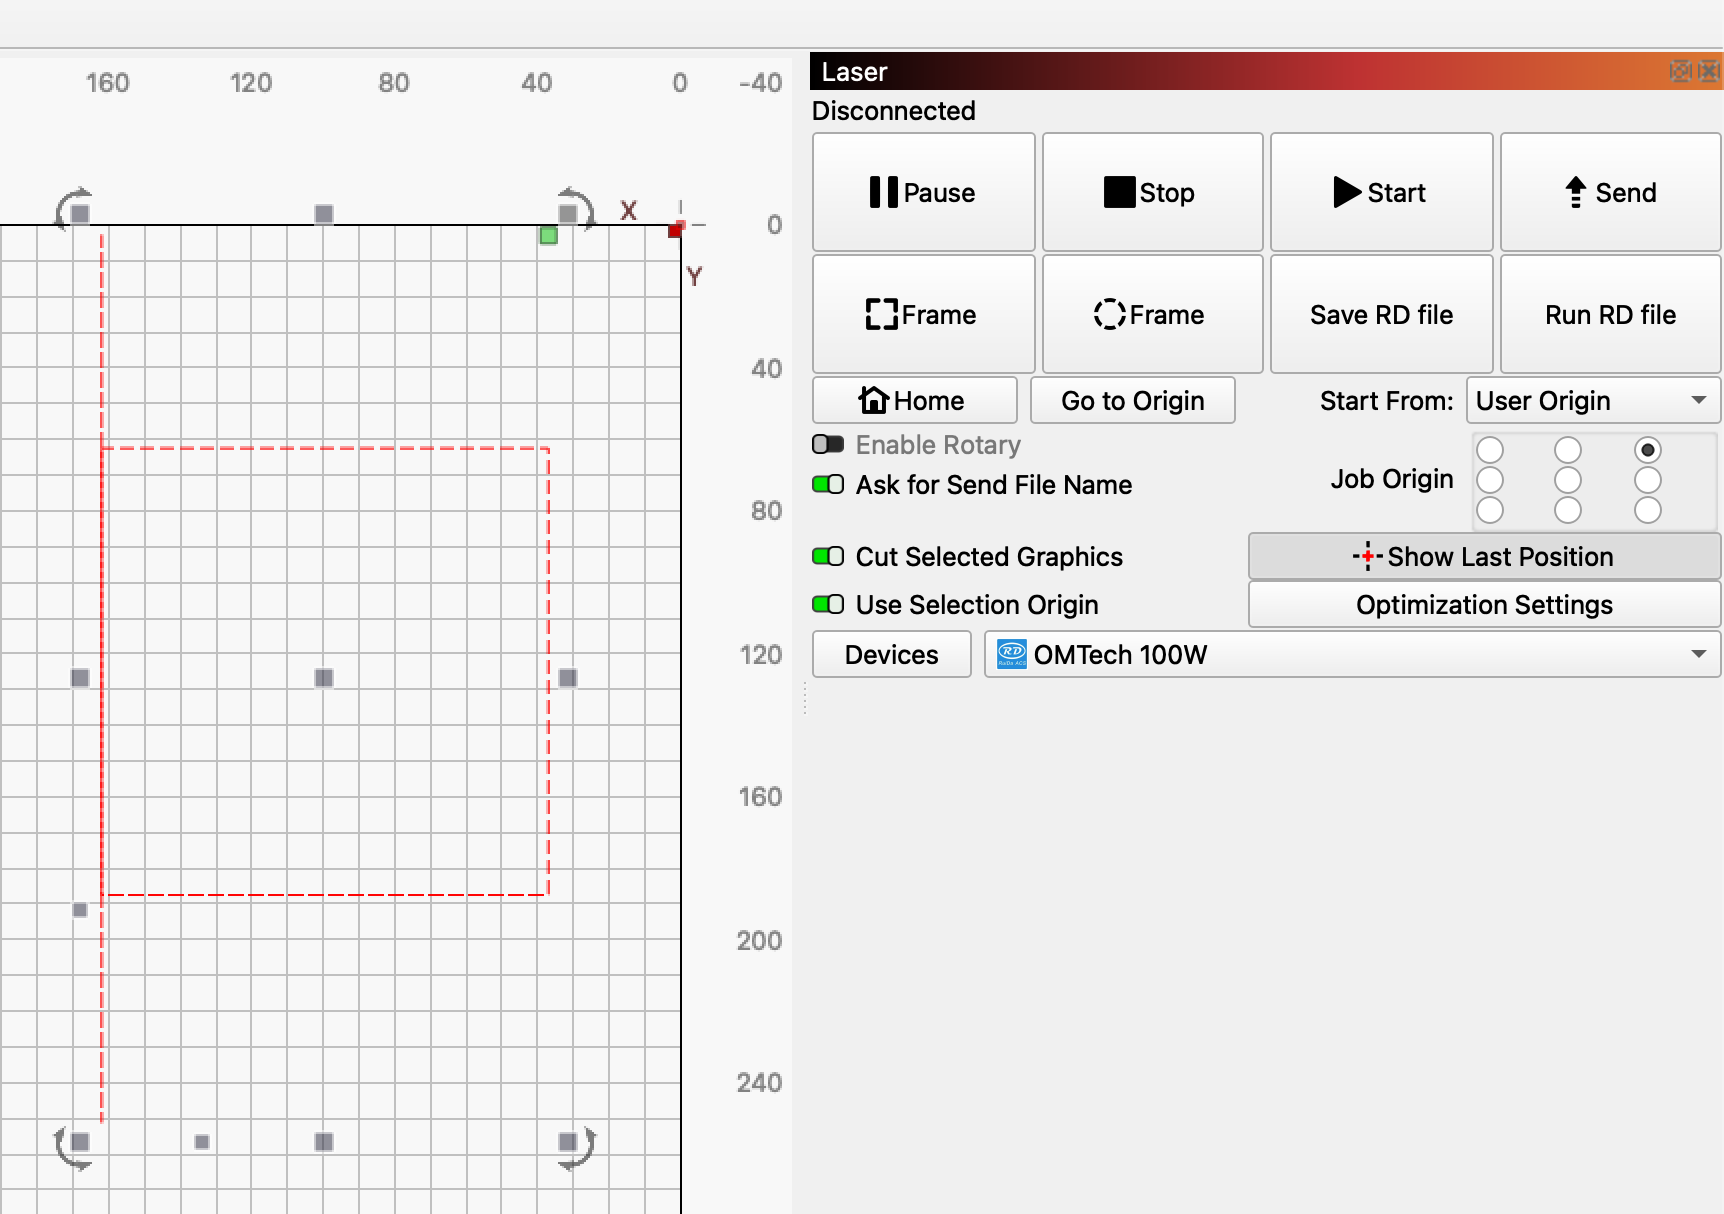
I have a 5" × 5" square, with a vertical line on the left that extends above and below the square.
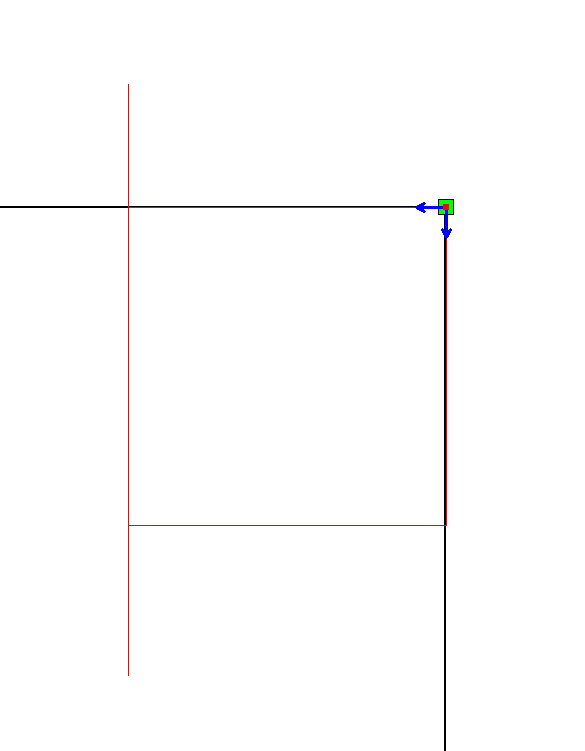
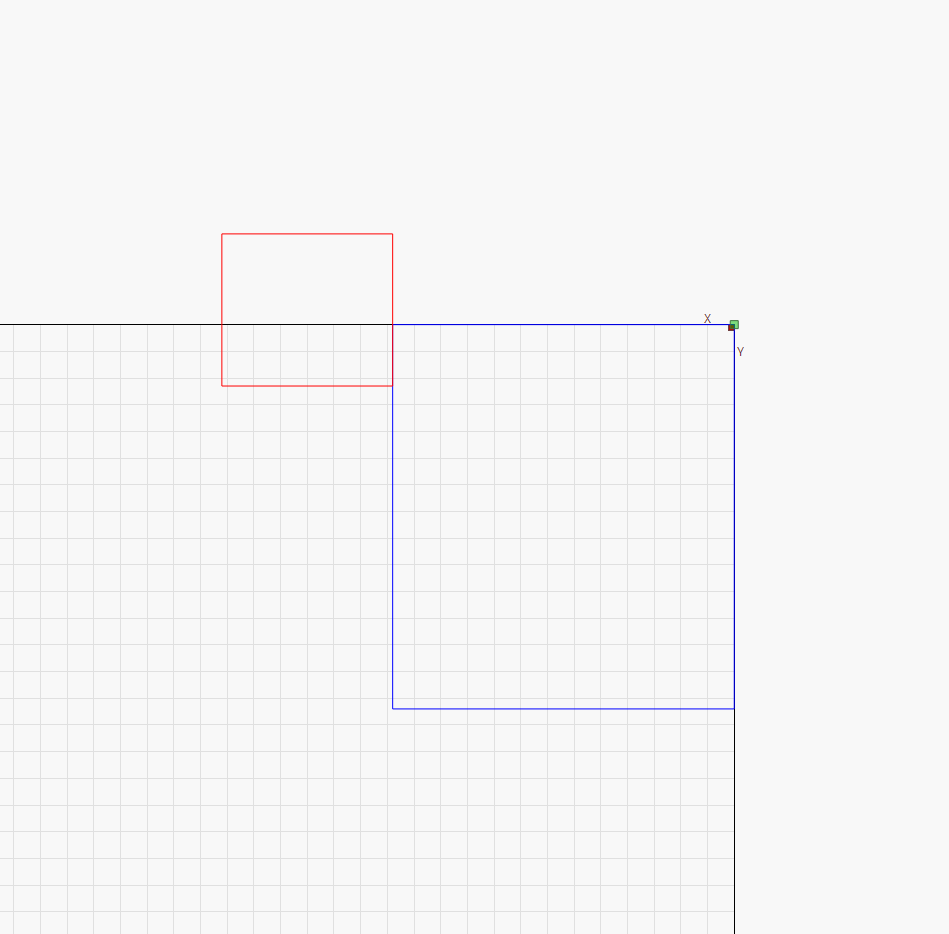
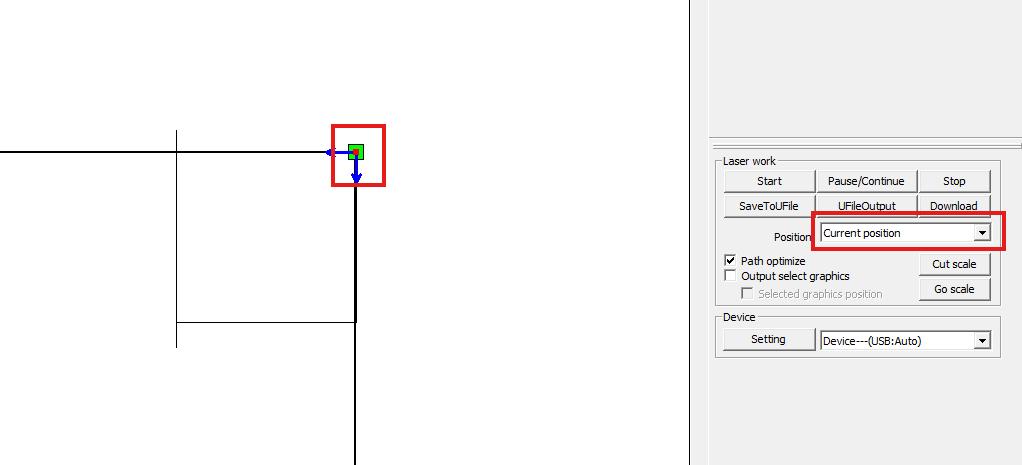
In RDWorks, I can set the top-right corner of the square as my start/reference point, even though the line extends past the square. You can see the green square and blue arrows in my screenshot showing the start position.
In LightBurn, the extended line changes the job boundary/reference position.
How can I make LightBurn use the top-right corner of the square as the start/reference point, just like RDWorks?
When I don’t use absolute coordinates I use the ruida controller itself to determine the start/stop position.
I place the laser head where I want it and press “Origin”.
I only use absolute when I do jigs and need it to make the alignment holes and so forth. Once completed, I’ve labeled on the jig it’s absolute position, move the head there, press origin and run the job with it’s user origin.
Thanks. I already use User Origin by moving the laser head and pressing Origin on the Ruida.
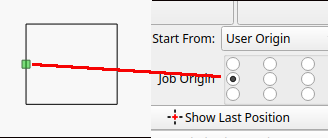
What I’m trying to reproduce is the green square in my second screenshot . That green square is the reference
/start position, and I can place it exactly at the top-right corner of my 5” × 5” square, even though the vertical cut line extends above and below it.
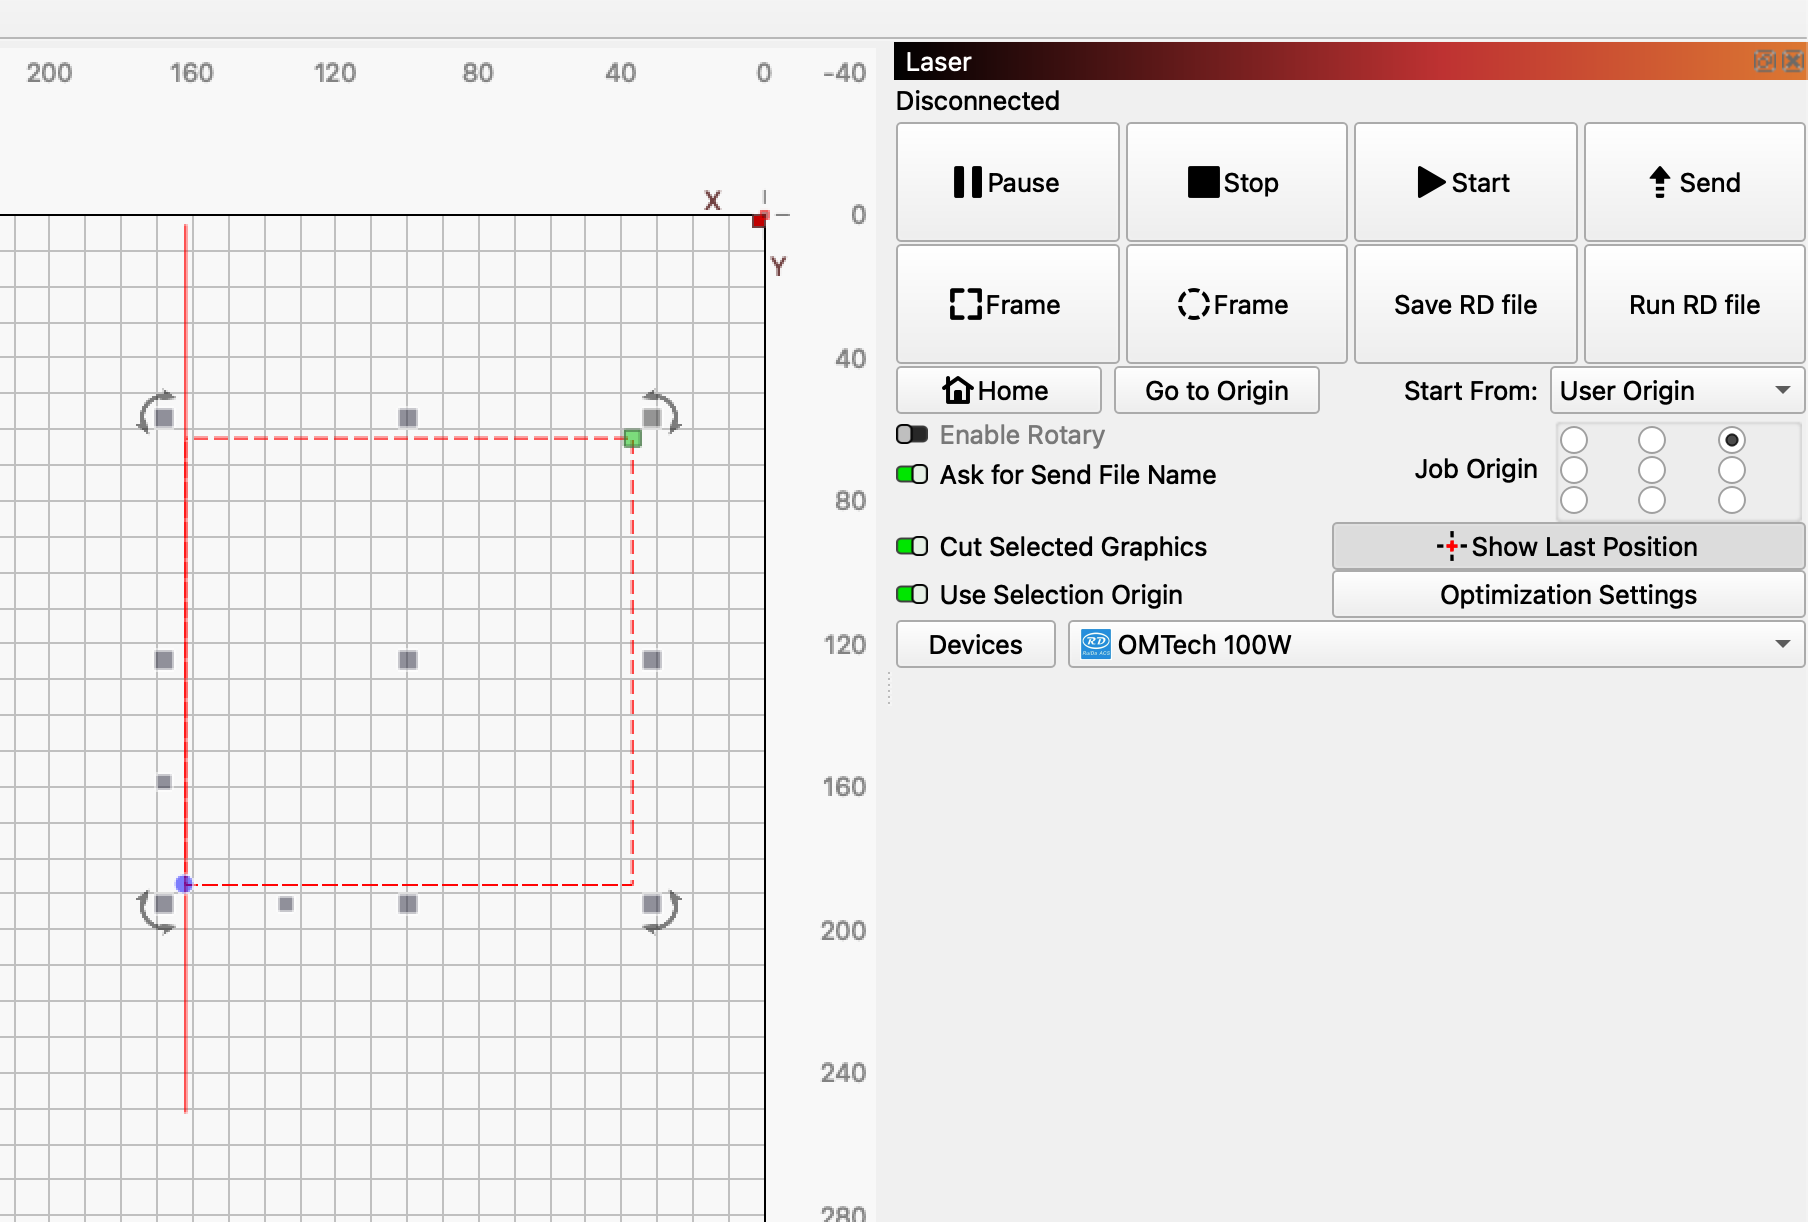
In LightBurn, the extended line changes the overall bounding box, so I can’t get the Job Origin marker at that same position.
Is there a way in LightBurn to manually place the Job Origin/reference marker like the green square in RDWorks, instead of having its position determined by the overall bounding box?
I still want the square and extended line to run together as one job.
Because I already cut the first square, and now I want to cut another shape that extends from the first square.
I use the top-right corner of the already-cut square as my reference point so I can line up the new shape exactly with the existing cut.
In RDWorks I can place the green reference square on that corner even if the new shape extends above or below it. I’m trying to do the same thing in LightBurn.
There is a difference in terminology between RDWorks and Lightburn. The start point and job origin are 2 different items.
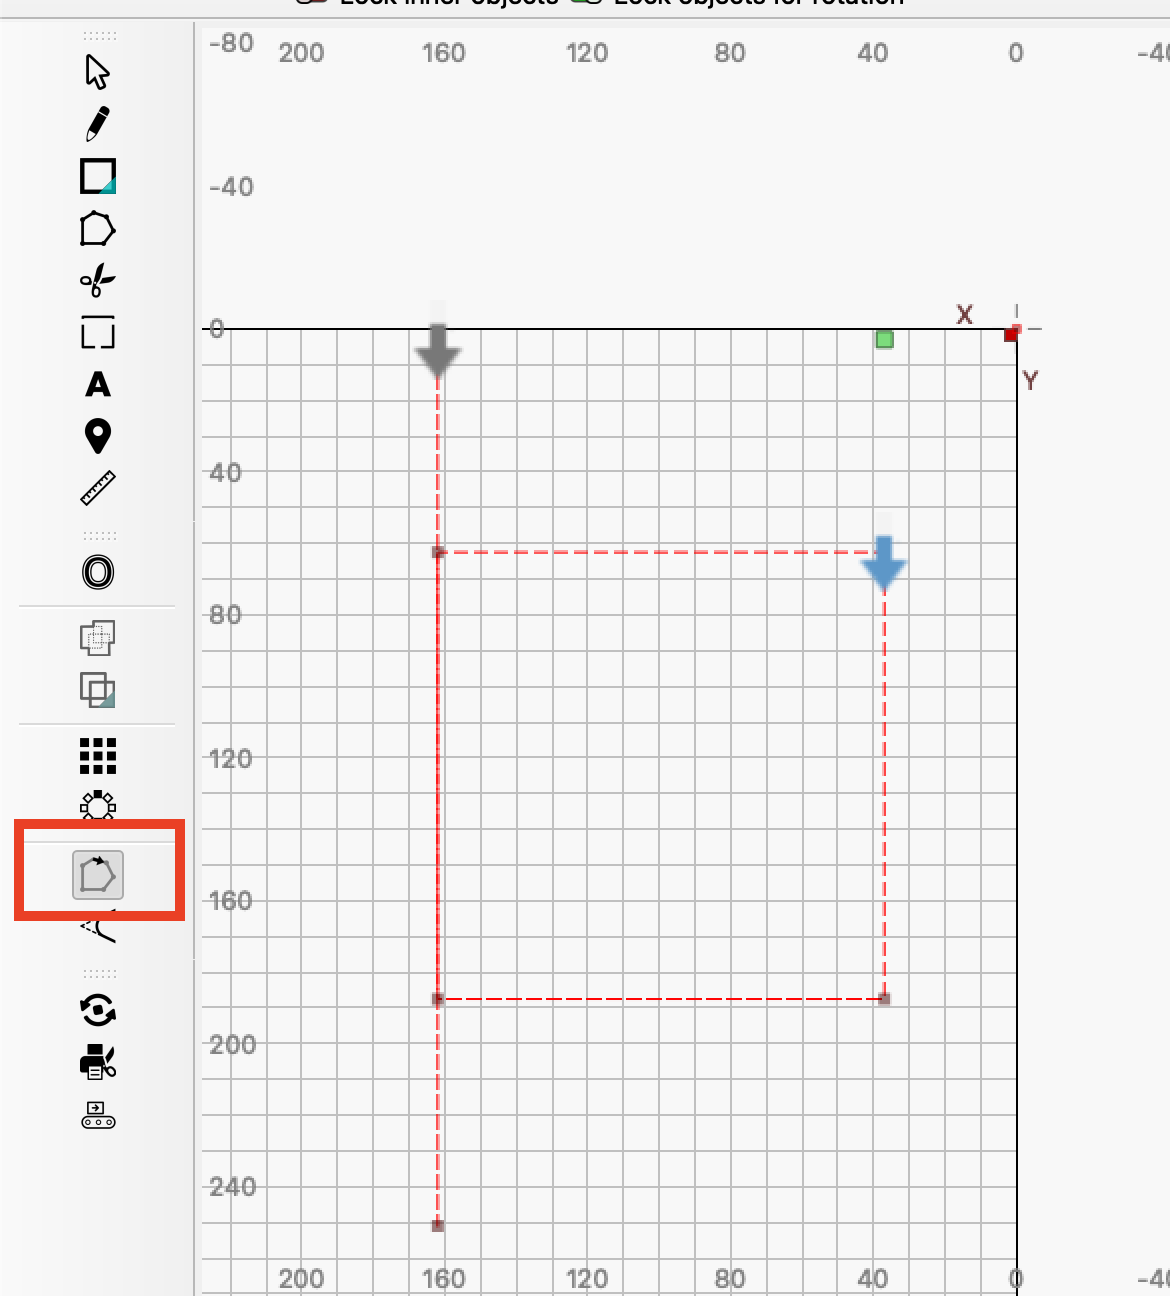
The highlighted icon allows you to set the start point of any shape. This is NOT the origin point. This is a 5x5 square with a line beside it. 2 distinct items which is why you see 2 start arrows.
The job origin can be selected with the cut selected graphics and use selection origin switches in user origin or current position mode along with the 9 dot position indicator. What you cannot do though is select just the square for origin and expect it to cut the line also. With just the square selected. The square will cut but not the line.
Both parts will cut.
If you want more, better help, upload photos of your current process with a good description along with the lbrn2 file of your project.
Sorry if it doesn’t work like you’re used to in RDWorks.
The workflow with Lightburn may have to be a bit modified to do what you want. If you want to use it for cut/print, I’d think you need to mark it somehow, at least on the material.
In RDWorks, I can use Absolute Coordinates and have part of my design extend outside the workspace/page, and RDWorks will still send and cut it.
For example, in this picture the square is inside the workspace, but the vertical line extends above and below the workspace. RDWorks still lets me cut the entire line.
In LightBurn, I get “Shapes crossing machine bounds” and it says those shapes will not be sent.
Is there a way to make LightBurn send and cut geometry outside the defined workspace when using Absolute Coords, like RDWorks does?
The machine can physically travel/cut in that area — I’m specifically looking for the LightBurn equivalent of this RDWorks behavior.
If you’ve got your machine work area size set correctly, then your part can’t be outside of the working area and be sent to the machine. It knows it cannot drive the head outside the machines work area.
If you’re using the work area to describe the size and it’s smaller than the machine, then you’re not set up properly.
If you use tool layers, it might be more of what you’re looking for.
I’m sorry, I really an not up on RDWorks, I run a Ubuntu box using v1.7 of Lightburn. RDWorks and EZCad doesn’t run on a Linux box.
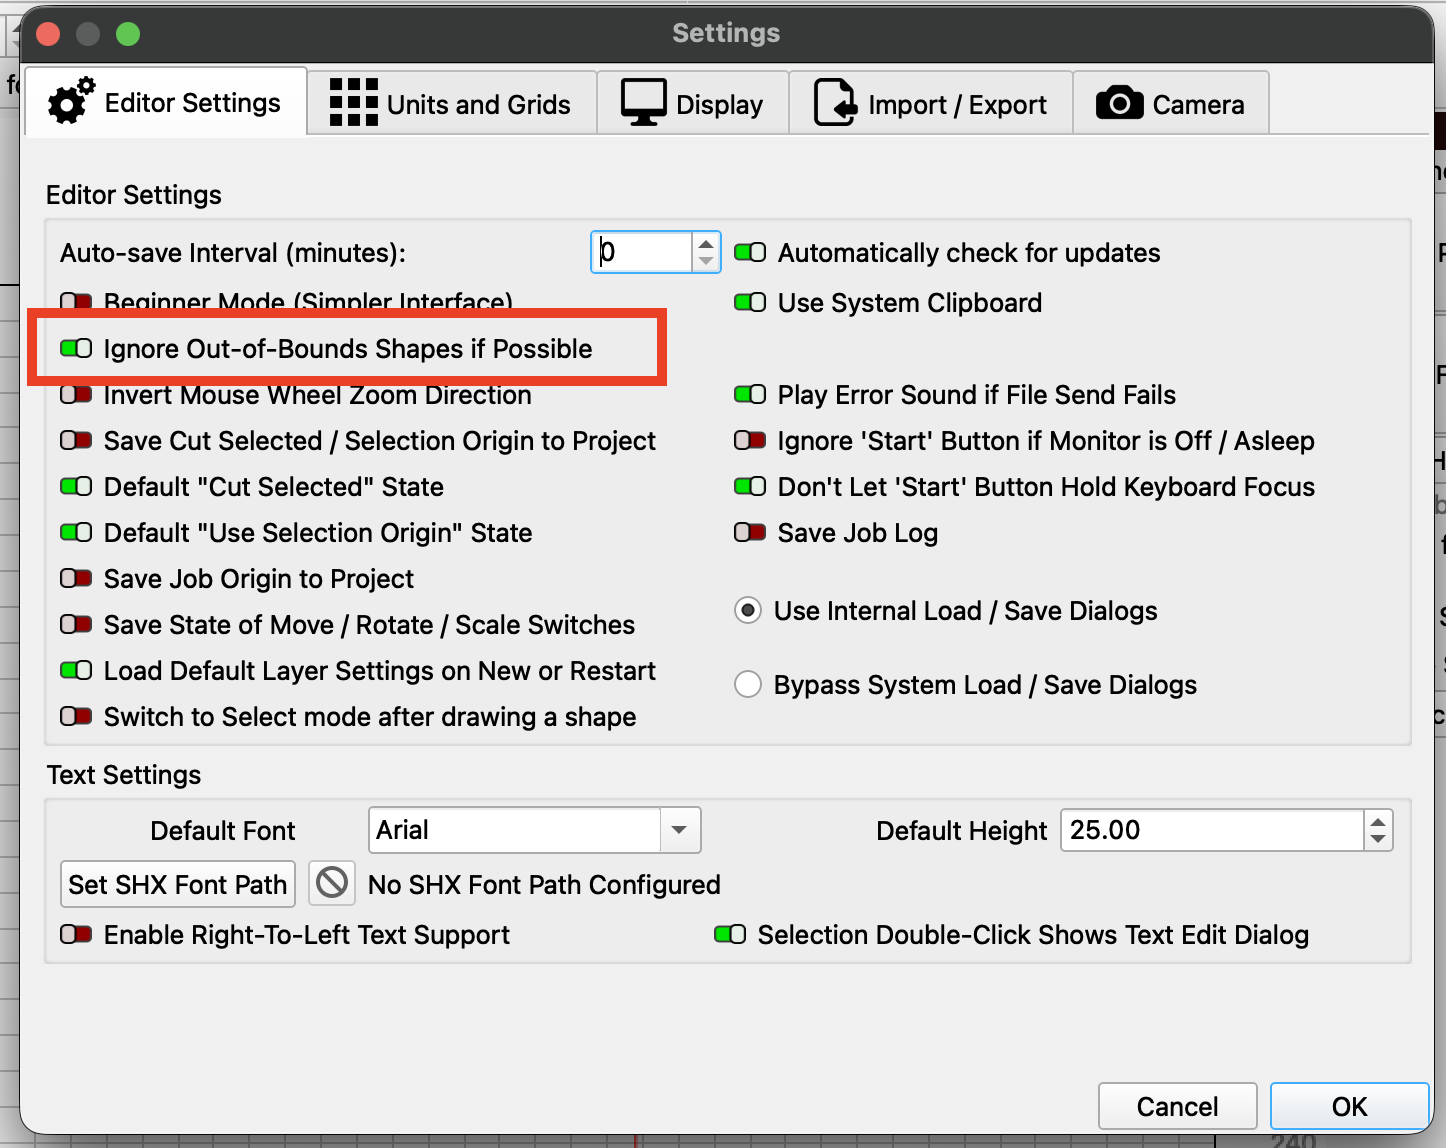
Unchecking “Ignore out-of-bounds shapes” solved the first part, thank you. Now LightBurn sends the geometry outside the workspace.
There is one more thing I’m trying to reproduce from RDWorks.
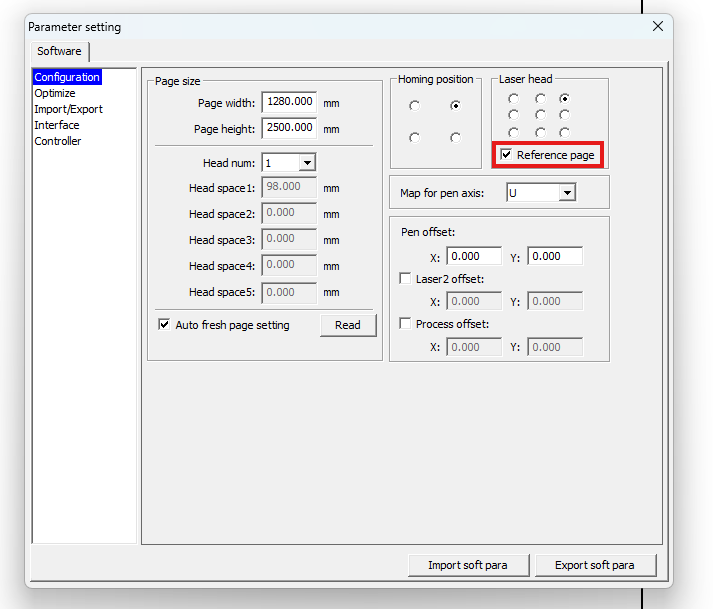
In RDWorks, when I enable Reference Page in Configuration, the green reference square stays at the top-right corner of the workspace, regardless of geometry outside the page.
Then I can choose Current Position, physically move the laser to any position I want (for example X=807, Y=12), and run the job from there using that fixed reference point.
It’s similar to Absolute Coords in LightBurn, except Absolute Coords references the machine’s fixed coordinates / 0,0. I want to use the top-right corner of the workspace as the job reference, but place that reference at whatever current machine position I choose.
Is there a LightBurn equivalent to RDWorks Reference Page that keeps the job origin fixed to the top-right corner of the workspace while using Current Position/User Origin?
I attached screenshots showing the Reference Page setting and the green square in RDWorks.
I believe this is what it’s supposed to do. Leaving it disabled, forces all work to occur within the work area.
I don’t know how RDWorks actually does things internally. I also am not aware of what you can or can’t select. Especially if these are done within RDWorks.
I stated previously, if you have a predefined work area and you tell it to go outside of that area, it’s going to flag that as a potential problem. One of the reasons I didn’t suggest it.
Tool layers allow you to draw object to define your limits, such as when doing a mug. You can get the measurements and use that to adjust where it’s at in the lasers output.
Does your machine actually home to the upper/right when you power it on?
Yes, my machine physically homes to the upper-right.
Disabling Ignore out-of-bounds shapes solved that part. Now I’m just trying to find the LightBurn equivalent of RDWorks Reference Page, which keeps the green reference point fixed at the top-right of the page even when using Current Position.