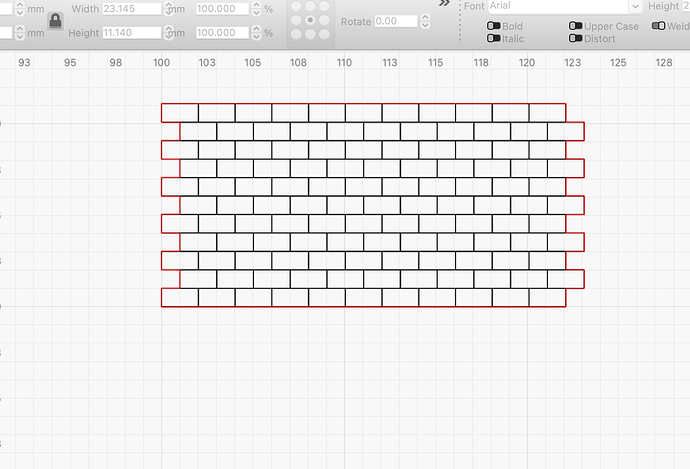
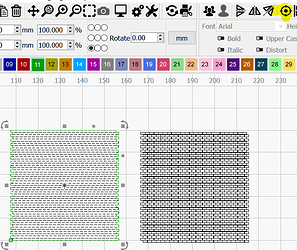
I have created a drawing within lightburn using a 1mm array to assist me creating a brick pattern for TT120 model railway buildings. This gives me bricks that are 2mm by 1mm and the edge has a brick left sticking out to make it a comb effect that will match with a similar piece cut from 2mm MDF to join the building sides. I need to be able to engrave all the brickwork patterm but cur the outside lines to make the joints. How do I select the outside lines to turn them into cut lines?
Image attached
BrickPattern.lbrn2 (552.4 KB)
You could create a 0.5 outward offset of the outer shapes only and set that shape as cut.
If you haven’t already found the discussions of making scale bricks & shingles, these may be of interest:
https://forum.lightburnsoftware.com/search?q=bricks%20ho%20scale
IIRC somebody was doing N scale, so play with the keywords and see what pops up.
Sorry was on mobile and unable to see the file.
I believe your better option is to duplicate your shape (Ctrl + D) and move aside as a backup
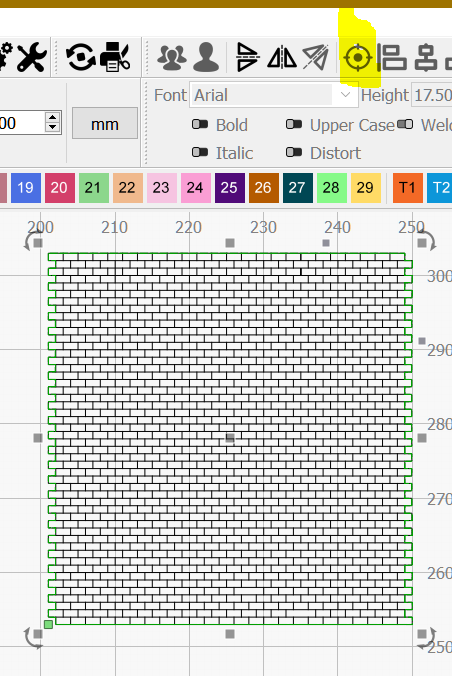
Then use the Cut Shapes tool with a rectangle set e.g. at position X=148 to grab all vertical segments
then Ungroup (Ctrl + U) and Auto-Join (Alt + J) and duplicate (for the left side)
.
Grab one line from your shape to add to the brick profiles
Use Scissors tool on the highlighted area.
.
Select the 2 shapes and click Align Centers and maybe adjust a bit.
Keep the different layers and Group.
.
Also your shape misses a vertical line
Since this is one of your goals, I would determine your kerf width and us 1/2 of that dimension with the offset tool. This should allow your outer score lines to still exist and it “should” mate with other pieces nicely.
Select all of your pattern then group it. Click offset tool and set the offset to 1/2 of your kerf width, Select resulting objects and optimize selected. Do not select delete original. After clicking OK, change the selected result to a different layer then ungroup it. You can then select just the perimiter and change it to a cut layer and delete the entire other offset layer.
You probably want to get rid of the red layer copy of black before doing this.
A easier better faster closed shape way:
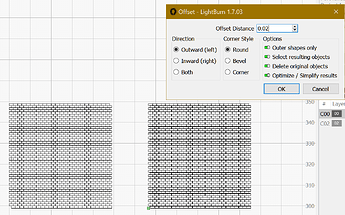
Select all (Ctrl + A) duplicate (Ctrl + D) and Offset with the following options (you could also offset a smaller value like 0.002):
.
Ungroup
press Esc key
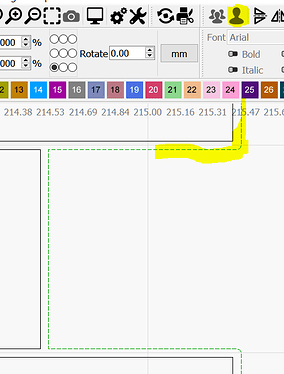
Zoom in a lot and select the highlighted shape
set selected shape to another layer
.
Ctrl and drag left and select your original shape (this selection order matters)
.
Click align centers and group
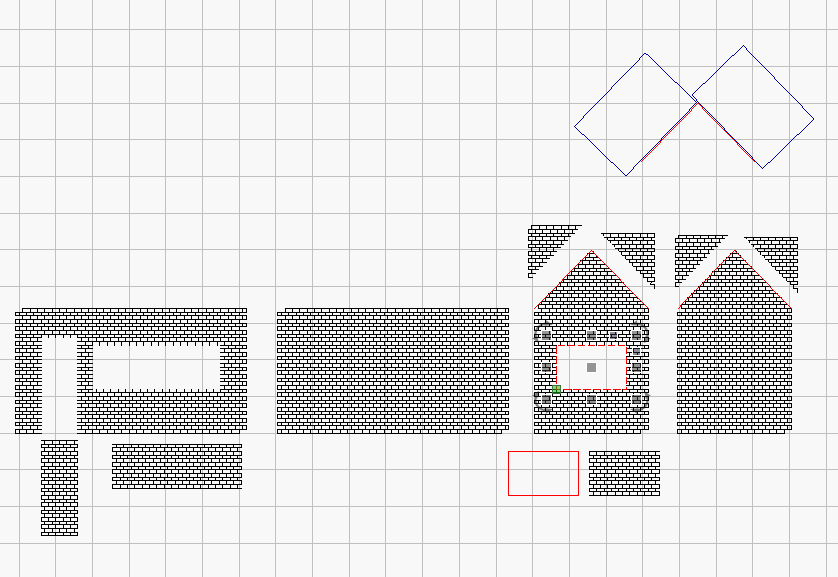
Thanks to everyone for their advice. I ended up creating a building side and grouping it then creating an offset of 0.005. then I marked all the interior cutouts ( doors and windows) and the roofline in red to cut separately. All I need to do now is go out to my workshop and give it a live test.
Building panels.lbrn2 (474.8 KB)
No need to engrave the parts cut from window doors etc.
Duplicate your red shapes and put aside for the final “assembly”.
.
Create a rectangle and angle align to a side of your roof shape duplicate then duplicate the rectangle mirror horizontal move duplicate to the other side.
Place 1 rectangle in your design against red roof shape to remove not needed part then use Cut Shapes tool, repeat with the other rectangle/side.
Do the same with windows doors etc.
Place the duplicated Red shapes(window doors etc) in your design to have a cut line.
You gonna end with less engraving time and some clean scrap MDF for another job.
Yo can use the Ctrl key while dragging the red shapes to place freely without snapping.
Hope you understand what I mean.
Building panels_.lbrn2 (585.9 KB)
This topic was automatically closed 30 days after the last reply. New replies are no longer allowed.
