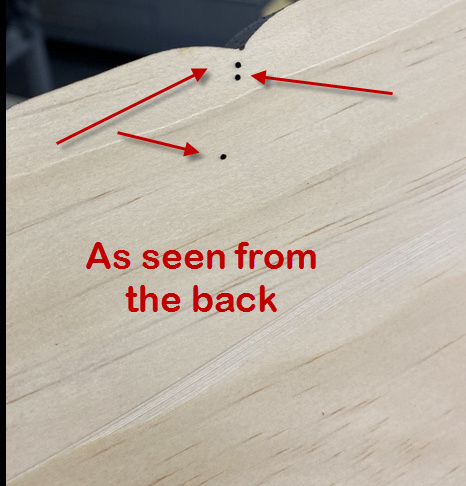
I cannot figure this one out. I have tried simplifying the vector, redrawing the lines, changing the power settings, yet nothing is working. When the mode is set to Line, the line always starts like Cut Through mode is enabled (and it is not). And it blasts a pin hole through 3/4" pine.
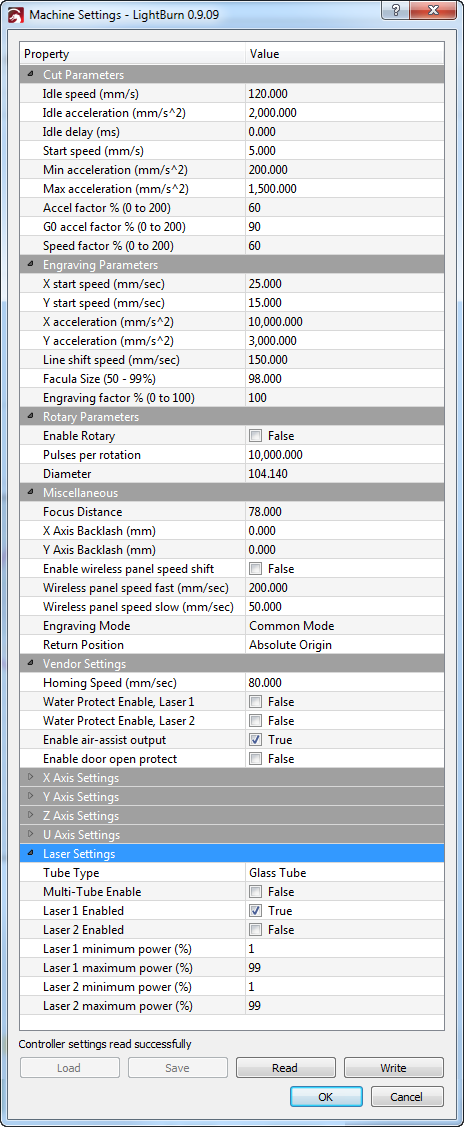
Is it paused at the beginning of the cut? What are you acceleration settings (machine settings) for Cut Parameters? If the acceleration is really low I could see this happening, because your power-on threshold is pretty high.
If you can go lower on Min Power, you should, as that might help, but you have a 150W glass tube - it’s intended for heavy duty cutting, not fine surface work.
You might be able to improve things by using Perforation Mode and setting small Cut and Skip values - like 0.2mm each. That will produce less overall output power, because it’ll be flickering the laser off & on, almost like dithering on a line.
You should also double check that you’re actually getting the power values you think you are. In Edit > Machine Settings, down at the bottom, there are min and max laser values. The manufacturer may have set your minimum higher than 10%, and those act as a hard cap - it won’t output lower than that minimum, or higher than that maximum, so check those. 10% seems low for a 150w tube.
Absolutely, it paused at the beginning of the cut. Paused and fired just like cut through mode.
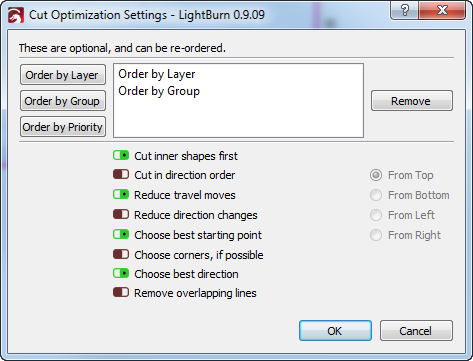
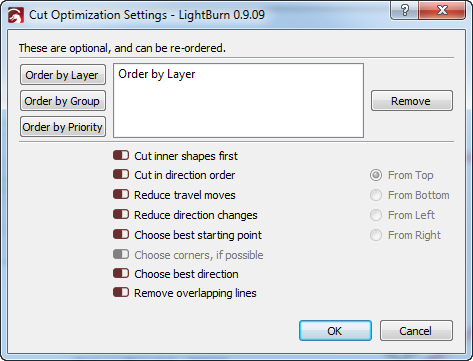
I found the problem to be a potential bug when Optimize Cut Path Selections are used. I disabled Optimize Cut Path and it stopped. This was consistent as an issue on 6 plaques I made. Then I turned off optimize cut path and it stopped.
All that does is change the order - I have a hard time believing that optimizing the cut path did that. Can you send a screen shot of your optimization settings, and the file you were cutting? I should be able to figure out why that happened.
Sure. No Problem. After trying everything else to fix it, I promise you turning off Optimize Cut Path was all I did to finally resolve it.
I got the idea after trying individual test objects in the same file and selecting the layers of my plaque individually. When doing that, the problem went away.
Damn. I changed all of the Optimize Cut Path settings and I want to give you a screen shot with how they used to be. I was about to test again with Optimize Cut Path turned back on; all switches off, and only Order By Layer. I can not tell you how they were exactly and I know that could be very important for something like this.
Yes. Selecting specific items and using cut selected graphics. So I turned on Optimize Cut Path, ran the job again, and the problem came right back. I even disabled all of the options only to keep Order By Layer.
Sorry. I grabbed my phone as fast as I could to take this video and even though I held it landscape, it recorded in portrait mode.
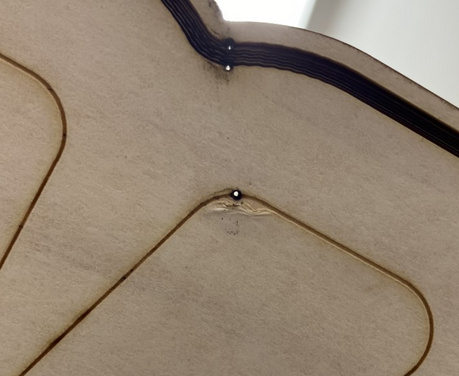
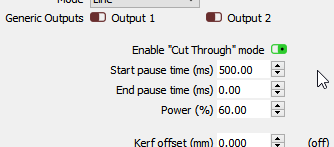
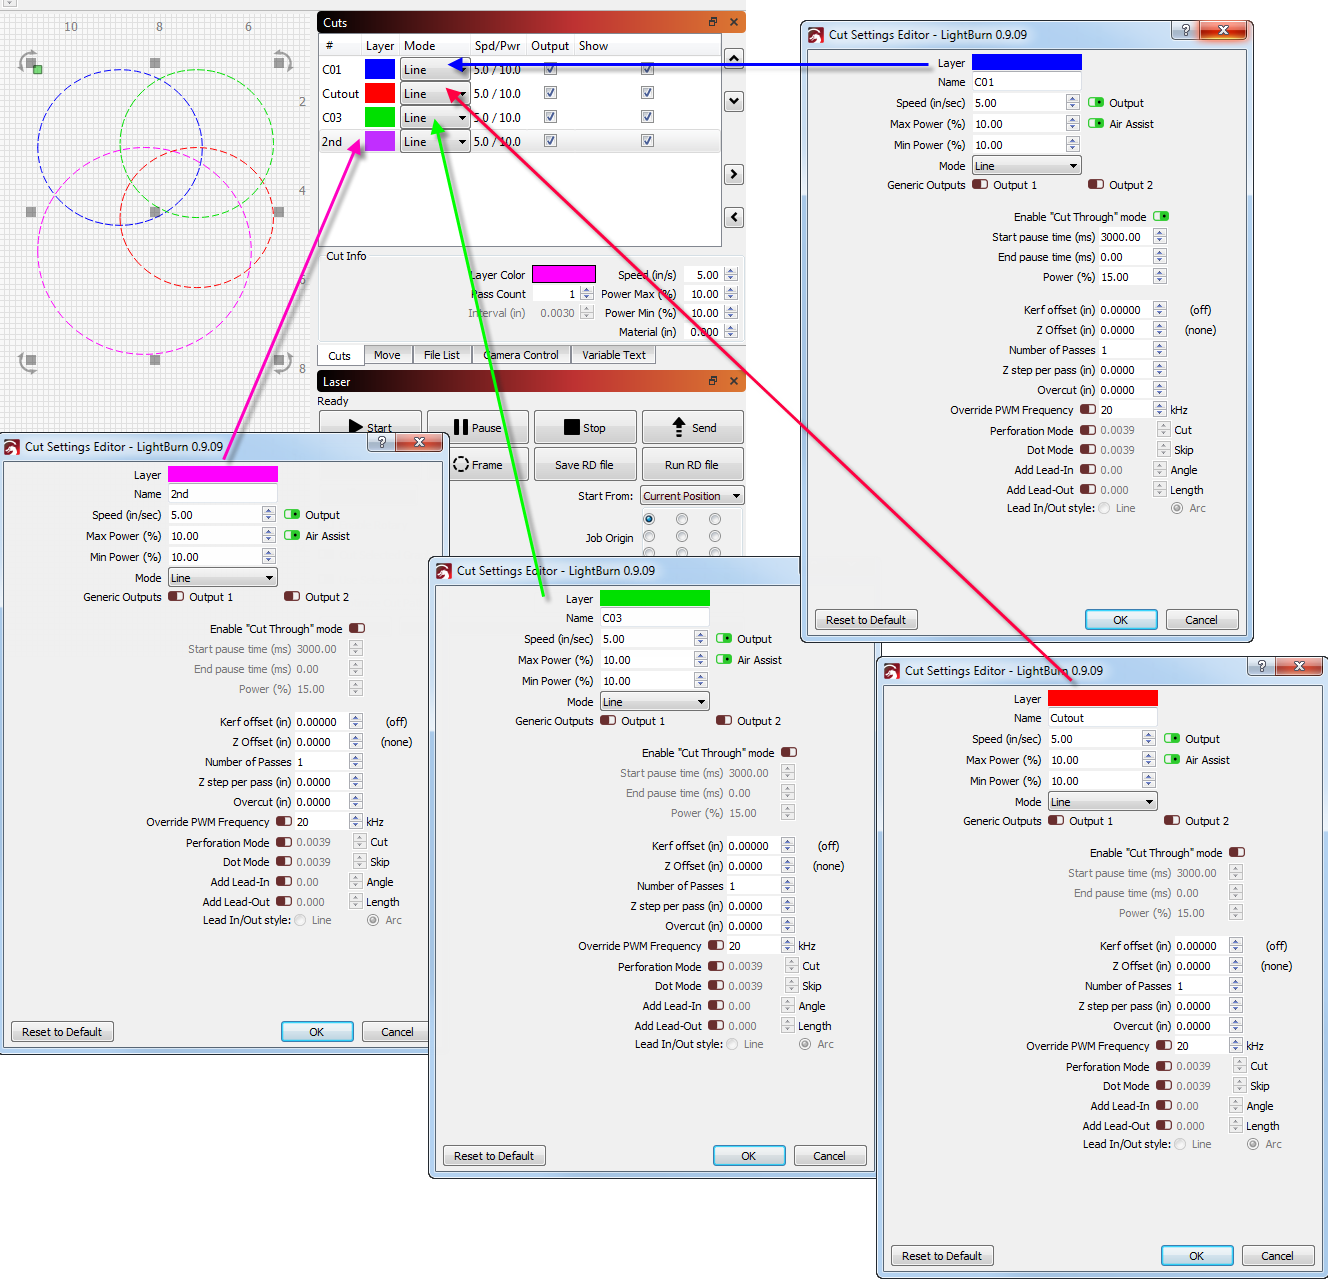
You do have Cut Through mode enabled in one of your layers (Cutout):
If it’s affecting other layers in the file, that’s wrong, and I’ll have a look to see if I can figure out why - it shouldn’t be doing that, but you certainly have it enabled.
Yes, Cut Through mode on the actual cut-out layer is intended. I kept it enabled during the tests when disabling Optimize Cut Path stopped the behavior. I can try it leaving optimize on and disabling cut through on that layer tomorrow to see if that helps.
I have narrowed the problem down to the following:
Any Line layer not having Cut Mode enabled subsequent to a Line layer that has Cut Through Mode enabled will also have cut through mode enabled exactly like the preceding line layer.
When I created this test, all layers copied layer 1 and paused 3 seconds while firing the laser:
In a second test scenario:
layer 1: Cut through off
layer 2: 3 second cut through mode
layer 3: Cut through off
layer 4: Cut through off Result was L1 no pause (Correct); L2 3 sec (correct), L3 3 second (incorrect), L4 3 second (incorrect)
Third test scenario:
layer 1: Cut through off
layer 2: 5 second cut through mode
layer 3: 1 second cut through mode
layer 4: Cut through off Result was L1 no pause (Correct); L2 5 sec (correct), L3 1 second (correct), L4 1 second (incorrect)
Hope this all helps. And thanks for the interaction and support on this. Your commitment to this application is wonderful.
I suspected that was what was happening - this should be easy enough to fix, and thank you for chasing it and testing the different scenarios - that makes it dramatically easier for me to find and fix. It’s appreciated.
I suspect it is less common to Vector Engrave after Vector Cutting, so the issue hasn’t been brought up before. This may be one of the first times I have needed to do this myself.
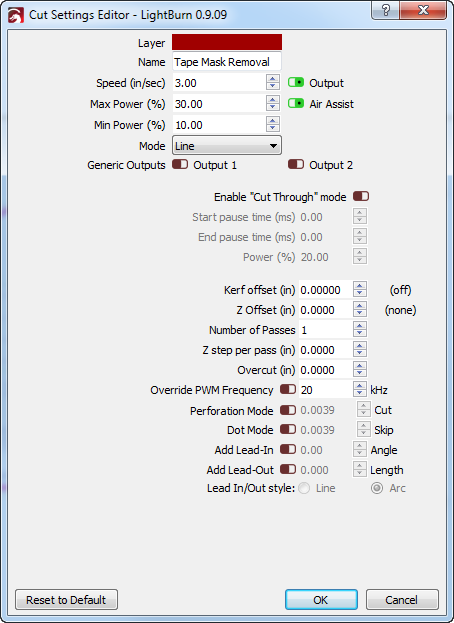
The short of it is this:
It would have taken exceptionally long to “Fill Mode” the border of the plaque. So instead, I created a series of concentric vectors 1/32" or so apart. However, I found that the result of this border was much better if I removed the masking first.
I originally created a second set of layers to run to allow for me to remove the thin strip of masking first. This is why the boarder has a different layer for the outer most and inner most vectors (they’re part of the first set of layers that run). Once “stage 1” was done, I opened the lid to unmask that small strip, then I would select the next set of layers to run “stage 2”.
But… Because the “tape mask removal” layer was after the cut-out it fell victim to the bug.
I have found a workaround - Set “Cut Through” mode on, but set the delay to 0. I’m going to bake this logic into LightBurn itself, so it outputs the right commands regardless, but that should get you going and still be able to use optimizations.
Yes sir. That was exactly what I thought of as well. I just hadn’t been home to test it. After my troubleshooting indicated I could change subsequent times, I had that same idea that you’ve confirmed works. Thanks!