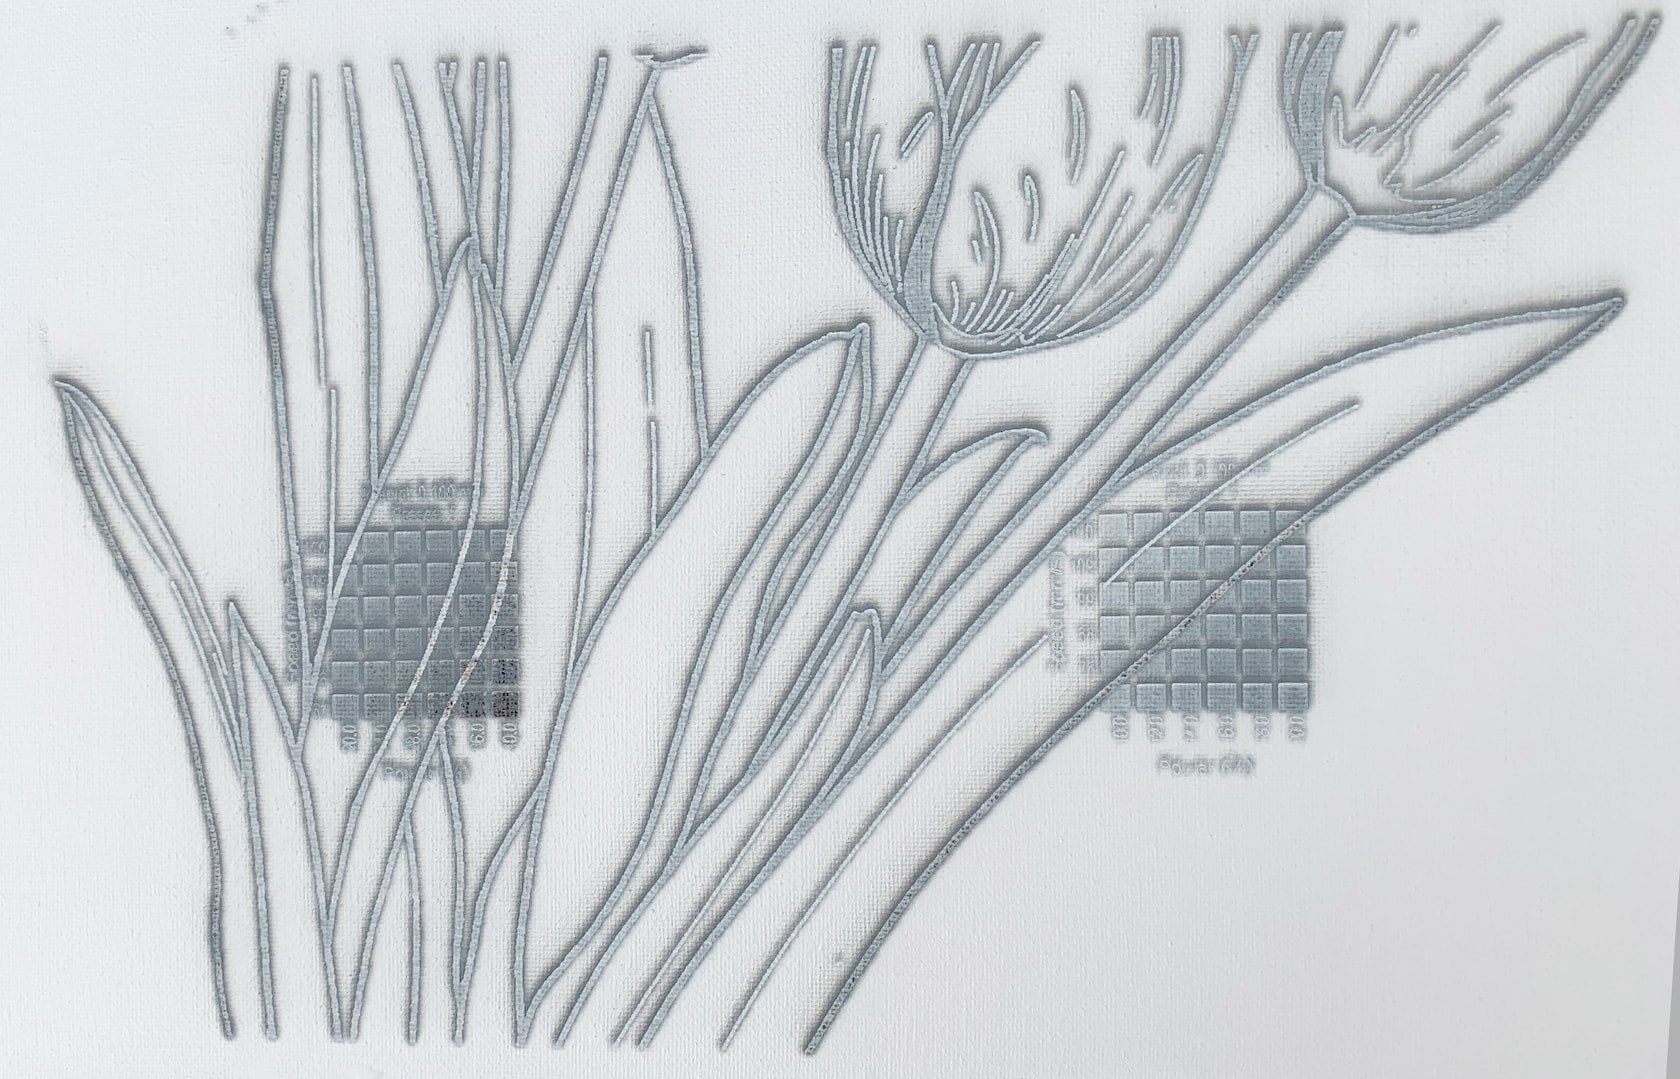
I’ve been trying to engrave a high-res line drawing on a canvas that I primed with acrylic and I can’t seem to get a clean drawing. Equipment is a Xtool D1 frame with a 20W upgrade and a Devil1 GRBL controller from Geeks at Large. This is a test I ran after running a couple of materials tests to get my settings. I also checked the focus and it is set correctly
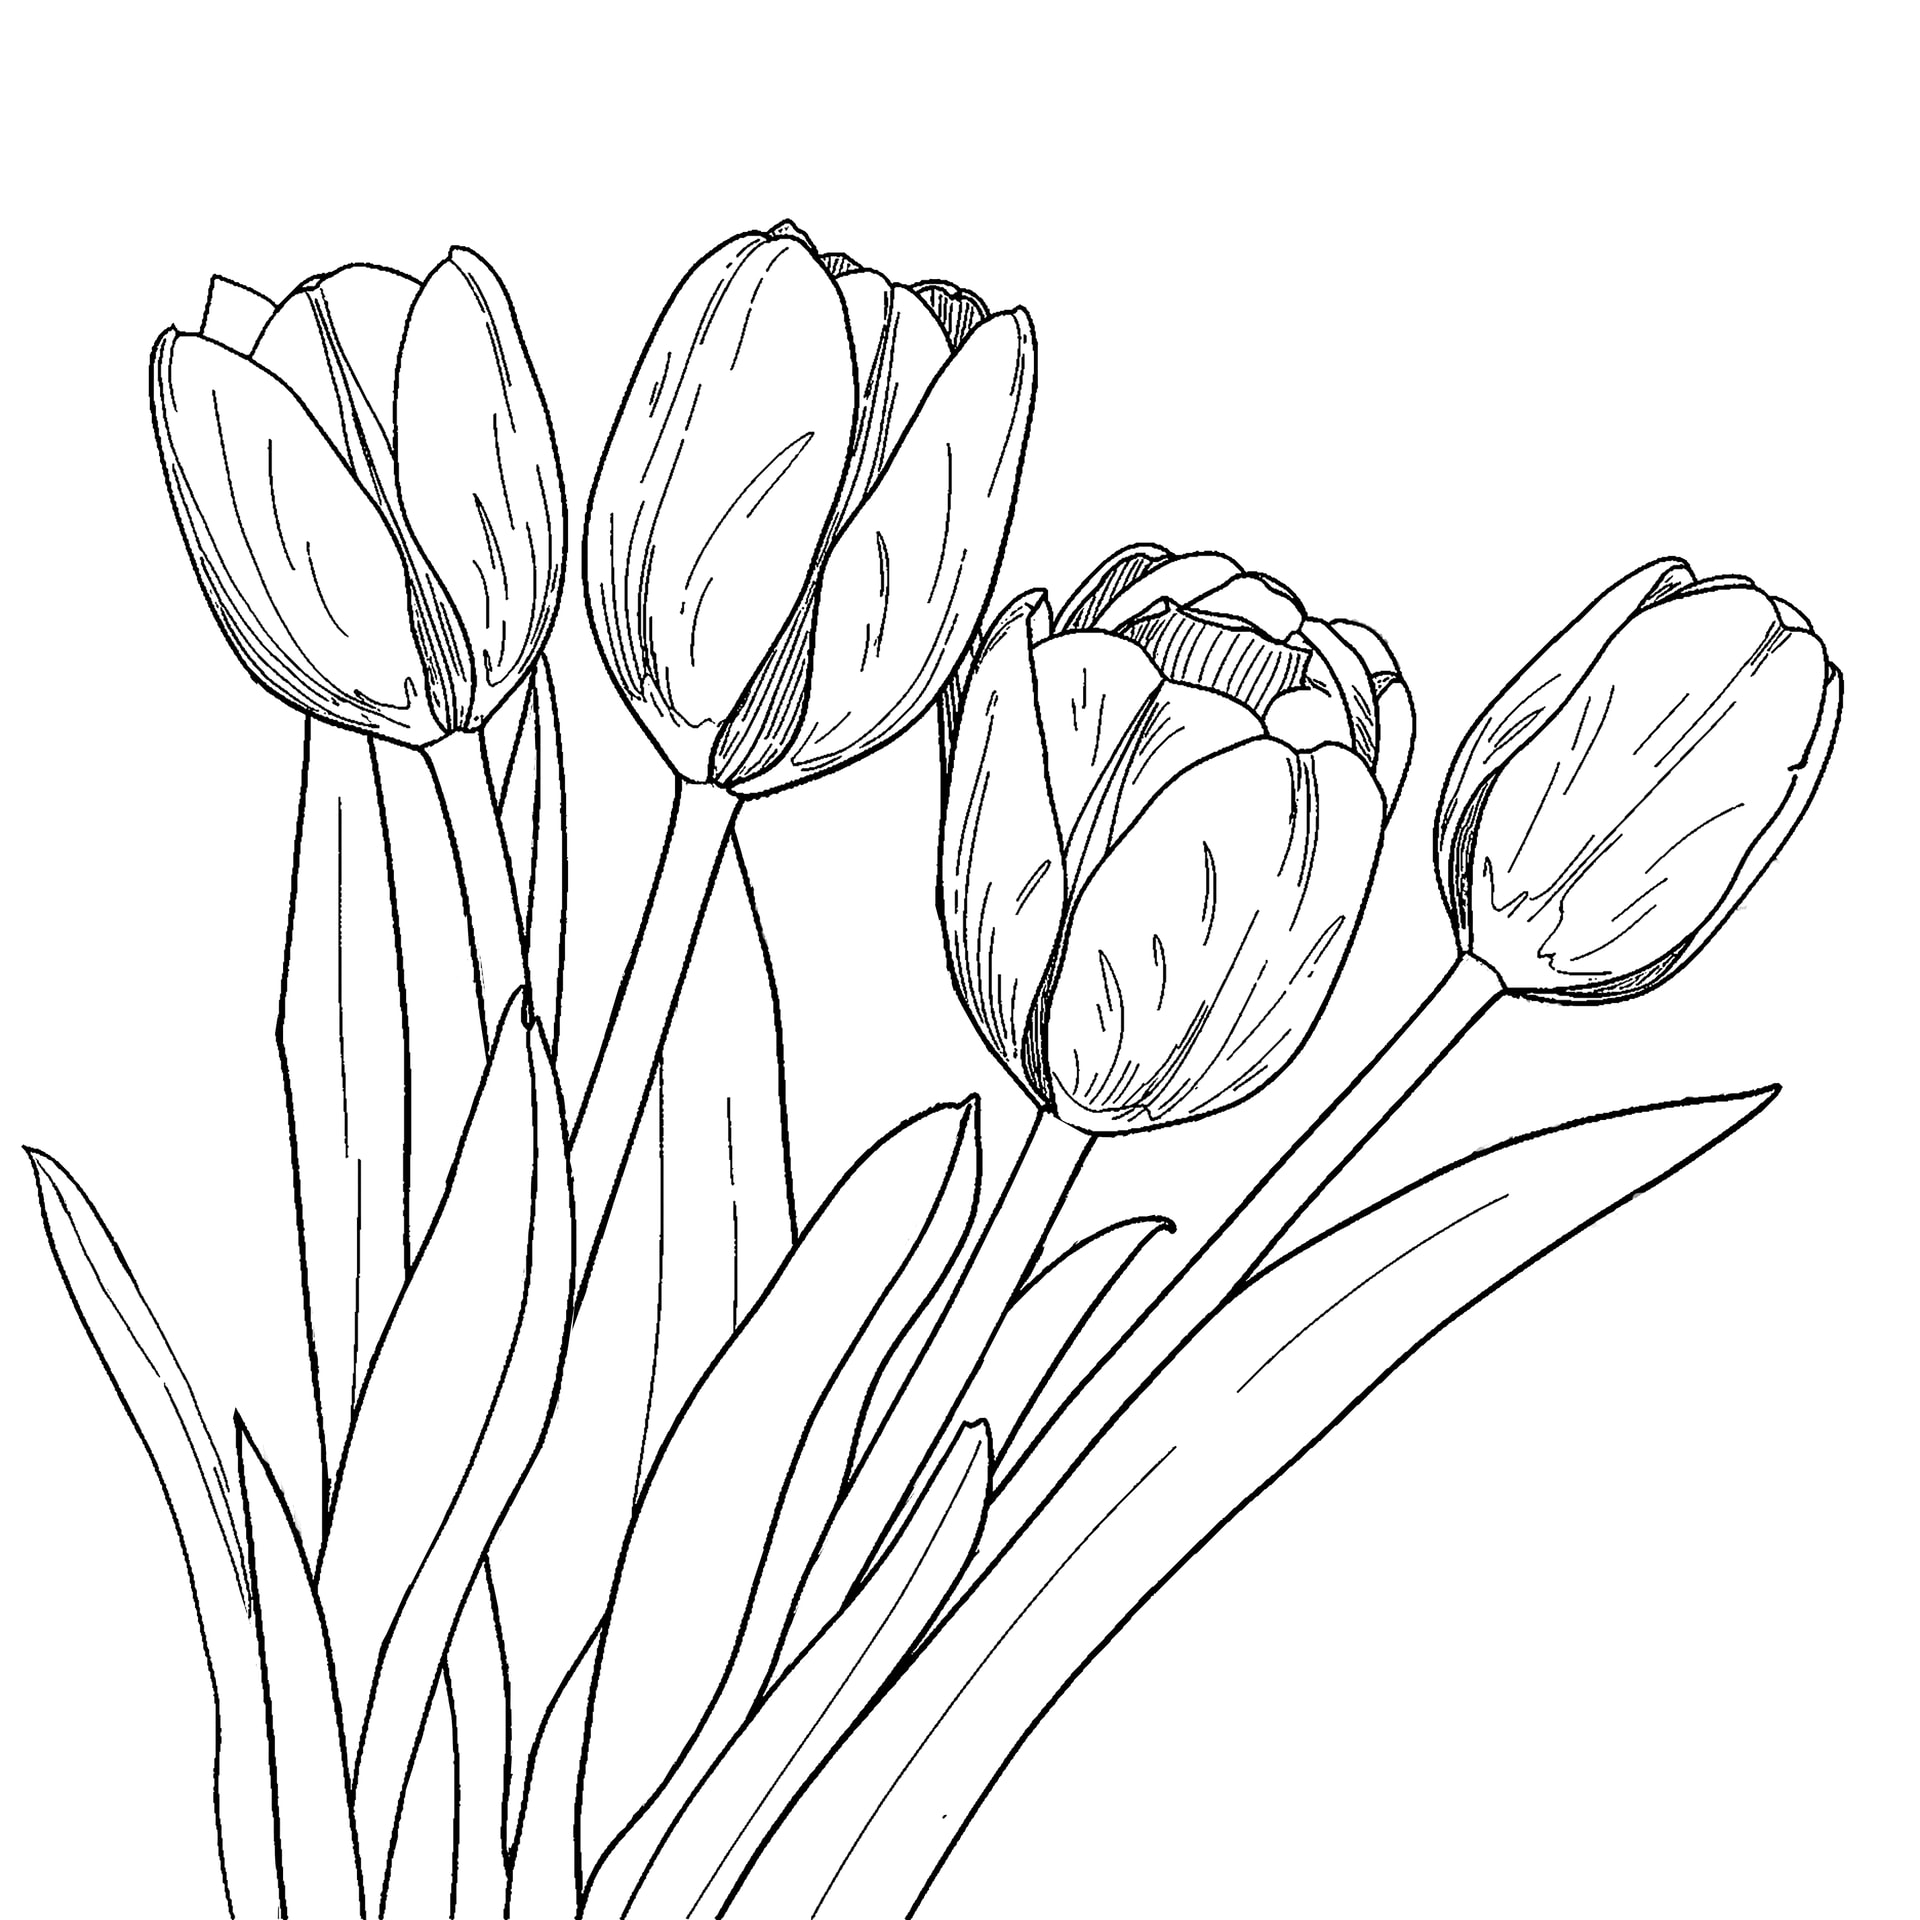
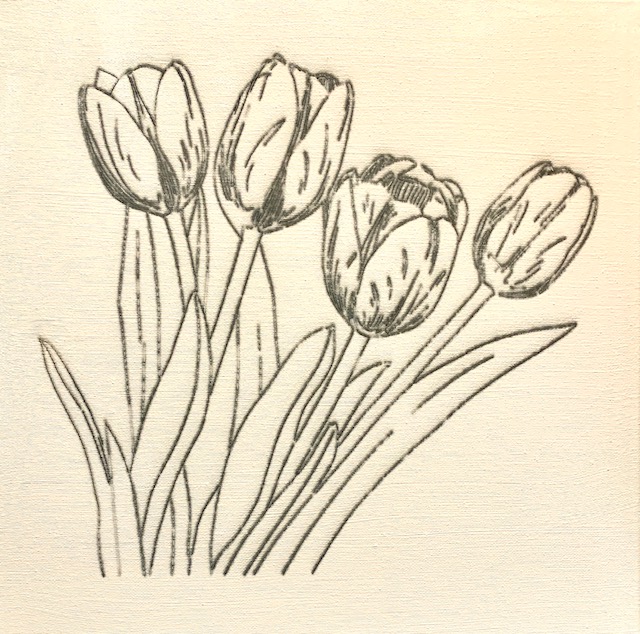
This is the 300 dpi artwork I created using Adobe Firefly Gemini and Photoshop to simplify the drawing and to make sure the lines were pure black and the background was pure white.
What do I need to do to get a burned image with a single black line as in the original artwork instead of the two lines on either side of a space where the engraved line should be as seen in the first attachment?
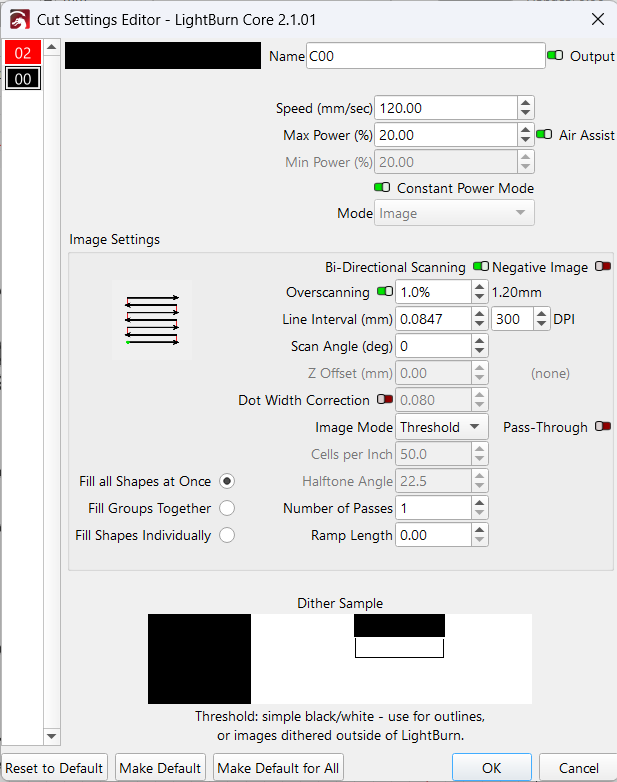
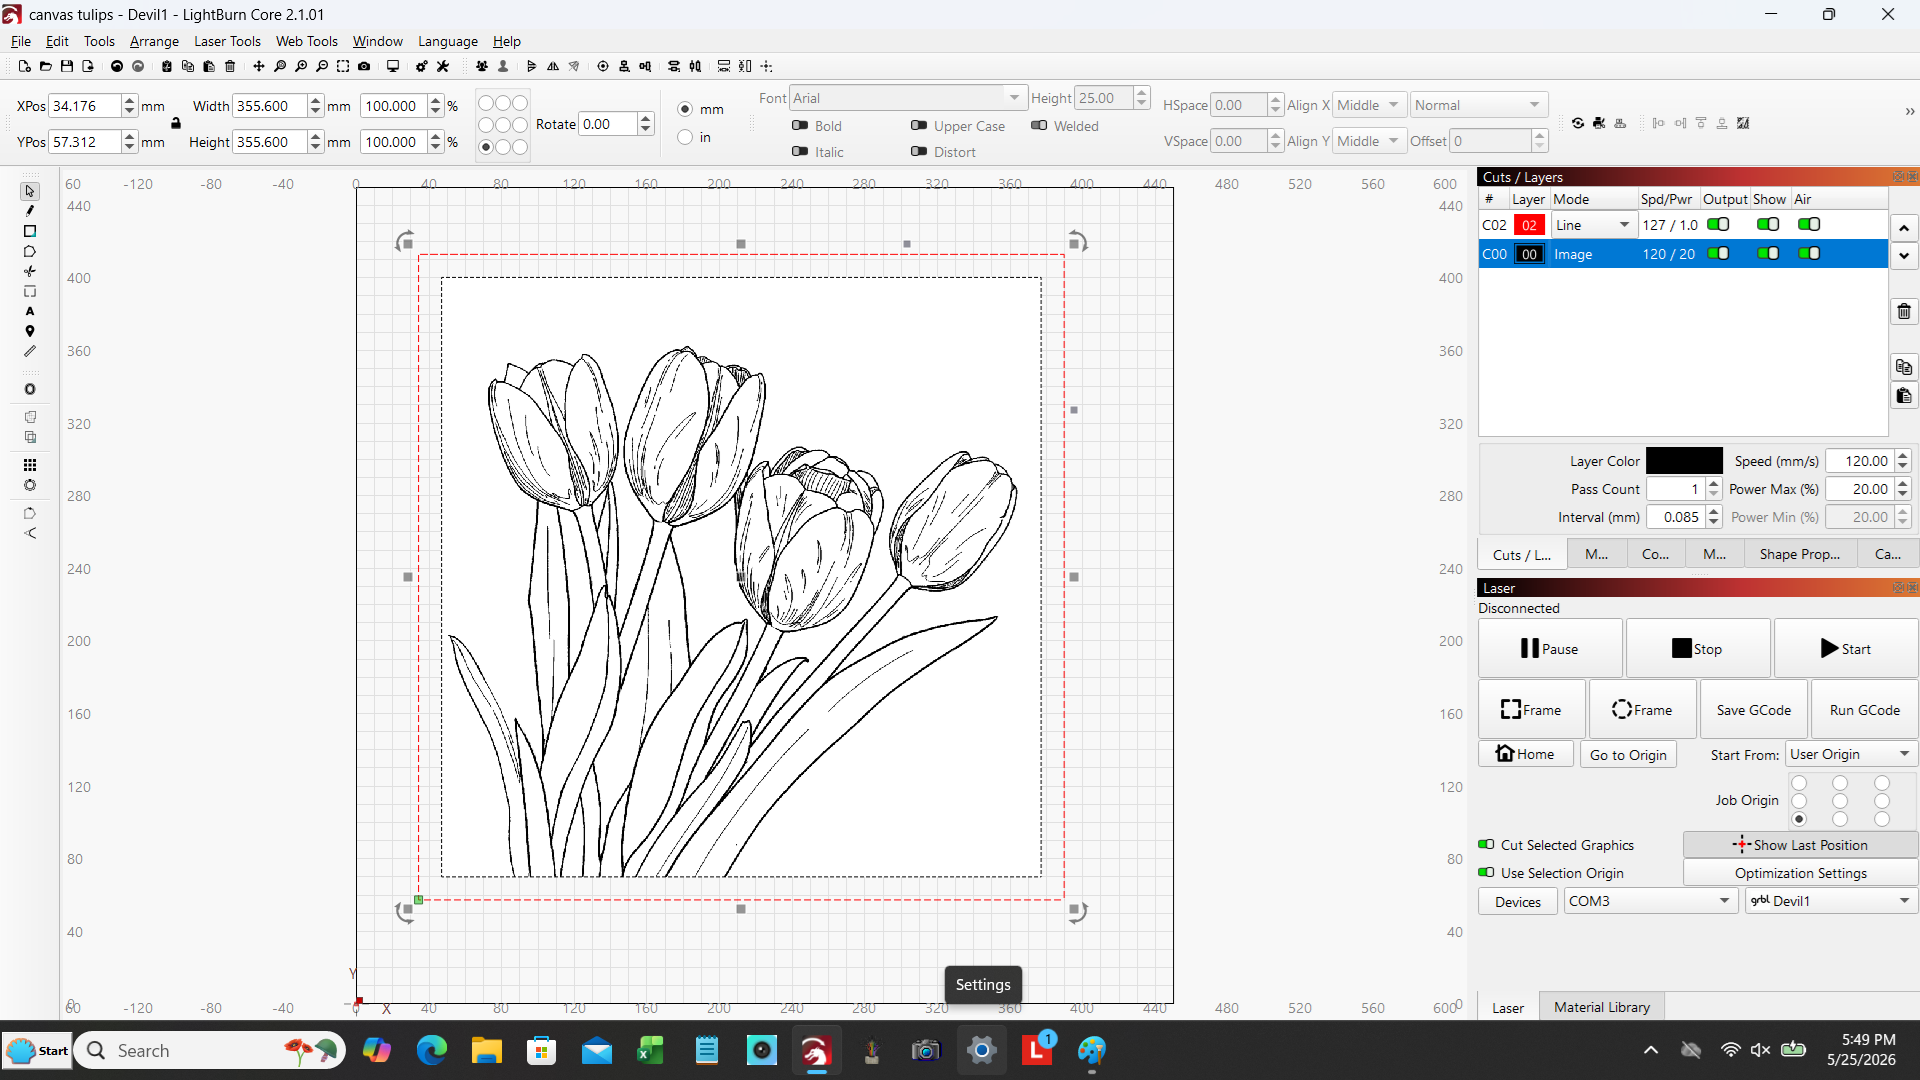
Many thanks. This got me to about 95%. This was cut at 100mm/s at 20%.This drawing was done on a 14 in x 14 in (356mm x 356mm) canvas that was primed with a thin coat of acrylic paint.
I’m preparing some more canvases so I can do a proper materials test. The first try worked but the lines are way too thick for my purposes. These lines are about 2mm wide. I’m hoping with increased speed and/or lower power that I can get finer lines more like a pen and ink drawing than was done with a regular sharpie.
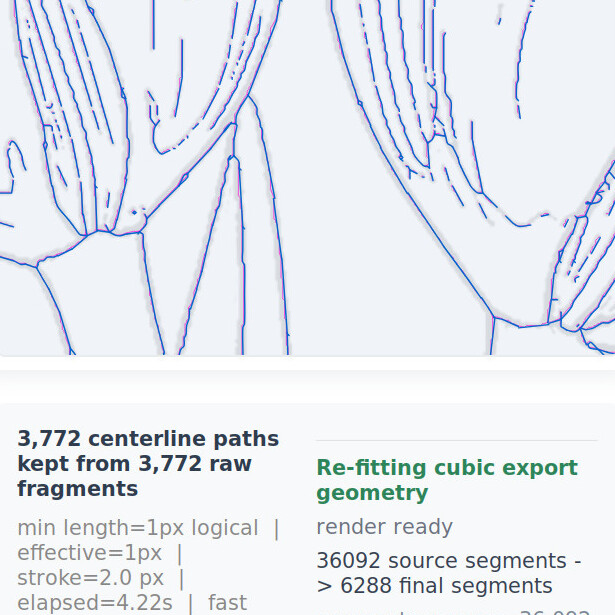
I ran the Tulips image through our new Centerline Trace tool (not yet publicly available) - here you go, hope this helps! Tulips Centerline Traced.lbrn2 (2.9 MB)
You’ll likely need to do some adjustments to the image grouping/node editing.
This video is super helpful to learn how to node edit well.
thank you. I’ll try it tomorrow after the paint dries on my test canvas, The test that I ran today using the online centerline converter worked but the lines came out 2mm wide with the drawing scaled to about 13 in x 13 in. I’m hoping that increasing the speed or decreasing the power will cause it to burn finer lines.
You can get somewhat smoother results by fiddling with LightBurn’s Optimize Selected Shapes tool, but that’s in the nature of fine tuning.
If you want to make those vectors wider, you can slightly defocus the laser to make a bigger spot.
It’s also possible to apply a small Offset to both sides of the vectors, put the result on a Fill layer, then engrave between the lines, which may do approximately what you want.
I ran several tests and I’ve decided that the problem is trying to score canvas stretched on a frame. The same tulip svg file worked fine when scoring a piece of birch plywood. I tried two different paints to coat the canvas and both scored 1.5-2mm lines. I tried each of the two svg files uploaded one at 15% and the other at 10%, The lower power at the same speed came out darker and slightly narrower that the higher power.
I did some searches and there was a suggestion that the laser vaporized the paint rather than burning it. I’m going to try again tomorrow but with a piece of plywood flush against the back of the canvas fabric. Maybe it will help trap some of the heat from the laser and burn rather than melt of vaporize the surface.
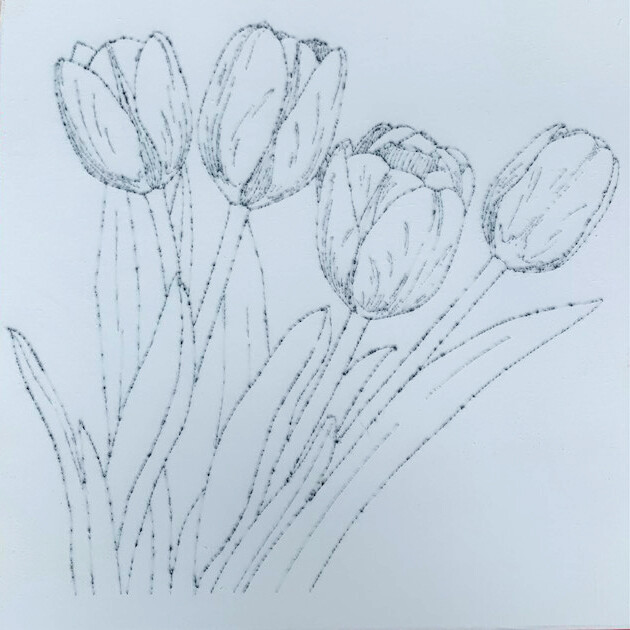
Here is the result of placing a piece of plywood under the stretched canvas fabric on the frame. To ensure good contact the plywood was taller than the internal recess of the frame. That ensured that the top of the fabric was level and slightly stretched. The darker spots occur where the ends of two lines come close but aren’t connected so that area was burned twice. It actually looks a lot better in person. Thanks for the help. The centerline trace was the key to getting this to work.