I need assistance in converting an Image so it will Burn Properly. The trace feature does a majority of it, however it still leaves a portion that needs to be done. Yes itis a Color image…..see attached.

This video will probably be helpful

Like I stated, the IMAGE Trace option does not get all the details. It cuts out the Light lines in the head, these are important for the design to be complete. It is a Military thing.
I’d first convert it to black and white in a graphics program and crank the contrast up before importing to LB. Maybe double the size beforehand too. Whilst this can be achieved inside LB, you can have finer control over conversion to get the fine details.
You might need to run the trace tool a few times with different parameters and join all results later on.
Yep - that’s what’s explained in the video above.
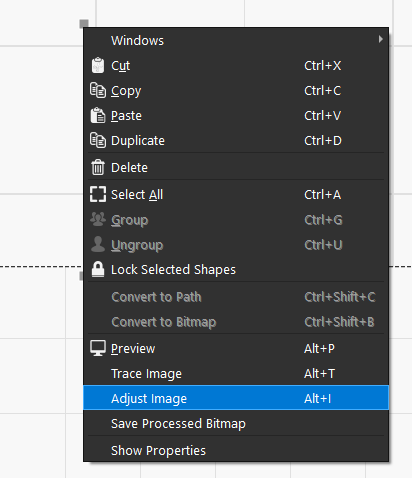
You can also do the image editing right in LightBurn - Right click the image and select ‘Adjust Image’
Indeed; but curves adjustment pre desaturation can help with challenging images, or stacking multiple desaturated channels isn’t possible with the adjust image tool
Fair enough! We aim to get most use cases satisfied with that tool - it isn’t going to compete with high end image adjustment software.
1 Like
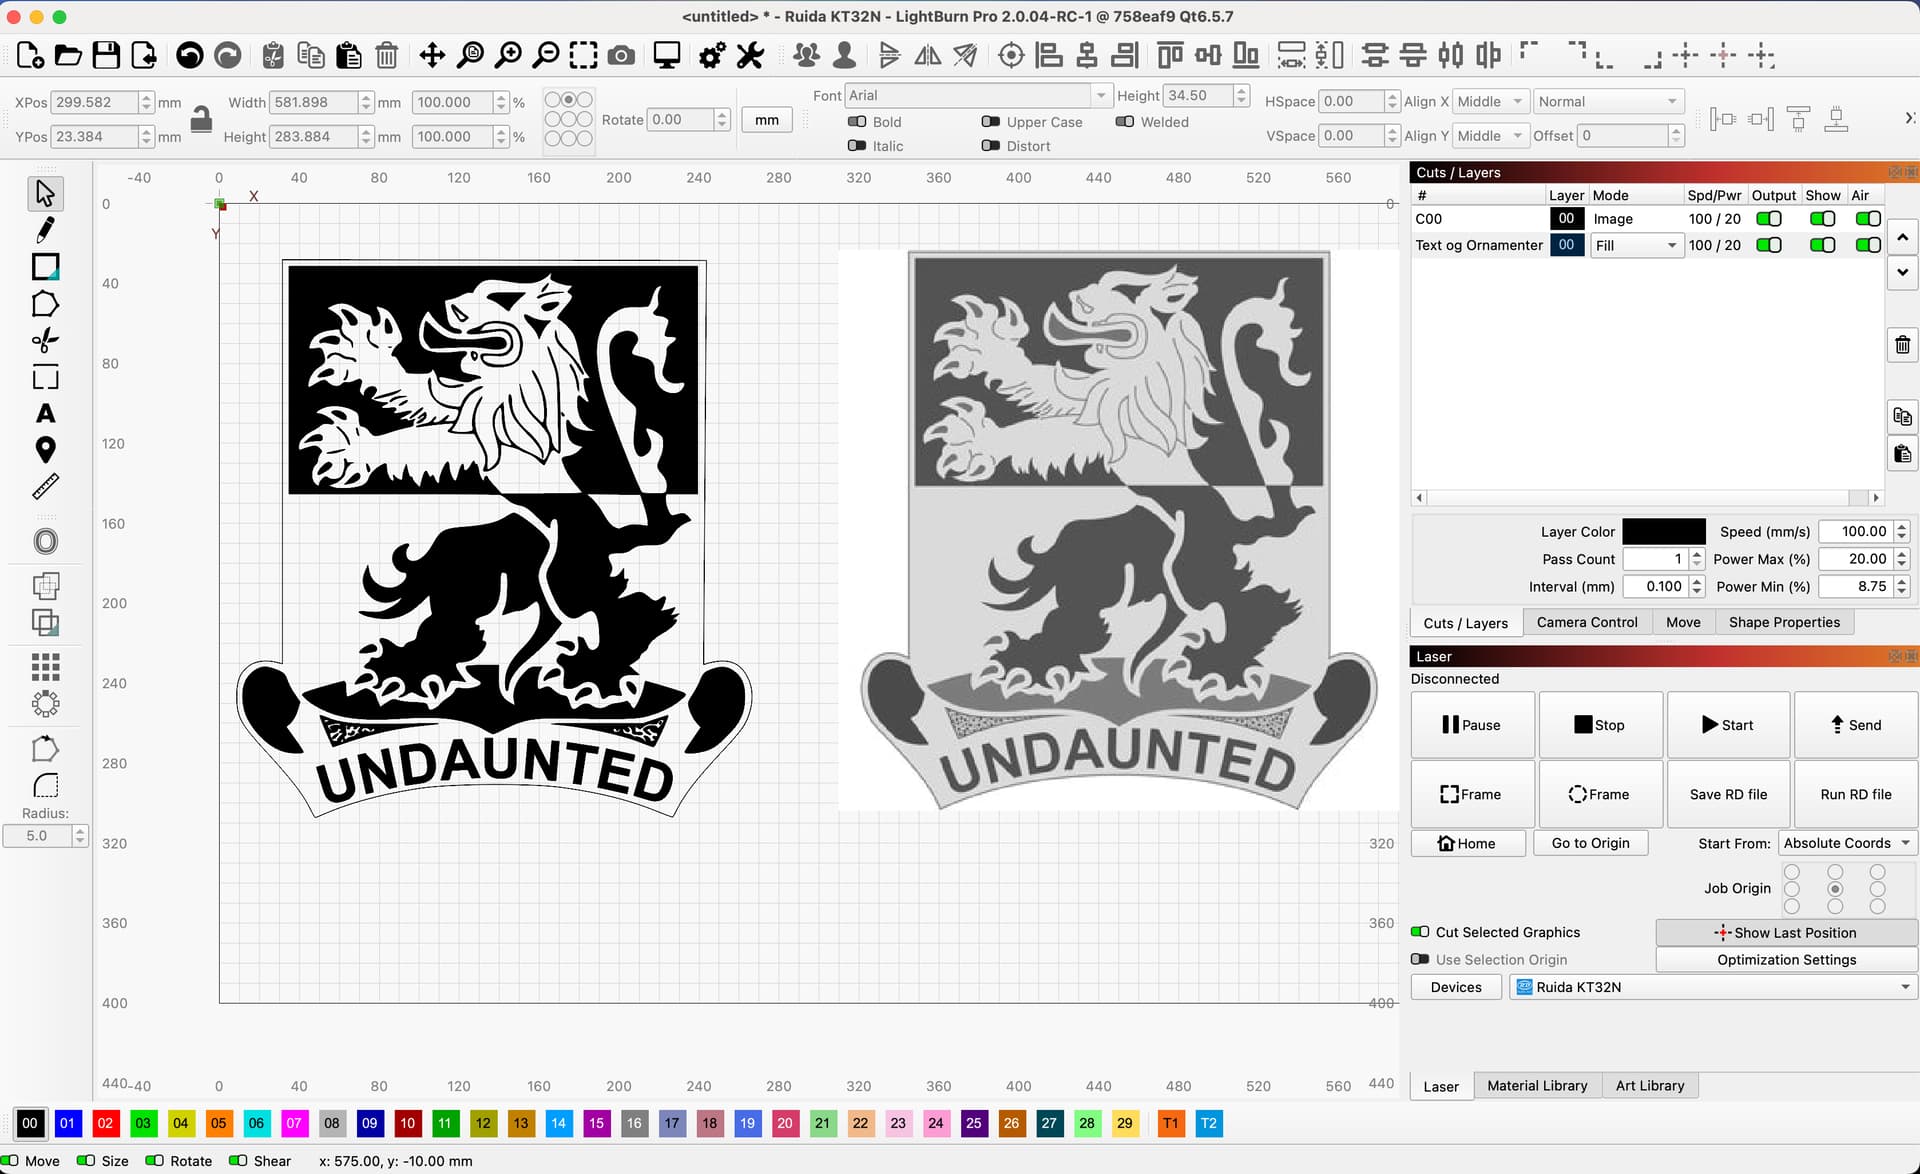
I’m not sure how fine (precisely) you expect or need this file conversion as you describe it in your first post. But as Colin says, the tracing function in LB is not comparable to those of some of the major graphics programs, but… I use LightBurn for pretty much everything because I feel best with this workflow. That’s why I gave your image a try. If black and white is not good enough, I will simply engrave it as a graphic, then you will get the most “original” image reproduced.
On the other hand, I think that my tracing is fine enough for most…
1 Like

Bernd,
I think you image is by far the most detailed i have seen. Can you send it to me…keith1018@live.com.
Våbenskjold-retur.lbrn2 (200.4 KB)
…you can easily refine it a little more.
To all that posted, THANKS, the LightBurn forum is the most interactive I have ever seen. we have a true group of professionals, that are willing to help, and not just make suggestions.
I did find a feature in LightBurn that somewhat worked…open the Cut Settings Editor, and on Image Mode, Enable PASS-Through. Apparently that enables LB to allow the image to work as an image and seems to work pretty good.
New issue…I had to do some adjustments, and monthly maintenance ont the Laser…now I am getting a new issue. I think it is a Focus issue, but I want to verify with the community before I work that troublesome issue. Enclosed is a snapshot of the issue…as you may be able to see it looks like double letters, and it should only be 1, easy look at the QUOTES and COMMAS, it is definitely visible
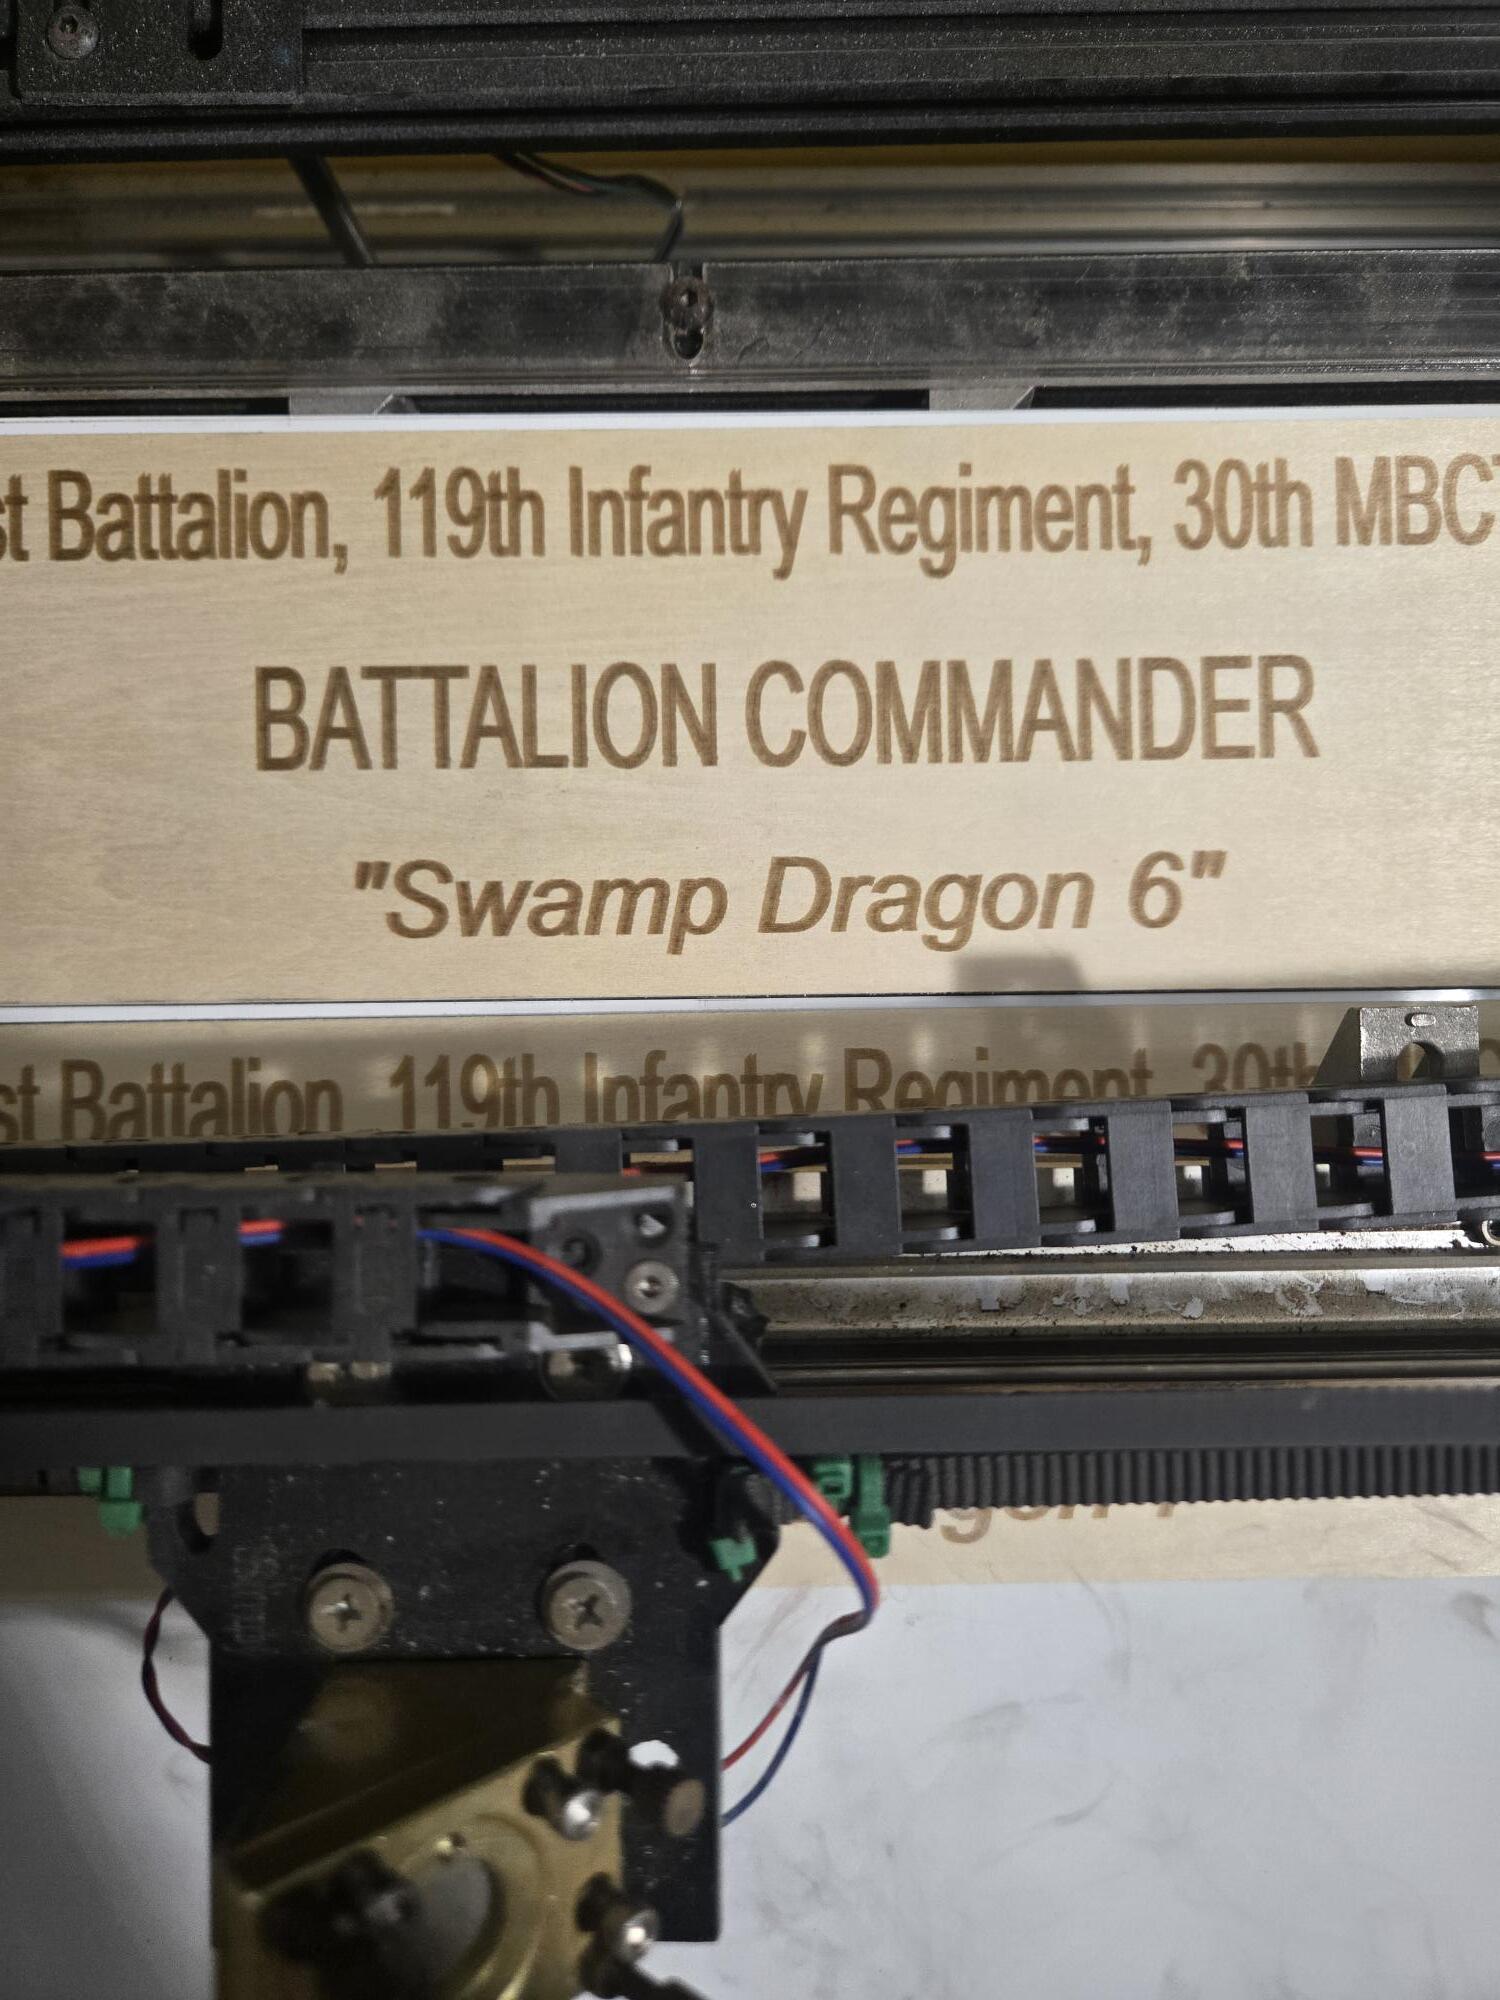
there.
What are your parameters for this engraving?
If the machine behaves differently than before the maintenance, go back and find the change you made.
Do you have scanning offset enabled?, too high speed…?
After you follow @bernd.dk’s suggestion to figure out what just changed, because it may be something slightly loose in the laser head, consider re-measuring the Scanning Offset Adjustment.
A while ago I ran some tests to show the effect of the Scanning Offset Adjustment values. Without the adjustment, 1 mm blocks have increasingly ragged edges at higher speeds:

With the adjustment, they became reasonably square:

I did some subsequent adjustments, but you get the idea.
1 Like