I’m new to this so apologize if this has been asked before, but I have looked and can’t find anything similar.
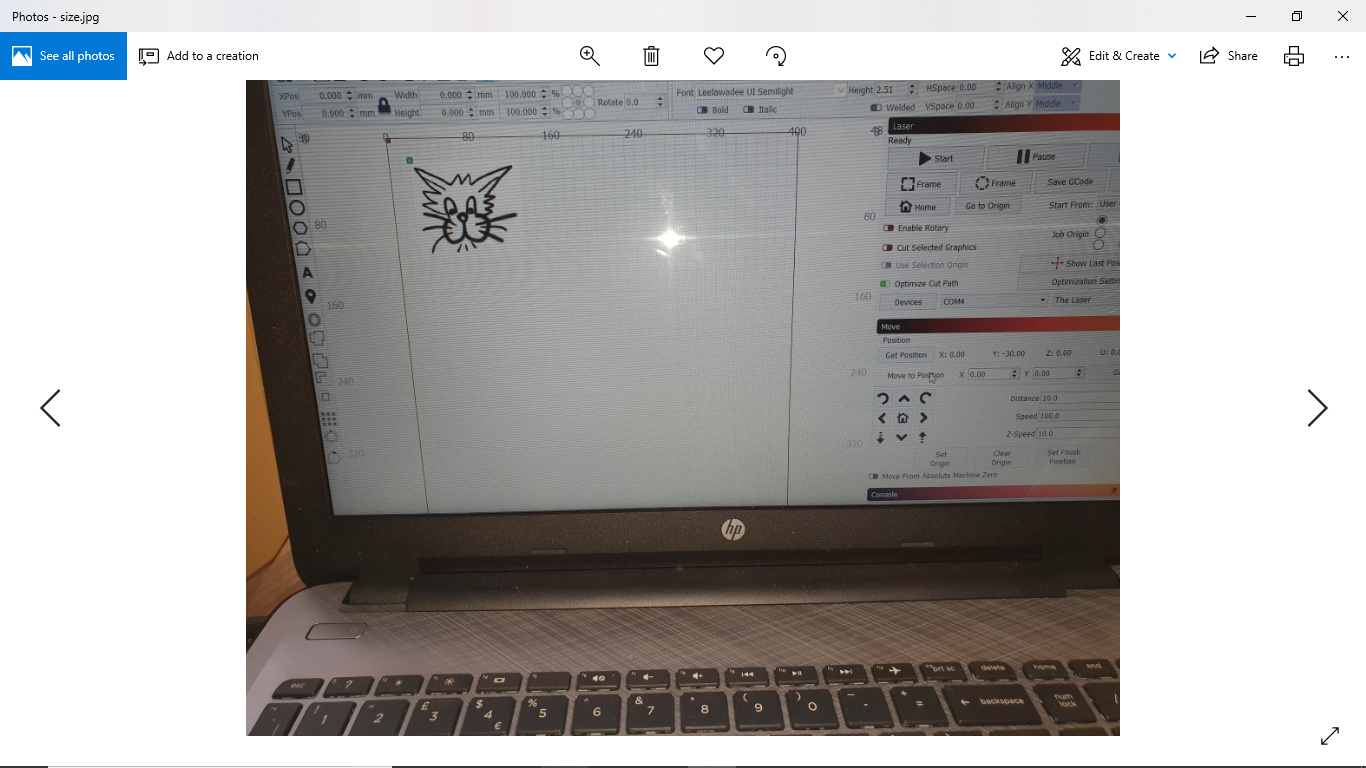
I have created a quick silly drawing, to see where 0, 0 is and how it works etc. (I tried plain text which went through the motions but no laser on,) but assuming this is me not setting something, Then I tried this quick sketch.
My problem is sizing.
The engraving area is 400 by 500, as you can see from the attached image, the image only takes up about 100 x 100 but when I print, it prints to the full size of the engraving area,
Is there a setting I am missing please?
These settings would normally be in your controller. You would need to tell us what that is. 
ah thank you, its a cheap Chinese unbranded laser,
arduino board, seems to be the nano,
firmware just updated to GRBL 1.1f,
grbl selected on device
does that help?
You’ll need to configure the steps/mm in the controller. The GRBL docs are here: https://github.com/gnea/grbl/wiki/Grbl-v1.1-Configuration#100-101-and-102--xyz-stepsmm
1 Like
This is great, thanks, I have managed to reset the size, but this is very much trial and error as even the guide says ‘it is likely to be 200’ or it could be 1, 2, 4. 8 or 16 to calculate the distance. (so best guess work between 20 and 400 and just kept readjusting) In the grbl console I set $100 and $101 to 50 in the end, which seemed to size roughly.
It wont turn laser on for a shape yet, so cant measure exactly, and it wants 7 hours to do the quick cat sketch 
X axis though seems to be inverted and now everything is incredibly slow, .
The view still looks the same, and if looking at the laser from above (control at bottom) it states that 0,0 is in the right hand corner, and it draws it from this side inwards.
If I make the image rectangular, it has x and y correctly (drew frame just to see which axis was longest)
Does anyone have an idea of the grbl settings for a cheap X400 by Y500 laser engraver?
Just losing will now as its been 2 weeks and still unable to use the thing at all.
(I tried doing $2 to 1 to invert x it did nothing  and now the move window will not move the laser more than one step, then nothing)


You should probably read this as a starting point: https://github.com/LightBurnSoftware/Documentation/blob/master/CommonGrblSetups.md
Most likely your origin is in the wrong place, and you likely need to enable Laser Mode or change your Spindle Max setting.
I have already read this, sadly did not fix the problem.
I’m sure its a little setting somewhere I am just not seeing…
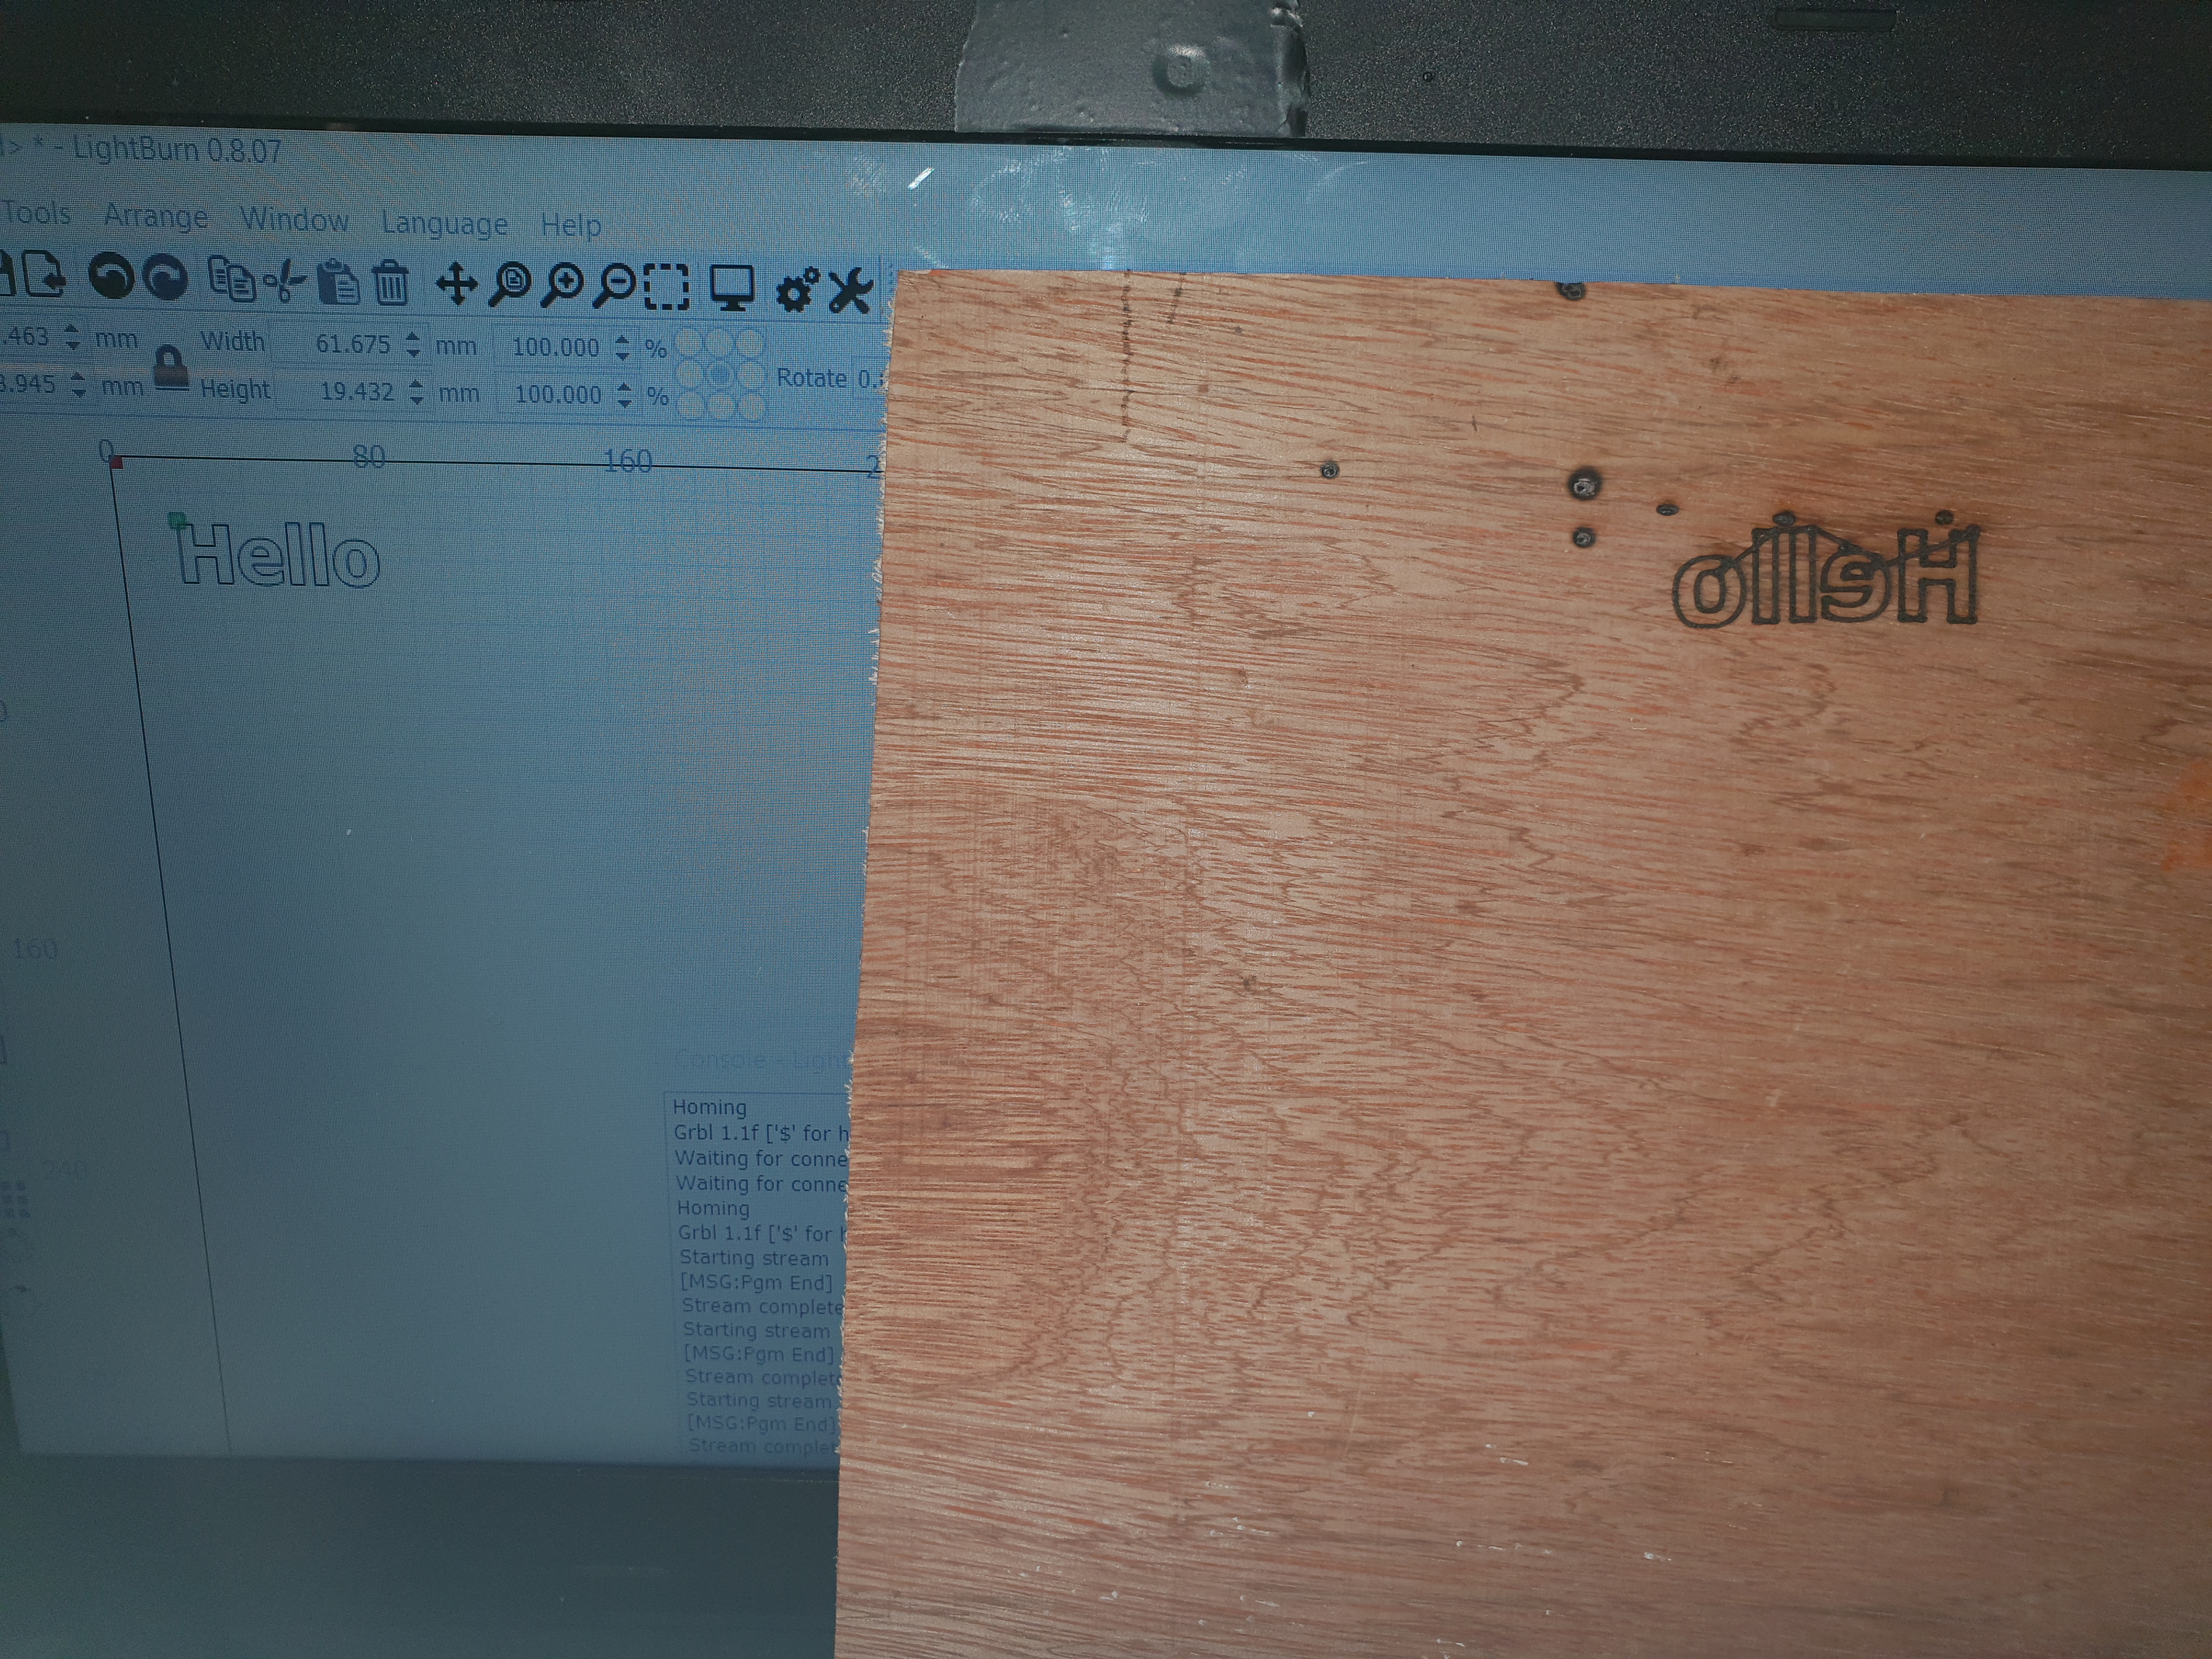
I have it burning now so have adjusted the sizes correctly, ($100 and $101 needed to be at 80 to set the mm correctly)
According to this write up, I am working in negative space, so I coded the origin using
G10 L2 P1 X-400 Y-500
This brought the head back down to bottom left,
I did the $10 =0 to reset and also reset origin,
It now tries to print off screen and just prints on top of itself
I can now use the move, print, and correct size though so its two steps forward, one back…
“It now tries to print off screen” - What is your “Start From” setting set to? Unless you have limit switches, you’d need to use “Current Position”, or power up the machine with the laser head positioned manually at the origin so your 0,0 value was correct.
Tried several variations of this, managed to get it to think 0, 0 was top left as in the picture, yet when it tries to print, it then tries to go off screen (outside engrave area) to the left?
Then when I check position, because its tried to go off edge, the coordinates do not even make sense
This has to be a logic error that I am not seeing somewhere?
I set it to 0, 0
Its in the top left.
I set print from current position
It still tries to print off screen?
messes with co ordinates,
All I am trying to do is tell it that the top left is the top left and print as I see in the preview
It is still trying to print in reverse outside of the engrave area
If you don’t have limit switches and you don’t zero the machine, try using “Current position” as the “Start from” setting. GRBL controllers are nearly always front-left origin. Try using front-left as the origin, as well as the job origin setting.
Done that and it still tries to go off screen, Squashes the print in one position
Is there not a set direction, as that’s all I want to do
OMG I am an idiot!!
I misread the GRBL document and was trying to change $2 instead of $3.
(I went through all changes line by line and noticed my stupidity!!)
I still have a few tweaks to make,
but it is engraving,
Its the right size
And
It is now the right way!
Thank you everyone for the help as many of the points have been helpful
1 Like