Hi all, new here, been playing with lasers for a while, recently upgraded from a 7w Neje unit to a 50 watt Raycus Fibre laser.
The fibre laser came with the Chuck rotary attachment that I’ve just started looking into using. I’ve followed the instructions on setting it up, I think I did it correctly, but all the images I’ve tested come out highly compressed on the X axis. If I follow the directions from another thread and create a contour mask, it shows up fine in preview contour, but does heavily get squished when actually running.
I’ve confirmed the number of steps to do a full rotation (6400)
To my knowledge the other settings are correct (Diameter and circumfrence) Is there anything I’m missing? It’s late now but I’ll try to upload a few pictures of results tomorrow.
I don’t know much about rotaries on the fiber… I have one, but am going back over some of the setups, including the timing. So I won’t mount the rotary until I get it set up correctly…
Where did you get the steps/rotation value? This is usually attained from inspection of the motor driver for that axes. It may be moot, if you are getting the proper rotation when you click the test button.
Are you applying some kind of correction to it, like cylinder curve correction?
Finally back, haven’t had a chance to touch my laser set up in a few weeks.
I found the number of steps by using a dry erase marker to make a straight line on the chuck and frame, then hitting the test button. It was trial and error with different suggested values until it rotated fulling and lined up.
It’s rotating around the X axis
I’m attaching a couple pictures from an attempt today to test it out.
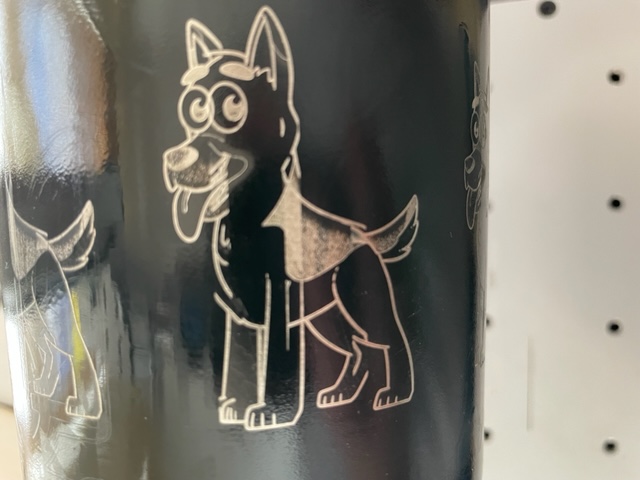
the image I’m using, and the result, you can see it’s compressed in several spots now, the eyes especially.
The motor driver has setting on it that determine how your rotary rotates.
You steps/rotation should be set to that value… On mine, which is a JPT mopa, it’s set to 12,800steps/rotation, twice that of yours…
It doesn’t sound like your setup works considering the output being squished which means the steps/rotation are not correct.
Do you know if the rotary is a direct drive chuck type. The other type will have to have a ratio applied…
I’d think your vendor would have set yours up correctly, but mine didn’t either. You can open the machine and read it off the driver board or query your vendor.
A chuck rotary uses the diameter, are you sure it’s the correct value?
Ended up fixing it, watched a few videos, and it works perfectly now!
The issue ended up being on the split size, when I set it to the same or slightly larger than the line distance it solved the issue