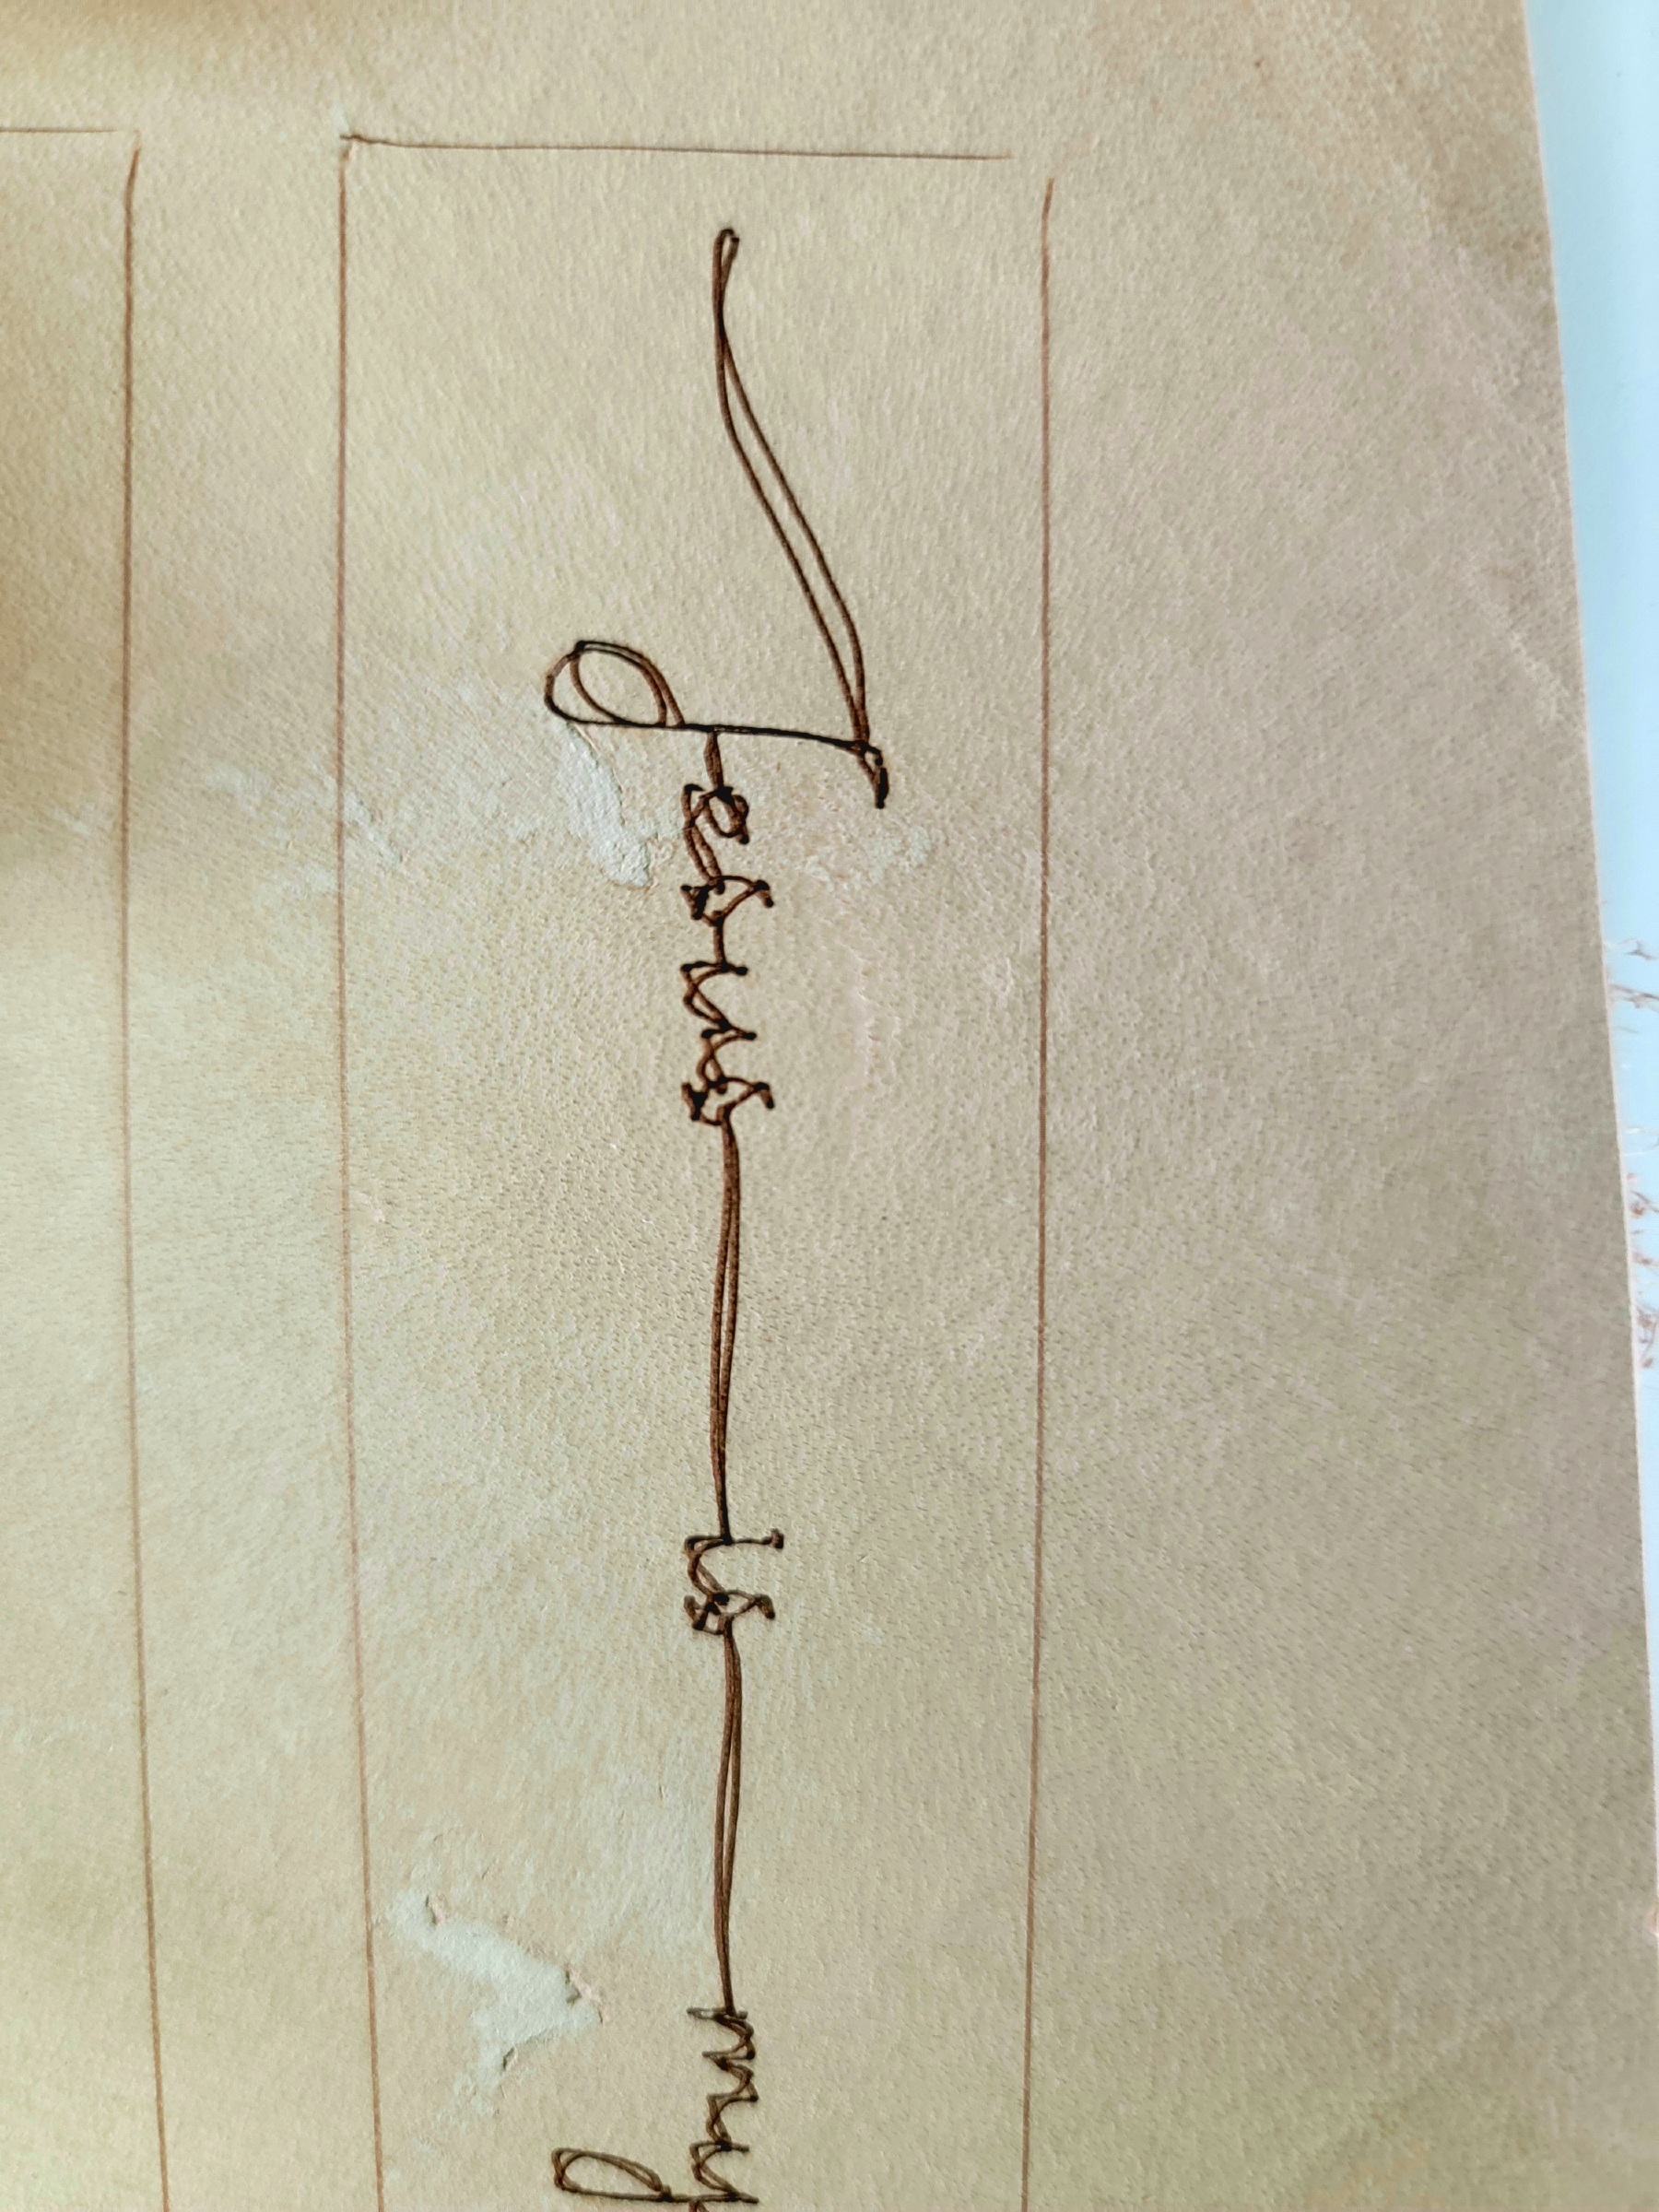
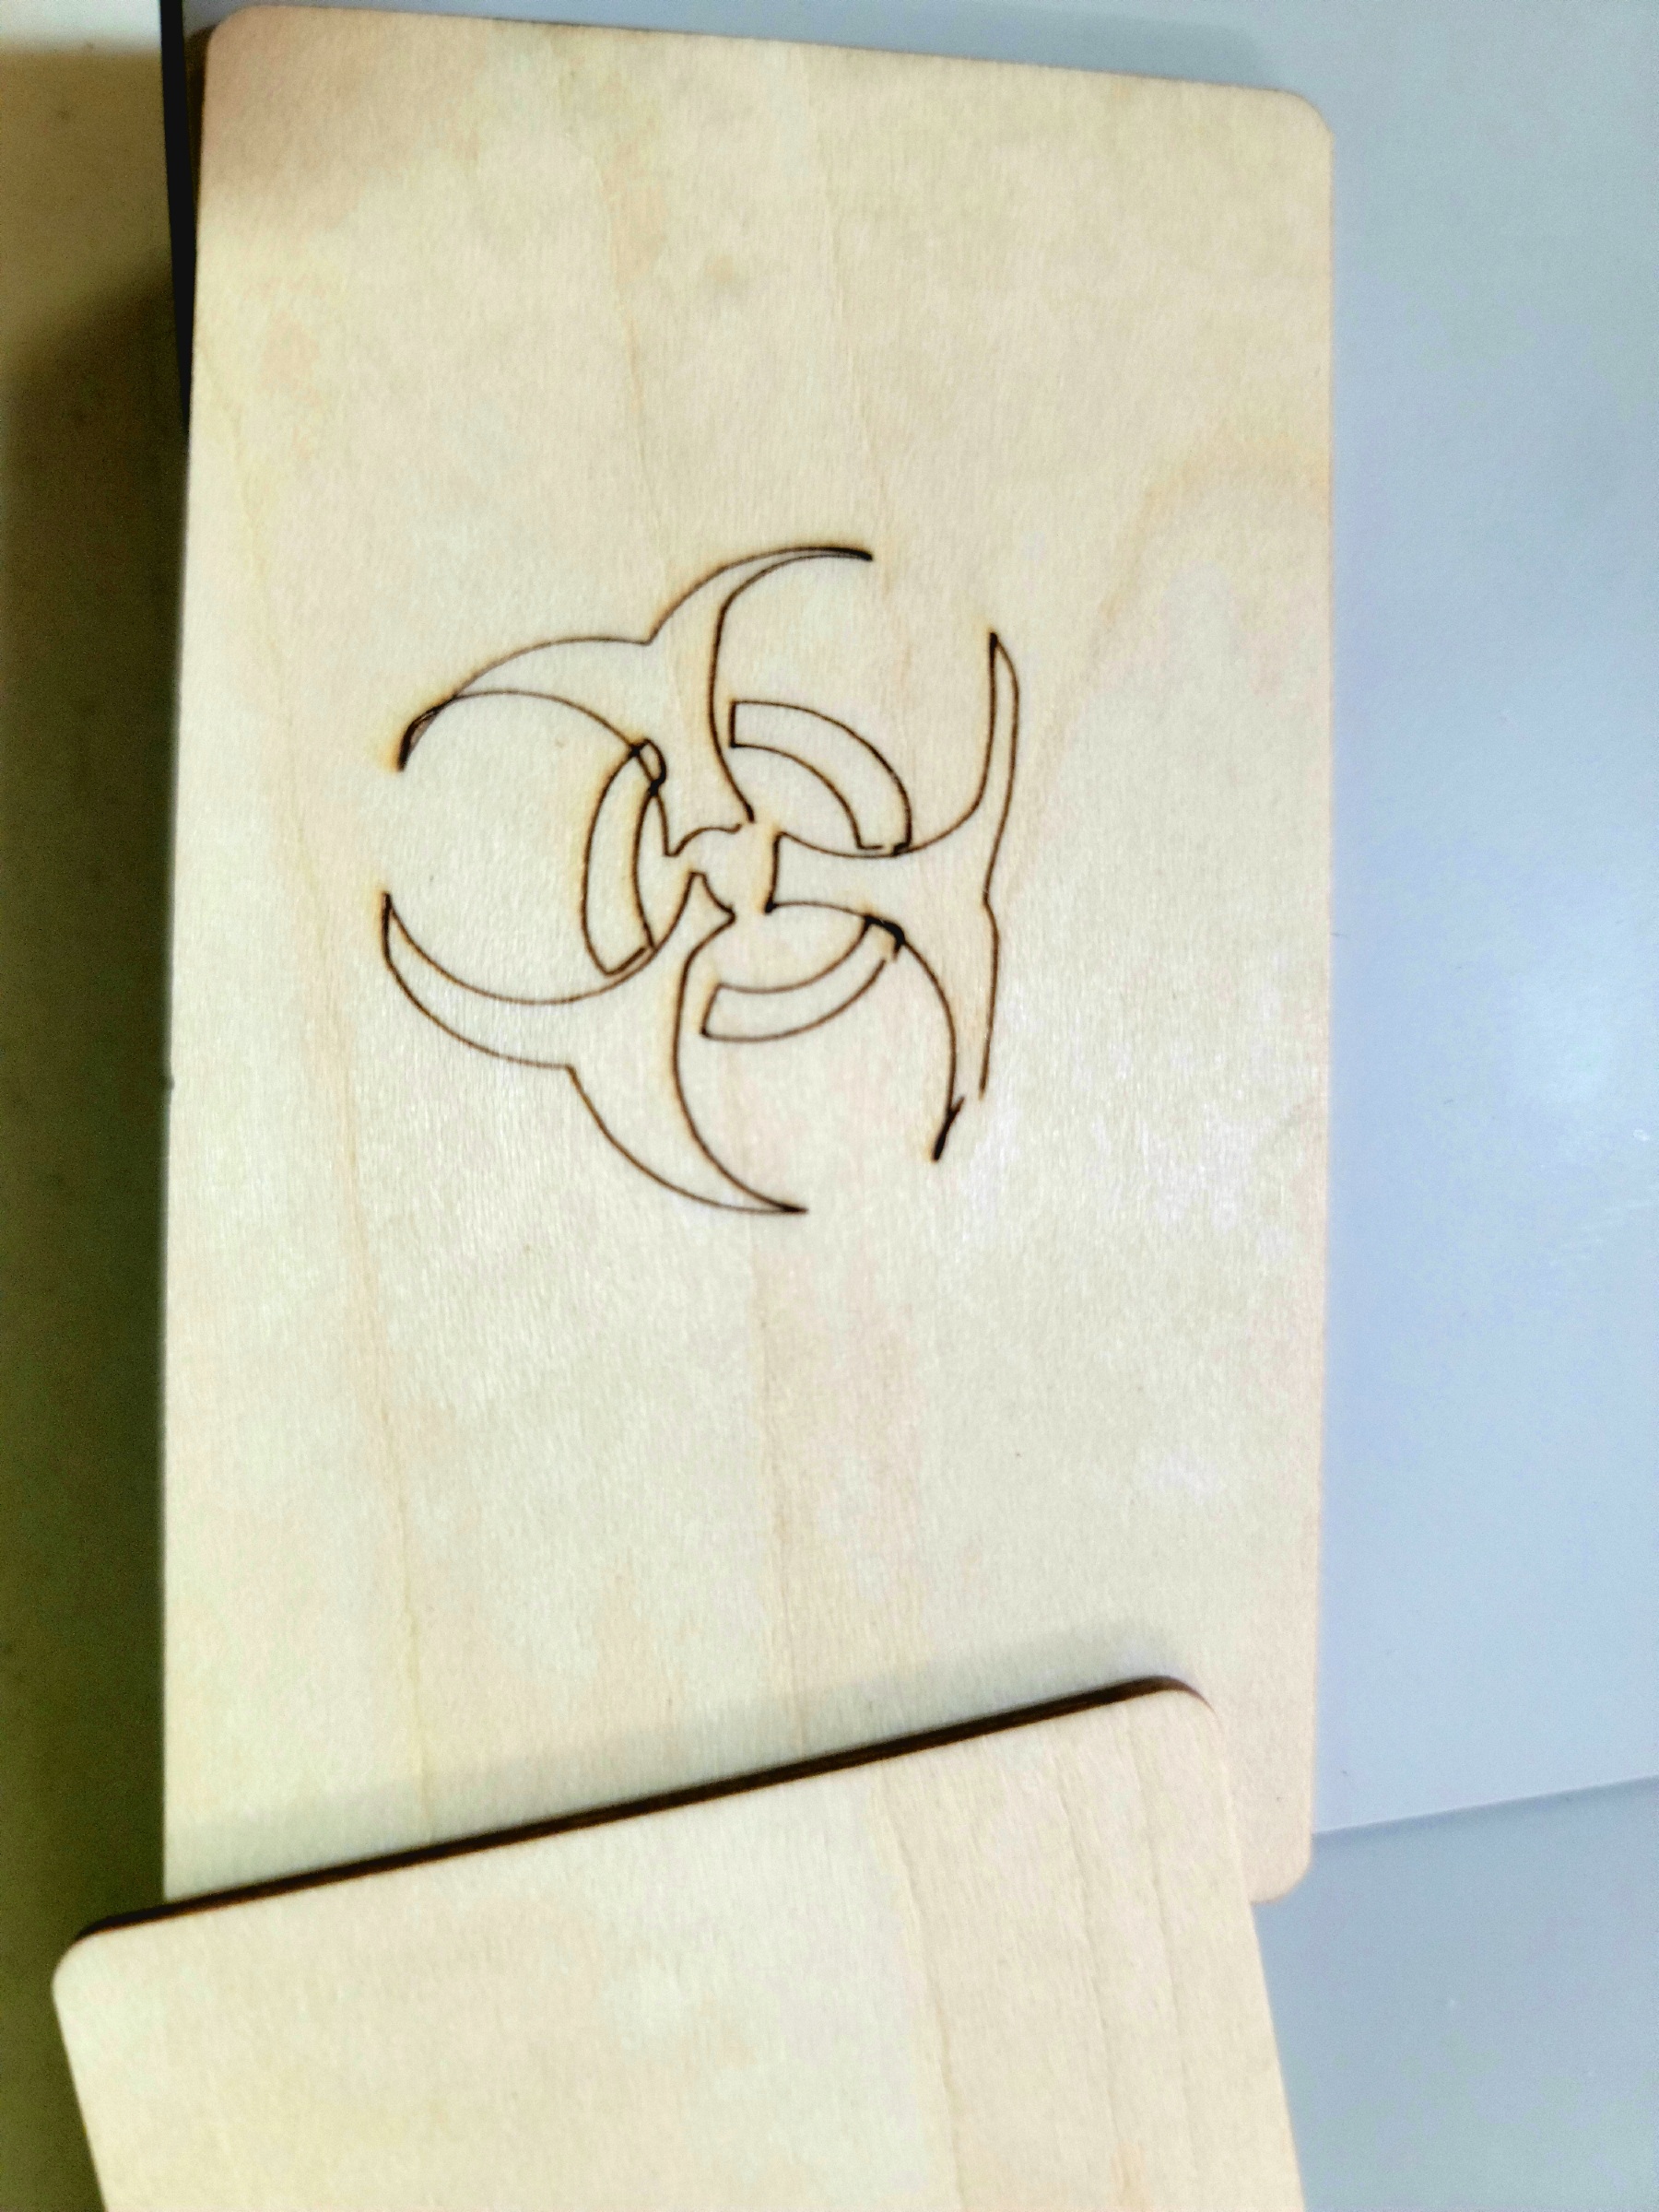
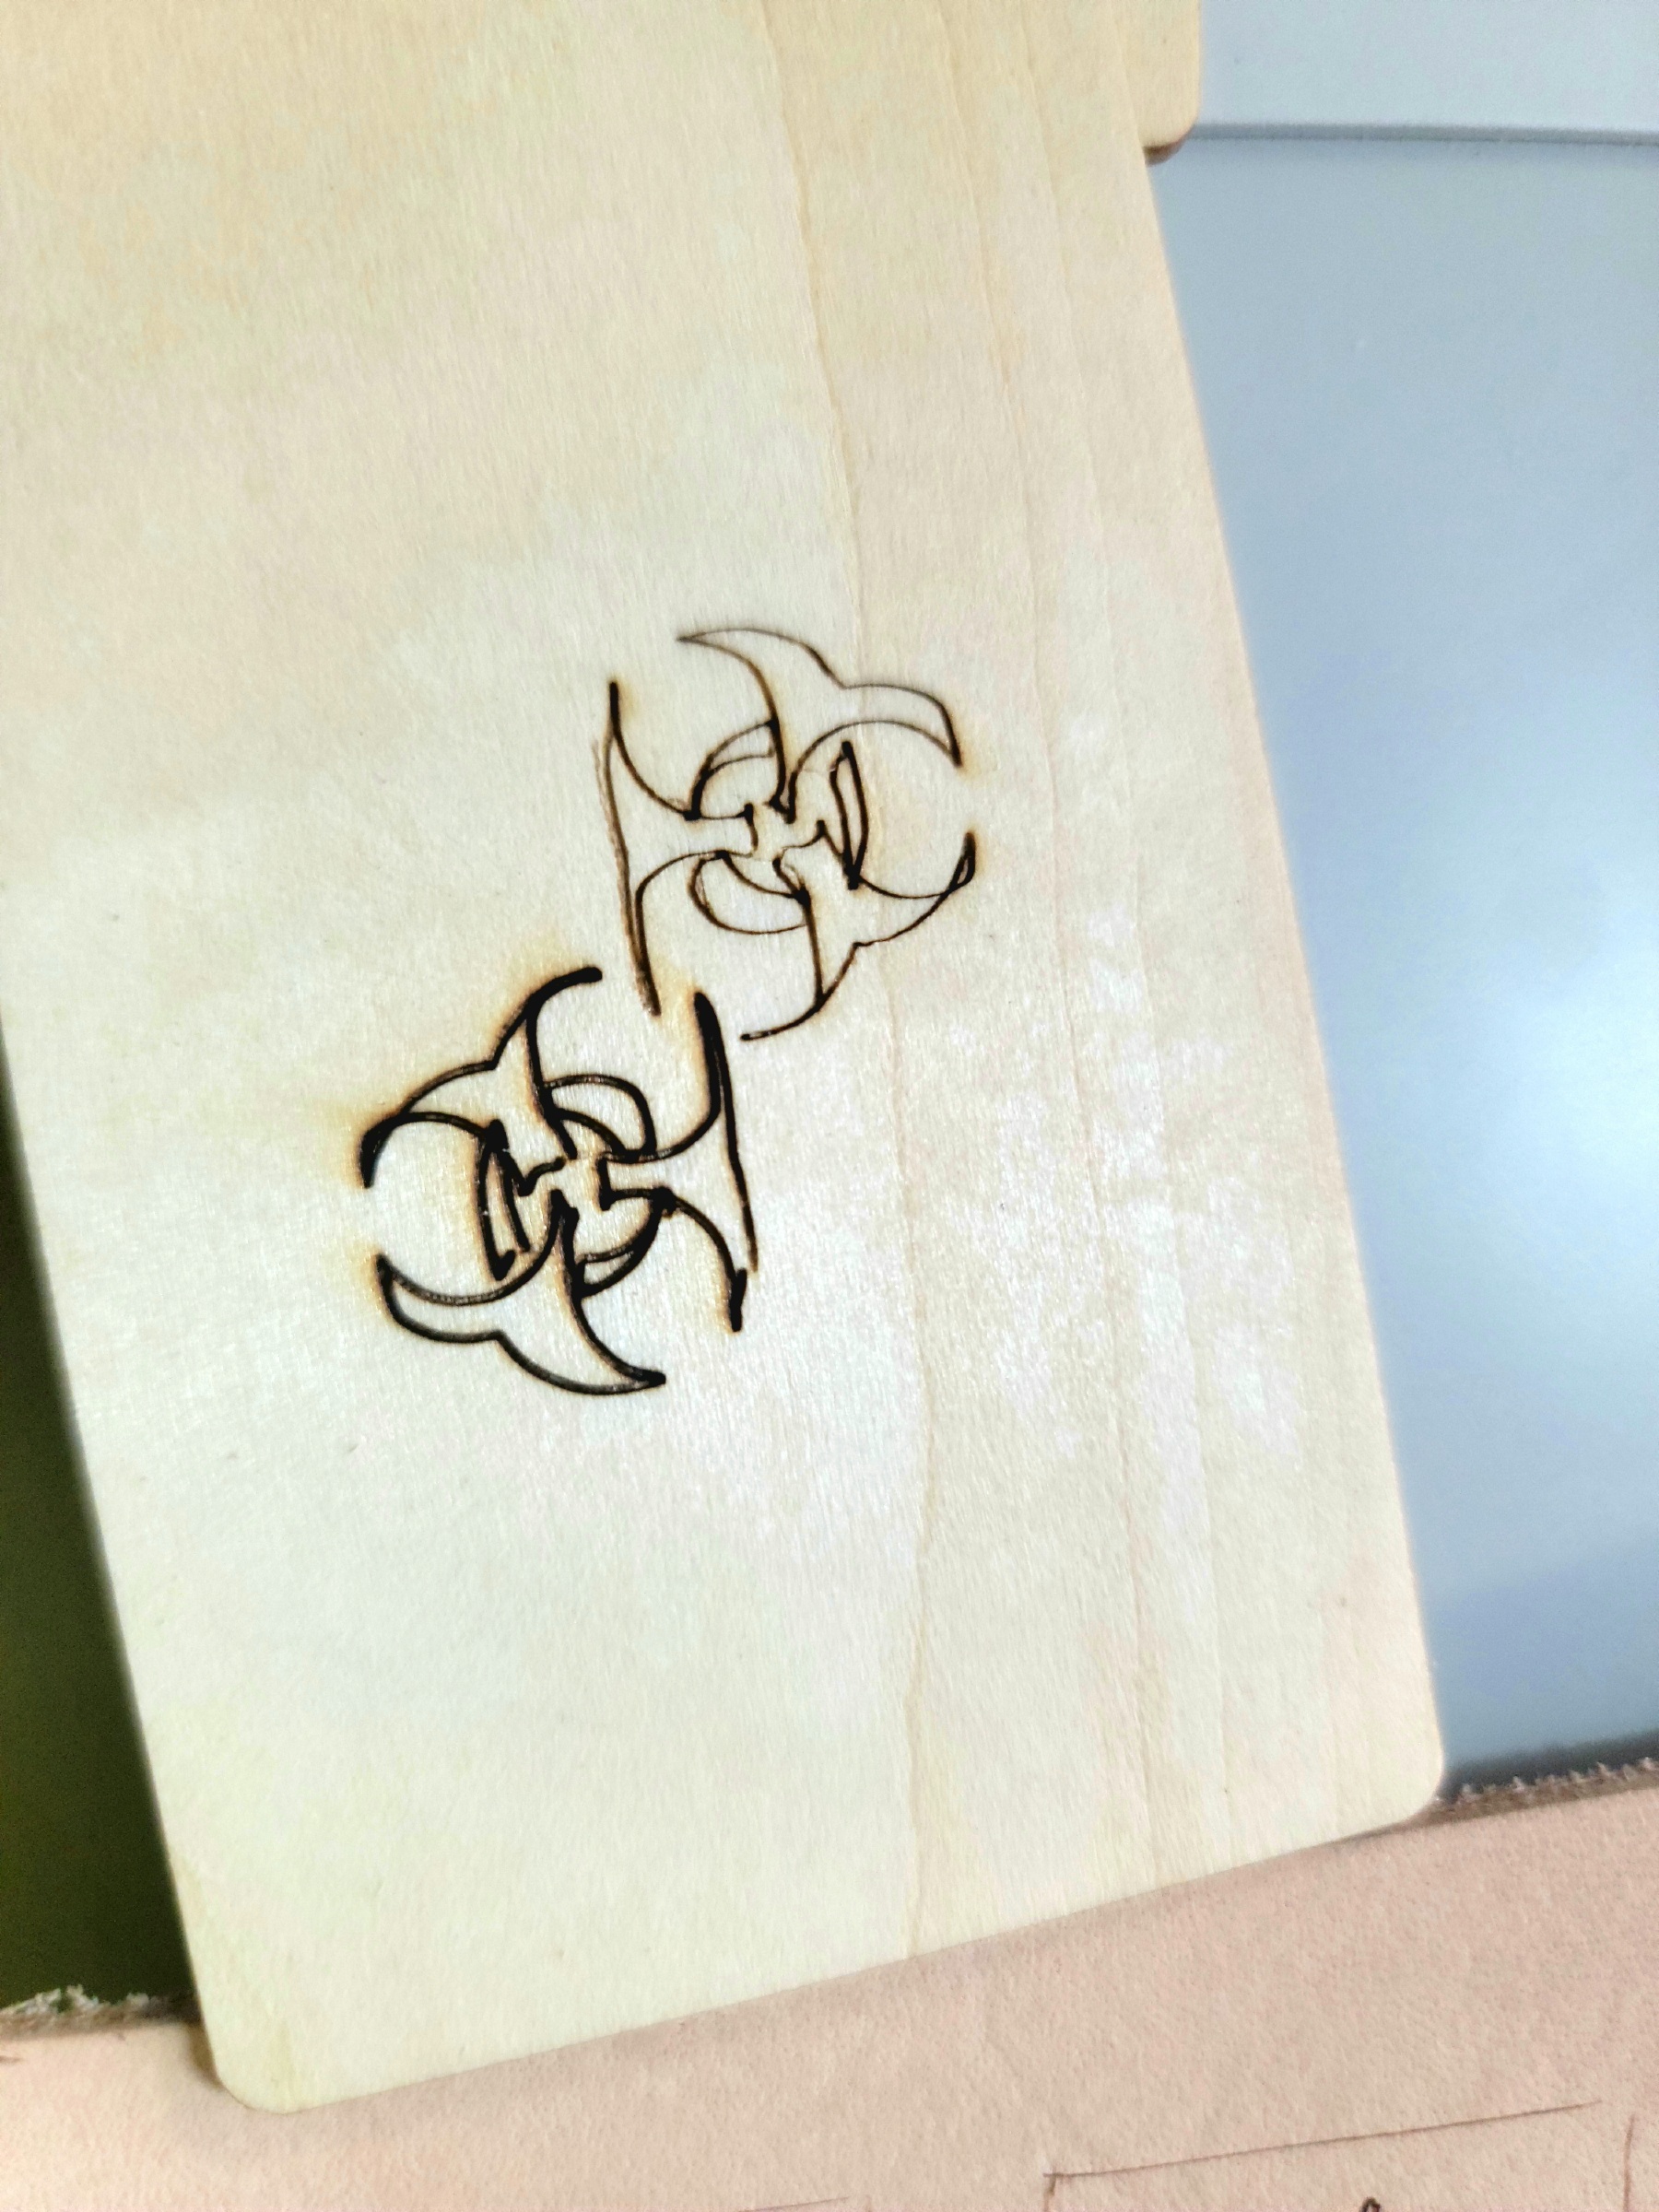
Hello all. I am new to this community and to laser engraving in general. I received my 1st laser today, the ortur master laser 2 and assembled it. I attempted my 1st engravings on a couple simple Images. The first was a simple continuous “Jesus is my life” text but the burn came out with two sets of lines instead of one. My second attempt was a biohazard symbol outline. It has curved pointed edges on the symbol, but the engraver smashed the curbesto almost a straight flat line. I use lightburn. Tried multiple times and power levels and speeds. Also the biohazard symbol overlapped part of the image. All the same results. Any advice?
Hi, maybe go through and ensure that everything is tight and the belt are set up appropriately, sometimes new things like to shift a little when they first get put together. A rigid machine is a better machine in my opinion when it comes to project quality. Also did you calibrate your axis within Lightburn to ensure they both move by the amounts you specify?
Don’t know how much this is going to help just thought i’d ask some introductory q’s
-Alex
Thanks I appreciate the info. I will double check everything is tight. How does one go about calibrating the axis?
No problem, “read all the way through first” While inside Lightburn and your machine is connected go to the “Edit” dropdown on the menu bar then click on “Machine Settings”, on the machine settings menu their will be a “Calibrate Axis” button, click on it. I can’t see after that as my machine isn’t currently plugged in but it should ask you to move your axis either x or y by an amount that you specify, so lets say 5 inches for example, when you say to move 5 inches to the right on the x axis does it move precisely 5 inches if not lightburn will have a box that says how far you said to move and how far it actually moved, so all you need to do is as precisely as you can use a measuring devise tape/ruler next to your machine to see how far it moved. This being said it might already move perfectly out of the box so maybe just see if it moves the right amount first.
another way to tell how far the machine moves is by creating a line with the pencil tool, setting it to a specific length, vector engrave it on to something then measure the line
and again this might be of no use lol and sorry if it isn’t but I don’t see anyone else just yet
You could also try engraving something new, like random text or something to make sure it wasn’t the test files being wonky? kinda doubt it though
No worries. I DEFINITELY appreciate all the help I can get. Even if it doesn’t work, it’s something new to learn. I’ll try tomorrow and see how it goes. Thanks again.
Thanks. I appreciate all the help. I was able to figure out that the belts did need tightening, and that there are two nuts in the rear of the top rollers that adjust the rollers tighter or more loosely to the frame. After I tightened everything up it worked like a champ. Only issues I’ve had now are I’ll do a power scale test and find my settings, then try to burn the material I tested on with the same speed and settings and nothing burns. I power scale tested on a sheet of scratch art paper at 3000 mm speed and found that 20% power was my optimal power setting. So I then loaded an image that I have changed to negative using the “da big gimpin plugin” in Gimp. I set my settings as the tests said they should be and nothing etches. Had the exact same problem when I did ceramic tile as well. Great results on the power scale test, but on the actual image I get nothing like the laser is suddenly weak. I even set the power to 100% and it still looked weak with no results. Any suggestions?
Follow up. I had set my measurements to inches to frame easier. Once I changed it back to millimeters, it worked fine. Did this twice. Any reason this would cause that???
3000 mm/sec, or 3000 mm/min? The former would be much too fast.
3000mm a minute.
Question so you can you engrave a regular file, say a square or a triangle? Sounds like it’s fine when your laser is going 20% power throughout the engraving, but once you switch to an image and dither or whatever method you use it fails. Maybe something there somewhere.
Side question when changing from mm to inches did you Change $13 in your grbl settings to inches or just change lightburn, I don’t know if this would cause any conflict with lightbirn but you never know.
Is your project being burned on scratch paper?? Power scales are run on the actual material your project would be. So if you’re project is a pine board, the power scale needs to be run on scrap pine.
Rich is exactly correct here - Scratch paper is a black matte surface that absorbs most of the energy from visible light sources, like your diode laser. Wood isn’t black, so it reflects more of the light, and will likely need more power, lower speed, or both.
Yes. I test a power scale test on the same material I will be using. I switched my measurements from inches back to millimeters and it seemed to fix the issue. Thanks for the input. I appreciate it.
I just changed lightburn. After switching it back it appears to be working fine now.