My original post got so long, I thought maybe it was best I start over with what I’ve experimented with. I am using the trial version of lightburn, and a Creality Falcon 2 Pro 22W engraver. My first engraving photo turned out fine, just a tad dark. I did some minor adjustments in Photoshop, then imported as a jpeg.
Engraving on 3mm basswood.
Today, I imported a similar photo, processed similarly in Photoshop, and imported into LB. Since the photo was similar, I used the same settings as the first photo, but only got a 5x7 rectangle of dark lines, no image at all. The preview shows the image just fine. I tried another photo, same results. I had saved the first image with notes, so I pulled it up in LB, and it printed perfectly again. I shut down LB and my engraver and restarted. Imported second image again, same result, only dark lines no image. Again tried another image with same result. Out of frustration, I turned passthrough on, and the image printed, only it was horrible. With passthrough on, the only engraving option is threshold, and other adjustment options are also greyed out as well. I have been working at this for over 12 hours now, and so very frustrated.
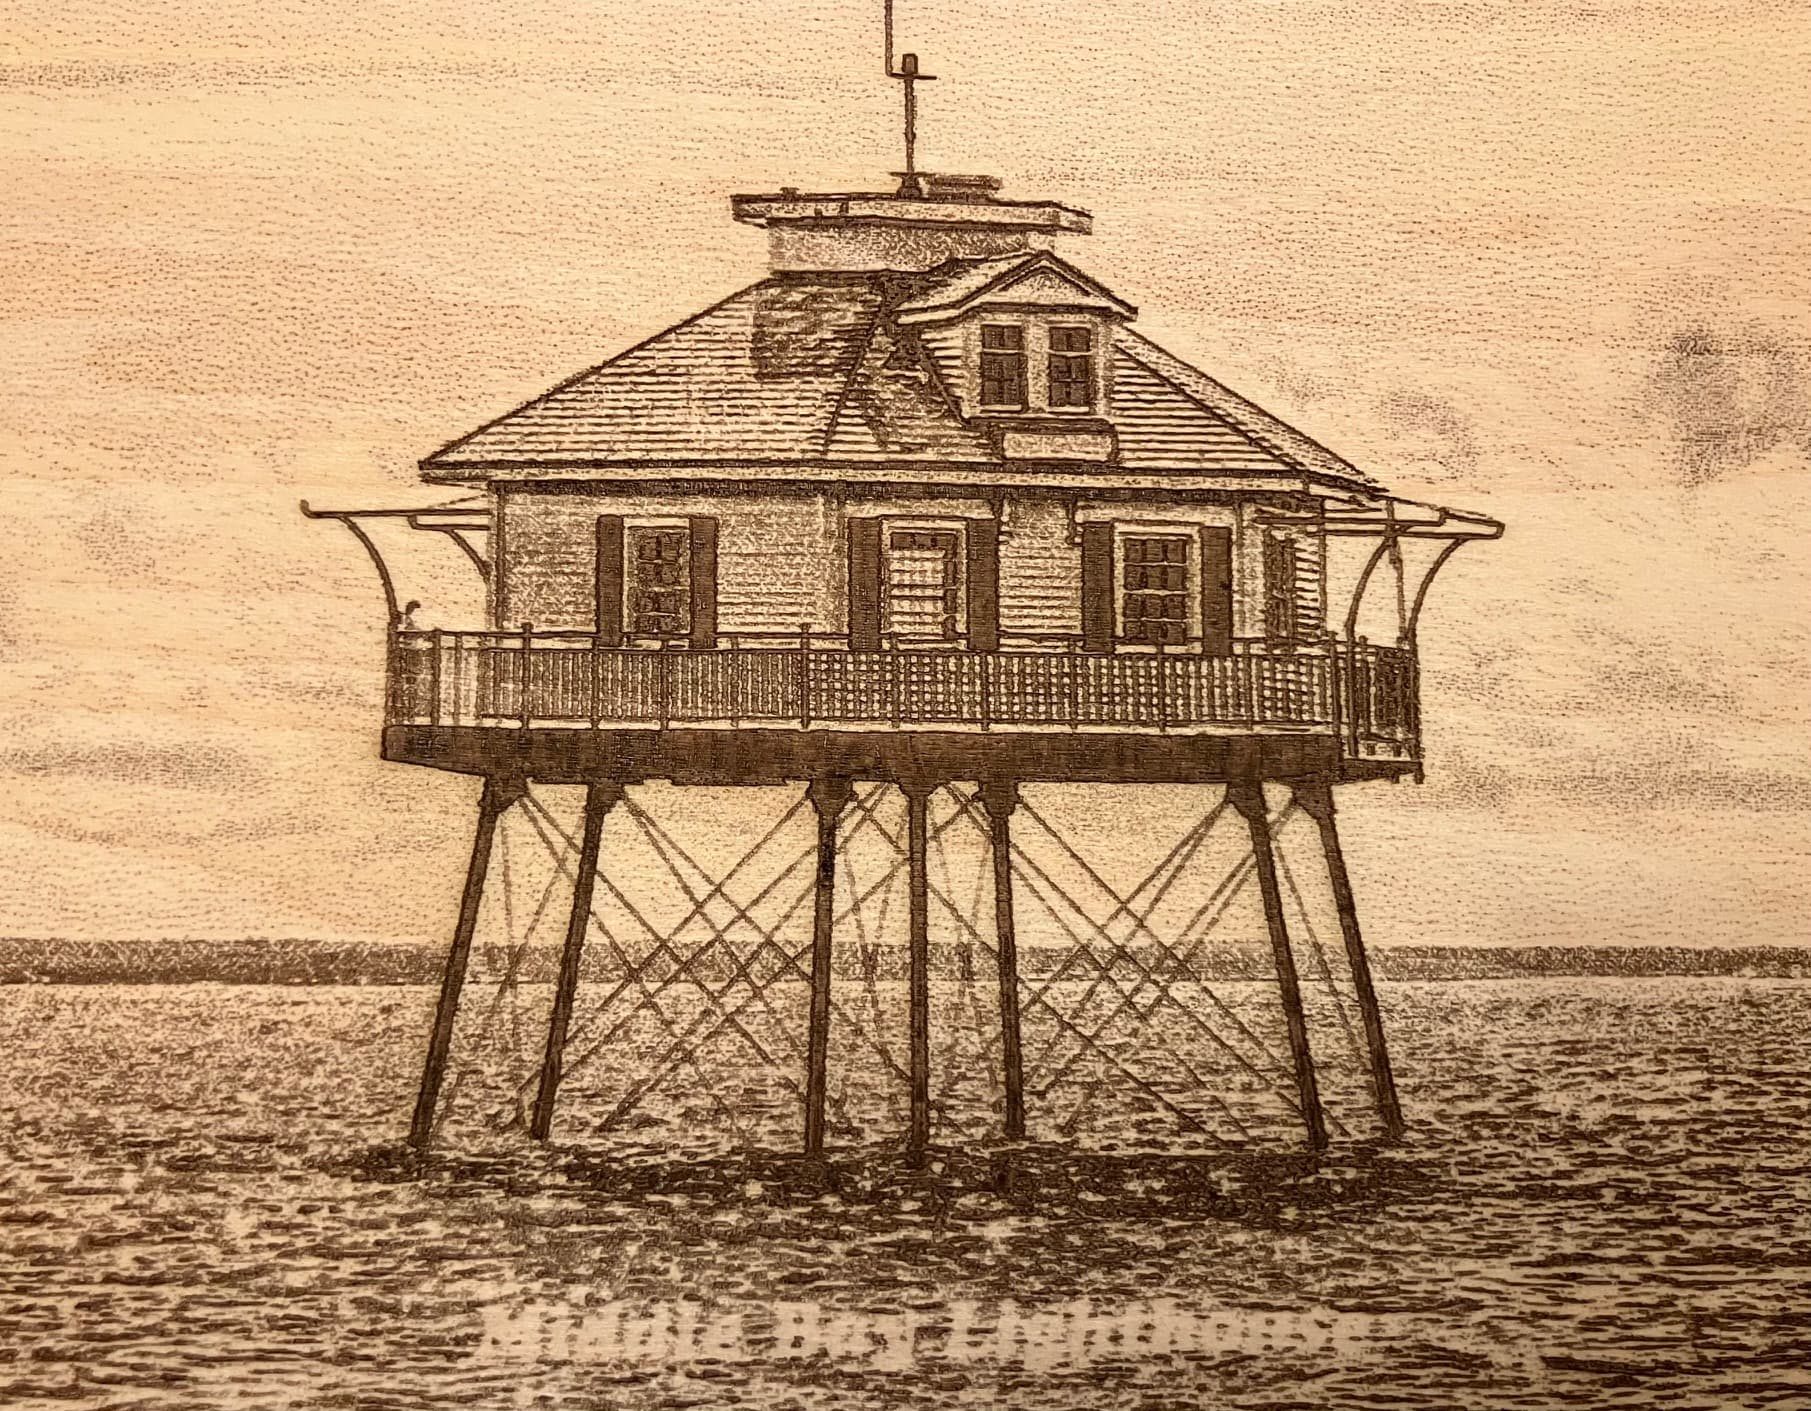
Here are a few photos: This is my first photo that printed out pretty good.
And this is what I get: (only a portion as I stop the engraving once I see that it isn’t working again). There is a very faint outline of the lighthouse in this photo, but that’s the best I get without passthrough turned on.
Did you save the one that printed properly as a Lightburn project file? If so, upload both .lbrn2 files for us to take a closer look at. If not, upload both processed photos and the current .lbrn2 file.
Yes, I did save the good one as a LB file, and I’ve saved the 2nd one now, too. Will upload. I found one other possible solution, but too tired to print up a whole engraving right now (79 minutes to engrave). I tried a few other engraving modes, and I did get the image to engrave with Jarvis, though not near as good as the first that I printed in grayscale.
Do you happen to know the procedure to adapt your settings in order to get the correct effective dynamic range (depending on your material and laser) and apply it to your image?
If not, here a very detailed tutorial
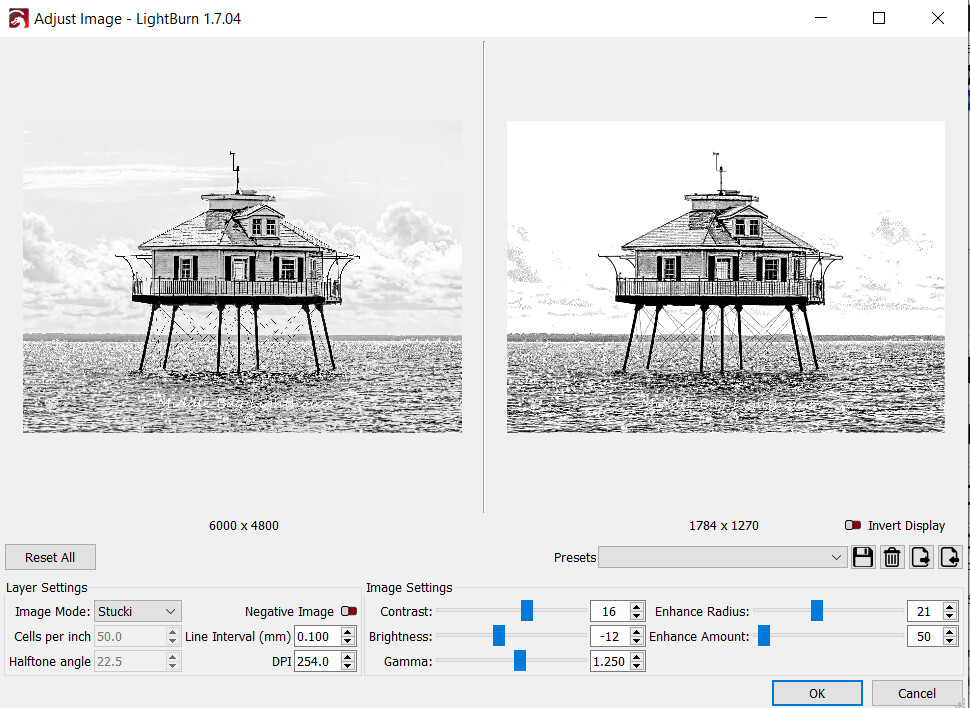
Laurie, I have looked at your files and see a couple of things. First, in Middle Bay, you have the image double stacked(2 copies on top of each other). You also have your line interval at .100, which is probably a good number for testing. The bottom image is highly processed and the top one isn’t. I don’t know if you exported and reimported the image or how you got there.
In Sand Island your line interval is .084. That can cause it to be a little darker, but I think the biggest issue is the processing. They are quite different between files. Although some difference is normal.
As far as the double stacking, I didn’t realize I had done that. I made some adjustments on the Middle Bay Lighthouse photo, and brought it back into LB again. I guess I thought that laying one image on top of another would “erase” the image underneath. Didn’t realize it was still there. The original image was exactly how it came from Photoshop, the “top” MBL image was cropped and processed with LB adjustments. The Sand Island photo you see here was probably after 8-10 different versions of trying to get it to engrave. The one with the different texture was probably after I tried saving as a BMP to see if that made any difference. I did so many variations that I’ve lost track of what I did.
Starting over again this morning. Did very basic editing of the original photo in photoshop. Saved and then opened with ImageR. Followed the steps there, then opened in Lightburn, where I did a bit more adjusting to contrast and brightness. Changed line interval to .1, then grayscale min power to 0, and the image is printing…a little light as I had upped my speed, but at least it is printing. It was such a similar photograph (lighting, contrast, etc) to the Middle Bay Lighthouse photo that I expected it to engrave with the same settings, which is where I started at. I still don’t understand what/where the difference is UNLESS I had the grayscale minimum set to 20% here originally for some reason. I have no idea what it was set to in my Middle Bay Lighthouse Photo. I saved the photo and “show notes” but I didn’t put that in the notes.
also, my husband just brought something to my attention as he was watching my first attempt this morning which only brought dark lines again. The laser wasn’t “going on and off” just staying a solid steady light back and forth. When I changed minimum power to 0, the laser light is now going off and on again.
When you adjust in ImagR, you should not do any further processing and use pass-thru mode. That will use the ImagR adjustments as intended.
I don’t know how experienced you are with lasers, but you do realize that working with images is probalby the hardest thing to get right, and grayscale is the hardest of modes to use. So, getting acceptable results is commendable.
Sometimes you need to back up and start from scratch. Keep with it.
Looking at this earlier, I didnt notice how in the engraving example that was stopped due to black lines, the background sky etc is darkly engraved but the lighthouse is very lightly engraved…isnt that the reverse (negative) of how it appears in the photo above it, that it originates from.
This is my first laser and so also first time using LB. I have been a nature/landscape/wildlife photographer for 15 years, and got into to this looking for a new way to display and use my photographs. I wasn’t expecting, however, for it to be so far above my paygrade.
Still been working with the Sand Island Lighthouse photo today. It’s just gotten personal. Anyway, I’ve made a bit of headway, in part, thanks to your suggestion about turning grayscale power minimum to 0. That left a lot of blank areas in the photo so I’m still readjusting. 2.5 power seems to be working better as well as a few tweaks in LB adjusting. I think I need to do some adjusting in Photoshop. The water is too dark and the clouds too light. I think if I fix those things in PS, the photo should print out like I want. Still have no idea why such the big difference between the 2 lighthouses as I got the first one almost like I wanted on 2nd try. Between the 2 days, it’s been 16 hours on this one. I was about ready to either get out the sledgehammer or find a buyer for my laser. Thanks so much for your suggestions.
No, I cancelled the whole engraving process about halfway through when my husband noticed that. (He used to be a welder, and said he knows “if the torch is burning steady, you’re gonna get a solid line”). It was just engraving dark steady lines. No print was showing up at all
That’s part of the problem, LOL. I do Real Estate Photography and Drone Photography.
But seriously, photo engraving is tough. The same rules don’t apply here that apply to print. You will have to unlearn some of your techniques to be successful in this medium. Not only are you working in shades of gray on your screen, the wood burns in shades of brown, and it rarely behaves the same between pieces of wood.
The videos suggested by @parsec above, really get granular into the hows and whys of photo engraving. I have watched them through a couple times and selectively many more times. It would do you well to follow suit. Pay particular attention to determining the correct LPI and Dot Width Correction for your machine.