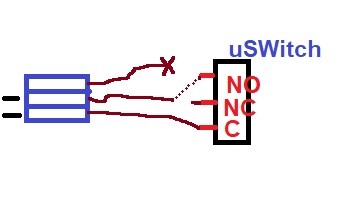
hello. i have a problem, would like to install limit switches by my GRBL . and need no know, the switch is in NO or NC position. then on the plate where to connect. on X-, X+, Y- or Y +? and how to program it in the lightburn
thank you
hello. i have a problem, would like to install limit switches by my GRBL . and need no know, the switch is in NO or NC position. then on the plate where to connect. on X-, X+, Y- or Y +? and how to program it in the lightburn
thank you
Try here:
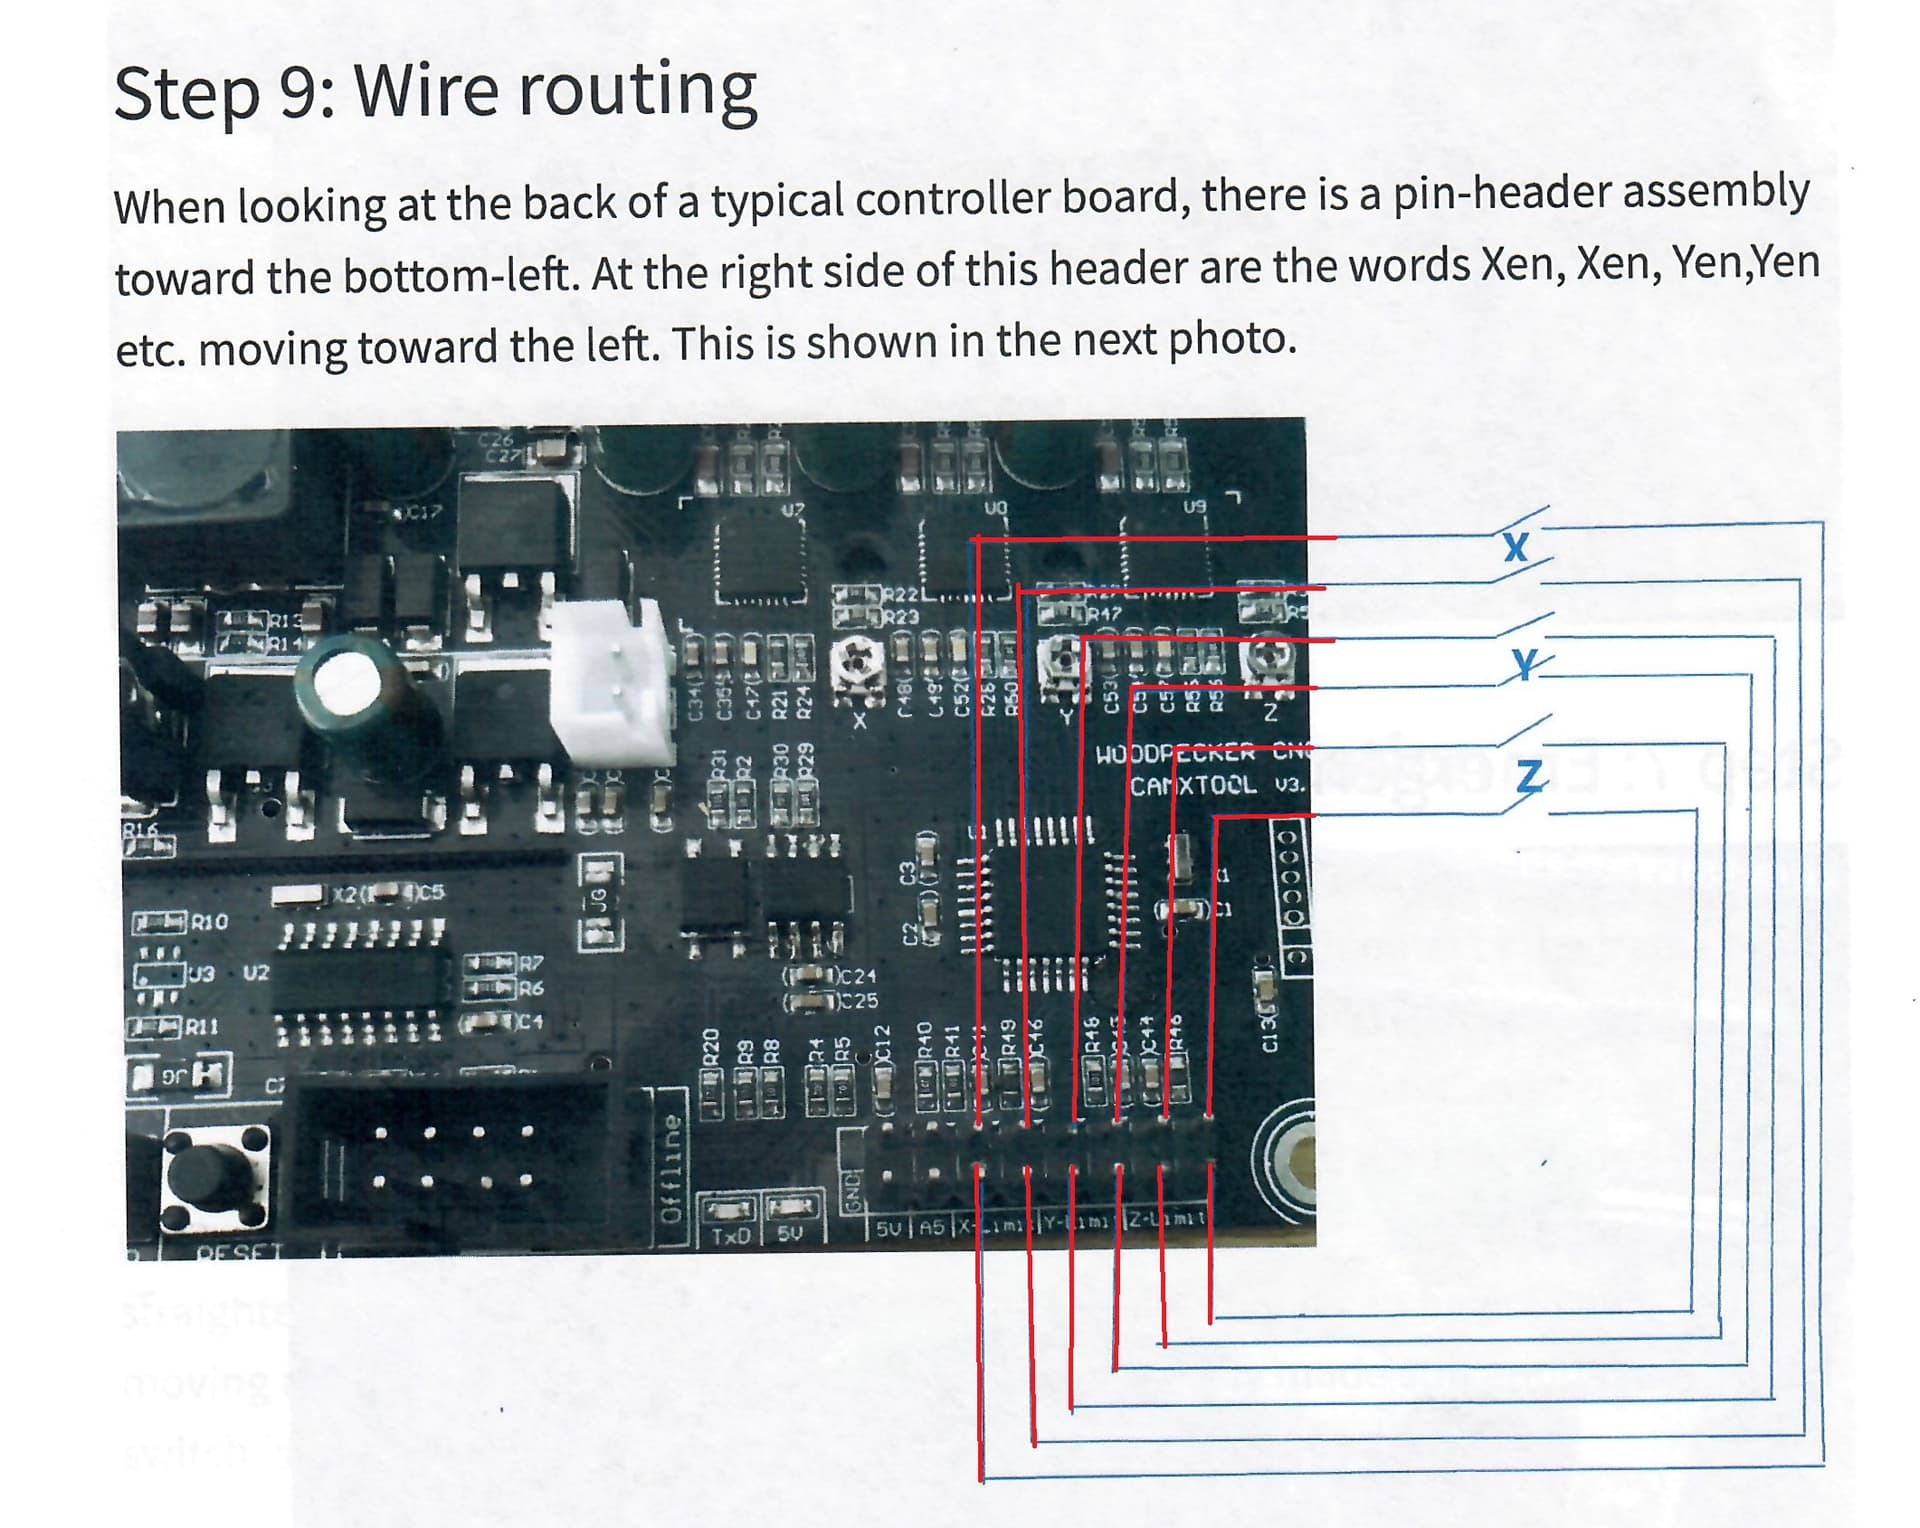
My info is for a Woodpecker 3.2a board, but is probably good for thr 32 bit board as well…
Through the Console, enter these commands, BUT FIRST, enter $$ and copy/save the current parameters. You may have to adjust some values for your particular machine.
$20=1 (optional, enables soft limits.)
$21=1 (enable hard limits, must have switches on X, y, and Z)
$22=1 (enable homing cycle)
Note: If you do not have a Z axis feed, there has to be a special adjustment for this. Unfortunately, I do not know the details.
$23=0 (Homing [direction] invert mask, particular to your machine)
$24=50.000 (homing feed, mm/min)
$25=500.000 (homing seek [rate], mm/min)
$26=100 (homing [switch] debounce, msec)
$27=2.000 (homing [switch] pull-off, mm)
Install your switches, then come back here and tell us what you did. As long as both $21 and $22 are both zero, adding the switches will do nothing to the machine operation.
thank you, i need to look at it.
thanks
Edit → Machine Settings will allow you to modify, save and load various different configurations…
Even with a new machine, you should save these settings… ensuring you have a pristine factory copy of your settings…
Good luck
![]()
thanks. need to read it.
This might help as well…