Is there a way to automatically run one layer and then the next?
I’m engraving some tumblers and the file has two layers. One is my black mark layer, and the other is my bronze(ish) mark layer. I was running the whole job at once, but I ran into an issue where once-in-a-while there would be lines where it wouldn’t properly adjust the speed/power level, so there would be lines where it would engrave at the bronze(ish) power, but at the black mark speed. So like ~75% power at 40mm/sec.
My “fix” is to turn off the output on one layer, run the job, then swap the output options, and then run the job again. Is there a way to run the job one layer at a time?
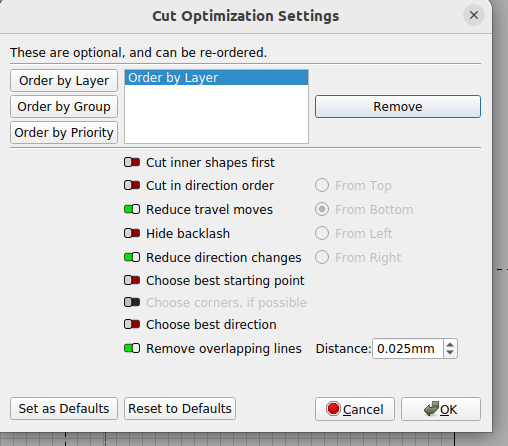
I’ve tried the “Order by Layer” option in the Optimize Cut settings menu, along with the “Run shapes in shape order” option on the screen that pops up when you hit start.
Did you remove the other options in the optimization settings? So you only have order by layer in the window?
Usually this can get changed, especially if it’s saved in one of the material libraries and you assign it to a layer… or have it saved as a layer default.
Yup, I made sure that it was the only option selected.
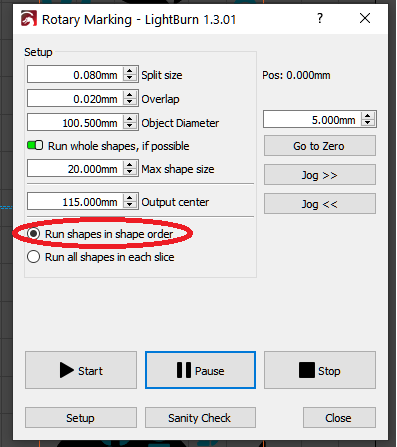
I think the issue is that the option doesn’t work as one would expect(to me anyway) with a rotary. I ran a quick multi-layer test job on a metal business card, and with that option selected, it burned the parts on the first layer and then the parts on the second layer. When I try to run the same job with the same settings with the rotary, it still burns all layers in each slice. Normally, it would burn both layers in a single “motion”. With the “Order by Layer” option selected, it will instead burn the first layer then burn the second, but it’s still the same “slice”, so I’m still running into the occasional issue of it burning a line with a mishmash of settings from both layers.
Here’s a quick video I shot. If you listen(around the 10 second mark), you can hear it burn a line in the “4” with the wrong setting. It leaves a visible line in the final product. Also, this is how it burns with the “Order by Layer” option selected.
Not sure on the answer here, I don’t have a fiber laser …yet… but question. How long does it take you to do a polar cup on them? I’m thinking it might be a backup to my CO2 for cups for overflow and I’m getting close to pulling the trigger.
Jack - You can’t really “see” it in the video. You can definitely hear it though. It’s nearly silent while marking the letters, whereas it’s a crisp buzz when it’s marking the “4”, but around the 10 second mark, one of the lines in the “4” sounds a lot quieter.
CK - I haven’t timed them, but these tumblers take probably 15-20 minutes. For context, one graphic is 50mm x 60mm and the other is 45mm x 50mm. Granted, I’m just using a “cheap” 20watt eBay laser, which has a Raycus RFL-P20QS laser source. If you spend more for a more powerful laser, those times could be reduced.
Thanks! I’m looking at the 60W MOPA Omtech. I know it’s cheap Chinese stuff but to be honest, I’ve already made a ton of money off of my 80W CO2 Omtech and it’s been great so far.
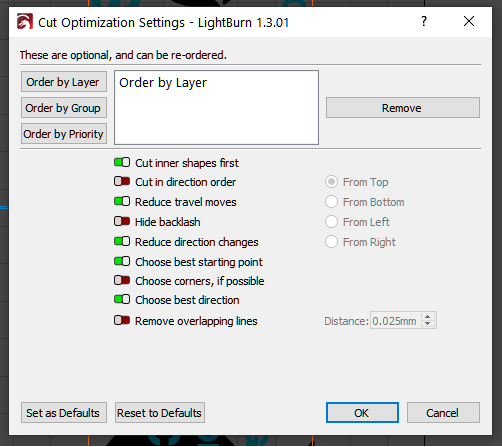
So I’ve finally figured it out. Thanks to the help of people on here, and through trial/error, I’ve found that these are the settings that made it so Lightburn would burn everything on first layer and then burn everything on the next layer while using a rotary.
For the “Order by Layer” option, I found that after removing the other selections, I had to hit “Set as Defaults” in order for it to stick.
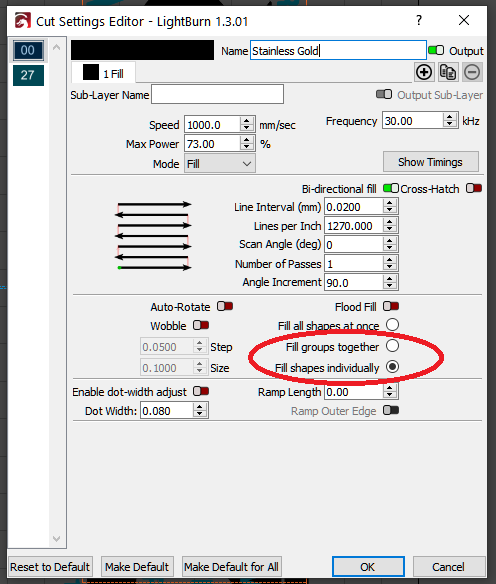
Right now I’m running the “Fill shapes individually” setting. I think selecting the “Fill groups together” option might also work, but I haven’t tried it yet.
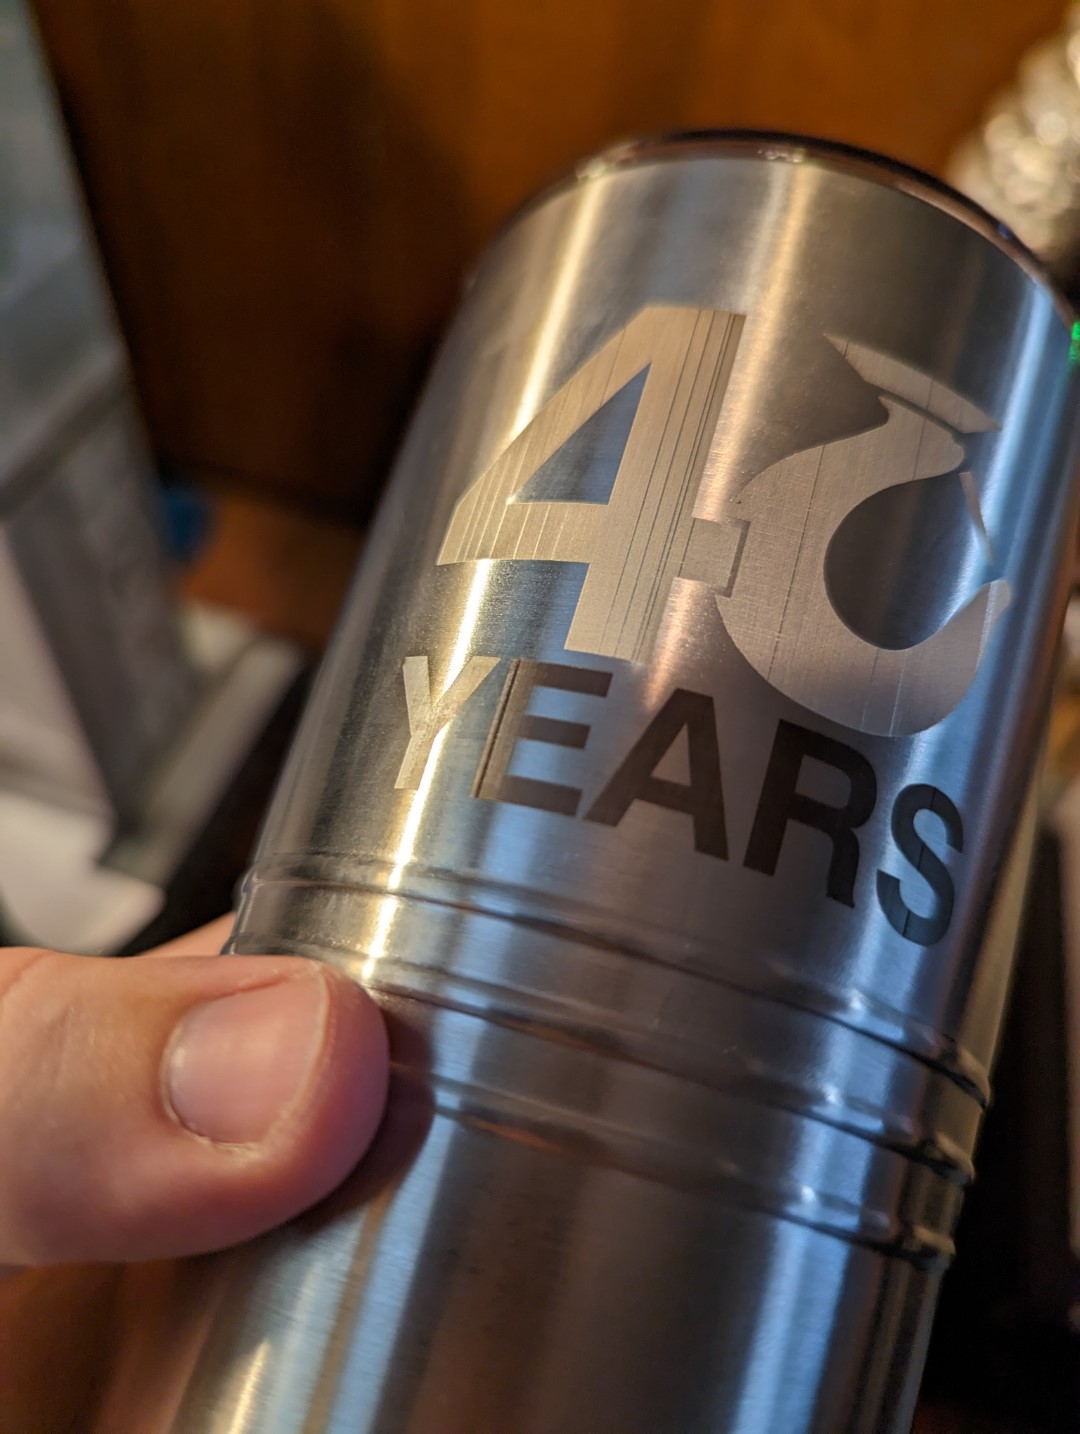
And here is a picture of what it looked like when the laser wouldn’t properly switch to the correct settings as it scanned up/down the tumbler. As you can see, in the “E” and the “S” there are deep lines where it kept the 40mm/s for the “00” layer, but it burned in with the 73% power setting that I had set for the “27” layer. You can also see the lines in the “4” and the hook where it burned at the the 1000mm/s that I had set, but it ran at the 54% power setting of the “27” layer.