Before I get to my question, I just watched the Gil Poznanski interview of Oz on YouTube. Really enjoyed it. Great work.
Now, on to my question. To preface, I use Print and Cut all the time. The reason being is that my Laser, a Laguna PL1220, comes in two pieces. The top part is the laser, which has an open bottom, and the bottom piece is the z-controlled bed. The bottom of the laser itself is open, creating a pass-thru either side to side, or front to back. Because of this, there is no side that I push my material up to get it always set in the same location and orientation. The honeycomb tray that I generally put my material on can be pushed beyond the usable bed of the laser in any direction.
So, print and cut comes in very handy for me, and is even better now with the wizard. I always try to engrave a pair of registration marks in every material before doing my main project, and then getting print and cut to allow me to register the material to the project.
So, on to my problem. It’s a little problem, and I can easily get around it, but let me describe what I do. I have been using acrylic sheets that I purchase from a local vendor, and these sheets are pre-cut in a size to fit a Glowforge (their primary customer, I think). The full sheet is just slightly less than the working size of my laser bed.
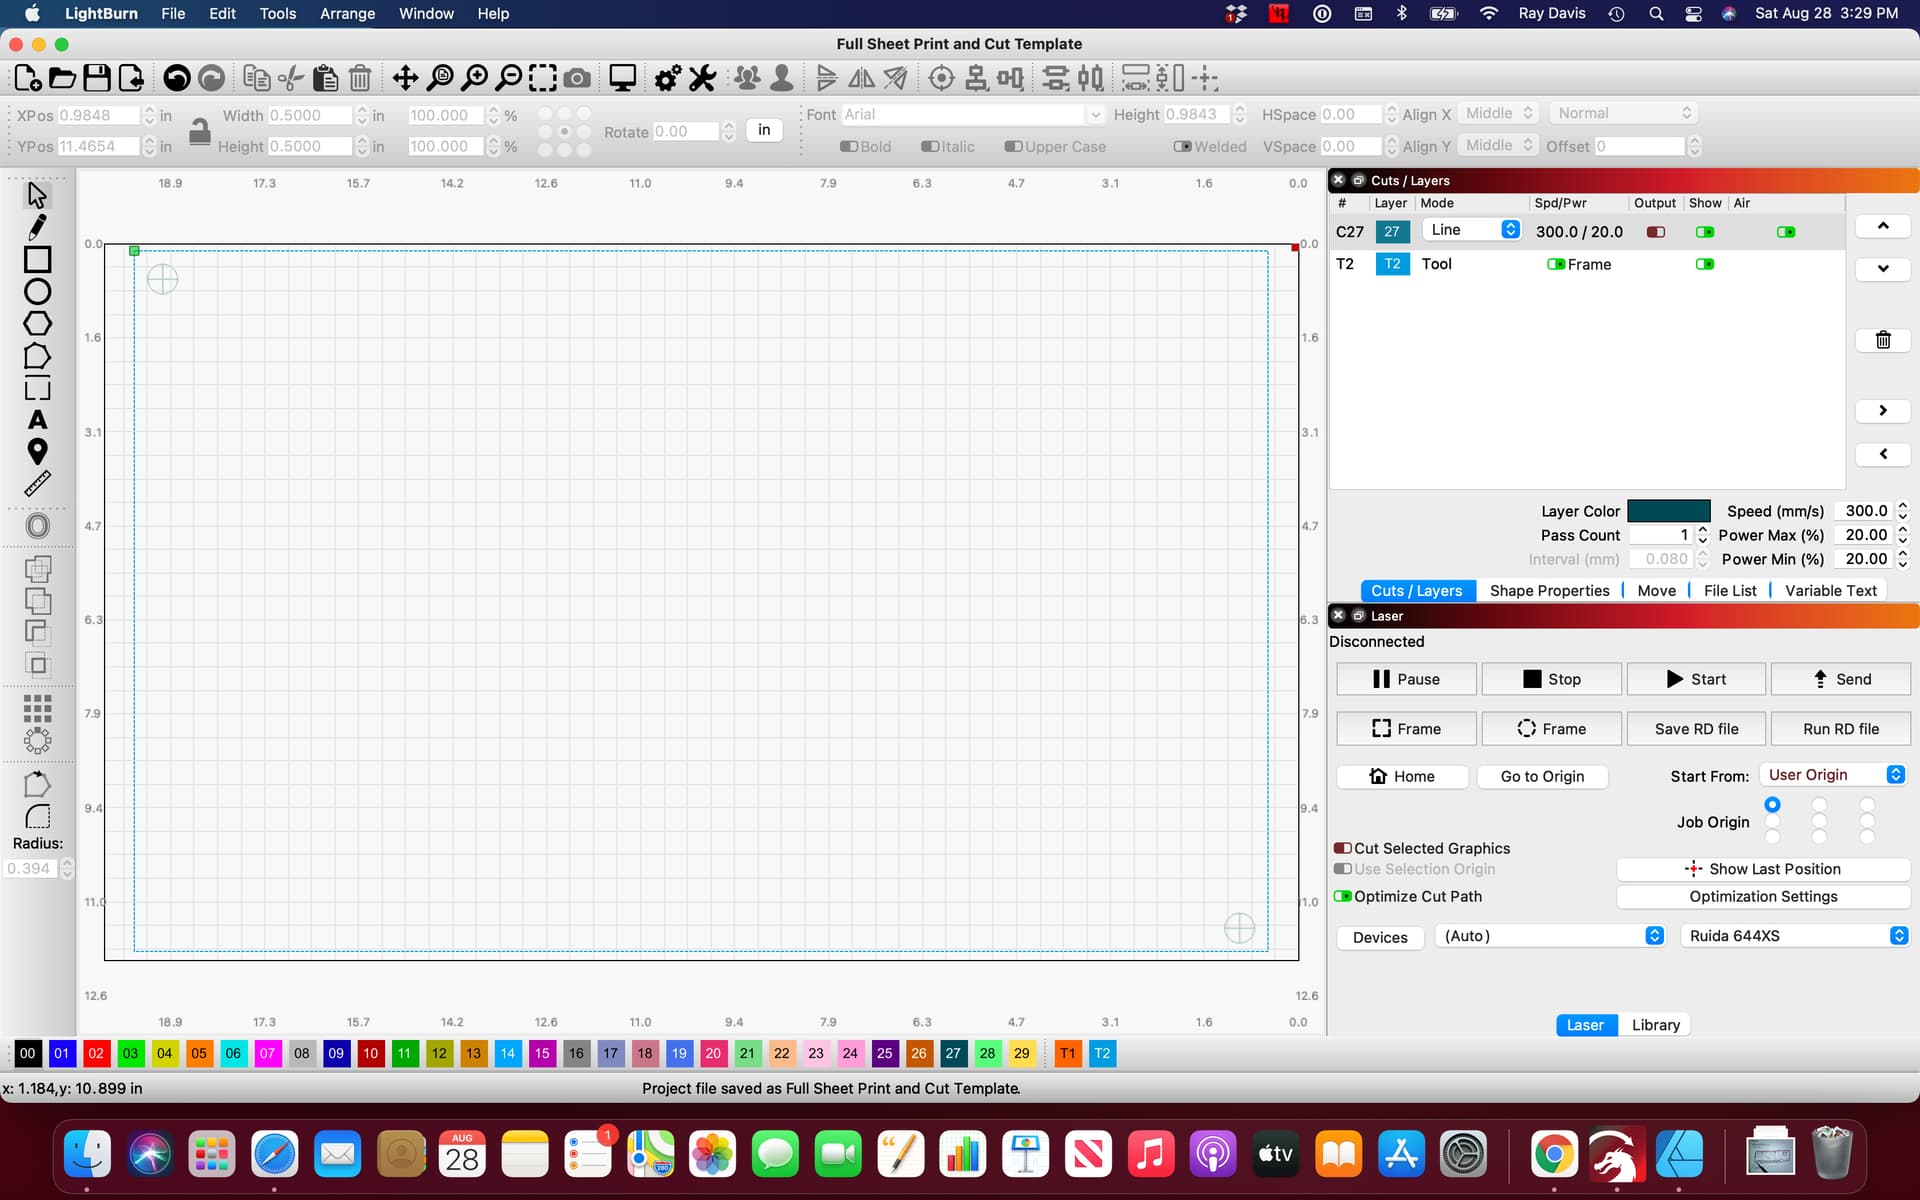
To use round figures, my laser is 20 x 12 inches. These full-size acrylic sheets are roughy 19.5 x 11.75. My basic project template has a rectangle that is the size of the material, centered in the laser bed area. The print and cut targets are in from the upper left and lower right corners (see attached image). What I would like to do to engrave my print & cut targets is to position the laser at either top corner, and then make sure the laser is running parallel to the acrylic piece. Then frame the job, just to make sure it’s going to fit. If the template rectangle has “frame” set, then my “upper left origin” goes to the upper left of this template rectangle. What happens here when I try to frame it, is that I get a warning that there isn’t enough room.
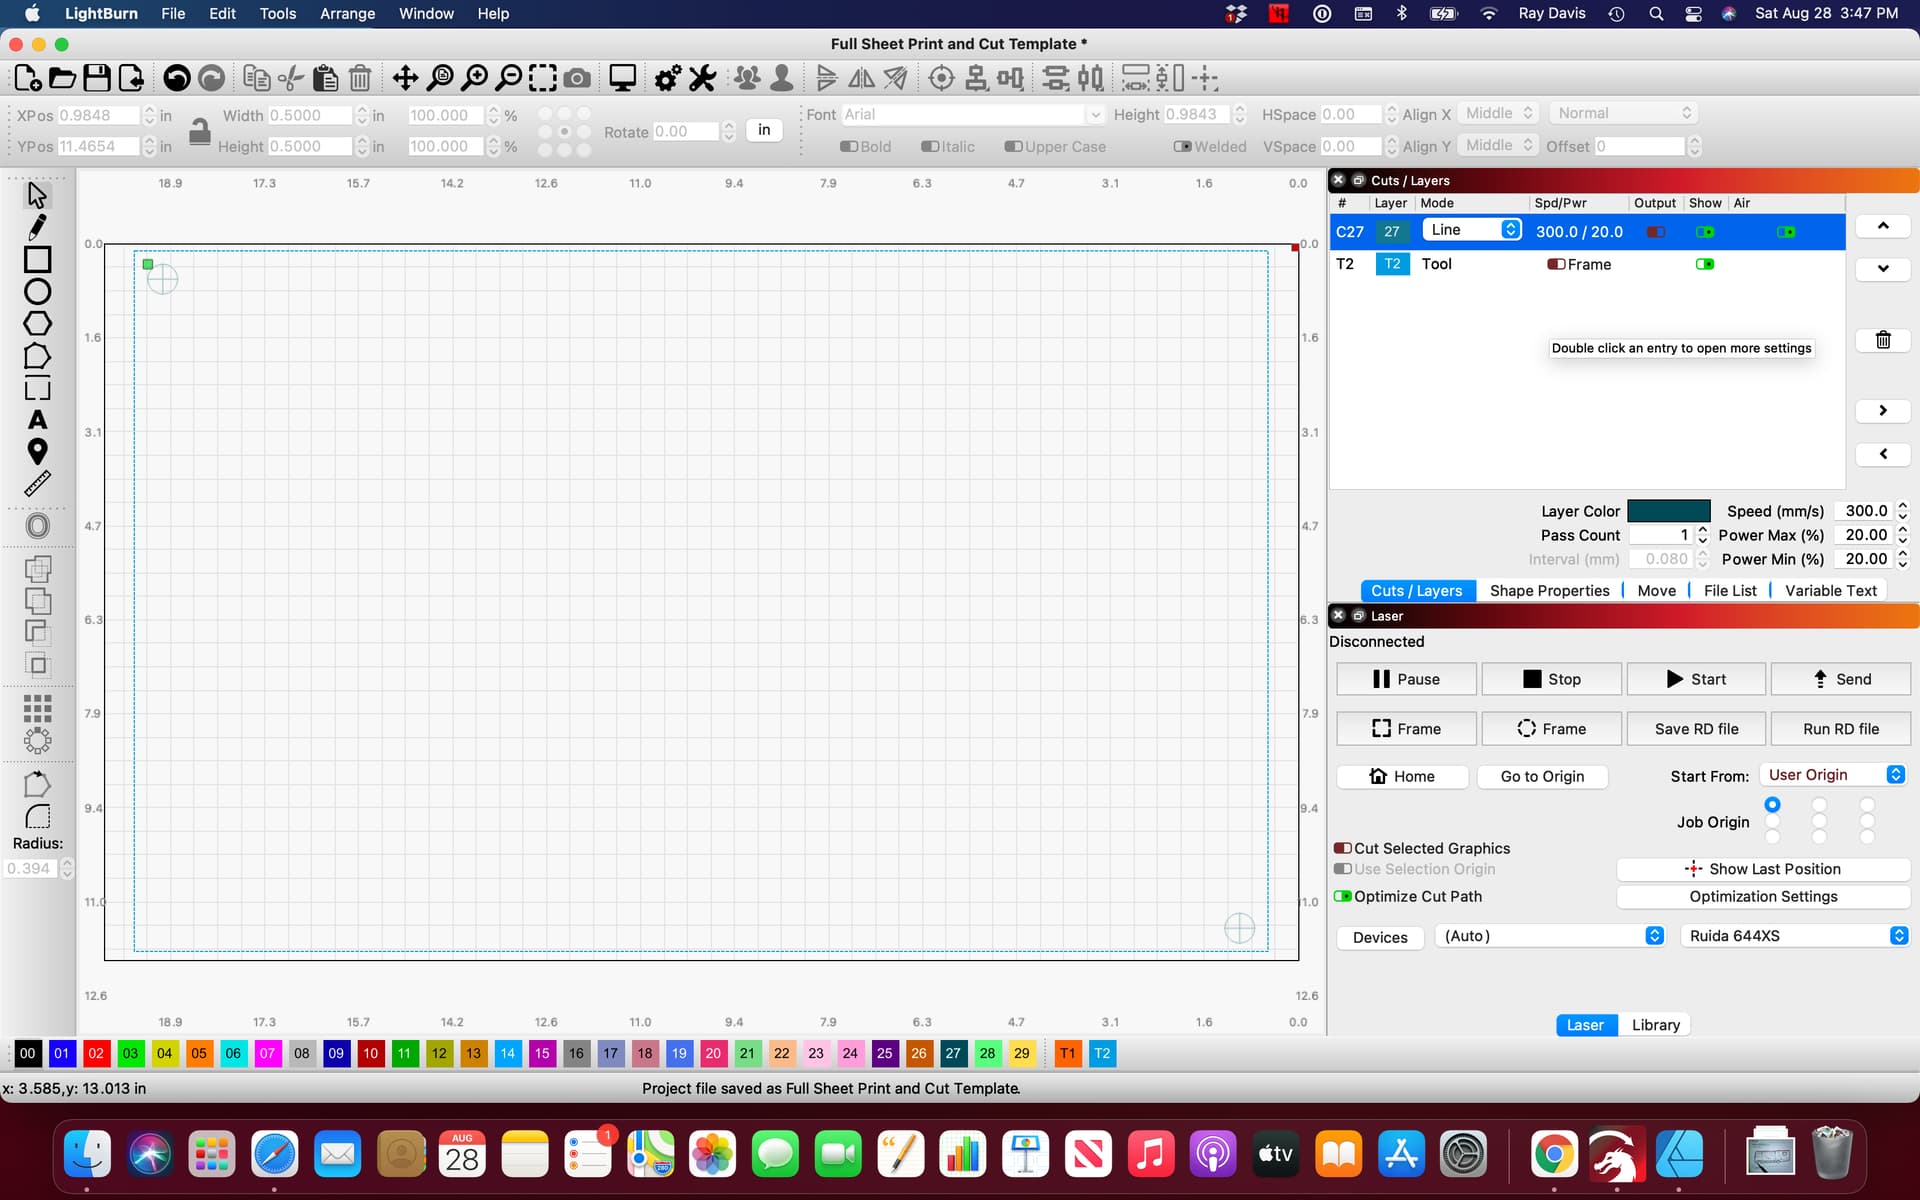
So, I turn off the framing for the template rectangle, but that moves the origin in LB down to the top left of the print & cut target, away from the edge of the material. So, to engrave the print and cut targets, I have to manually jog the user origin down and right a bit, and then try framing the job. This usually works fine, however it might take several passes of setting the origin and running the frame to get it where I want it.
What would work better for me is if I could set the user origin on the top left corner of my material, but when framing, only the cut targets are framed. Does this make sense. When I take the material out of the framing, the origin moves in LB.
I am attaching two images to perhaps better show this. The first shows the origin set upper left, and it is on the top left corner of the template, which is where my user origin would be set.
The second image, I’ve turned off framing for the template layer, but this moves the origin, so to match this on my laser, I have to fiddle with the laser origin to get where it fits.
Obviously, I can get this to work, but wonder if I am missing a better way to do this. It’s only really become an issue using these acrylic sheets that are almost as big as the cutting limit on my laser.
Thanks