Hey everyone. This is my first post, and I am a newcomer to the laser community. I have a Boss LS1630 CO2 machine and I am trying to create safety placards out of reverse engravable Rowmark and IPI reverse engravable acrylic for our business. Both of these are in the colors Red and Blue.
The IPI has a white backing, then blue or red, then the clear acrylic. The Rowmark has just red or blue then clear acrylic.
These are being fill engraved at 200mm/s at 16% power. Then the letters are being line engraved at 200mm/s at 16% power to try to get a cleaner edge. Then cut on the outside at 40mm/s at 40% power.
Afterwards, I am cleaning them with a soft paint brush dipped in soap and using hot water along with this. Then they are being back filled with acrylic paint.
Bed has been leveled multiple times, laser has been realigned multiple times. Focal point dialed in. All pullies on the machine replaced. One mirror and two lenses replaced within the two weeks of owning this machine trying to hunt down this issue. Scan offset adjusted and dialed in. I am running into a wall here.
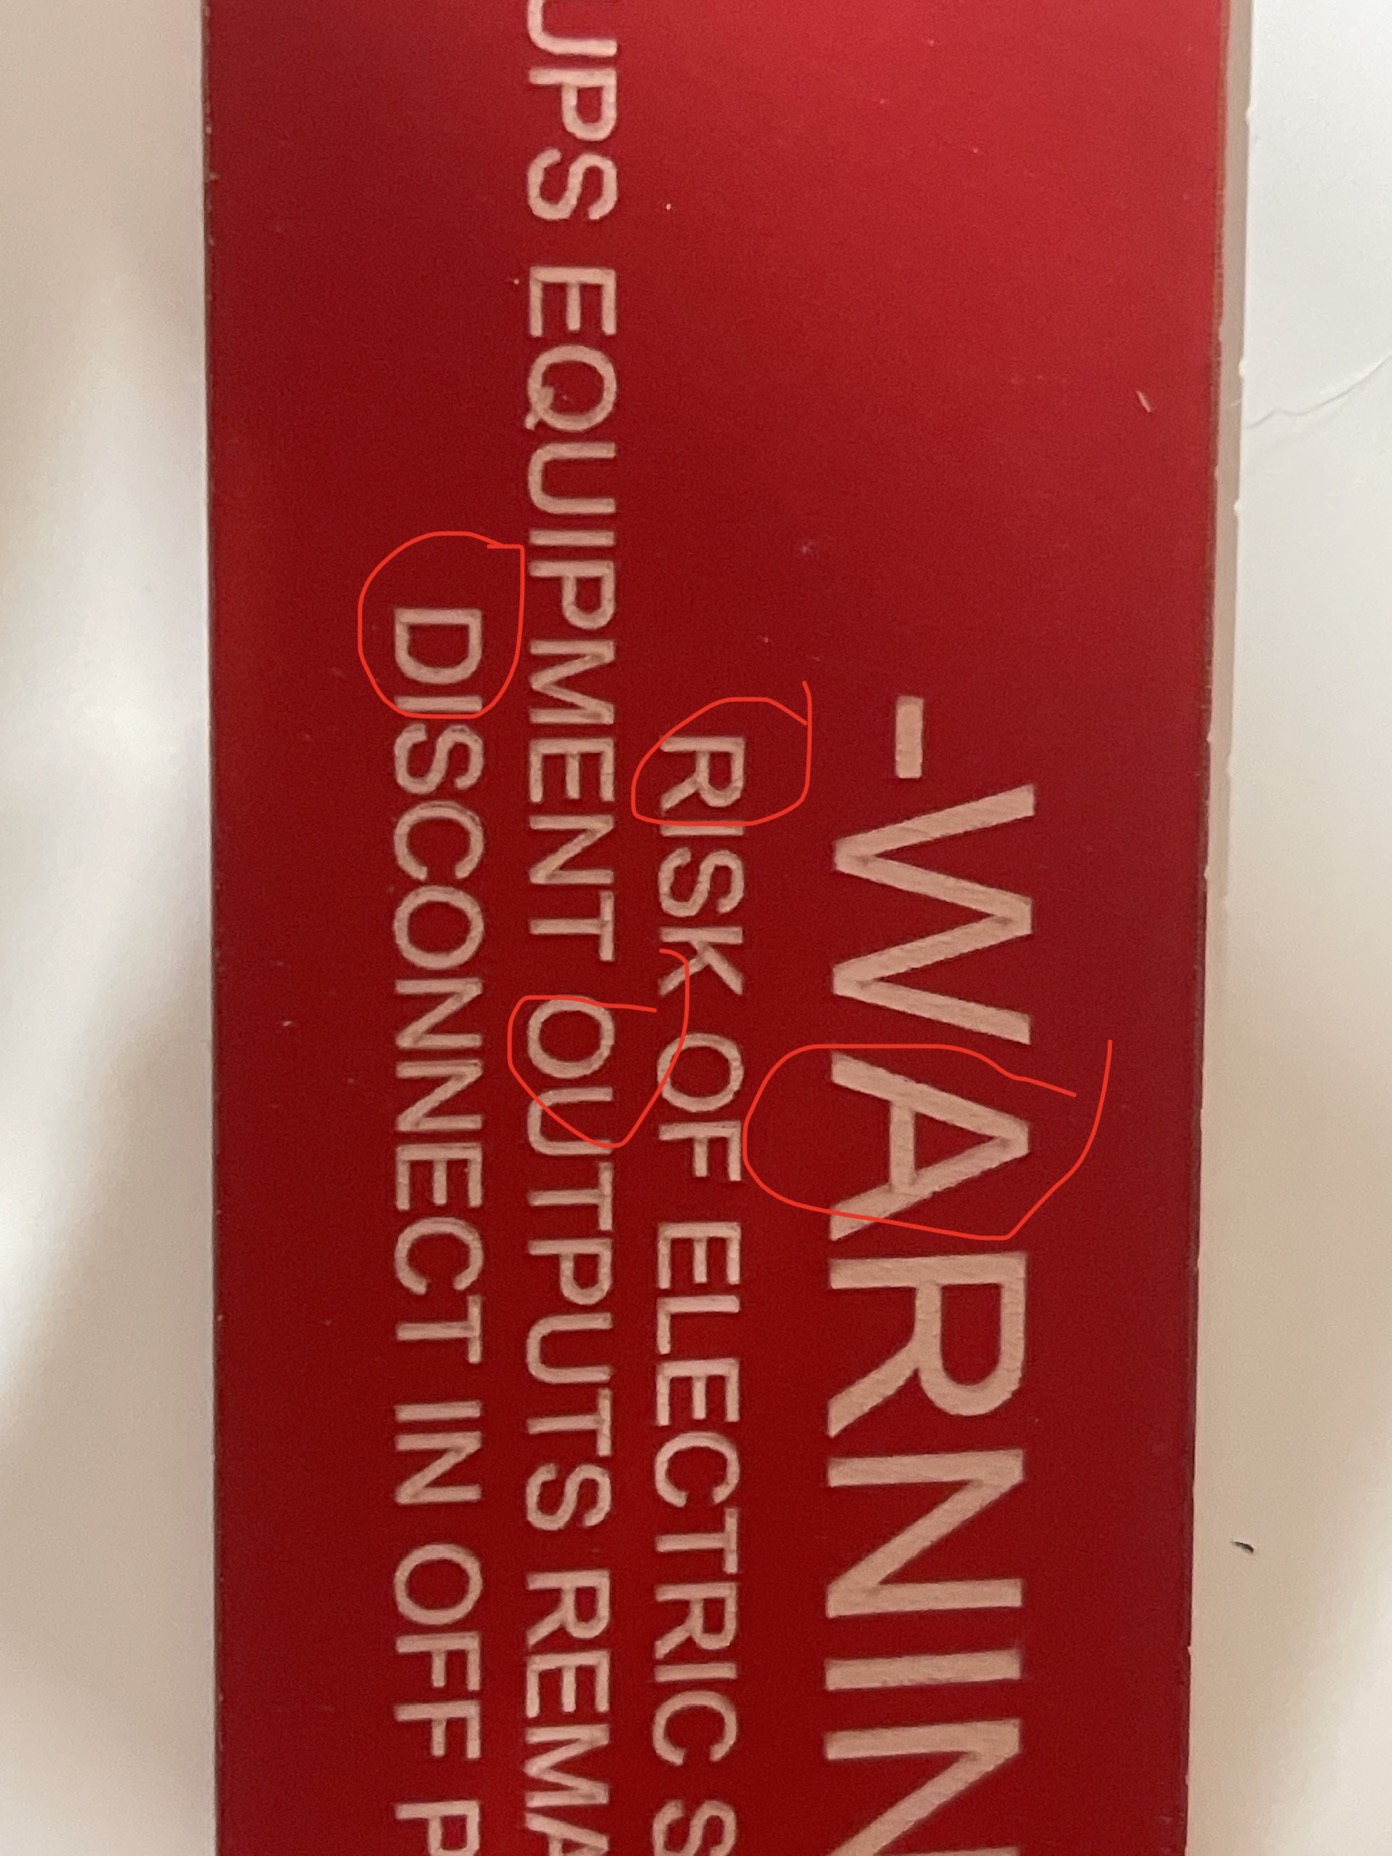
I am getting some strange artifacts within the text that Boss themselves has no Idea as to what would cause them. This ranges to letters that are abnormally engraved to some letters being deformed. Any help would be appreciated. Pictures Below:
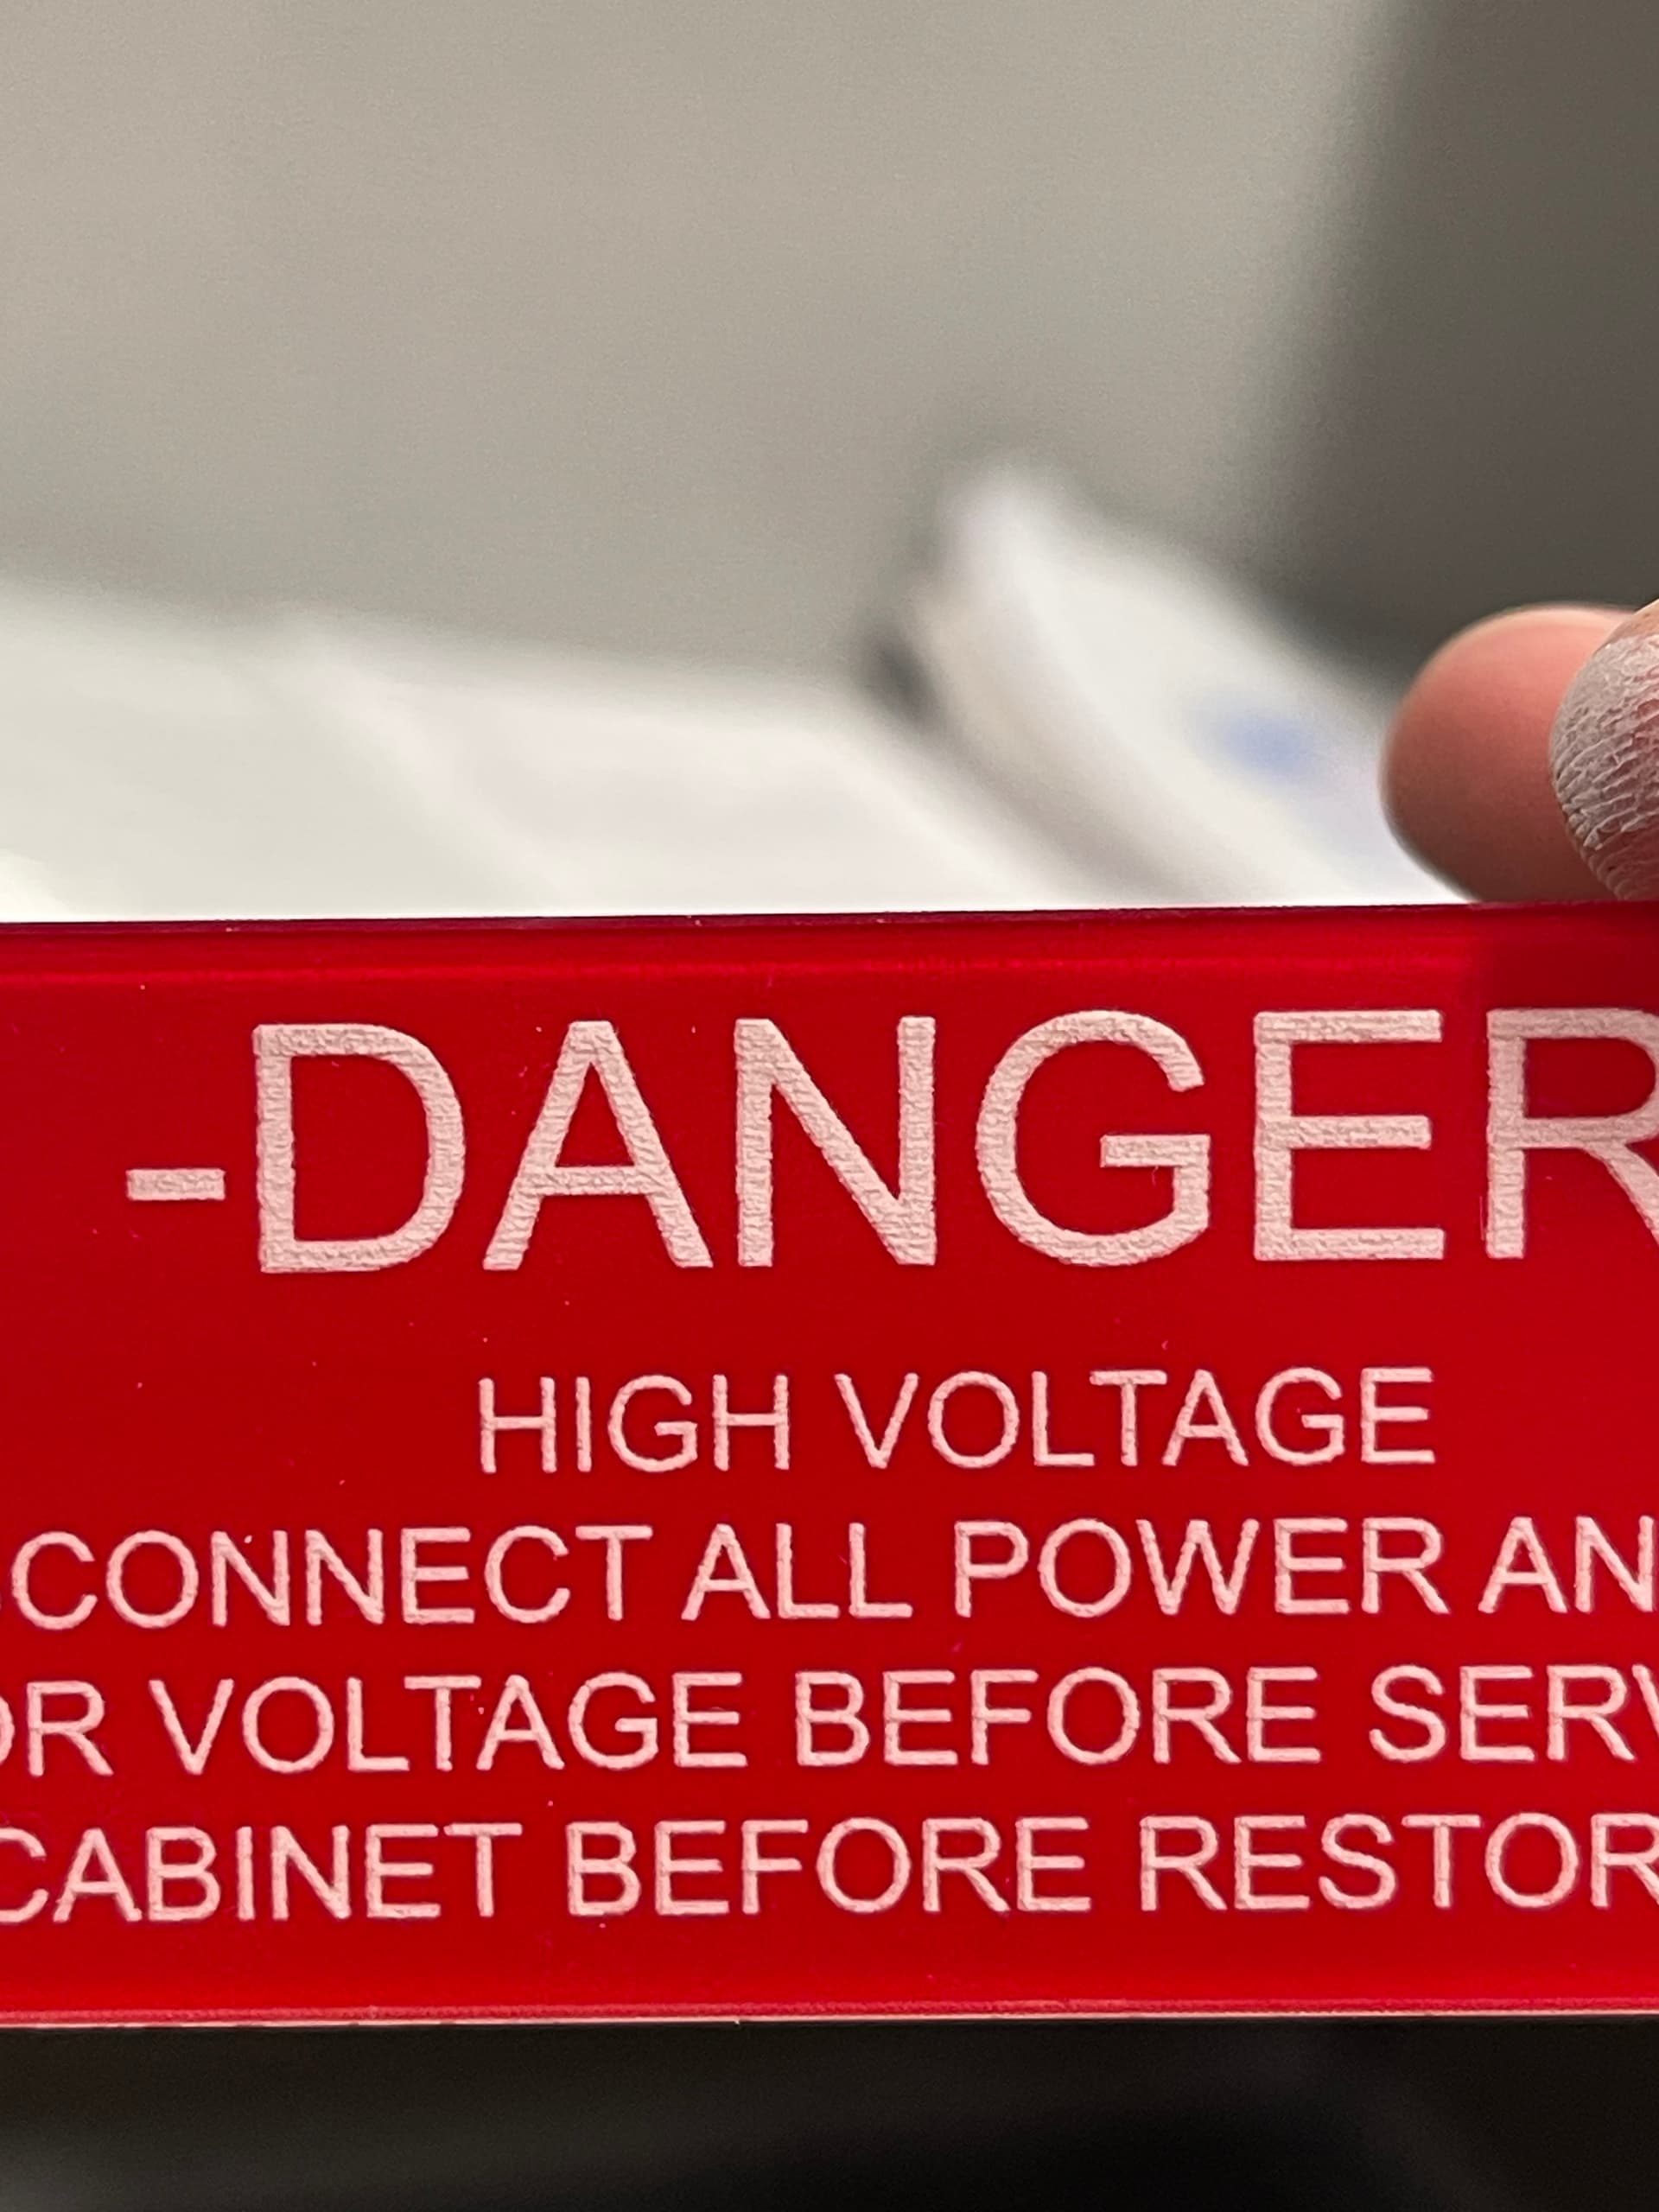
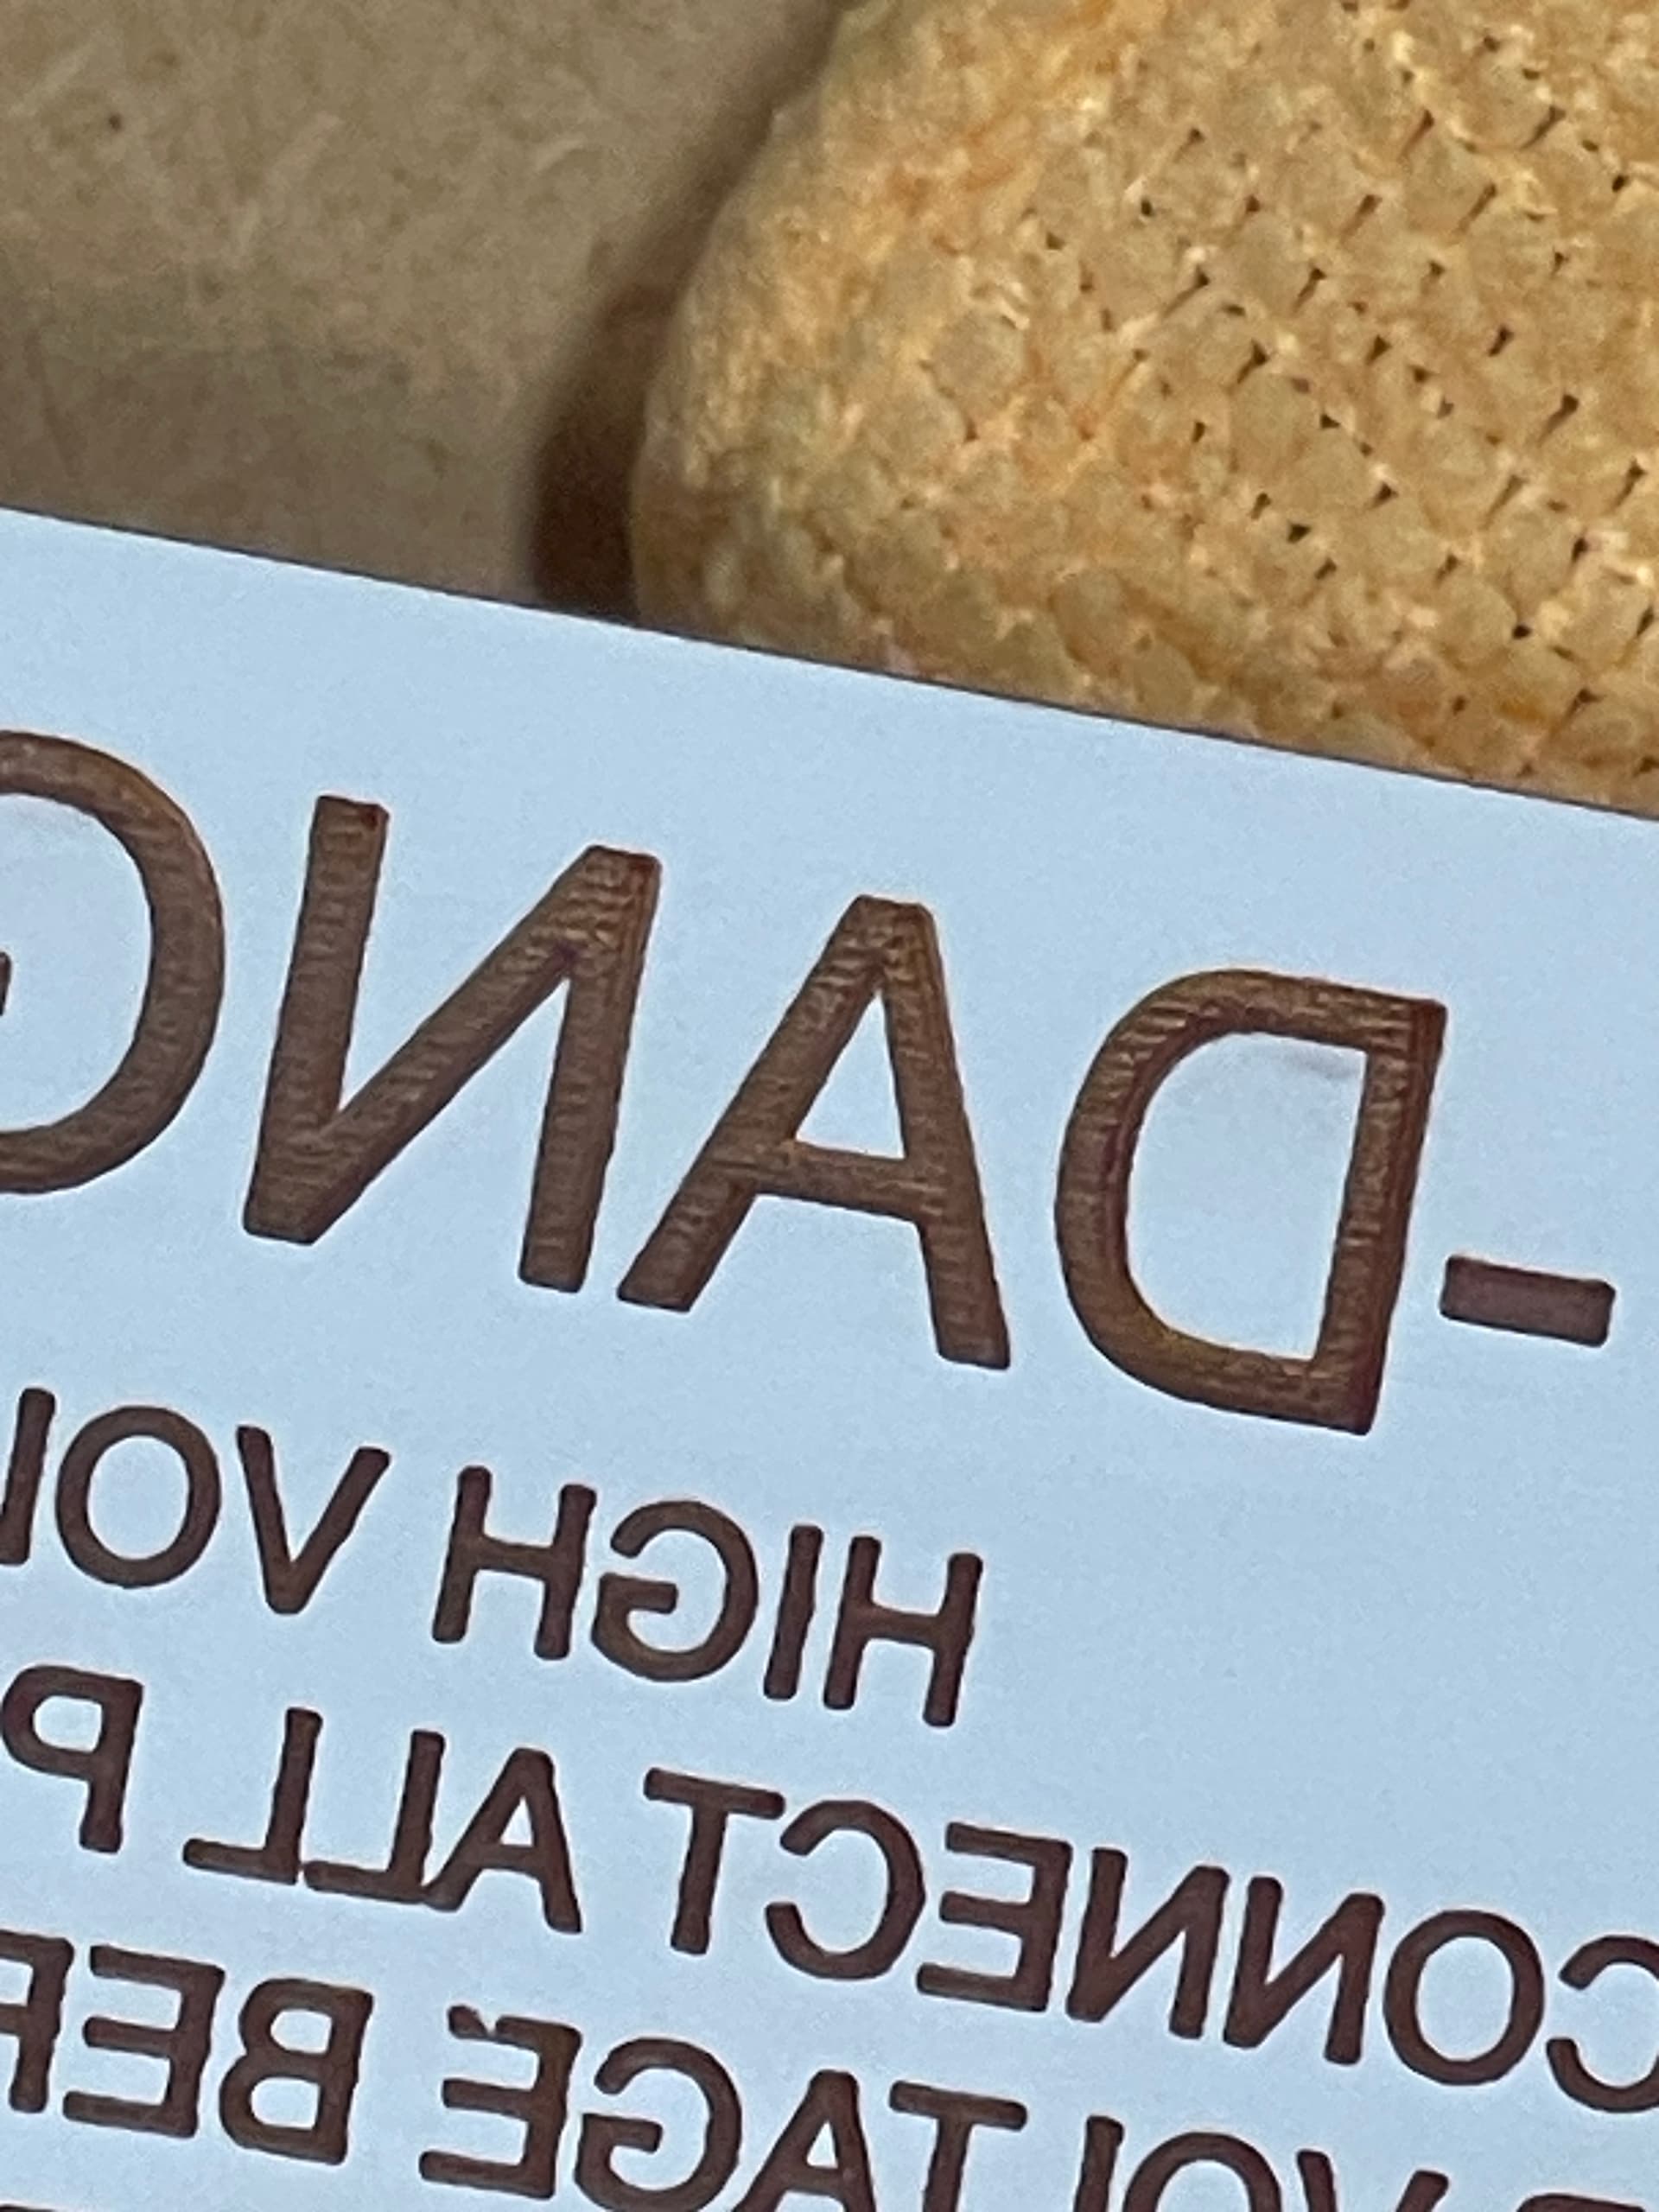
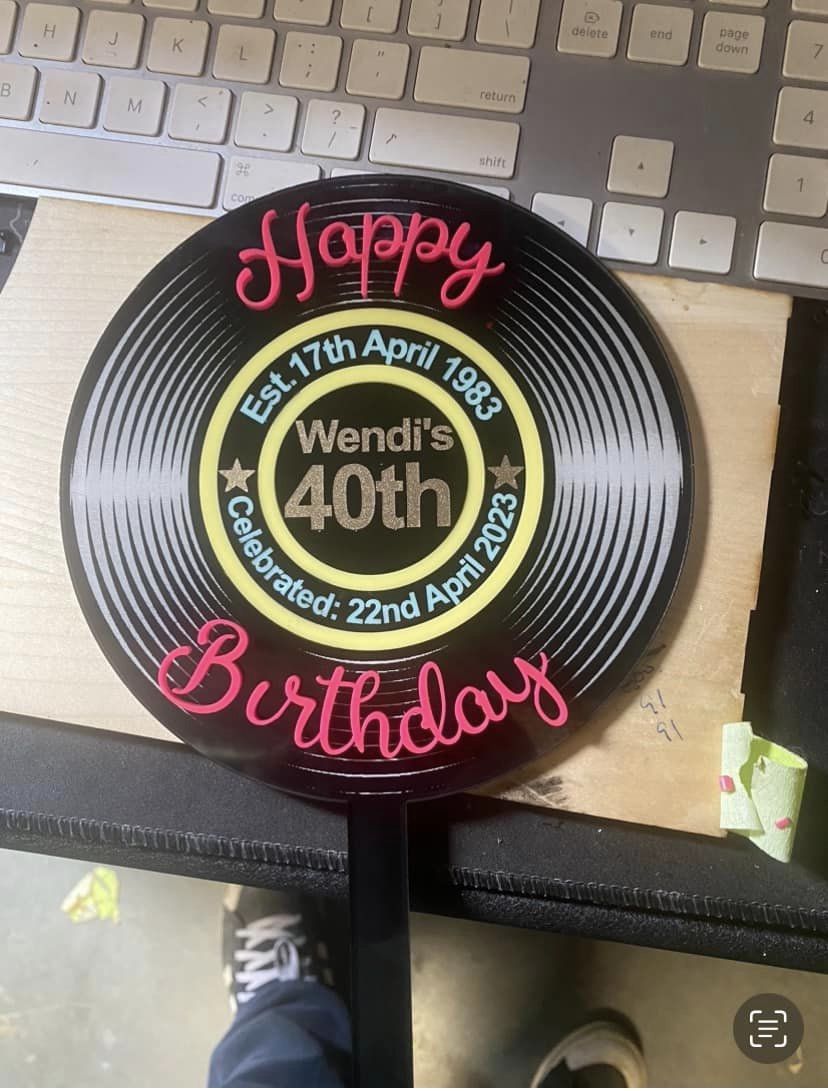
For reference, this is the quality I am looking to duplicate and have had no such luck with. I have been told time and time again from boss laser I should be able to achieve this quality. This placard was also made with the same material and paint:
Could I be missing something in the post processing/ cleaning section of this workflow?
Could the quality of the one I am trying to duplicate be a pipe dream I am chasing? I mean is this something that can be produced, or possible, on a laser?
You may have too much laser for the material. Even with the laser throttled down, the correct exposure requires more more speed than the machine can handle for small shapes.
The black sections are 2 mm across and the wobbles are on the order of 0.2 mm peak-to-peak. I’m reasonably sure the machine does not reach full speed on any of those straight sections, so the wobbles come from abrupt direction changes at whatever cornering speed it uses.
Bonus: using the very low power levels you need produces irregular tube current that doesn’t engrave cleanly, which becomes painfully apparent in acrylic surfaces. The green trace shows the laser tube current at 20% PWM with a vertical scale of 5 ma/div:
You’d think the current would be a straight line at 20% of the tube’s 25 mA maximum, but it’s a series of high-current pulses that kinda-sorta average out to the right value. Unfortunately, acrylic is sensitive to those pulses and they become visible along edges and at the bottom of engravings.
You may get better results / cleaner edges by skipping the vector engraving and fine-tuning the fill engraving settings for best edge definition, then hoping the acrylic paint backfill covers the worst of the bottom surface irregularities.
I have some experience vector engraving on TroGlass Reverse and what I found to work best is to engrave out of focus and increase the line interval to produce a smooth translucent surface on the acrylic. Taking the laser out of focus tends to melt the engraved surface and reduces the “whiteness” of the engraving. increasing the interval reduces the overlap and helps to blend the edges of each pass and reduce the prominence of the engraving lines. It takes a bit of experimentation to get it just right.
This one wasn’t painted, I engraved the reverse but reduced the power so it left a very faint amount of the black to create a silvery reflection effect. Both were done using a 2.5" lens set 2mm out of focus and the line interval set to 0.15mm.
Cheers,
Rob
I have been hoping this may not have been what it was. I was wondering if it’s possible to have “too much” wattage. Ill try skipping the vector portion snd see if I can fine tune it better.
This was black with white and gold paint. The scanning offset was out a bit but otherwise it’s almost perfect. You can get really fine detail once you get the settings correct.
regarding cleaning the acrylic after you engrave, I use Shellite (aka naptha) because it has no effect of the material and it is a good degreaser/prep to the surface for painting.
good luck!
Cheers,
Rob
Hi Rob, Wondering if you would be able to share a little more on your settings, we are rapidly running out of tester material trying to get the right settings on this Troglass, I know we will need to experiment on our machine still, but narrowing down a starting point would be insanely helpful
Thanks!
D
Hi Danille,
I have a 130 watt CO2 laser so my settings aren’t really going to help. I have also found that the plastic coating on the acrylic varies between sheets.
Starting from scratch you want a good exhaust flow and the air assist turned off. You also want to make sure the smoke is being drawn away from the engraved area and not over it.
Make yourself a small (3/4") square shape to use for test engraving on the material.
focus the lens and set your laser so it will engrave through the plastic layer and into the acrylic. you want to cut into the acrylic about the thickness of a credit card. once you get a good clean engraving pull the lens out of focus about 2mm.
that will smooth out the floor of the engraving and make it more translucent. you will lose some depth in the engraving but it should still be enough to maintain a smooth translucent finish. if not, increase the power a few percent.
I have done some experimenting with spay painting clear cast acrylic with waterbased acrylic paint and reverse engraving and it seems to work fine. I don’t know how it will hold up long term but it does engrave just fine as long as you give the paint plenty of time to cure before engraving.