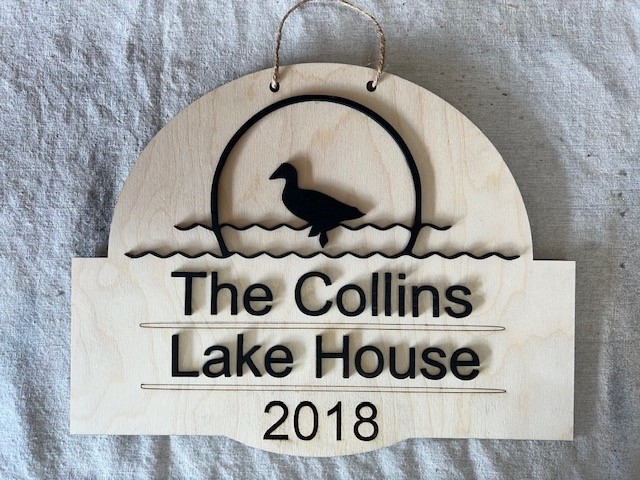
Lake House Design. 11 x 14 on 1/8 Baltic Birch Plywood.

Lake House Design. 11 x 14 on 1/8 Baltic Birch Plywood.

Ah yes…like the autum design the shadowing is from the lightsource angle.
Clean & Clear work…very nice.
Open the 2-1 file and make any changes to the Name and Date. Then save and run the 2-1 file to make the guide lines and cut out the pattern. Then open the 2-1 file and copy and paste everything but the date and the pattern in file 2-1 into the 2-2 file and cut all the parts. Use DAP Rapid Fuse Quick Set superglue to glue everything on using the guide lines to position. The date is the only item not using raised lettering. It is fill engraved but that could be easily changed.
Too bad lightburn doesnt let you have groups of cut files. Then you could do this all in one job. Just turn on one group for 2-1 and have another group for 2-2. You also can’t assign an object to 2 different layers. Guess you could still figure something out but too much messing around and easier to just do the way i am currently.
The Collins Lake House 2-1.lbrn2 (197.4 KB)
The Collins Lake House 2-2.lbrn2 (199.3 KB)
What app will open those files, the phone instructs me to go to ‘galaxy store’ to get App but doesn’t name the App.
How to batch work with updated details and the point about layers is interesting.
They are Lightburn files. You wont be able to open them on your phone. Only on a computer with Lightburn installed.
Rather than selecting and moving to a new file, select your items that you want to cut, duplicate them (CMD/CTRL D) and place on a new layer. Set your cut settings for the new layer. Disable the new layer and run your engraving and outline cut. After that process enable your new cut layer and disable the others. This can be donequickly by right clicking on the word output above the layers and selecting Invert enabled cut layers. That will toggle the state of all layers in one click.
I kind of played with that but found out you cant have one design item in 2 different cut layers. But i guess duplicating the items would work and create a new layer for cutting. But again I don’t think i’m saving any steps. Im still copying, still pasting, and still creating a new cut file.
Also I could copy all items. Then delete everything and paste back in and create a cut file for them. Then just don’t save the original. Lots of ways to skin a cat.
If you could put each design item into multiple cut files, and create cut file groups you could turn on or off it would be perfect. I guess sub groups is kind of like cut file groups but you still cant put a design item into more than one cut file.
What you’re saving is not having the project in 2 separate files. This way, it’s all in one file.
I think you’re mixing terminology. Use the term cut “layers” not files. Files refer to your saved project file or graphics files that you import. Layers refers to the different color layers where you change your settings.
Thaty’s exactly what I showed you how to do. Select, duplicate, assign to new layer, turn the layer on or off as needed, done.
I got it. Your way works. But I’m old and don’t like change. ![]() But your way is cleaner. Now if I can automatically change the work piece.How about we stack two pieces of wood together and change the focus so it does the whole job at once. Just kidding
But your way is cleaner. Now if I can automatically change the work piece.How about we stack two pieces of wood together and change the focus so it does the whole job at once. Just kidding
Me too. I’m also lazy, so I look for the easy way out.
I was once told to look for lazy people to work for you because they always find the easiest way to do things.
Bottom line is do what works for you.
Ah…soon so!
Thank’s
Nice…it even sounds good.