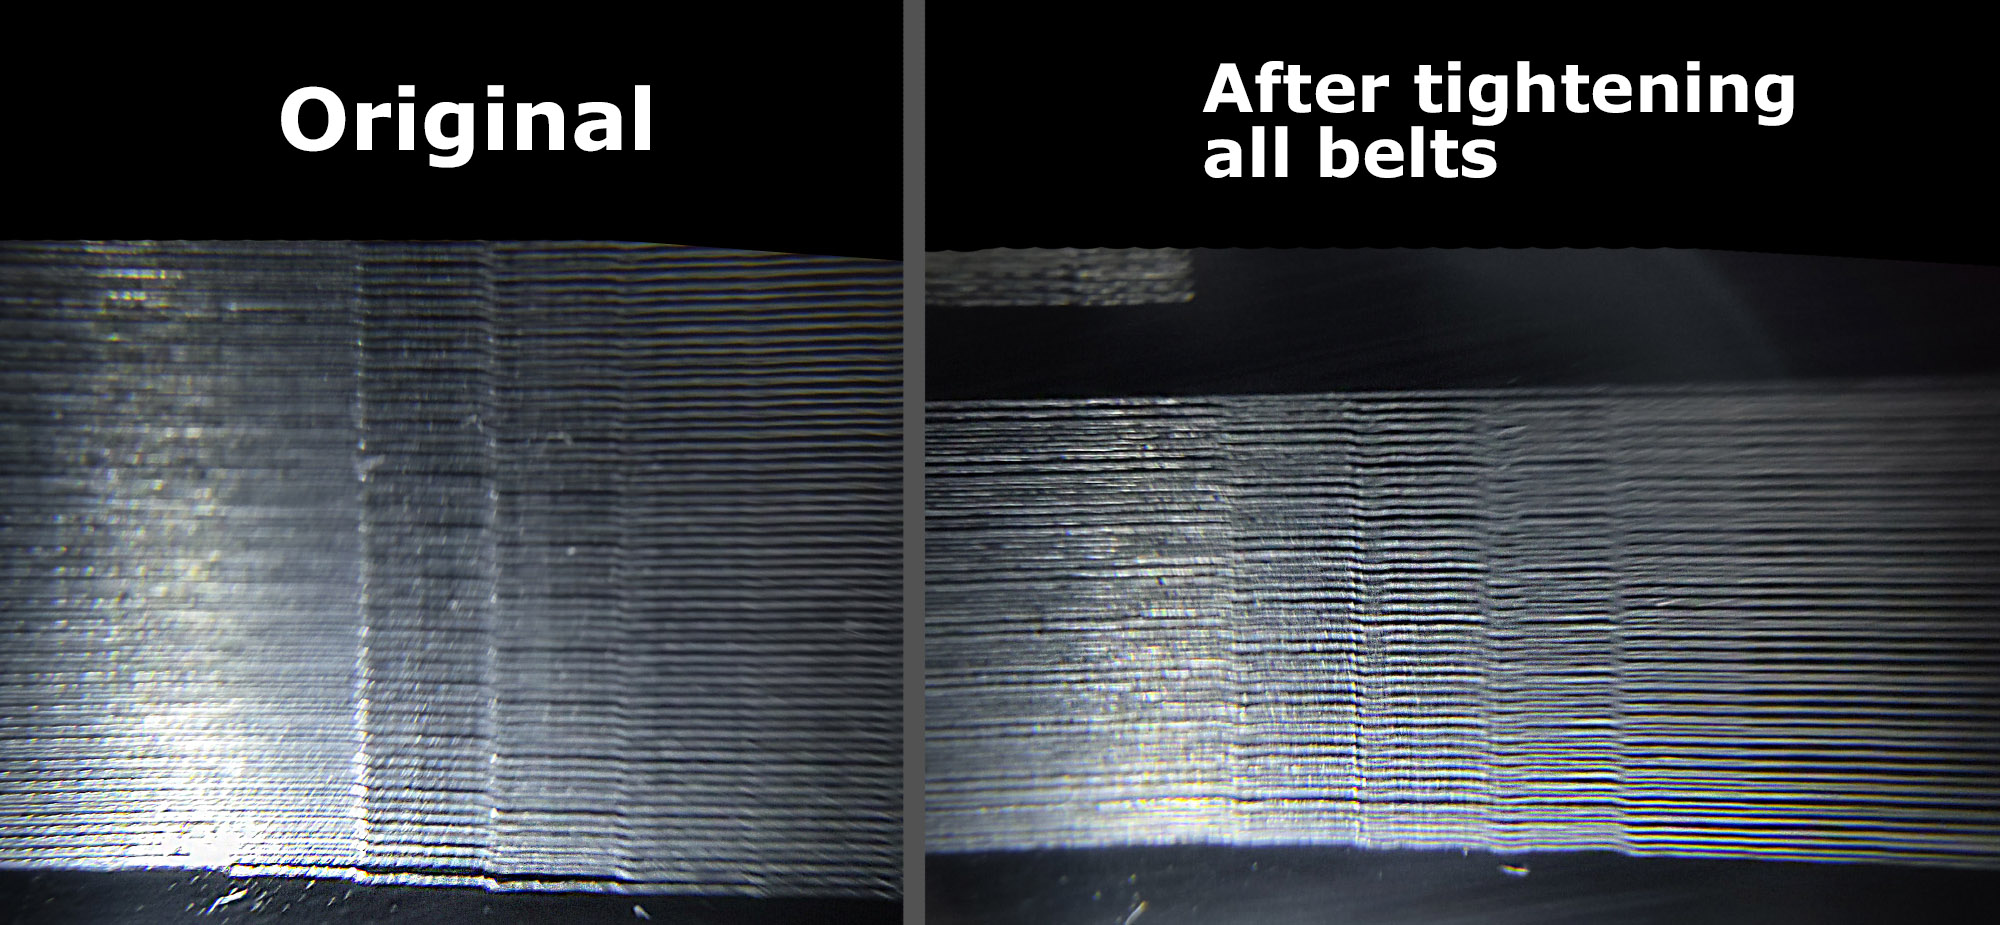
I noticed that my fairly new Acmer S1 laser has some banding issues at certain parts of the engraving area. When I look at it with a magnifying glass, it looks like the laser is bumping up a bit, which causes uneven lines and visible bands.
The first thing I did was tighten all the belts just to make sure it wasn’t as simple as that. It seems that it might have helped a bit, and the bumps are not as visible, but they still remain.
Any thoughts on what could be causing this and how to fix it?
Speed and power settings doen’t seem to affect the issue. It shows even with slow 200-600 mm/m speeds.
The bands are clearly visible to the naked eye, but the changes in any individual line are hard to see. You can see them if you look very very close, but we are talking about roughly 0.1 or 0.2 mm movements.
I’ve been trying to see if I can repeat the bumps in another part, which would mean the pulley is the problem, but after tightening the belt, it’s harder to spot the errors in other parts of the X-axis. Acmer S1 only has a 13x13 cm area, so repetition is not so obvious.
The X-axis pulley in this model is annoyingly hidden in the laser carriage, so disassembling it will take a good minute. But if cleaning the pulley grooves is what it takes, I’ll absolutely try.
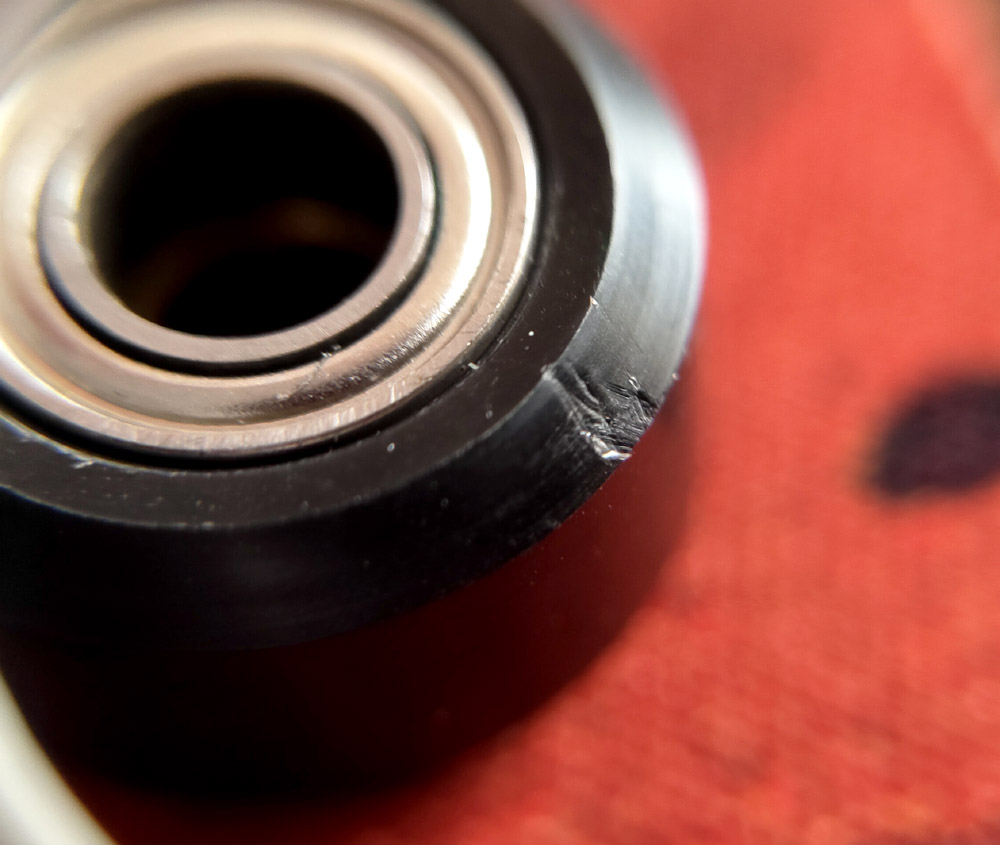
Found the reason, it was one of the roller wheels.
While disassembling and reassembling the machine, I didn’t really see anything wrong. The pulley wheels and belts looked good, and just a precaution, I switched the pulley from X-axis to Y-axis. But then I noticed something when assembling the laser carriage.
Even though the pulley and belt were not connected, I felt something odd when putting the top rail between the wheels. A little bump roughly every 4cm, and the only thing making contact was the wheels. So, I checked things again. The wheels just happen to have a roughly 4cm circumference, and wouldn’t you know it, one had a defect.
I switched the broken wheel from the X-axis to one side of the Y-axis to the eccentric nut. I thought there the defect would do the least amount of damage to the overall quality, as most of the steady movement is lateral across the other axis.
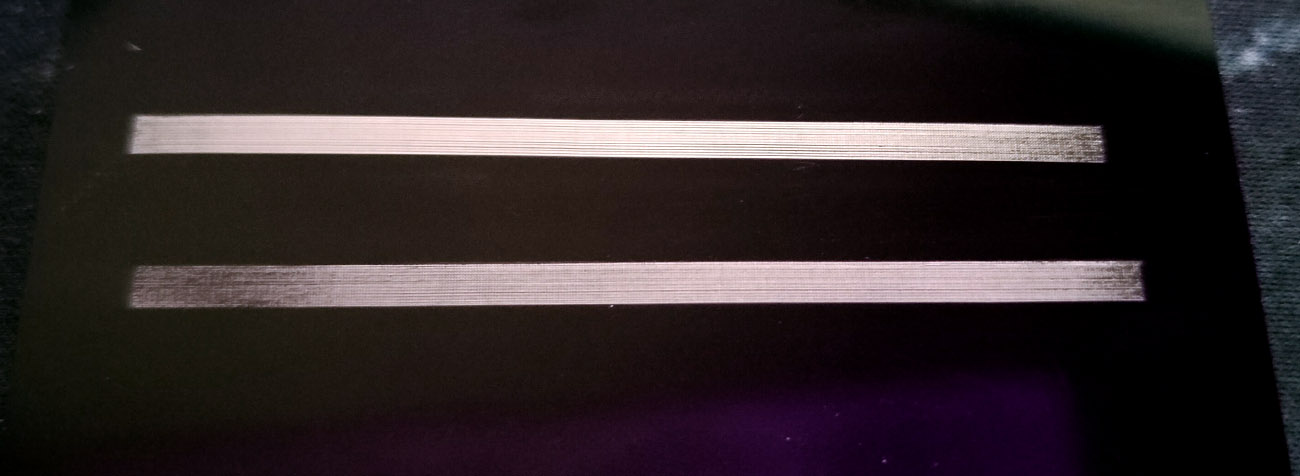
So, I put the engraver back together and tested some lines covering the full width of the engraving area. The top box is the left half of the area and the lower one is the right half, and as you can see, no more bumps, no more bands.