Laser etching topo lines on 3D milled landscape (Question)

Hello Community,

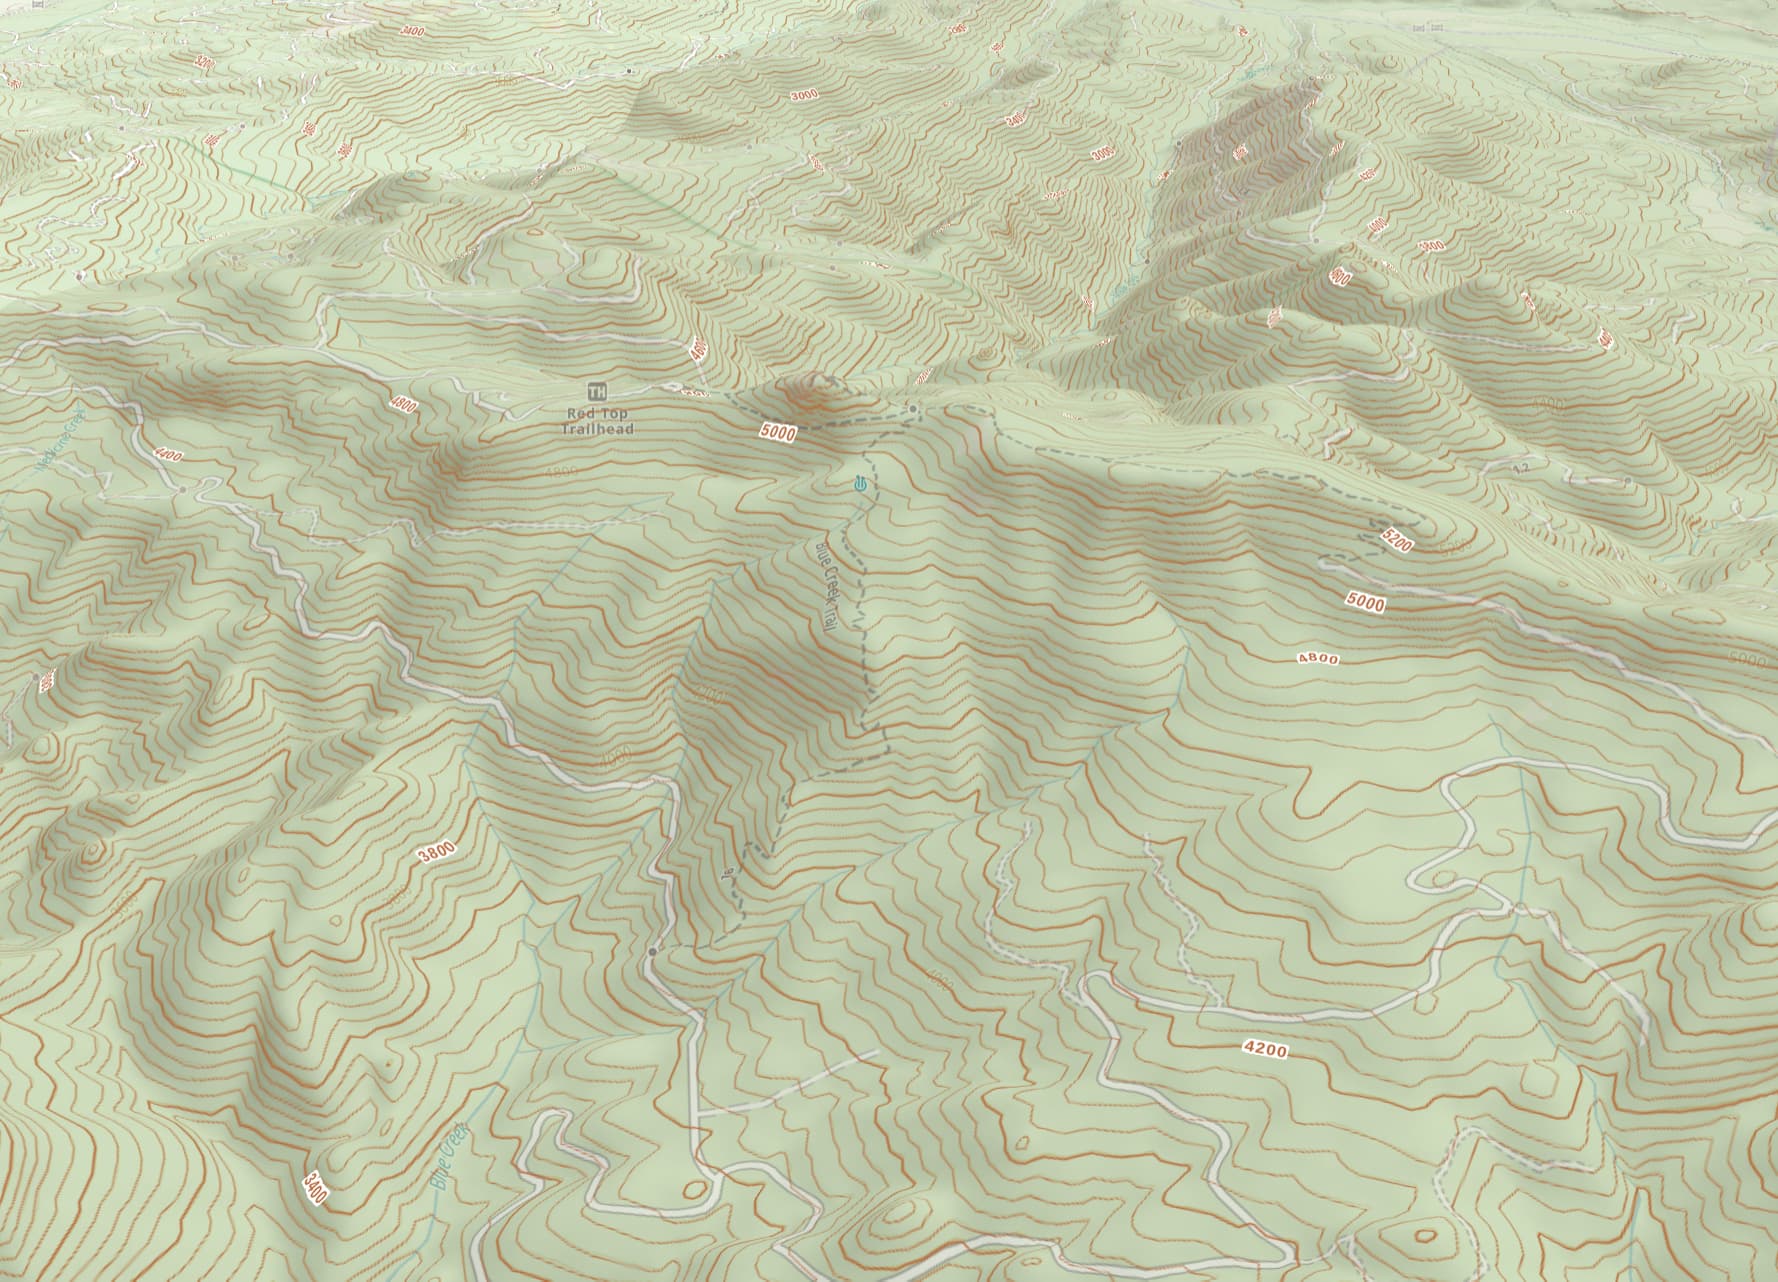
I am playing around with 3D landscapes created with my LongMill CnC. My goal is to create 3D maps that have Topo markings on them. Not laser CUT topos. I am talking more about milling 3D reliefs of landscape first then coming back with the laser and creating mark ups with etching.

I would like a physical 3D model like this picture.

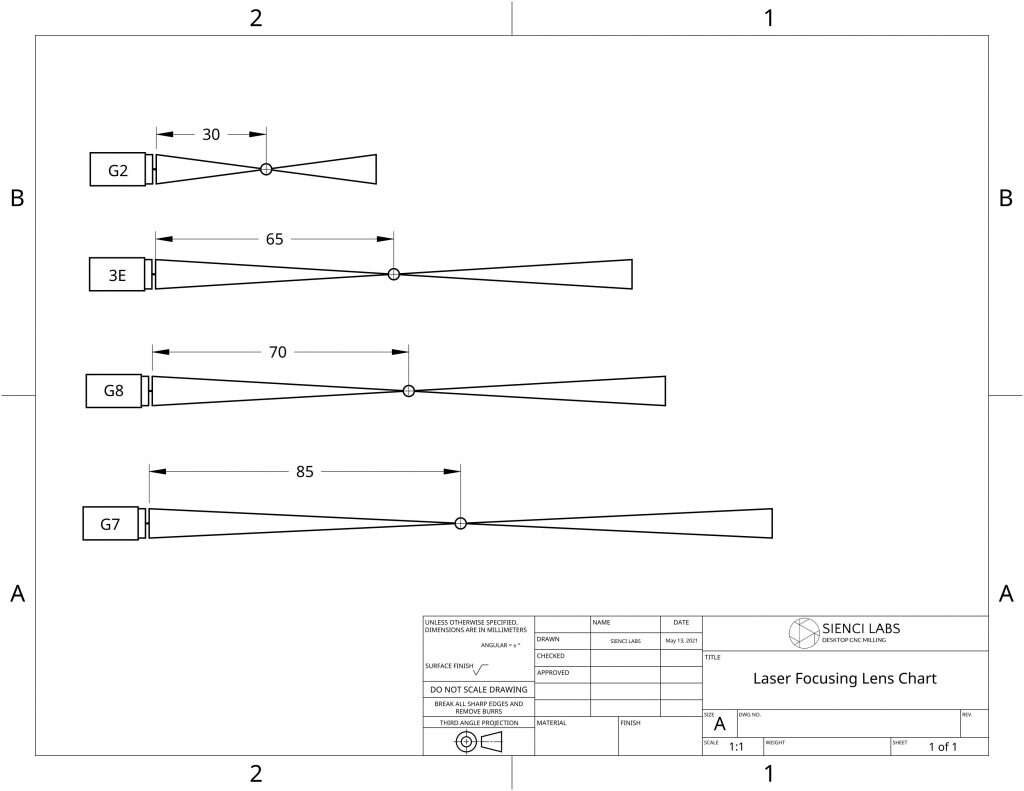
Is there a way to do this? Since the laser focal point will change in the Z axis while etching the topo lines, I can see this as a problem.

Any ideas as how to solve this? I havenā€™t seen much literature on this at all. I see that LightBurn has a Z axis enable. In truth, I donā€™t even have my laser module from Sienci yet. :slight_smile: Just trying to get a jump start on my education before I get it.

Thanks in advance for any insight as to how to do this!
-Lutra

Hereā€™s an idea.

  1. Create a separate layer for each set of lines for each unique topological elevation
  2. Then define the z-offset for each layer to accommodate the focus height
  3. Burn

I donā€™t see any reason why this wouldnā€™t work in principle. Some practical limits might be a limit on the number of layers. I think this is limited to 30 layers at least from the UI. Iā€™m not familiar with the laser you mentioned so assume youā€™ve checked that it can be driven from LightBurn. Youā€™d have to work out a method of aligning the CNCed material to your design but thatā€™s relatively straightforward.

Would be best if you could auto-generate the layers. You may be able to do this from your CAD software if you can get it to generate the design with LightBurn layer colors.

1 Like

Thatā€™s what I would do also. Each level of topography is itā€™s own separate burn. When itā€™s done, refocus to the next layer up or down. Repeat until done.

1 Like

Thank you. This is a great idea. Yes, the diode laser is compatible and Sienci recommends LB as a great app to use for etching, cutting etc.

When my laser actually arrives, Iā€™ll have to give this a shot. Maybe with free Fusion 360, I can create a seperate tool path for this. Vetric / Aspire is too rich for my blood now and not sure if it will even work.

So thank you @berainlb and @LeoG for reccomending this approach.

I supposed the challenge in the G code would be to turn the laser on and off, so it doesnā€™t leave tool path lines between vectors. Oi, that will be a pain. Maybe a dev here would also think this is a clever idea and put in functionality for LB to address this. Something like a Snap Vectors to a 3D model (STL) or something.

Sincere appreciation and thanks!
-Lutra

LightBurn manages this so itā€™s trivial. Each vector and each layer will be burned separately.

Iā€™m not familiar with this. How does it work?

IMHO, the focus is going to be the issue. There are more than 30 levels and in fact are probably ā€˜thousandsā€™ of variations based on the topo.

How long of a lens can you get hold of? To give you a little more leeway with the focus.

I had thought about this and wondered about applying one of the CNC mapping probe to map the surface or even use the topo map itself. Iā€™m afraid Lightburn wonā€™t be much help in either.


The other issue is ā€˜registrationā€™ to the laserā€¦ The camera could help hereā€¦

Good luck

:smile_cat:

The diode laser has a pretty long focus.

1 Like

Focus should be fine as long as itā€™s only the topography lines. If the rivers or some of the slanted text needs to be engraved then that becomes a real challenge.

I was just thinking aloud. I wouldnā€™t know how it would work. In Fusion 360, I believe that you can snap text (Vectors) to objects and have the text conform to the shape. I wouldnā€™t know how it would work either in this scenario. :wink:

Here is the laser: Laser | Sienci Labs
Here are the lens offerings - It comes with the G2. I have the 3 Element and the G8 on order.

Ah, yes, if I did it the way you suggested. Is it true, at least in LB, that anytime Z is initialized it turns the laser off?

I am imagining that you focus the laser and set the Z height, then start the G code on the 3D model tool path. It moves the gantry, following the contours of the 3D model and only burn in the vectors (in this case, Topo lines, roads, hiking trails, etc) while maintaining the original set Z height to preserve the focal point (length).

I am not sure what this means?

Please excuse my ignorance. I am just getting started in the hobby and most likely biting off more than I can chew. Iā€™m mechanically inclined and have a computer hardware background. Lacking developer skills but still learning Arduino, etc. So, I have the skill sets for this and there is plenty of information out there. Itā€™s just timing to get and absorb it. :slight_smile:

OK, my idea behind this is that my wife and I love to hike, camp, and over land. We have a friend who is a hard-core hiker and mountain climber. Heā€™s climbed some pretty gnarly peaks and plans on doing more. I would love to show his base camps, climbing paths, along with other cool landscape markings, etc. I want to make those 3D models for all of us as commemorative pieces and have a ton of fun and learn along the way.

Just looking at the easiest way to do this. :slight_smile:

Again, thank you!

I donā€™t believe LightBurn currently does anything where laser is active during a Z move. Iā€™ve seen hardware based dynamic auto-focus systems that will follow the contour of a material. I donā€™t know if those systems require a trigger on the software side or ifā€™s a hardware on/off.

The challenge will be in the non-topo lines, especially if youā€™re going to have features that span z-heights. If you could automate the generation of the ā€œlayersā€ you could do a fairly granular set of layers and practically paint-on all the features. Youā€™d probably want to keep whole letters intact but I suspect this would be good enough for most everything else.

What type of layer height would you have on the CNC mill? And what material were you thinking of using?

I suspect Jack is talking about alignment of laser to pre-milled material. Heā€™ll correct me if this isnā€™t right.

I think thatā€™s a great idea creatively. Or use laser cut flag pins. If you have a craft cutter that can bring in some other materials and textures as well.

1 Like

Thanks for the reply @berainlb.

If anyone is interested, I am talking with the Sienci people about this. Here is the forum post.

I would like this thread to be about having the ability for us as a community to be able to burn a 3D model and keep laser focal length perfectly set with Z manipulation. I think that would be highly beneficial. It would save valuable time in any project. I really donā€™t want to have to set the focal length manually, in the middle of the project. I also donā€™t want to set x number of layered tool paths in my project if I donā€™t have to. Shouldnā€™t math do this for us?

I agree, it really has nothing to do with topo lines now. Regardless of what you want to burn, there is nothing that I know of now that will keep a consistent focal length while etching a 3D model with height.

The answers - which I sincerely appreciate - are to burn with multiple tool paths at different heights or to work inside the laser focus length norms without Z translation.

The Z height limitation is about 4.5" ~ 115mm based on the way I have my table setup. I raised the Y rails about .25" to get a little more Z height on my table.

I plan to use hardwood for my 3D models of terrain - mostly mountains and back country. At this point, I donā€™t even have my laser yet, just doing a ton of reading, watching videos, and playing with trial versions of software. I am carving some landscapes but mostly in cheap pine until I get good at it.

I love your idea about experimenting with other materials, which I plan to do. Glass, Acrylics, epoxy pours, leather, etc. Again, thank you for taking the time to reply.

I hope a dev from LB reads this and thinks this is a great idea to implement. :slight_smile:

-Lutra.

This topic was automatically closed 30 days after the last reply. New replies are no longer allowed.