I have cleaned, checked belts and screws, connections and uninstalled and installed. Still not framing a box and making a grinding noise each time. Setting are all good and I sent a copy of codes that it was giving me. Now what do I do?
Check the motor cables. And also upload a video of the effect. Stepper motors make different types of noises.
I have downloaded LaserGRBL free softward and sculpfun s9 works there so why won’t my paid version of Lightburn work without any problems
The video link is not working unfortunately.
If it works in LaserGRBL, you are using wrong settings in LB. Here is a set of screenshots of the settings you need to set: Setting up the software - Diode Laser Wiki
Still have no answer and no help to solve this problem. I have opened previous projects that worked fine and still am getting the grinding noise and not framing correctly. Some times with will frame 2 sides then grind and go ballistic on the 3rd and 4th sides. Sometime it will frame 1 side then sit still for 2nd side and move the 3rd side and still on the 4th side with no grinding noise. It is not framing correctly so the laser settings are not the issue if it will not frame correctly. I really need someone to call me to get this fixed as i have projects passed due and no help to solve this issues.
I’m seeing plenty of help for you here.
These reports tell us how your Sculpfun engraver is set up and how LightBurn ought to communicate with it. Once we know what is configured (or not) we can set up LightBurn to communicate with it.
You’ll need to share the information in these reports here so we can see what your engraver is expecting.
I’m confident that you’ll see that you’re getting the help you need when you pause and consider that the questions being asked and suggestions being made are diagnostic and will help you get to your goal.
Folks here really are trying…
This is probably where things aren’t right.
LaserGRBL does not offer the different coordinate systems so it’s likely starting where you’re telling it to start from.
No one here suggested this approach. I advise against it when asked but folks really seem to think it’s worth a try. It’s rarely productive.
I’m looking forward to the settings reports.
Waiting for connection…
Grbl 1.1h [‘$’ for help]
[MSG:‘$H’|‘$X’ to unlock]
error:9
G-code locked out during alarm or jog state.
[MSG:Caution: Unlocked]
ok
[VER:1.1h.20190825:]
[OPT:V,15,128]
Target buffer size found
ok
<Idle|MPos:0.000,0.000,0.000|FS:0,0|WCO:0.000,0.000,0.000>
ok
Waiting for connection…
Grbl 1.1h [‘$’ for help]
[MSG:‘$H’|‘$X’ to unlock]
error:9
G-code locked out during alarm or jog state.
[MSG:Caution: Unlocked]
ok
[VER:1.1h.20190825:]
[OPT:V,15,128]
Target buffer size found
ok
<Idle|MPos:0.000,0.000,0.000|FS:0,0|WCO:0.000,0.000,0.000>
ok
<Idle|MPos:0.000,0.000,0.000|FS:0,0|Ov:100,100,100>
ok
Starting stream
Stream completed in 0:07
<Idle|MPos:0.000,0.000,0.000|FS:0,0|Ov:100,100,100>
ok
Starting stream
Stream completed in 0:07
<Idle|MPos:0.000,0.000,0.000|FS:0,0|Ov:100,100,100>
ok
$i,
error:3
Grbl ‘$’ system command was not recognized or supported.
$$
$0=10
$1=25
$2=0
$3=0
$4=0
$5=0
$6=0
$10=1
$11=0.010
$12=0.002
$13=0
$20=0
$21=0
$22=1
$23=3
$24=200.000
$25=3000.000
$26=250
$27=3.000
$30=1000
$31=0
$32=1
$100=80.000
$101=80.000
$102=250.000
$110=6000.000
$111=6000.000
$112=1000.000
$120=1000.000
$121=1000.000
$122=1000.000
$130=410.000
$131=400.000
$132=200.000
ok
$#
[G54:0.000,0.000,0.000]
[G55:0.000,0.000,0.000]
[G56:0.000,0.000,0.000]
[G57:0.000,0.000,0.000]
[G58:0.000,0.000,0.000]
[G59:0.000,0.000,0.000]
[G28:0.000,0.000,0.000]
[G30:0.000,0.000,0.000]
[G92:0.000,0.000,0.000]
[TLO:0.000]
[PRB:0.000,0.000,0.000:0]
ok
?
<Idle|MPos:0.000,0.000,0.000|FS:0,0>
ok
$
[HLP:$$ $# $G $I $N $x=val $Nx=line $J=line $SLP $C $X $H ~ ! ? ctrl-x]
ok
This is the copy of the codes you requested.
In the Console window, after you see the word ok and before doing the next thing, please type the following:
$22=0
then press enter.
$20 (soft limits enable) and $21 (hard limits enable) are both equal to zero in your settings. This means that they are turned off. This turned-off the limits of the engraver. These limits are necessary for homing. $22=0 turns off homing to match what’s there.
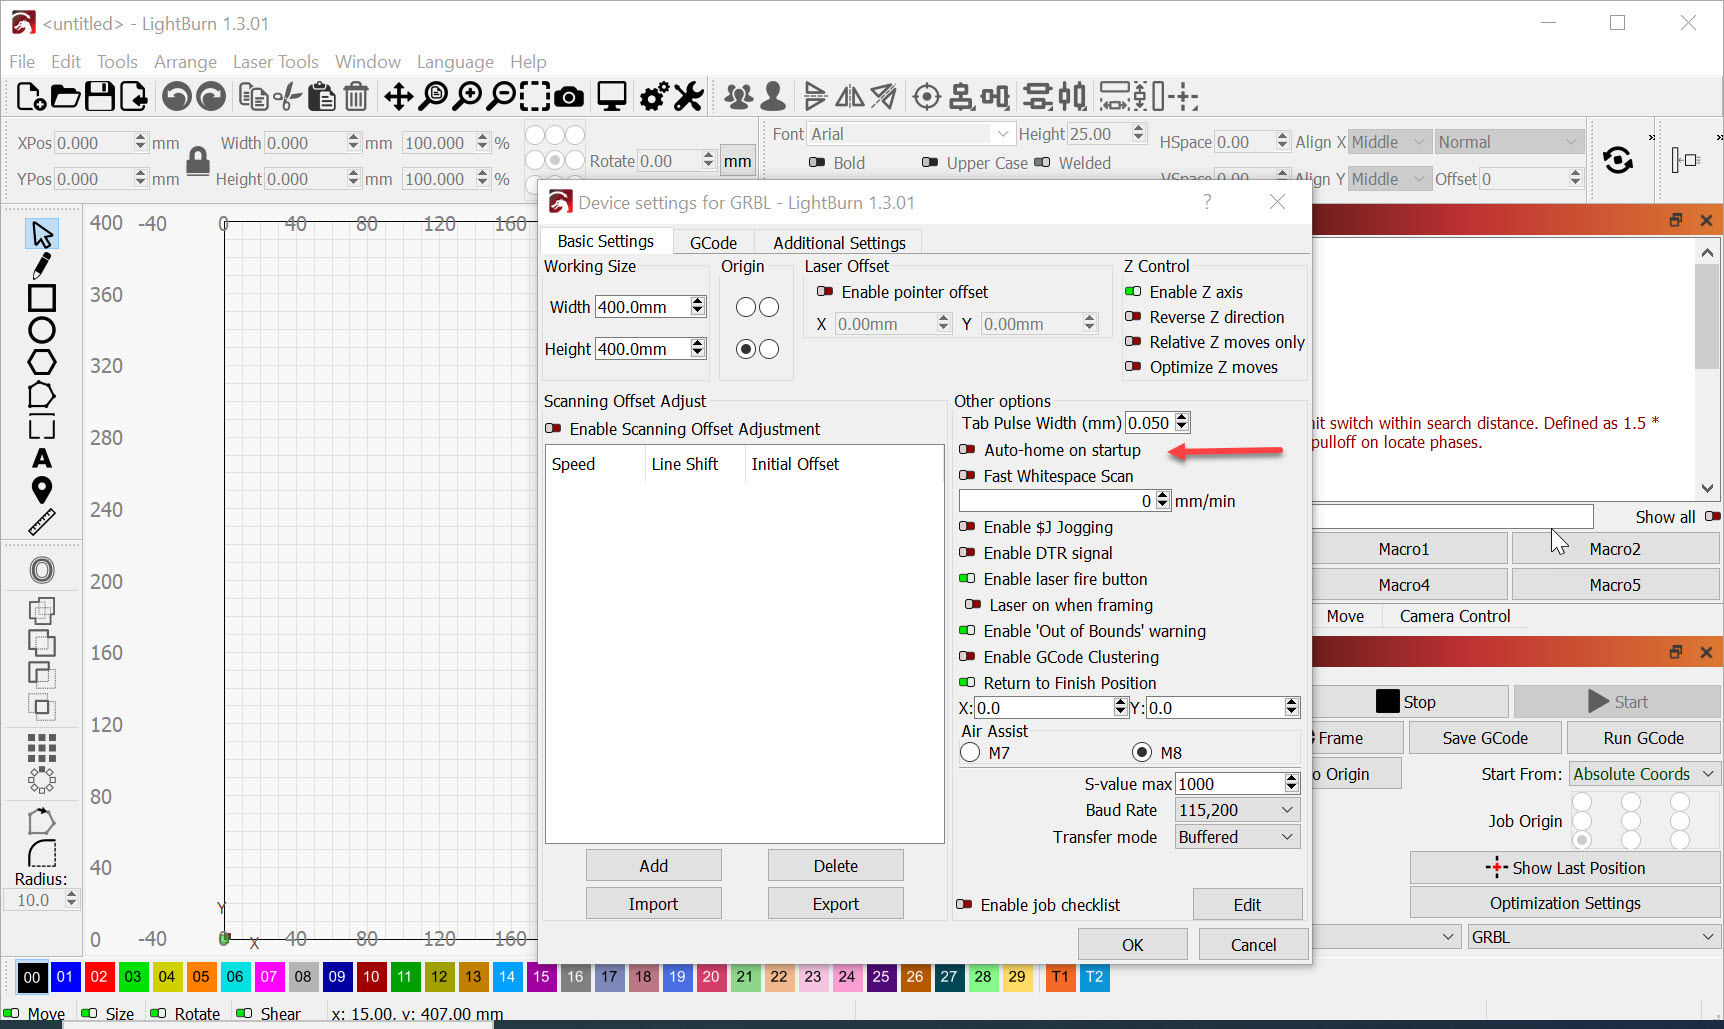
You will also want to turn off Auto-Home on startup.
Click Edit, click Device settings, and make sure this switch is off.
Then click the OK button near the bottom of the window.
Also of interest in your settings, $130 = 410mm (max travel X) and $131 = 400mm (max travel Y) doesn’t reflect your work area in LightBurn.
Please adjust this at your convenience as follows.
After you see the word ok in the console window,
You can simply change the max travel Y by typing the following into the console window $131=800 then press enter. Please use a slightly smaller number than the available work area to prevent collisions.
This is a pretty solid write up of what all those settings mean. It’s definitely worth a read.
Set up this way, you will have to treat your engraver as if it doesn’t have limit switches. Here’s a great video of how to manage the coordinate systems with and without them.

Once you get a few of your projects and deadlines looked after we can readily re-enable the Limtis, Homing, and auto-homing on startup. Let’s get you out of the woods first.
Please let us know if there are any other stumbling blocks. Most of the early stumbles are well known and we’re absolutely willing to help.
John changed by parameters bed size to match my set up under device settings, my auto home at start up was turned off, exited out of lightburn and turned off sculpfun s9 and restarted computer turned on the sculpfun s9 tried to frame a small box and the framing is still going ballistic and not even framing the box. It seems to frame one side then goes ballistic grinds then grinds on the next side and grinds and ballistic on the 4th side then it will go another direction after it should be done. The framing is not working now what do I do.
Size good, autohoming off good…
With all the homing features off, and before powering up, gently move the engrave head of the laser engraver to the front left and side of the machine before applying power.
It’s in the Video I offered but it’s really easy to overlook.
Start LightBurn and plug in, connect and power up the engraver.
You should see no homing behavior when it starts.
We’ll need to check the settings report again.
Please type $$ in the Console Window and press enter.
Copy and paste them if you like - you know what they mean - I trust you.
I’d like to make sure the size change $131 and the homing-off $22=0 persisted after shutting down and powering back up.
There’s a setting that a manufacturer can apply that makes it so the parameter change won’t survive turning the engraver off then back on again. I’m hoping Sculpfun didn’t do that and that the changes to the settings persisted.
Auto-home on startup should have stayed off. Please click edit, Device Settings and confirm this. While in Device Settings, make sure the Origin is in the right place and you’ve set the origin to Bottom right.
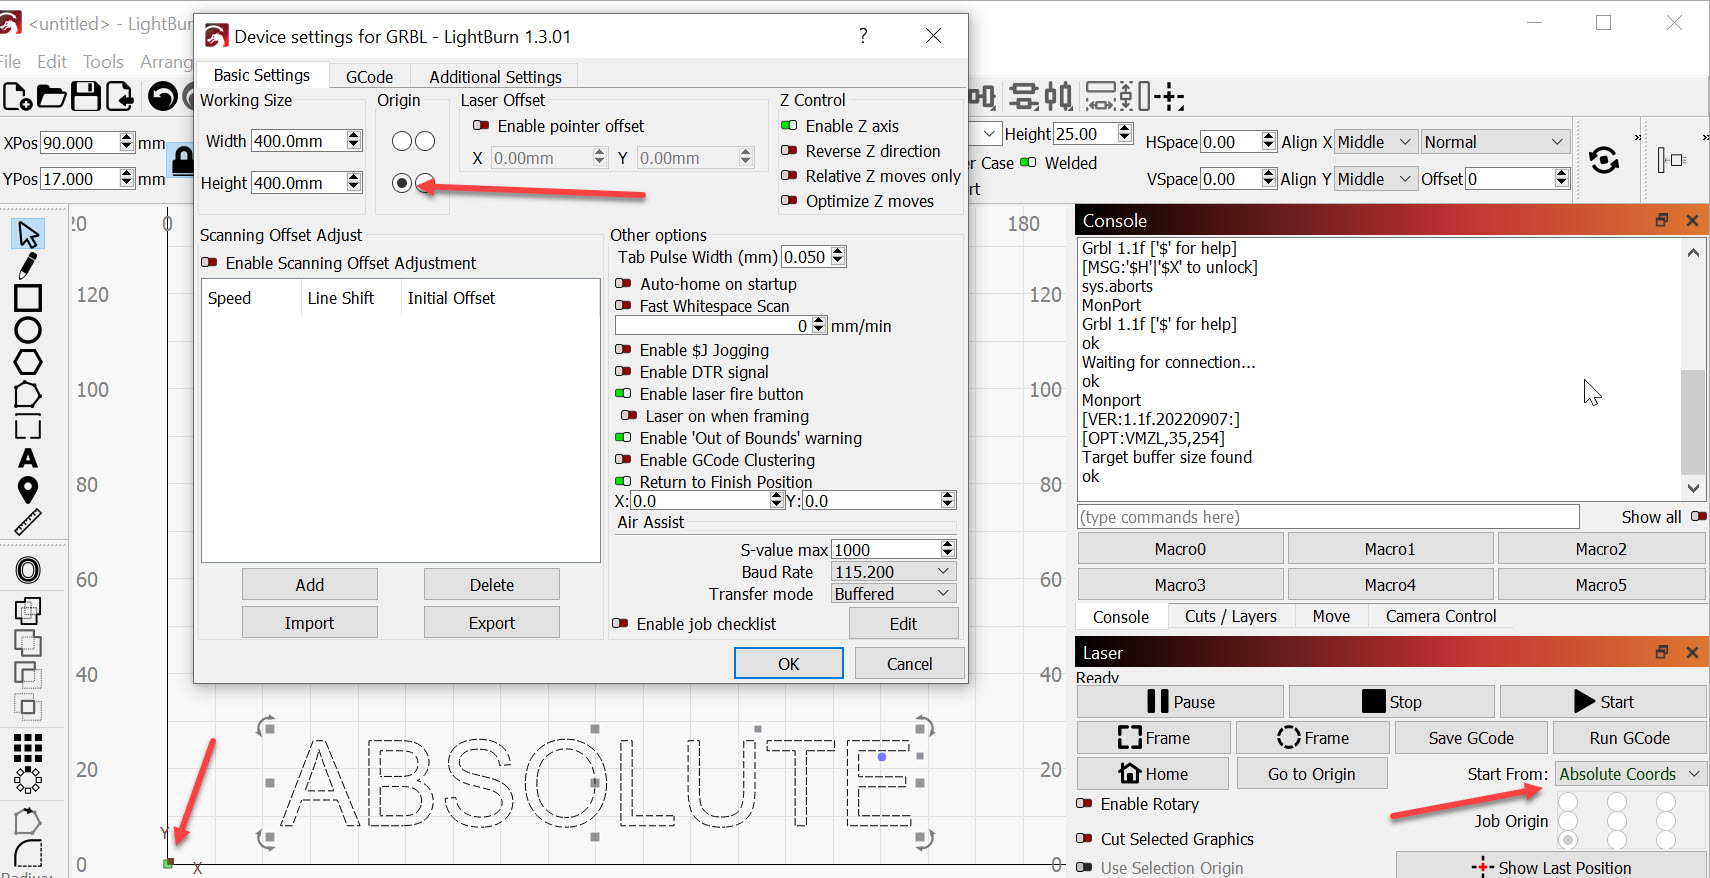
Next, confirm that the origin is front right in Device settings, and the ‘Start From:’ box in the Laser window says ‘Absolute Coords’. This will put both coordinate systems into the bottom right corner of the workspace (arrow) where the laser powered up.
If it still crashes after this we’ll go after wiring and see if the X-axis motor and Y-axis motor wiring is crossed up.
moved to left bottom corner turned on lightburn no homing but that was not doing that before. When I go to frame a simple box it will start on the x axis grind on the y axis does the x axis and grinds on the y axis and then will go ballistic at the end and go off on another direction. This is the same thing as before nothing has changed. It was working fine completed a project I cleaned the laser then started the same project and the framing went ballistic. I used the same settings as before so nothing was changed. I don’t understand why Lightburn will not work we have projects pasted due and loosing business because the system will not work.
Waiting for connection…
Grbl 1.1h [‘$’ for help]
ok
[VER:1.1h.20190825:]
[OPT:V,15,128]
Target buffer size found
ok
Grbl 1.1h [‘$’ for help]
ok
[VER:1.1h.20190825:]
[OPT:V,15,128]
Target buffer size found
ok
$$
$0=10
$1=25
$2=0
$3=0
$4=0
$5=0
$6=0
$10=1
$11=0.010
$12=0.002
$13=0
$20=0
$21=0
$22=0
$23=3
$24=200.000
$25=3000.000
$26=250
$27=3.000
$30=1000
$31=0
$32=1
$100=80.000
$101=80.000
$102=250.000
$110=6000.000
$111=6000.000
$112=1000.000
$120=1000.000
$121=1000.000
$122=1000.000
$130=400.000
$131=940.000
$132=200.000
ok
<Idle|MPos:0.000,0.000,0.000|FS:0,0|WCO:0.000,0.000,0.000>
ok
Starting stream
Stream completed in 0:09
Grbl 1.1h [‘$’ for help]
I don’t know yet either, but all the settings remained in place which is great…
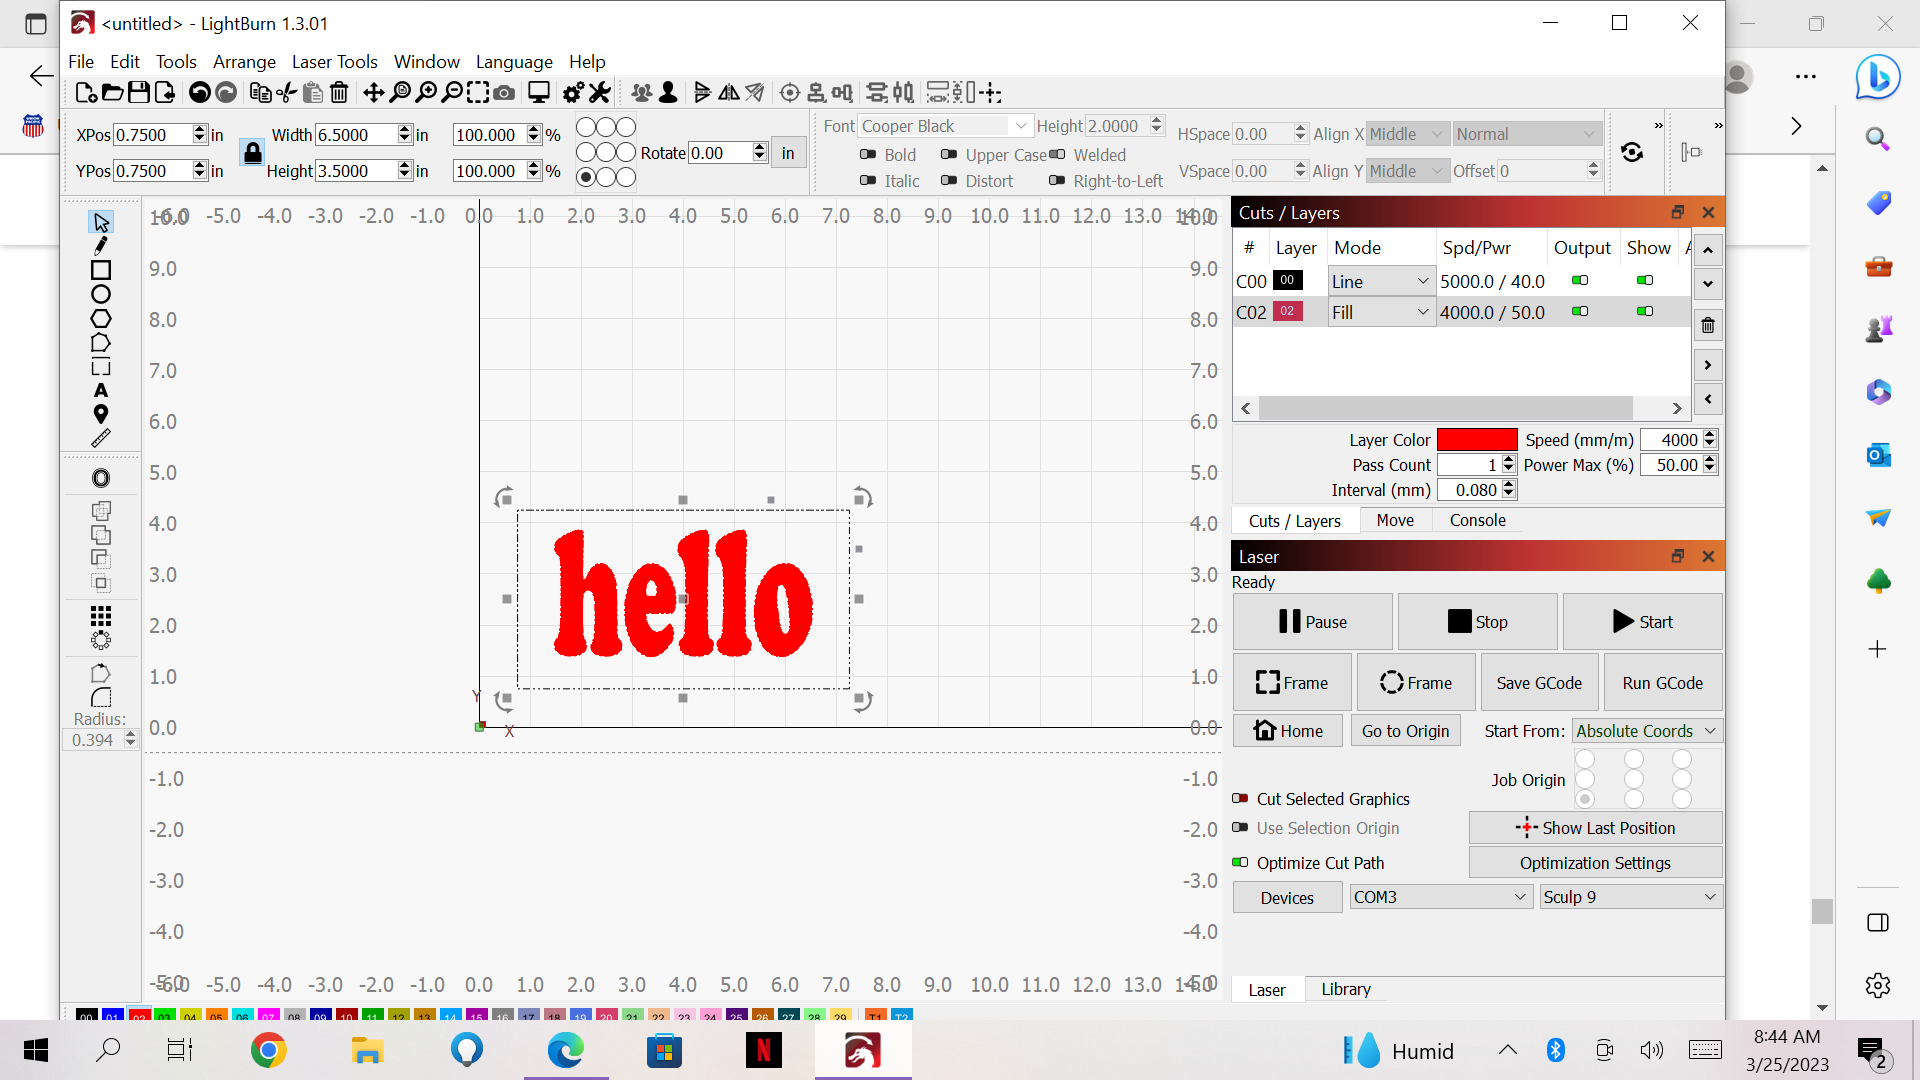
I was hoping for a screen capture or confirmation about the coordinate system showing the origin in the bottom corner, and the “Absolute Coordinates” shown in the Laser window.
Not what is seen here:

Hoping for this: (especially Absolute Coordinates - Don’t worry about the two arrows on the left. They seem like they would be correct here.)
Choosing the correct coordinate system is critical to success.
This is really handy for verification:
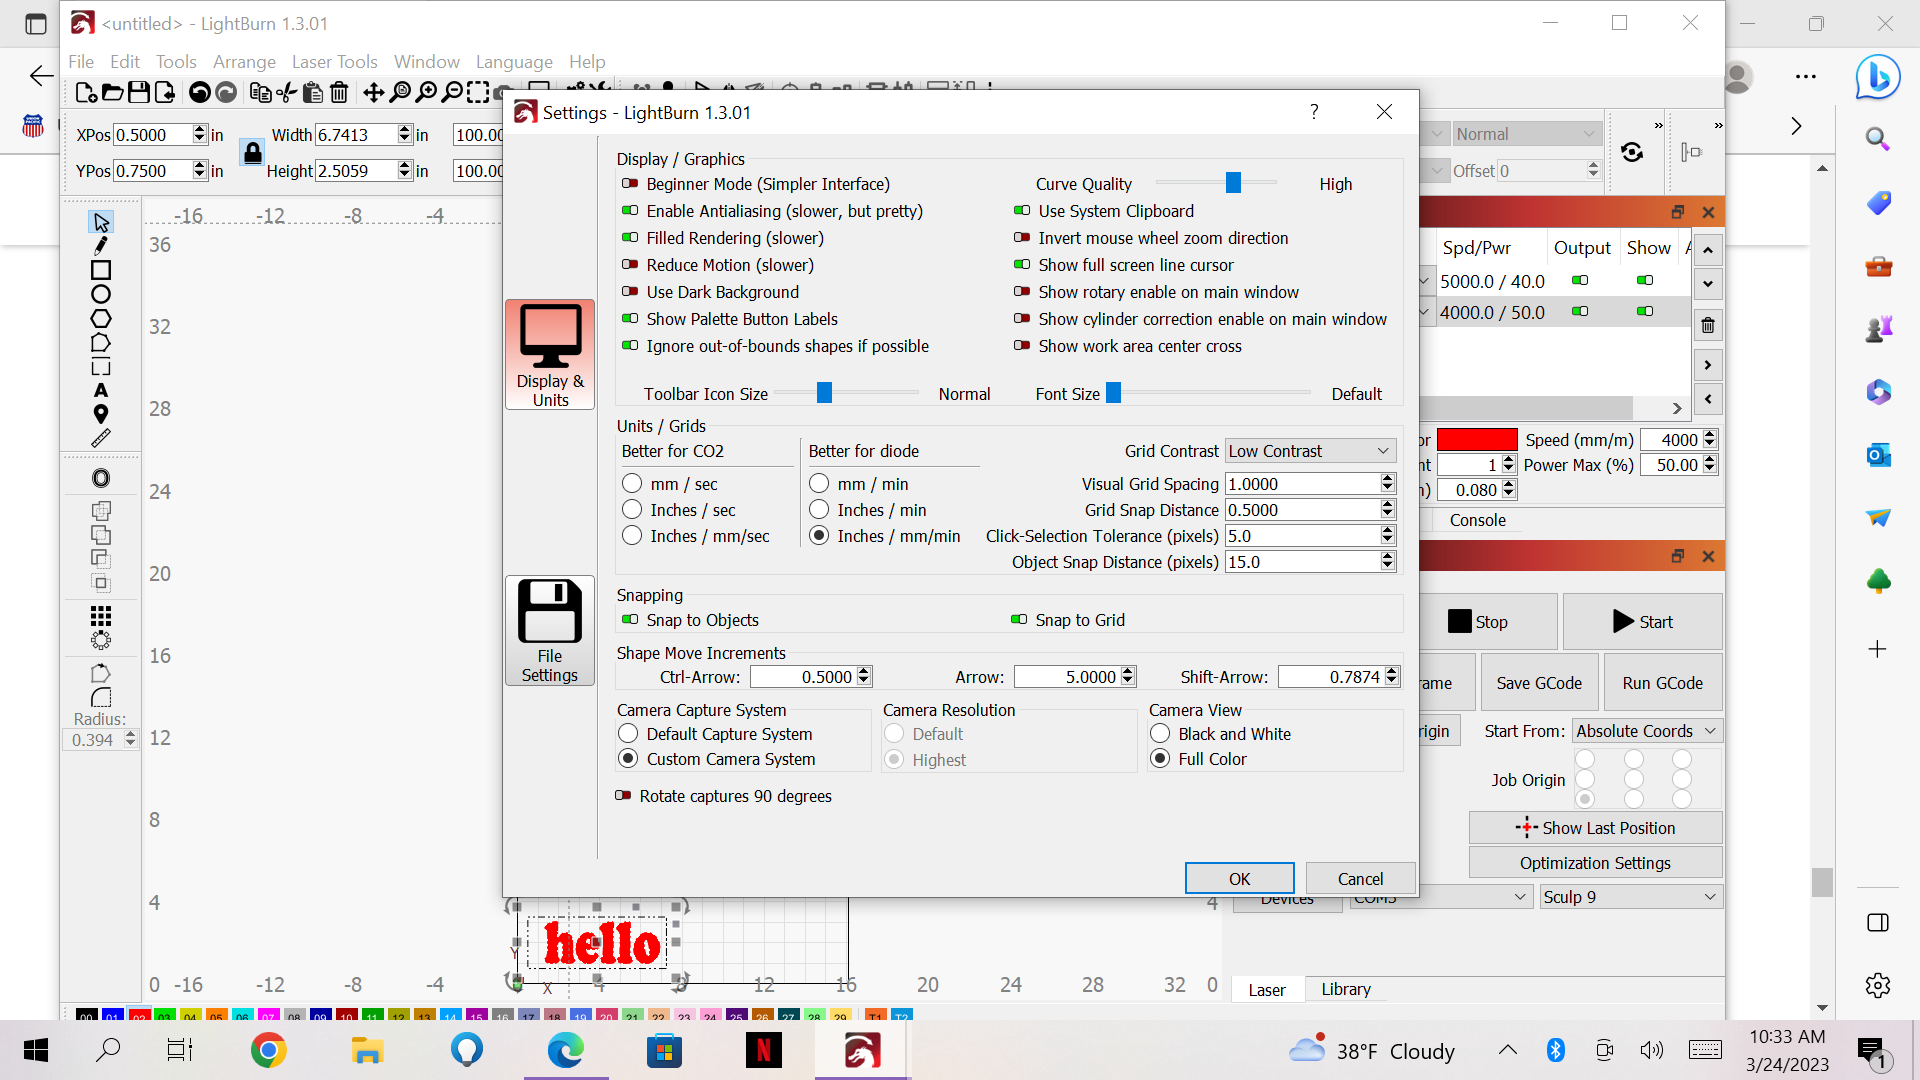
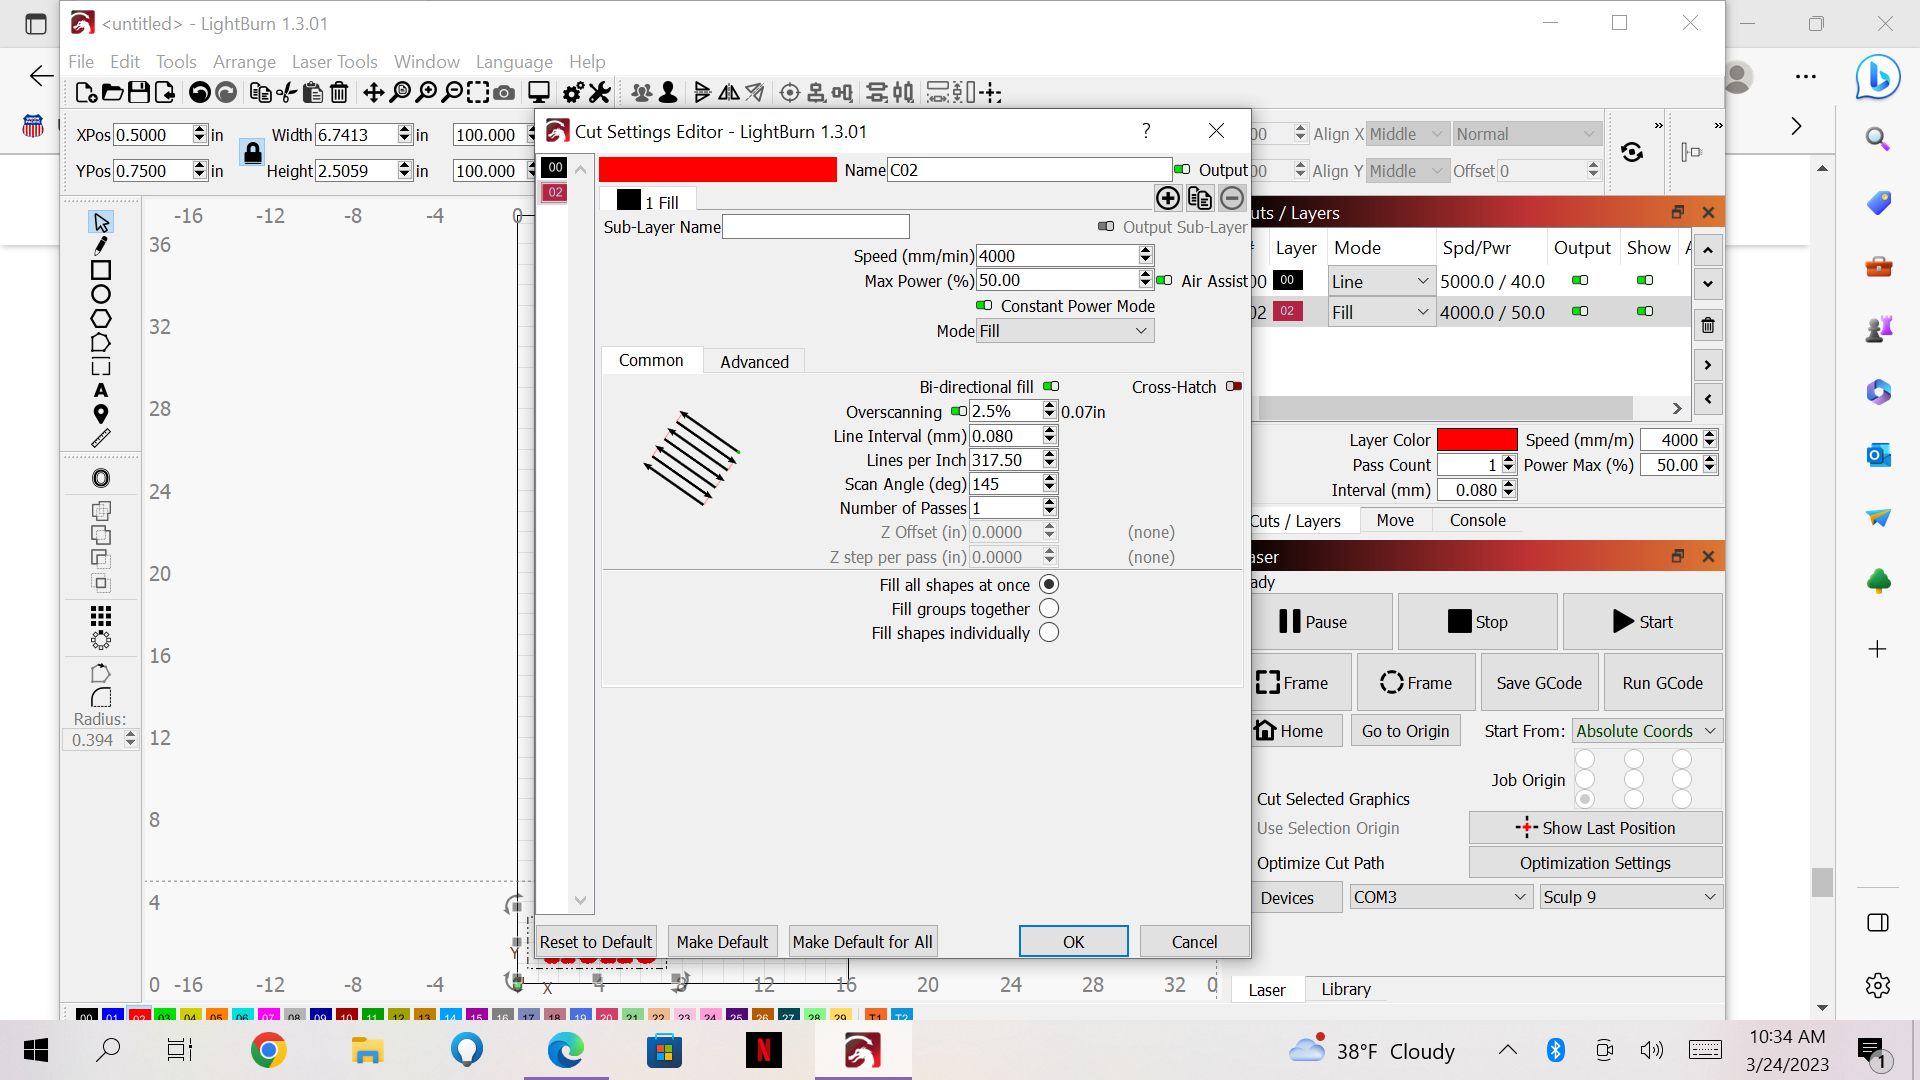
It would also be great to capture the work area and the Cuts / Layers window to make sure you’re not asking for a large number of inches per minute (or worse yet, a large number of inches per second) out of the engraver.

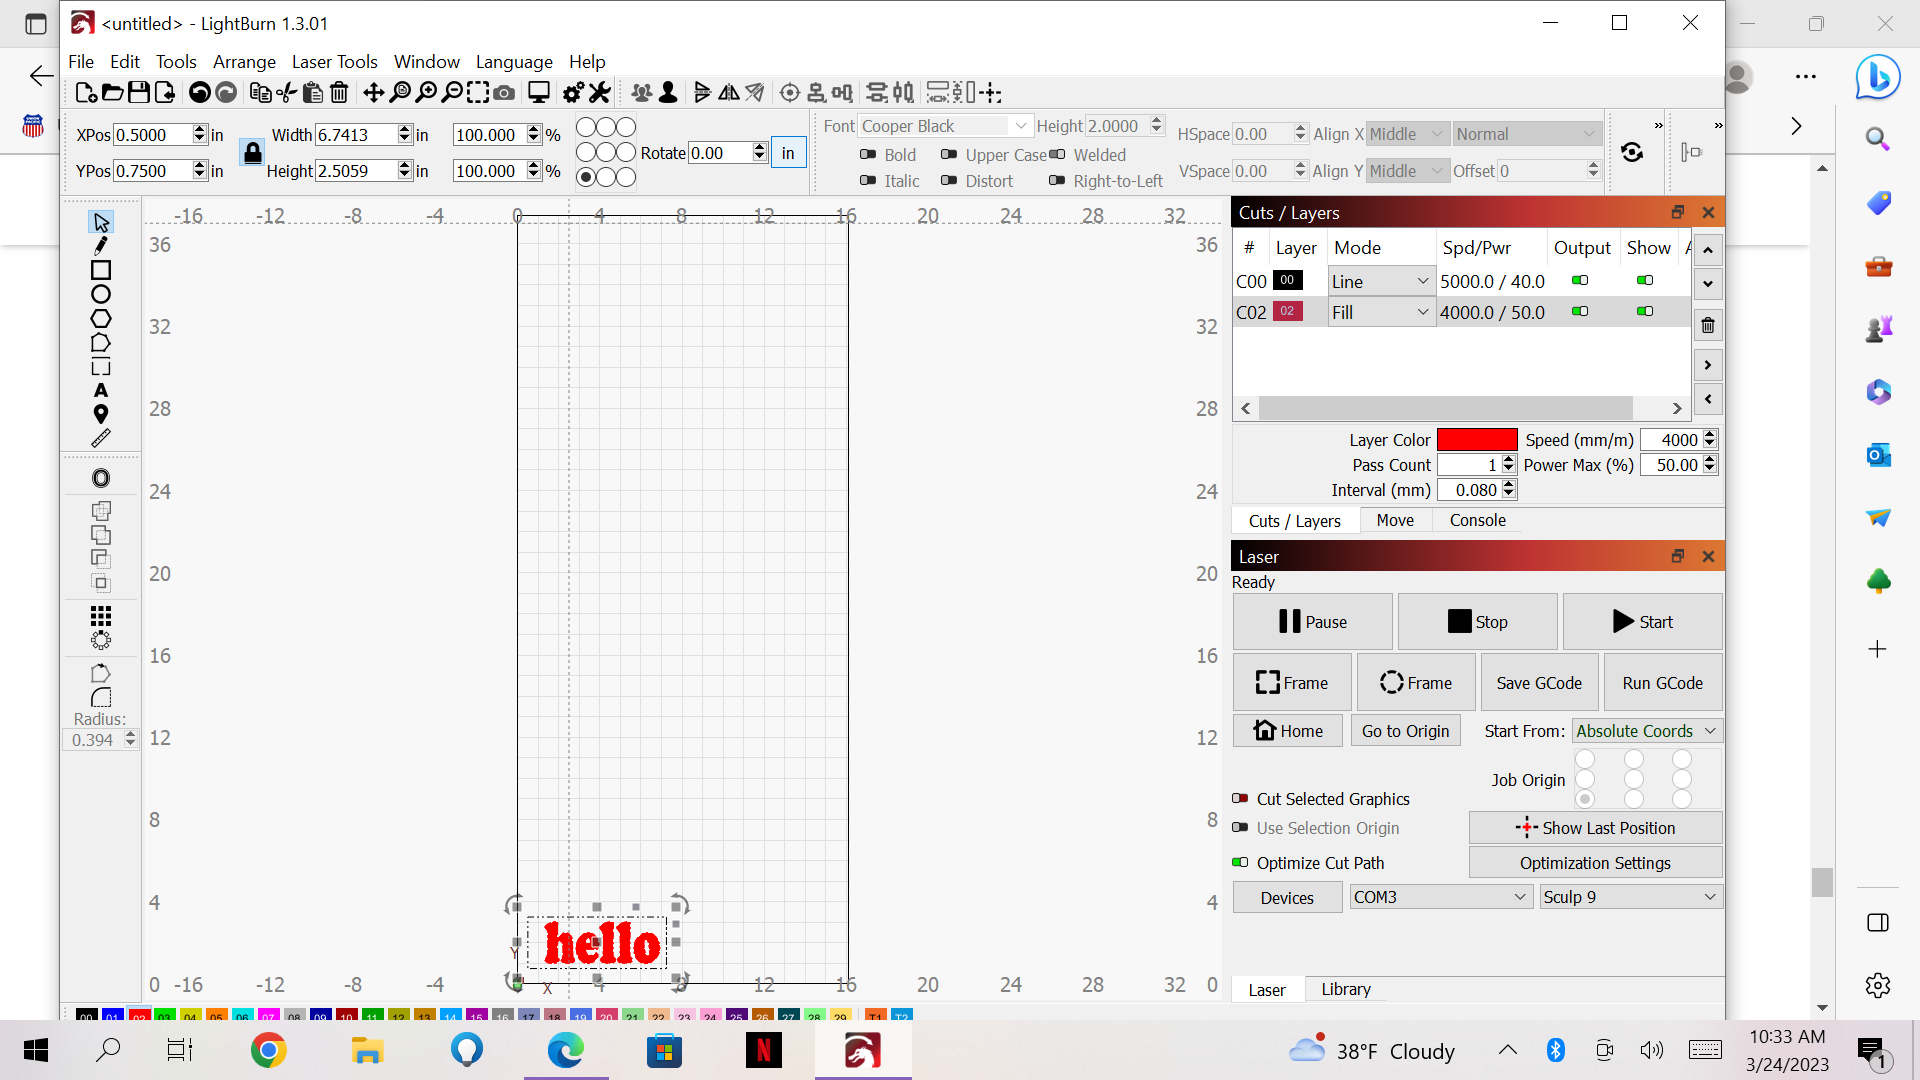
This is interesting.
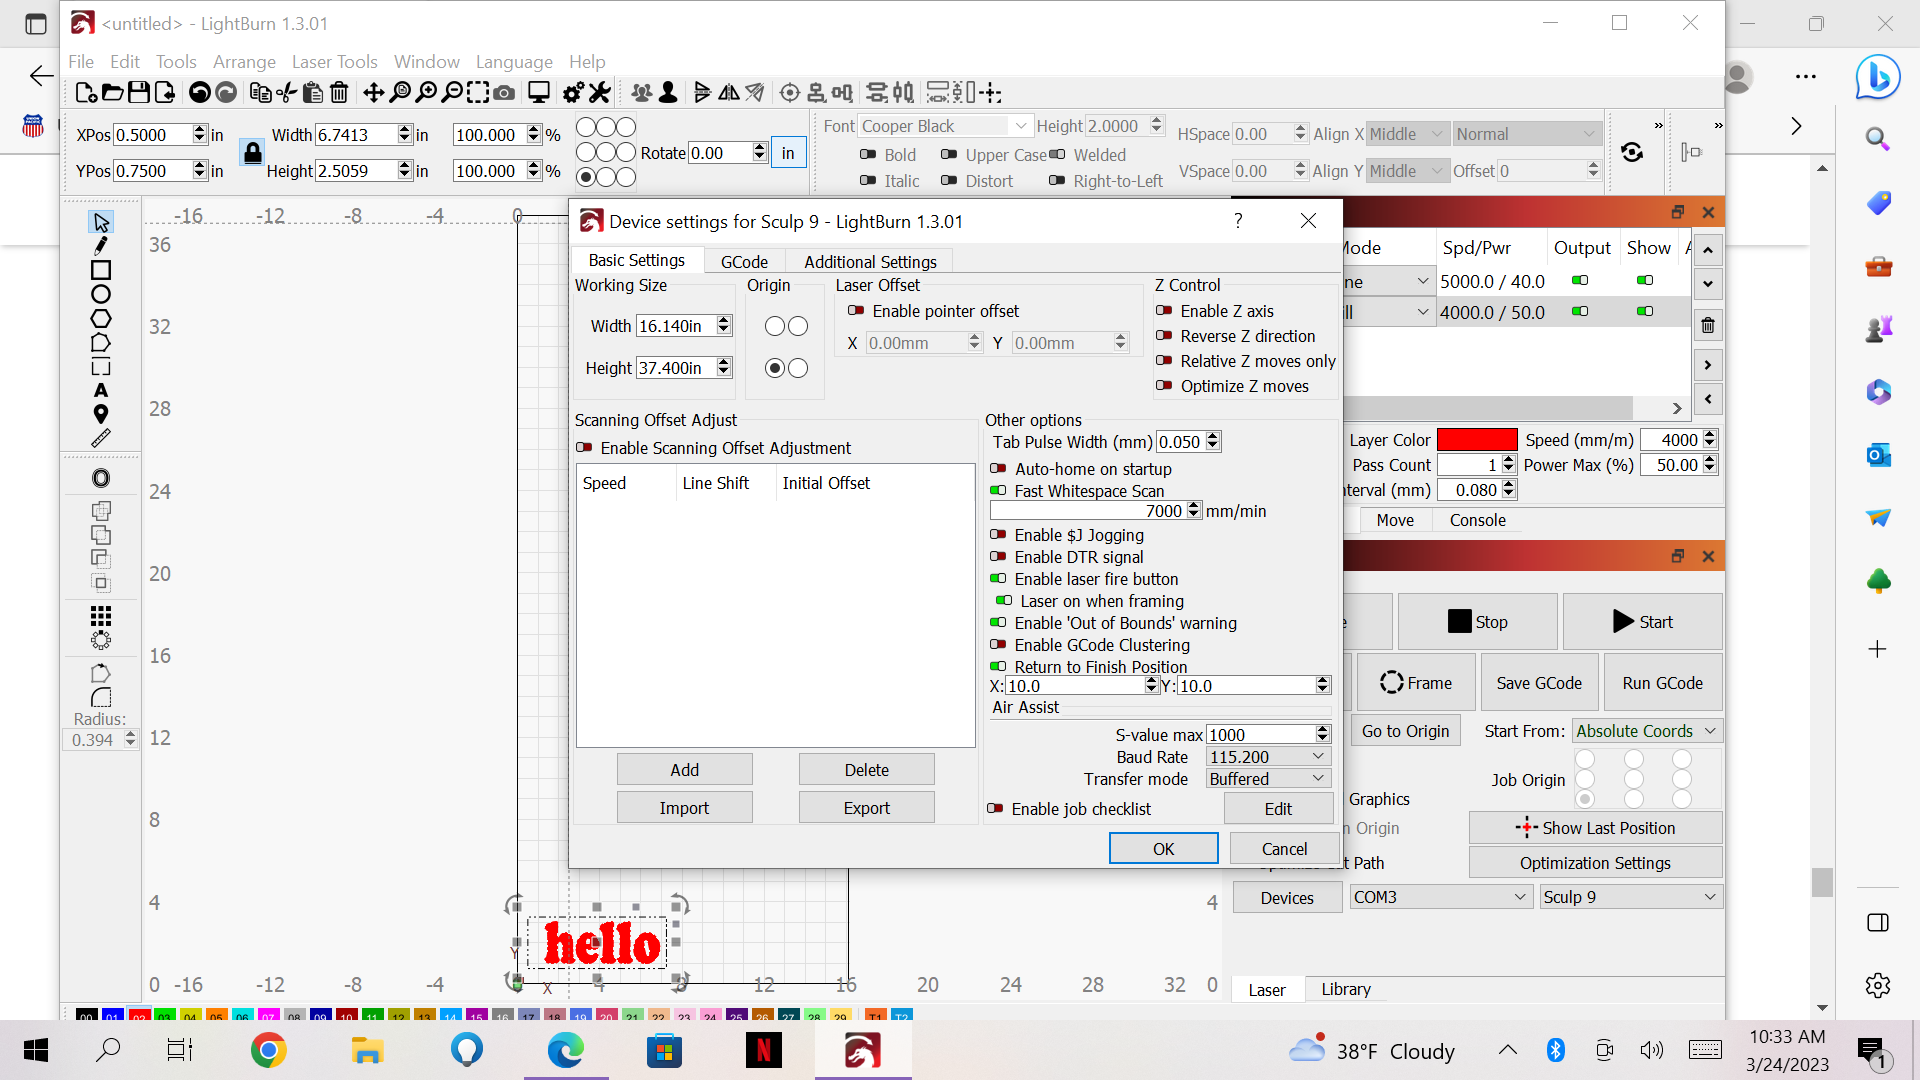
Because you are working in inches, a finish position of X=10 inches and Y=10 inches could be problematic. Please change both of these to 0.5 inches.
From this screen (above) type Ctrl-A
then Ctrl-Shift-A
and then capture the screen.
then,
Click the Preview Button (looks like a flat screen monitor - shown below)
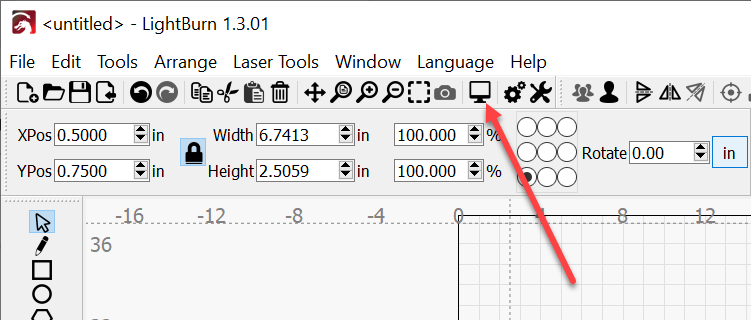
then capture that screen as well.
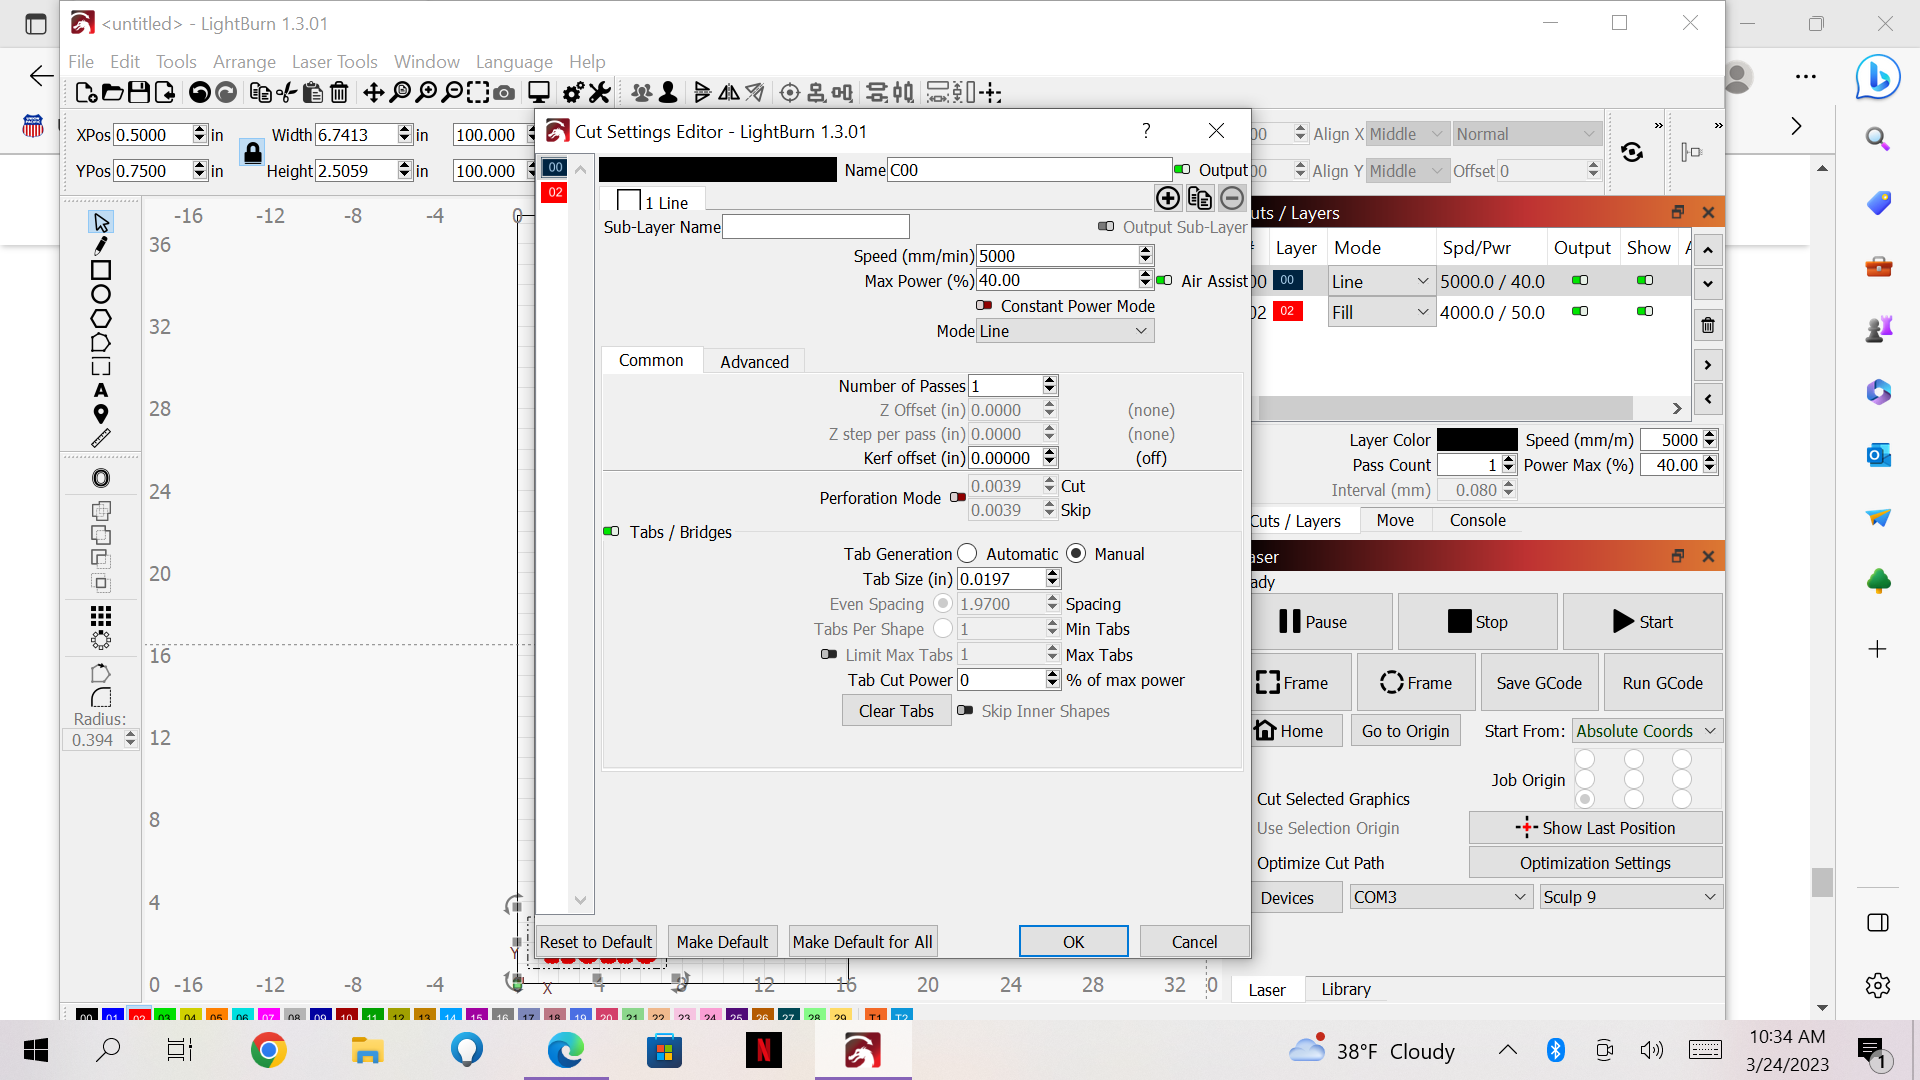
The dashed lines seem strange and may be involved in the strange framing behavior.
This isn’t really relevant to what you’re doing or what’s wrong here, but you could switch off the Tabs and Bridges switch here:
.020 inch is about the thickness of a dime. It’s a nice delicate work support for cutting. Are you cutting out the test piece? This setting can be put back later.
Looking forward to your reply. ![]()

Still grinding and going ballistic
Ok, Next level…
Click File,
Click Save GCode.
add .txt to the end of the filename.
this will allow it to be uploaded here.
I’ll look at the GCode.
Are there any error messages in the Console window when it ‘goes ballistic’?
No it says it’s complete no error messages
Waiting for connection…
Grbl 1.1h [‘$’ for help]
ok
[VER:1.1h.20190825:]
[OPT:V,15,128]
Target buffer size found
ok
<Idle|MPos:0.000,0.000,0.000|FS:0,0|WCO:0.000,0.000,0.000>
ok
Starting stream
Stream completed in 0:07
<Idle|MPos:50.800,76.200,0.000|FS:0,0|Ov:100,100,100>
ok
Starting stream
Stream completed in 0:07
<Idle|MPos:19.050,19.050,0.000|FS:0,0|Ov:100,100,100>
ok
Starting stream
Stream completed in 0:06
<Idle|MPos:19.050,19.050,0.000|FS:0,0|Ov:100,100,100>
ok
Starting stream
Stream completed in 0:06
Grbl 1.1h [‘$’ for help]
hello gcode.txt (303.7 KB)
I Imported the GCode stream and it’s complete.
The MPos is changing each time, so I’m leaning toward data-loss.
I don’t see anything responsible in the GCode you shared.
I’m going to take this to the Dev Team.
Final Step:
Click File, click Export Prefs and name the lbprefs file with something related to today’s date.
Please email the LightBurn File and the lbprefs File to:
Support@lightburnsoftware.com
ATTN: John RE forum Ballistic Sculpfun 94423
I’ll Test it on my Win 10 laptop at low power and match your settings.
Whatever is going on we should see it.