Laser material fire, being prepared helps (to learn further)

Sometimes a day in the workshop does not finish how you expect.
Cutting Acrylic 4.5mm with 50w at 12ma, 3mm/sec. Using a 2mm knife blade bed. Cutting air ON and two exhaust fans ON, these drag air from the cabinet lid closure point across the bed and then vertically at the rear.
This job was intricate so a lot of heat for a longer time in close proximity.
When using the laser I go no further than about 3 to 5m and only for a few seconds, particularly while cutting. engraving I relax a little but stay focussed to be be checking and not too far away.
Prior to building the laser I had researched many fire blogs re: co2 lasers and as a result took the additional precautions I could (at the time which is 6 months ago).
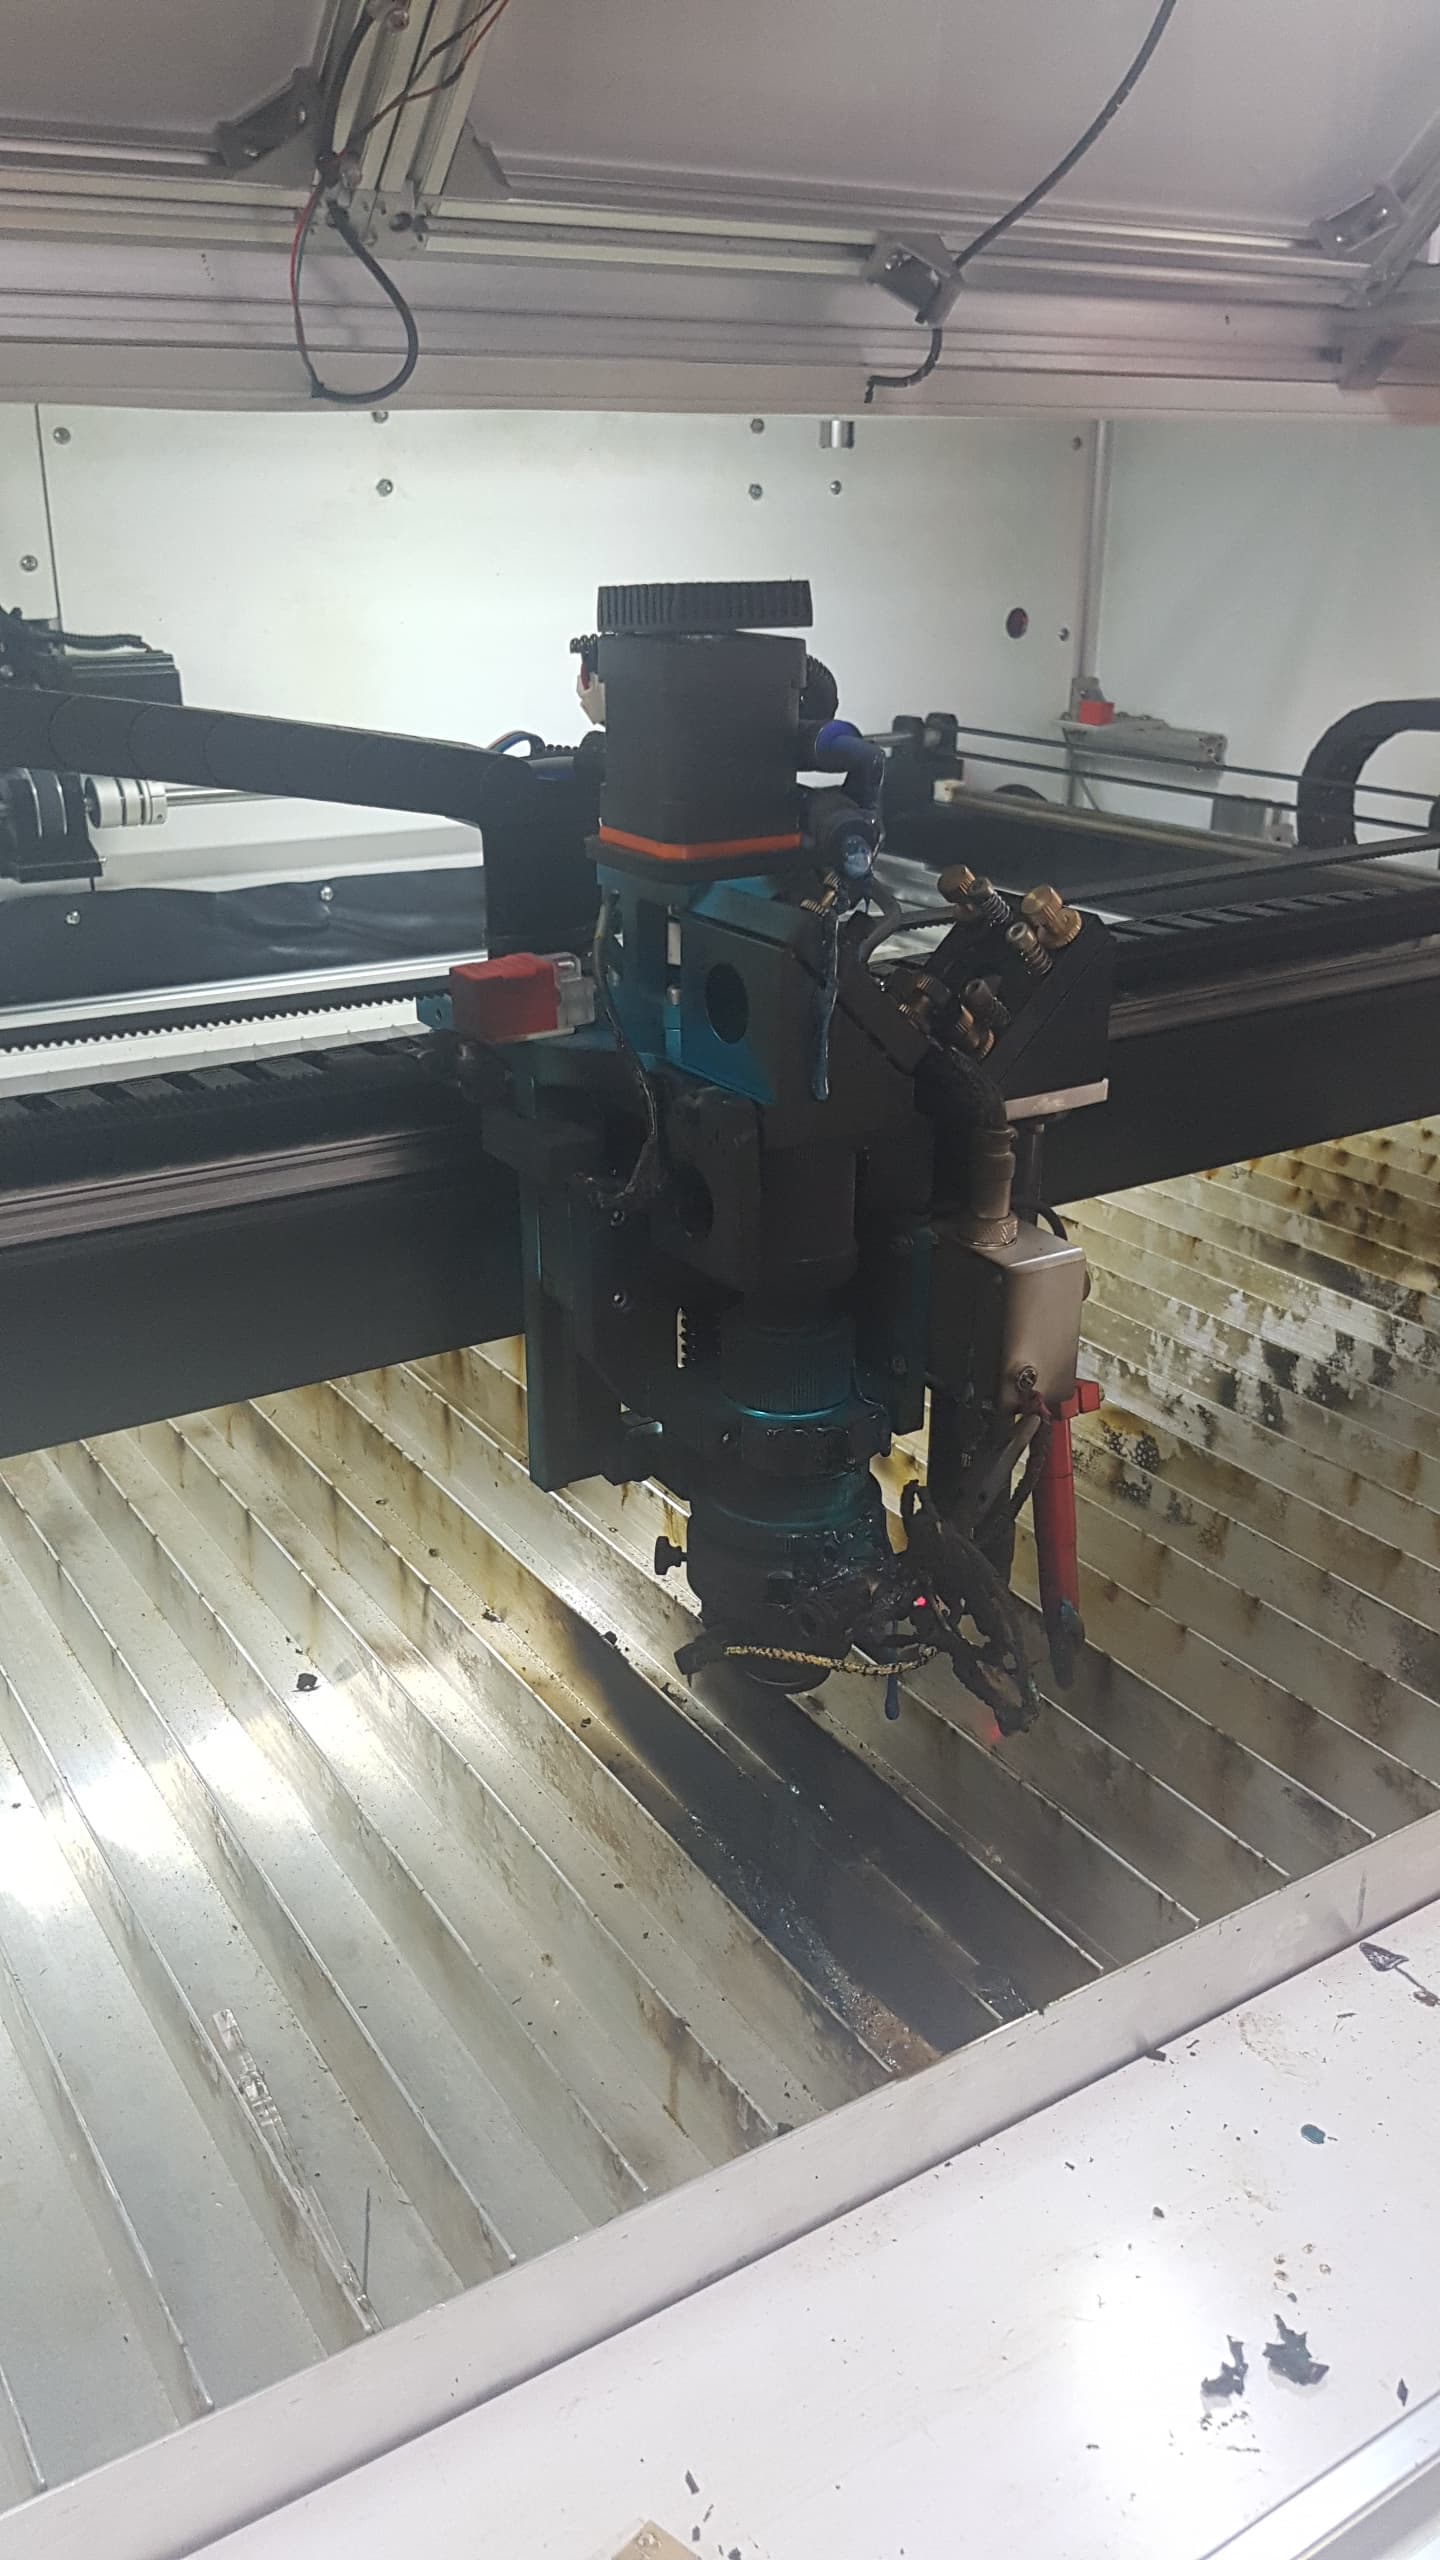
The material caught fire, heated the nozzle and infrastructure and then those parts combusted as well.
It took just seconds to get alight.
The data cables to limit sensors, auto focus and auto follow head are run on 24v with the signal data fed back to the RDC6445 control.
With the data cables burnt and shorted the 24vdc psu shorts to OFF
That turned the RDC controller hence the laser off and also exhaust fans(which are run off 24v relay).
Maybe 30 to 60 seconds between visual checks.

I keep several extinguishers at hand, dry powder, water and Co2( plus fire blankets, safety shower etc)

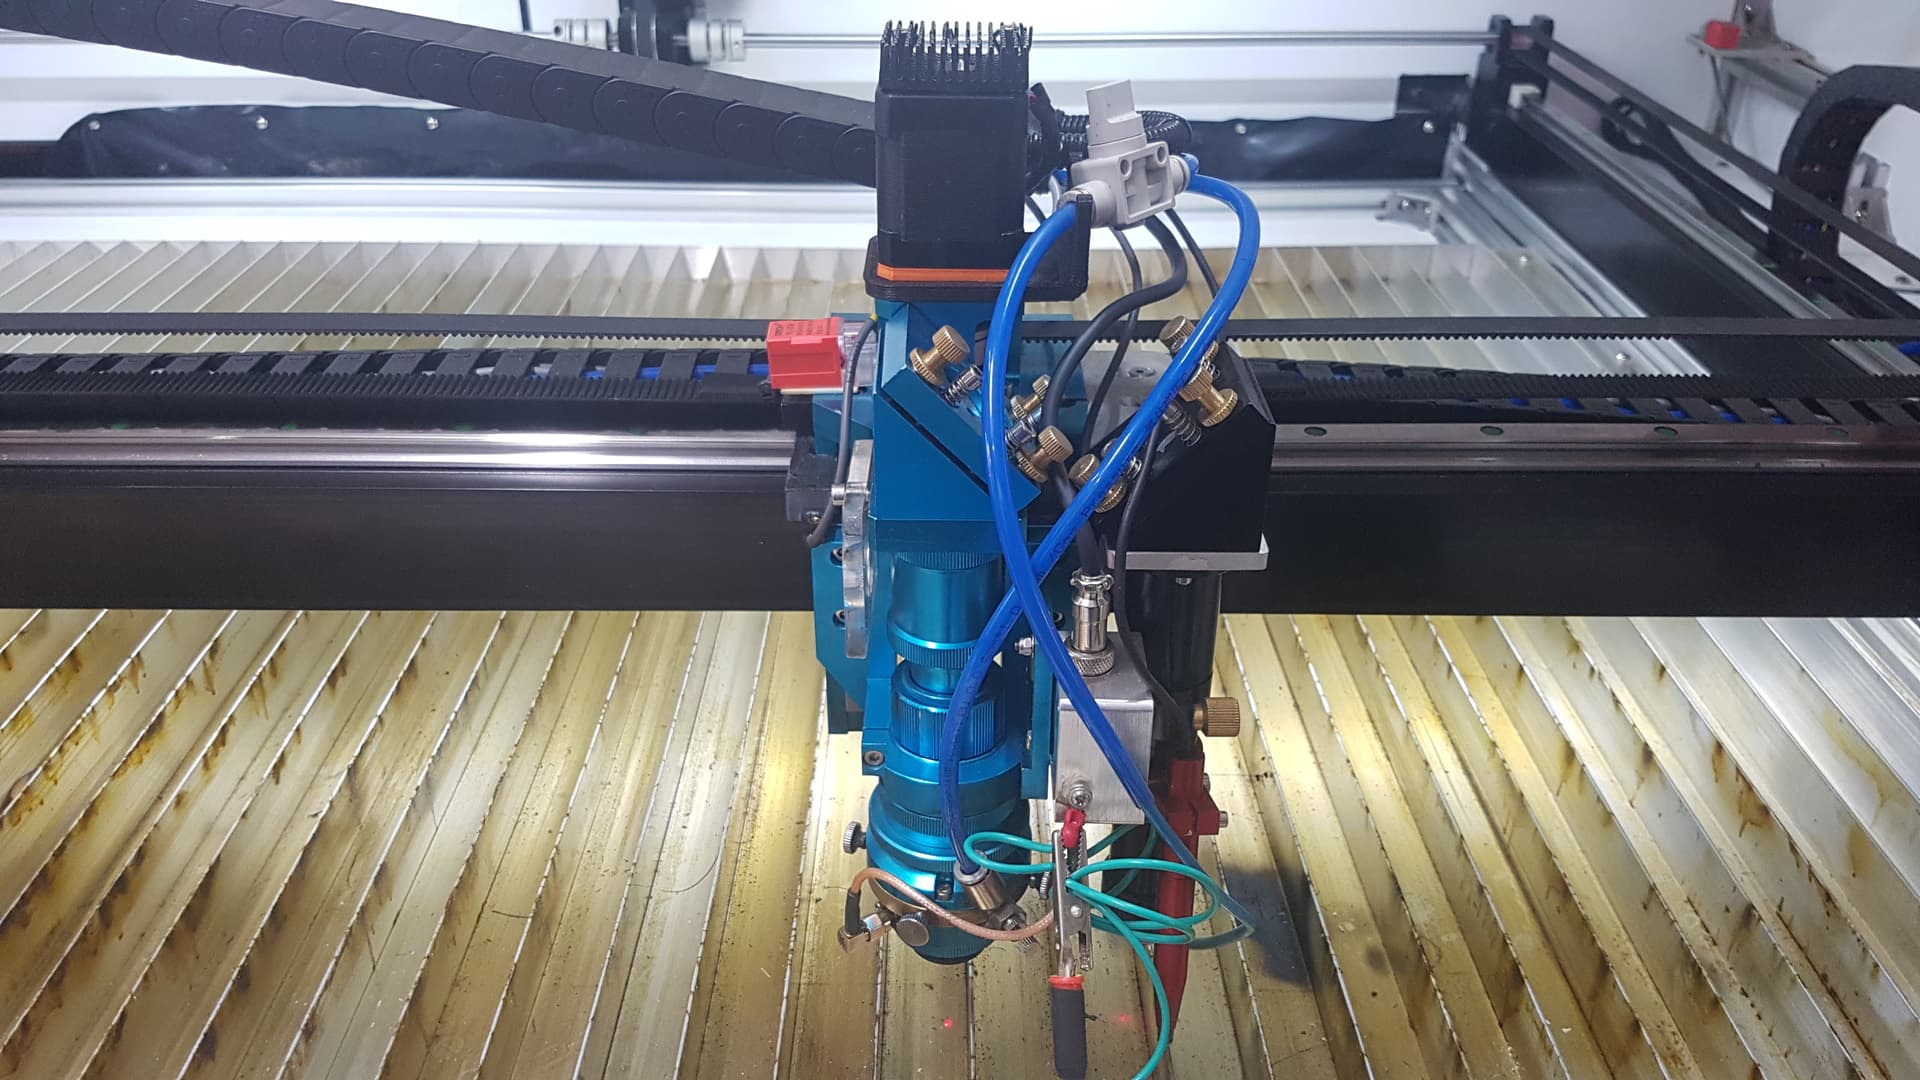
1st photo is what it used to look like.

These two photos show after fire.


Then clean up took a couple of days, some jury rigged parts until new gear arrives. lots of Iso, acetone etc. I’ve found that a product called “orange” is really great for carbon removal from a previous workshop fire.


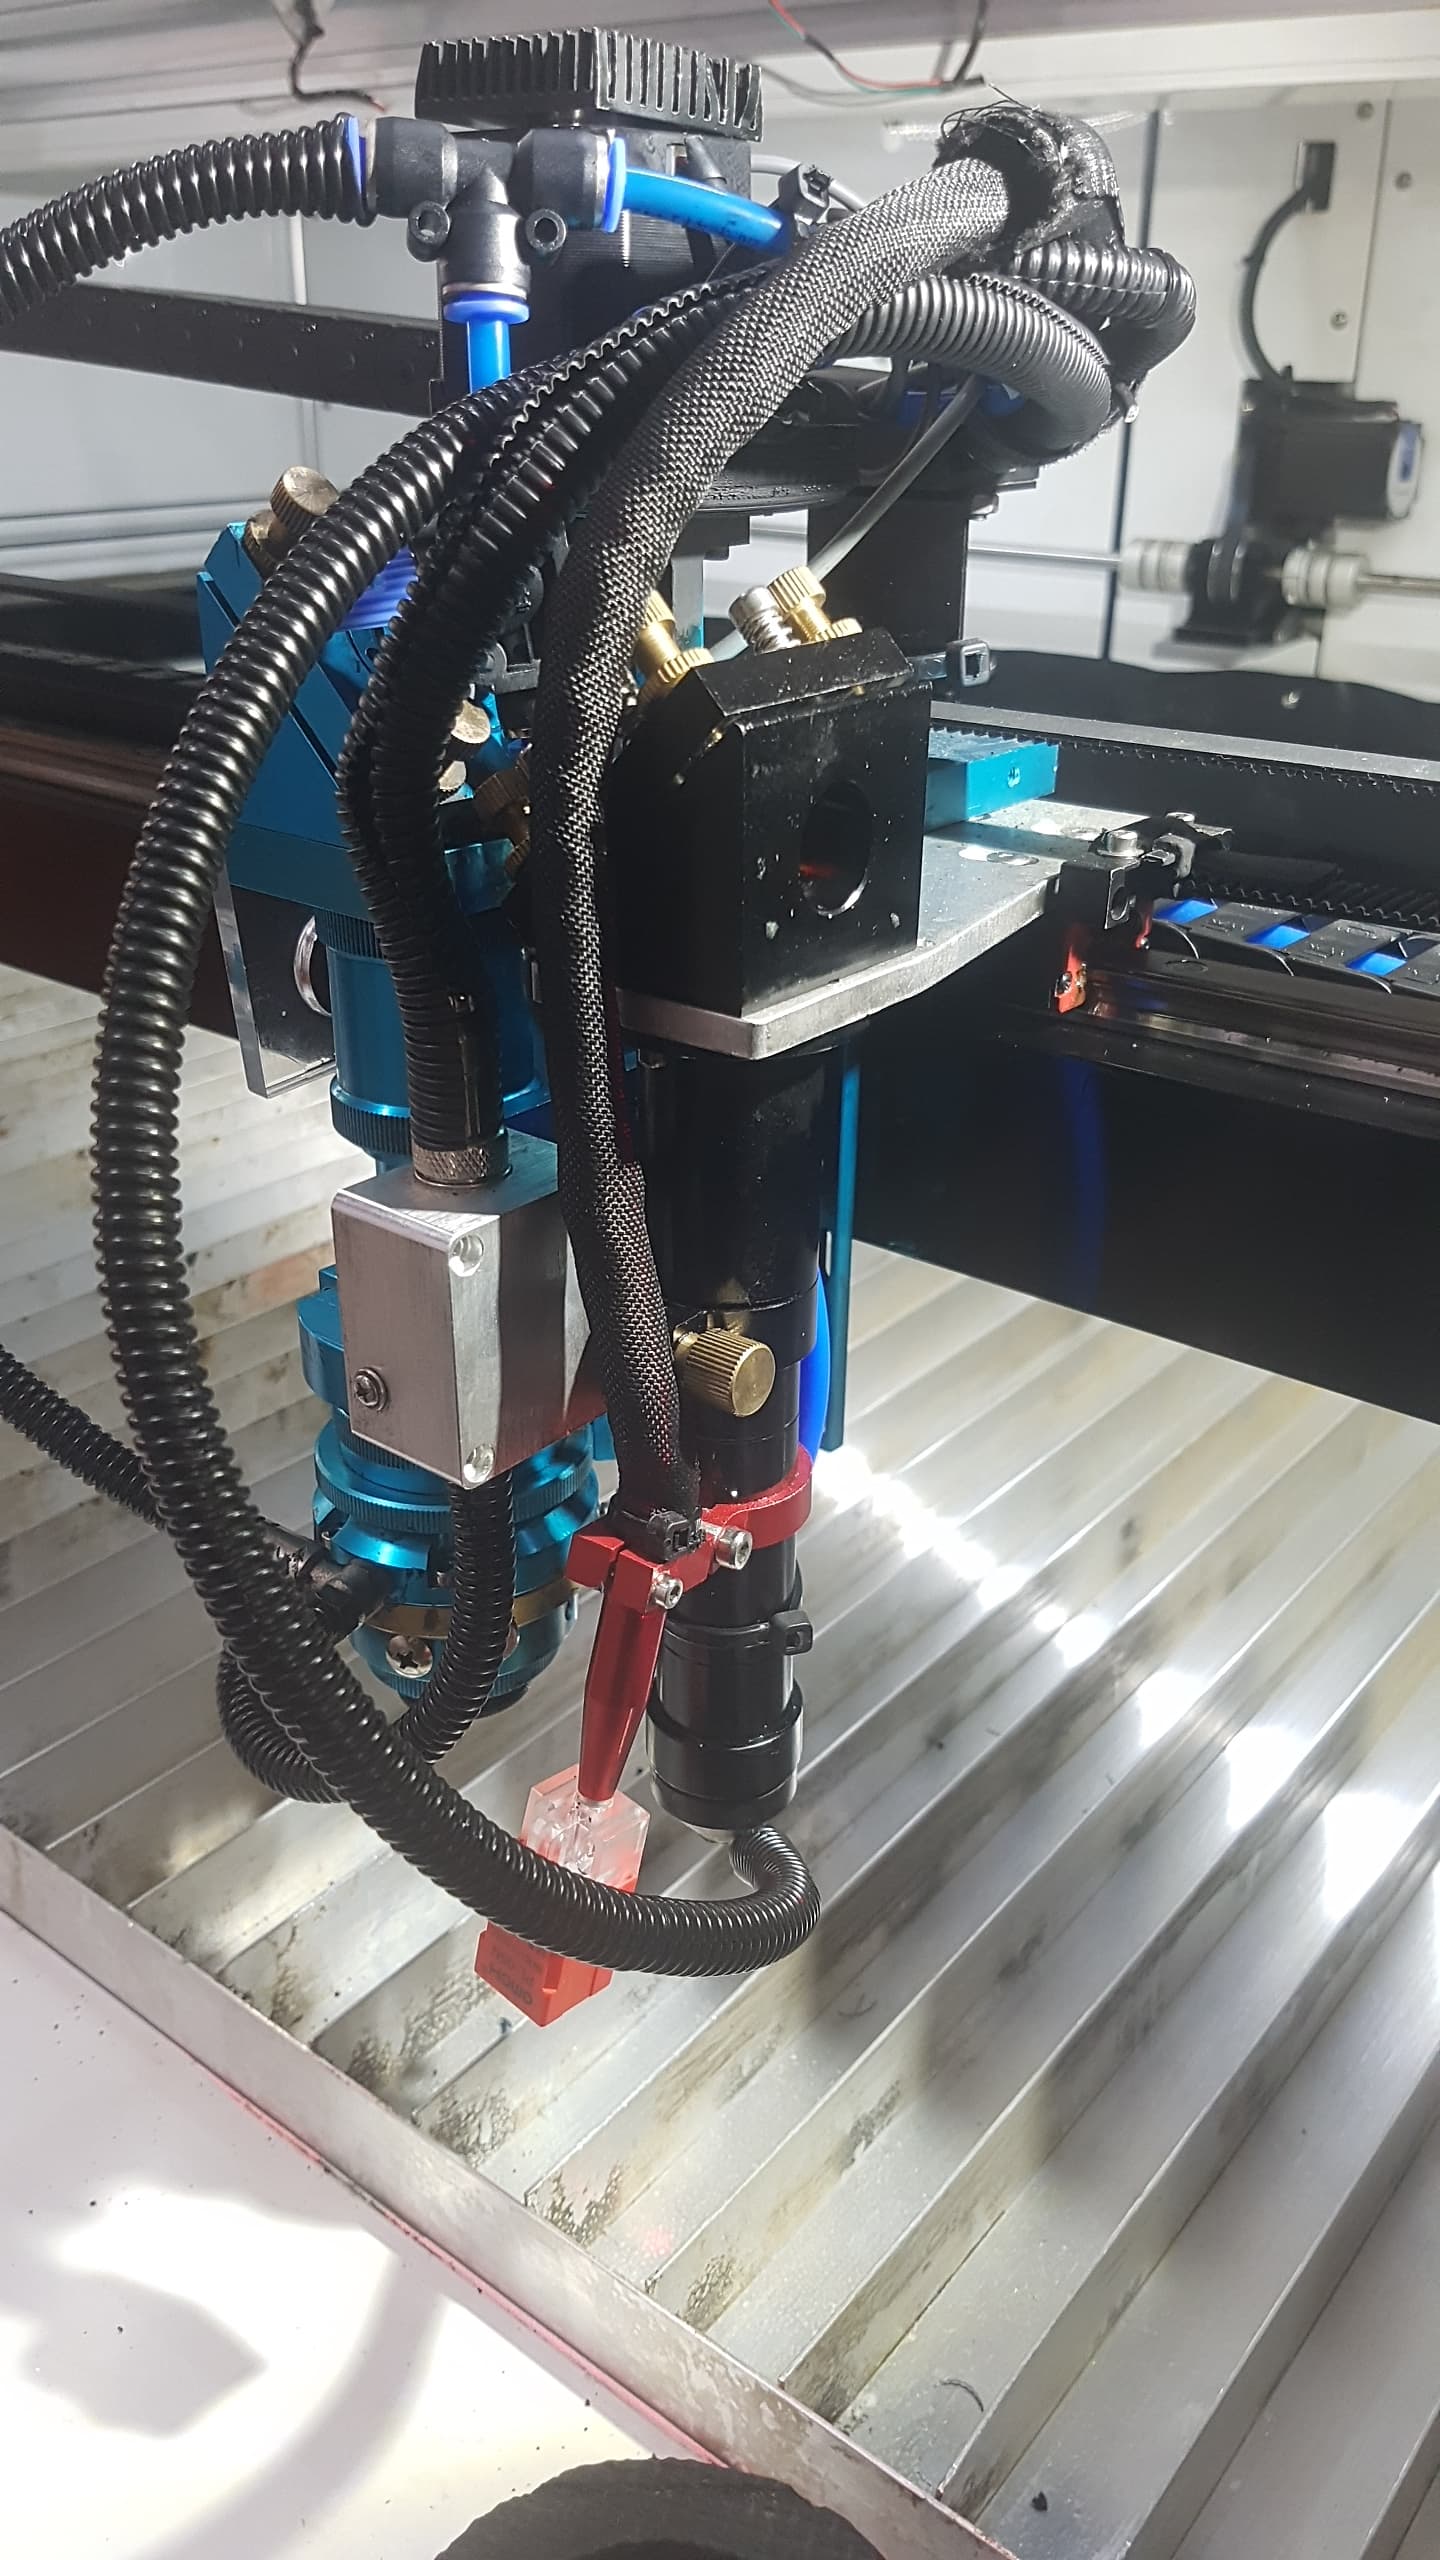
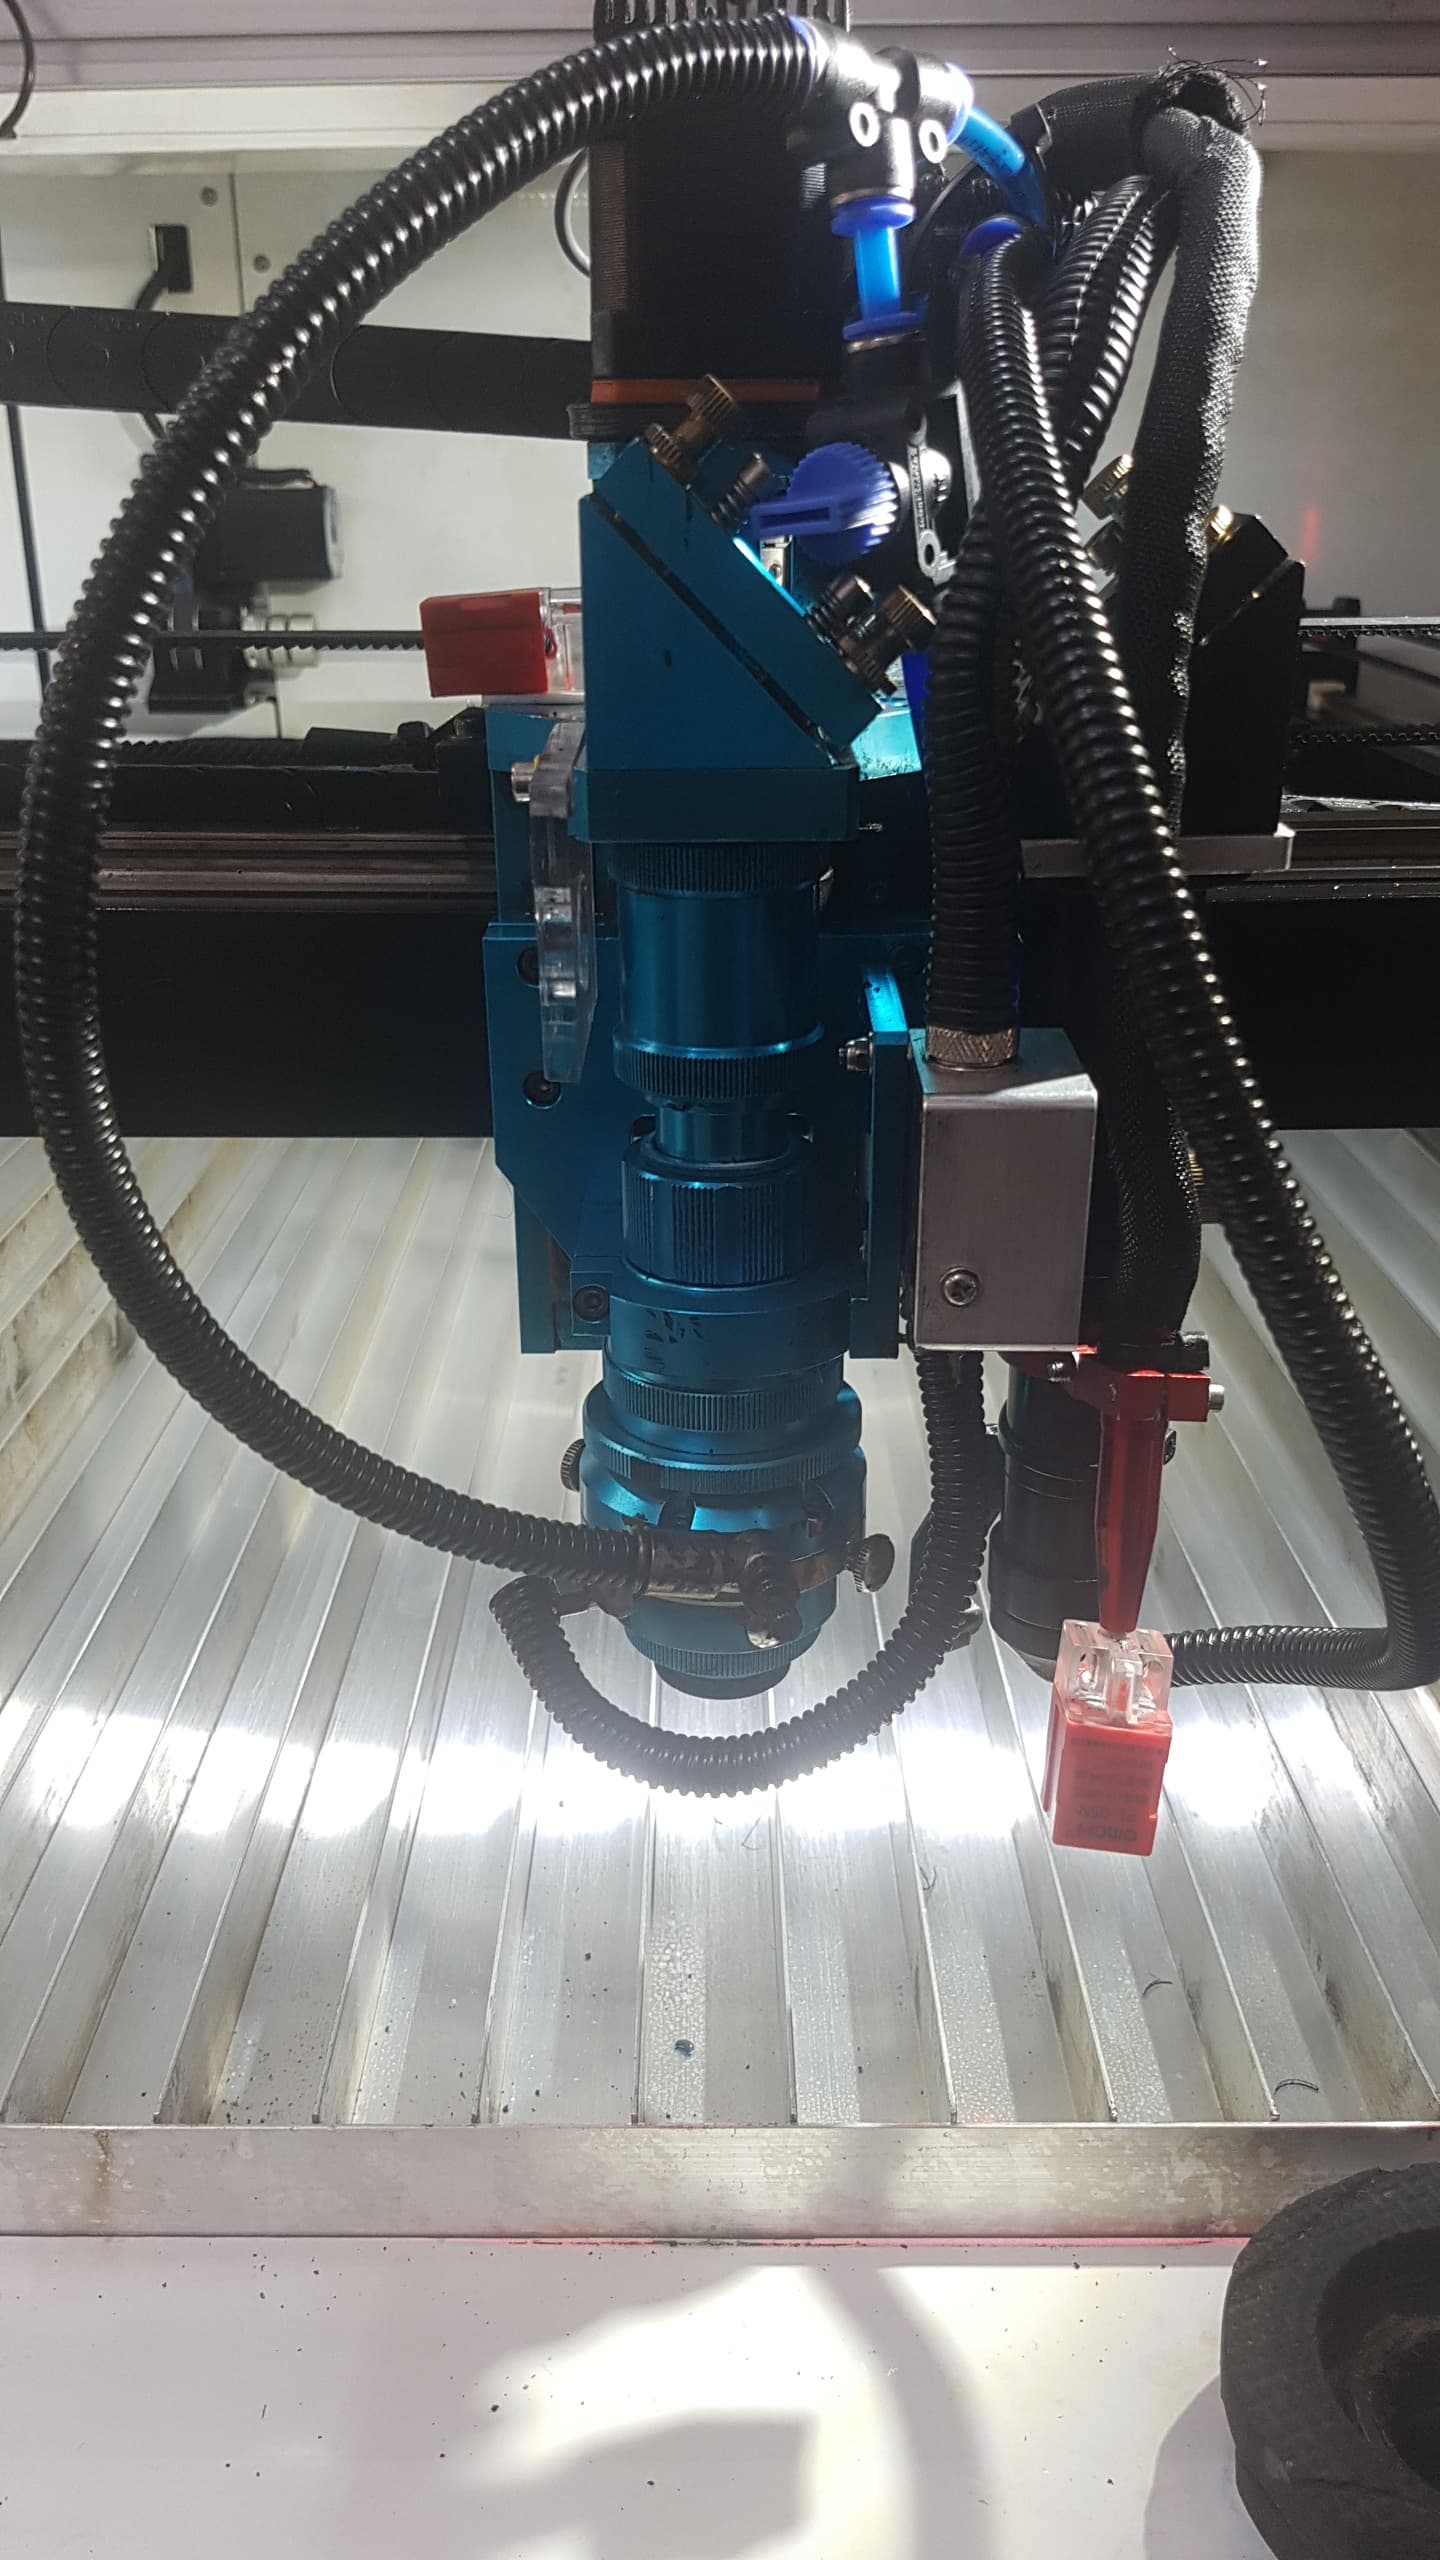
The photos show additional cabling shroud to assist in reducing some thermal damage in the future, however I have ordered in fire proofing material which will be placed so that any further incidents will be mitigated somewhat.

Staying at the laser during a cut would cure most of that as well, small flare ups can easily damage air lines and data cables. So this is all overdue.

This could have been a lot worse, I am grateful that safety gear was at hand, it paid for itself.

The last fire in the workshop, known as the “Great fire of 2014” within the family took out fully 25% of my 7m x 15m area, destroyed thousands of dollars in equipment. having dry powder capability at hand for such an event was pretty neat. it was out by the time the fire brigade showed.

Lessons: Have two clear exits out of the workshop.
Keep fire blankets, enough fire extinguisher capability on hand which would enable you to 1st of all , get out of harms way and 2nd slow down or put out a fire.
Safety shower, bulk water source.
Look after yourself, plan ahead.

By the way, I work by myself at the end of a road. There is no one else nearby or in calling range.
Warwick

Thank you for describing the incident, you have my sympathy.
It’s only good that you were there and could prevent the fatal disaster.
I have also tried a minor fire once while working with acrylic. The material that evaporates during laser processing is reasonably explosive with the right air-gas mixture.

Agree with @bernd.dk and my condolences. First fire, I remember that wasn’t on a honeycomb bed.

Is it correct to assume there was debris buildup on the aluminum supports?

I have a flat rolled sheet steel for the bottom and prop up the material. After I’m done, I wipe off the excess deris that has covered the steel sheet. Lowers the overall smell also.

Might not really be useful in any kind of production…

Good luck

P.S. is that an inductive focus arrangement? Sure looks complicated…

:smile_cat:

Thanks guys,
I generally keep the blades clean however a couple of things i had left out.
Acrylic had paper backing.
When engraving, fill, i use an additional air supply across the job, works well. I had inadvertantly left this switched on. That means any conflagration would be supplied with both cutting and across flow air. Plenty of o2 in that fire triangle.
I had decided to do some type of standoff , thanks for all suggestions.
The autofocus probe burnt out so it turns out the inductive sensor fits neatly into probe end. It is also set at my my table zero height and different to the probe which is set further down to enable triggering.
I have new probes on the way, there are advantages with both systems and maybe by dumb luck this could work out better for myself.
Cheers

Sounds like the perfect triangle, which often doesn’t work out so well…

However, sounds like you will be ahead in the end… so good news…

I spent lots of time taking stuff of the X axes, so I could run it quicker…

Good luck, take care

:smile_cat:

Yes the X axis is loaded, it seems to be max speed 150mm/s before anything happens like lens correction.

The one thing I have noticed is that at the distances my head is from the laser tube output I get less power, it approximates 2.7m at the furthermost reach.
So at 0,0 it is still at least 1.5m cuts better there than at 0y, 1285x( 0y being 1.5m from tube. i could invert it all, run higher speed and less power.

I am not in a rush and prefer to watch carefully at the front right of my machine, its a hangup from my cnc 0,0 position.
Cheers

They will widen and lose some energy. There are physics formulas for figuring out the loses.

It is not the general rf formula, since it a coherent beam…

NASA laser beam is 3 meters here and is 2kM by the time it hits the moon… average travel time, there and back of 2.5 seconds.


I can run my X axis at 1650mm/s, but I’ve lowered the mass by at least 1/3 if not more.

It’s not good for much except exploring ideas… most good engraving is much slower…

Good luck

:smile_cat:

Understood. I will cut an acm 3mm board to table size (930 x 1400) which will allow wipe downs and then use stand offs as required. it wont hurt to give it a go.
Thanks
W

Sorry to see the fire, glad you got it back up and running.

Besides that however, how do you like the auto follow head? I cut warpy thin material and usually use my blower fan to suck it down to a sealed off honeycomb table with reinforcement to reduce bowing, but it does still bow. Was wondering how difficult it would be to make my own sort of thing with a very narrow range, only ~.375".

Hi Colin,
I think it could be made. All parts are cheap except the controller. If you could write some arduino code to capture inductance and drive a stepper motor .
It might be possible to also use a z axis probe to sense the height, ie it auto lowers until the probe says you are say 3mm off job, if the sheet bends up then the stepper acts to raise head.
On reflection it could be done without a controller and simply switched into auto , three switch wires to a suitable spring switch. Up, down ,off on.
W

Problem is the inductive head only works with metals, as far as I know maybe @Fatbuoy can comment.

If you could scheme up a nozzle that followed warped mdf, you’d have a cash cow…

:smile_cat:

Happy to know the damage is not to high and you solved it easily.

I’m always afraid of my CO2 130w laser catching fire so I have a CO2 extintor close to it.
Sometimes I cut 10mm PMMA with double layer adhesive and it takes no more than 2 seconds to catch fire so I hit pause inmediatly. It takes me 3 times longer than the cut itself, but at least I can do it.
I put a concave mirror on the bottom of my laser so I can see the bottom of my honeycomb. I can’t take my eyes of it and my finger is always touching the pause key.
The acrylic vaporiced and ejected by the laser beam is highly flamable and the adhesive layer makes things worse. It tends to stay under the acrylic if it is not taked away by the aspiring flow.
I think your bed design doesn’t makes things easy as it has the bottom closed and don’t let flamable gas to get of the laser area, but that’s only my opinion.

Angel.

Thanks Angel for your input. My table blades are slightly higher than the bed edges allowing for some air to come in under material. Ibtake your advice and think more airflow needed by machining holes where needed.
Itvwas always said, thevright soeed is not too fast and not too slow.
Cheers

Jack,
I lookedcat this mdf probing for a long time prior to the build. Without experience on laser i came to thecsolution for me in a practical sense. One laser with a long focus distance would effectively give a cut capacity greater than my maximum material thickness.
That means the 180w has either a 63 or 101mm lens.
I can cut easily 32mm pine in one shot mdf tougher at 15mm and most ply 6 to 7mm at full power.
The beam is vertical and capable over the mid dustance range. Engraving with the 180 means what Ievel of overcooked you get as power doesn’t kick in below 11%.

Inductance measurement controller needed for metal follower is correct. With a little work a switch arrangement giving constant adjustments could be built.
W

A laser is nothing without the lens. The beam is large and some of the K40 folks have stuck their hand in there accidentally or on purpose, leaving something like a cigarette burn.

Funny I only see males, mostly young, doing this kind of stuff…?

Even thing else correct, the lens is the workhorse and it is best tailored to whatever you are doing.

I have 4", 2", 1.5" and a compound lens. I do thicker cuts with longer lenses (bigger kerf) and the most detailed engraving with the compound. The kerf on my 4" is about .22mm with mdf, if I recall.

I think that would be a cash cow…

You can’t have anything where the actual laser is, so it will be offset. Then it would be limited to how much of a variation it could respond to within a certain distance. I think you need something other than a switch to pull that off. Mechanical stuff always seems to hang up on things…

Talk about a can of worms…

Good luck… have fun…

:smile_cat:

Many thanks to all who have made suggestions to me, I have covered my knife table with acm sheet and now stand off for cutting, much easier to keep clean as well.
Cheers to all.
W